Wednesday, November 14, 2012

Happy Navarathri - 2012

Navarathri Golu 2012 - Home
 
My Dear Bloggers, wishing you all a very Happy Navarathri this year. We expanded our golu this year with more dolls we collected since last year but nothing could beat the traditional dolls which we had at home in India. Chanted Lalitha Sahasranama everyday and offered Sundal Neivedhyam in the evenings. Mainly we invited many families and friends for the Thamboolam ( Kumkum ) during these days and had an elaborate dinner. Kids had fun too and dressed up in their traditional dresses.
 
We could feel the divinity during the entire Navarathri period and the positive energy prevailed in the mind which in turn boosted many activities at home. Sadly packed up the dolls after the durga pooja but cant wait to set the Golu next year. I hope you all would have celebrated navarathri with the same mindset and I wish you all once again. May Goddess Durga bless everyone in the world to have peace of mind, happiness and good health.
 
Sarva Mangala Mangalye Shive Sarvartha Sadhike
Charanye Thrayambhake Gowri Narayani Namosthuthe
 
Yaa Devi Sarva Bhooteshu Buddhi Roopena Samsthita
Namastasyai Namastasyai Namastasyai Namo Namaha
 

Krishnashtami / Gokulashtami / Krishna Jeyanthi / Krishna Jayanthi


Krishnashtami / Krishna Jeyanthi is celebrated by all Hindus all over India and also in some parts of the world where they worship Krishna. Krishna Jeyanthi festival marks Lord Krishna's birth and its celebrated with grand show. People decorate their houses with flowers, rangoli and balloons welcoming Baby Krishna on this auspicious day and they draw small footprints of baby krishna from the entrance of the home till the Pooja place. There's a belief that baby krishna would walk on these foot steps into their house and enjoy their prasads on this special day. As Lord Krishna liked milk, butter, curd during his childhood, they offer many milk based sweets to him along with the traditional seedai, murukkus, payasams and aval ( poha ) based food items.
 
We celebrated Krishna Jeyanthi at our house with Aval ( Poha ) based prasadams this year.
 
Krishnaya Vasudevaya Devaki Nandanayacha
Nandagopa Kumaraya Sri Govindaya Namo Namaha.

Thursday, September 20, 2012

Happy Ganesha Chathurthi / Ganesh Chavithi / Vinayaka Chathurthi - Festival


Wishing you all my dear friends, family and my dearest bloggers a very Happy Ganesha Chathurthi / Chavithi.

Lord Ganesha, who is the supreme God is well known for wisdom, prosperity, good fortune and he is being worshipped first before starting any new venture. Ganesha Chaturthi / Chavithi is a Hindu festival which is celebrated all over India on the occasion of Lord Ganesha's Birthday. This festival generally falls between August and September.  In some parts of India, this festival is celebrated for 10 days and a grand immersion festival is being celebrated on the last day of Ganesh festival.
 
Hope you all would have celebrated Ganesha Chathurthi / Chavithi in a grand manner in your homes with wonderful decorations and yummy prasadams. We also celebrated the festival with lots of happiness, devotion, elaborate pooja and yummy prasadams. Out of all the festivals, I love this festival so much mainly due to the tasty modhagam / Kozhakattais. Since childhood, I have been a big fan of this Kozhakkatai and Ganesha is my favorite God. My mom used to make different varieties of Modhagams on that day and my father used to decorate Lord Ganesha and pooja place and perform the pooja elaborately.
 
In our household, we prepare 5 or 7 varieties of prasadams and offer to Lord Ganesha. This time I prepared three types of Kozhakkattai, Palaarthi, Pappu arathi, undrallu, Chickpeas sundal. I always try to include both andhra and tamilian style prasadams in every festival to balance both my side and my husband's. 
 
I will post the recipes of the prasadams in my following posts.
 
My Husband made a home made ganesha using turmeric powder, sandal powder and rice flour. Its really difficult for us to take out the Ganesha as we love this cute little ganesha so much..
 

Powerful Ganesha Mantra

"Gajananam Bhoota Ganadi Sevitam,
Kapittha Jambu phalasara bhakshitam
Umasutam Shoka Vinasha karanam
Namami Vighneswara pada pankajam"
 

Meaning

"Oh Elephant-faced, worshiped by the existing beings, of all living beings, tasting the elephant apple (kaith) and jambolana (jamun), the Son of Uma, destroyer of grief, I bow to the lotus feet".
 
Will post the recipes of Sweet / Salt Kozhakkatai, Undrallu, Pal arathi, Pappu Arathi, Chickpeas sundal in my following posts very soon.

Thursday, September 13, 2012

Baingan Bharta / Baingan Barta / Low fat , Healthy Style Baingan Bharta


I have tasted different versions of Baingan Bharta so far but this one is unique and special. My Mother-in-law has been making this type of Baingan Bharta since ages and she learnt this version during her calcutta days. My husband is a core fan of this version and he loves to eat this dish with hot rotis. Recently, I made this Baingan dish using our home grown Eggplant and it turned out very well. To my surprise, my daughter loved this spicy baingan dish and requested me to make this often. Though I am not a big fan of this version, due to its simplicity and less oil  I love to enjoy this dish occasionally.
Ingredients
Eggplant - 1 Big or 2 Medium
Red Onion - 1 Medium ( I strongly prefer red onion )
Lime - 1/2
Green Chillies - 2 Big or 3
Salt - To Taste
Coriander Leaves - To Garnish
For the Tadka / Tempering :
Oil - 1/2 tbsp
Hing  Asafoetida - 1 Dash
Mustard Seeds - 1 tsp
Cumin Seeds / Jeera - 1 tsp
Urad Dal / Ulutham Paruppu - 1 tsp
Channa Dal / Kadalai Paruppu - 1 tsp
Dry Red Chillies - 2 Medium
Curry Leaves - 2 or 3
Method
  1. Shred the onion and green chillies into small pieces and keep them ready. Squeeze the lime juice and keep it ready. Wash and crush the coriander leaves into pieces and keep them ready.
  2. Wash the eggplant ( Brinjal ) and wipe it off with the tissue. Poke 2 or 3 holes into the eggplant and roast the eggplant directly onto the flame using a suitable spatula. Rotate the eggplant in all directions till it turns black. The eggplant should shrink in all directions, get cooked inside completely and the skin of the eggplant should turn dark and lightly dry. This denotes the completion point and we could peel off the skin.
  3. If its roasted fully, then it would be very easier to peel off the skin. After peeling the skin, mash the cooked Eggplant thoroughly either using hands or masher in a big mixing bowl.
  4. Add the shredded onion, green chillies, lime juice, coriander leaves, required amount of salt into the mashed eggplant.
  5. In a frying pan, add oil. When its heated, add all the ingredients for the tempering process one by one and pour them over the mixing bowl.
  6. Mix everything well and finally garnish with coriander leaves. Enjoy this oil free side dish with your hot rotis.
Tips / Variations
  • Instead of directly roasting the eggplant, you can microwave the eggplant or broil the eggplant in the oven too. But I adopt this method as the directly roasting process enhances the taste of the Baingan Bharta.
  • If the size of the Bharta is medium, its easier to roast than the big ones.

Small Onion Red Capsicum Chutney / Spicy Red Chutney


Using the small red onions and red capsicum, I tried to make a spicy chutney for my Vendhaya Dosai and the chutney was a very good accompaniment to the Dosas. I should definitely say that this chutney triggered my nerves and woke me up mentally!!!! It was a sleepy, cold morning and I started doing the chores physically with half sleep.  Try this spicy red chutney and start your morning with more briskness !!! Due to the addition of small pearl onions, the taste was amazing too..
Ingredients
For Grinding :
Small Red Onions / pearl onions - 10 to 13
Red Capsicum - 1 Medium ( cut into small pieces )
Oil - 1/2 tbsp ( Enough to fry the onions and capsicum )
Salt - To Taste
Urad Dal / Ulutham Paruppu - 3 tsp
Dry Red Chillies - 7 Medium
Green Chili - 1 Small
Tamarind - 1 pinch
Jeera /Cumin Seeds - 1 tsp
Ground nuts / Peanuts - 1 tbsp
Channa Dal / Kadalai Paruppu -  2 tsp
Jaggery - 1 small pinch or 1/2 tsp
 
For Tadka / Thalimpu :
Hing / Asafoetida - 1 Dash
Mustard Seeds - 1 tsp
Cumin Seeds - 1/2 tsp
Urad Dal / Ulutham Paruppu - 1 tsp
 
Method
  • In the frying pan, add oil first. When its heated, fry all the ingredients for grinding on medium heat except small onions and red capsicum. Do not add salt and jaggery piece at this point.
  • When they turn golden brown, transfer them into the mixer grinder. In the same pan, add the peeled small onions, red capsicum pieces and fry them till they become translucent. While frying them, cover the lid and allow them to cook for 1-2 minutes and fry in the middle.
  • When they are cooked and fried enough, transfer them too into the mixer grinder. After the contents are cooled, grind them nicely. Add salt and jaggery piece while grinding and transfer the chutney into the serving bowl.
  • In the frying pan, add the contents for making the thalimpu and pour the contents over the chutney. Enjoy with your hot idlies, dosas or any other tiffin...

Thursday, September 6, 2012

Peach Thokku


Peach is a wonderful fruit with a twist of tangy and sweet taste. We can make milk shakes, smoothies, yummy desserts using Peaches. But I did not have an idea of making thokku or pickle out of it. One of my good friend's mother visited my home last week and she made this delightful peach thokku within minutes. Thokku tastes heavenly, tastes like our mango thokku and we all liked it. Its difficult to hide this thokku at home as it's the best accompaniment for curd rice. Just 4 or 5 big peaches are enough to make a decent quantity. Try this peach thokku and enjoy..
 
Ingredients
Peach - 4 or 5 Big
Hing / Asafoetida - 1 Dash
Salt - To Taste
Fenugreek Powder / Methi Powder - 1 tsp
Red Chili Powder - Between 3 to 4 tbsp ( Depending upon your taste )
Gingelly Oil / Nalla Yennai - 1/4 cup
Method
  • Wash the peaches and grate them with the skin.
  • In the cooking pan, add the Gingelly Oil first. When its heated, add the Hing, grated peach and fry them for 2-3 minutes.
  • Add all the other ingredients and fry them on a medium flame for about 5-6 minutes till it thickens to the thokku consistency.
  • Allow the thokku to cool completely and store the thokku in a suitable container.

Tuesday, August 28, 2012

Black Eye Beans Masala / Black Eye Beans in Tomato Gravy


To go with the colourful green spinach parathas, I made this spicy, tangy Black Eye Beans Masala in tomato gravy. Its a very good combo with green and dark orange food items. I should have made this combo on our Independence day with a side of white raita too. Try this out in your kitchen and enjoy...
 
Ingredients
Black Eye Beans - 2 Cups
White Potato - 1 ( Optional )
Ripe Tomato - 4 or 5 Medium
Red Onion - 1 Medium
Green Chili - 1 Medium
Ginger Garlic Paste - 1 tbsp
Cumin Seeds / Jeera - 1 tsp
Kasoor Methi - 1 tsp
Turmeric Powder - 1 tsp
Red Chili Powder - 2 tsp
Garam Masala Powder - 1 tsp
Dhana Jeera Powder - 1 tsp ( Coriander Cumin Powder )
Sugar - 1 pinch
Salt - To Taste
Water - As required for the gravy
Oil - 1 tbsp
Butter or melted ghee - 1 tsp ( OPTIONAL )
Coriander Leaves - To Garnish
Method
  • Soak the Black Eye Beans in water for an hour and pressure cook them for 4-5 whistles. Peel the potato skin and cut them into medium size squares. Cook them in a microwave and keep the potato cubes ready too. Make the tomato puree by grinding five tomatoes and the green chili using a mixer grinder. Cut the onion into small pieces and keep them ready.
  • In the frying pan / kadai, add oil first. When its heated, add the cumin seeds, ginger garlic paste, onion into the pan. Fry them on a medium flame till the raw smell goes off.
  • Add all the powders into the pan and fry them for a minute. Pour the tomato puree into the pan and mix everything well and allow them to cook for 2-3 minutes with the lid closed.
  • Add some water if you notice thickness in the tomato gravy. Adjust the gravy consistency as you wish.
  • Then, add the Black Eye Beans, cooked potato squares and the Kasoor methi into the pan along with salt and a pinch of sugar. Mix the contents thoroughly in the pan and allow them to set properly in the gravy by cooking them on a medium flame for another 3-4 minutes.
  • Garnish with coriander leaves and serve with your nutritious green parathas. Add a tsp of melted butter or ghee on its top just before serving.
Tips / Variations
Don't overcook the Black Eye Beans in the pressure cooker. It should be well cooked and visible separately.

Monday, August 27, 2012

Spinach Chappathi / Spinach Paratha / Palak Paratha / Green Chappathi

 
School is getting started and my mind is thinking of various school lunch options, healthy dinners for the kids. Whole bag of spinach was sitting in the refrigerator and I decided to make some different variety out of it. Though Palak Paneer is our all time favourite, spinach paratha won my mind. With a tangy, spicy side dish, its a very good combination for dinner. I made Black eye beans masala in a tangy,spicy tomato gravy which makes the dinner more colourful.
Ingredients
 
For Grinding :
Spinach Leaves - 3 Cups
Green Chili - 1 Medium
Jeera / Cumin Seeds - 1 tsp
For the Dough :
Wheat Flour - 4 Cups
Sugar - 1 Pinch
Salt - To Taste
Turmeric Powder - 1 tsp
Red Chili Powder - 1 tsp
Ajwain Seeds - 1/2 tsp
Thick Curd - 1 tbsp
Grounded Paste - Add fully.
Water - Little as required for making the paratha dough.
Oil - As required.


Method 
  • Wash the spinach leaves thoroughly and steam cook them along with green chili and cumin seeds in the kadai / pan with the lid on. No need to add water. When it gets cooked and reduced in size, grind them in a mixer grinder smoothly with no water added. Keep the green paste ready.
  • In a big mixing bowl, add all the other ingredients for making the dough and the green paste too and make a smooth paste. Knead the dough well with little oil to make it more softer. Keep it aside for few minutes.
  • Heat the frying pan on medium flame. Take a small ball of the paratha dough and spread the ball into a thin round paratta.
  • Fry them uniformly on the heated frying pan on both sides. Apply little ghee on its top while serving for kids.
  • An excellent healthy paratha for breakfast, colourful lunch for kids and delicious dinner along with a good side dish. Can be eaten at all times and loved by all ages.
 
Tips / Variations
  • While kneading the dough, care should be taken while adding water. Green paste and curd should be added first while making the dough and then water should be added slowly till you get a desired consistency.
  • I prefer not to add so many powders while making the dough as I wish to retain its original flavour and make it more simpler.
 

Saturday, August 25, 2012

Chocolate Kalakand / Chocolate Milk Cake - Using Ricotta Cheese


I made this special "Chocolate Kalakand" for our sweet Krishna in our house, my son. My kids were so excited to see the Chocolate version of kalakand and they enjoyed this sweet happily. Preparation of this Kalakand was exactly the same as the regular Kalakand except that I added a packet of Cocoa to the mixture before microwaving them.
 
Please see the link as below for the preparation...
 

Kalakand / Milk Cake - Using Ricotta Cheese


I made this milk based sweet Kalakand during the festival "Krishna Jeyanthi".  Using Ricotta cheese, the process was made simpler and quicker.  I adopted the microwave method for making this sweet as it reduces the preparation time.
Ingredients
Part Skim Ricotta Cheese - 3 Cups
Milk Powder - 1.5 Cups ( I used Fat Free Milk Powder )
Sugar - 1.5 Cups
Melted Butter - Between 3/4 to 1 Cup
Rose Essence - 2 Drops ( For Good flavour but its optional ).
Shredded Nuts - 1/2 cup ( To decorate the kalakand on its top ).
Cardamom Powder - 1 tsp
( Shredded Nuts include Cashew nuts, Almonds, Pistachios.)
Method
Mix all the ingredients in a microwaveable glass bowl except the cardamom powder, rose essence and shredded nuts. Cook them in a microwave for nearly 10-15 minutes till the contents get little thicker and comes to a semi solid consistency. Add the cardamom powder, rose essence at the end of the process and mix them well. Pour them over a ghee coated plate uniformly. Before the Kalakand mixture gets cold, make squares or any shapes you desire. Once it gets completely cold, take out the kalakand squares and enjoy. While cooking them in a microwave, take out and stir them constantly and continue the process.
 
Tips / Variations
You can adjust the amount of sugar and ghee according to your taste.
Kalakand texture would be little softer if the amount of ghee is less. So, adjust the ghee level according to the texture you want.

Thursday, August 23, 2012

Vendaikkai Thayir Pachidi / Bendakaya Perugu Pachidi / Okra in Yogurt Gravy / Bindi in curd gravy


Okra / Bindi / Ladies Finger is always liked by all ages. Instead of making the regular Okra fry, I wanted to make this vendakkai Thayir Pachidi as its mostly preferable during summer. It goes well with any spicy, tangy Kuzhambu like Kara Kuzhambu, Vethakuzhambu, spicy tomato rice, or any mixed rice variety..
Decided to make use of my home grown Bindi / Okra, I had been collecting them since a week. Once it came upto a decent count, I finally made my favourite Vendakaya Thayir Pachidi.
Ingredients
Okra Plant in our Home Garden
For Making Okra Fry
Fresh Tender Okra - 25 to 30
Hing / Asafoetida - 1 Dash
Sambar Powder - 3 tsp
Coriander Powder - 1 tsp
Salt - To Taste
Oil - 4 tsp
Mustard Seeds - 2 tsp
Urad Dal / Ulutham Paruppu - 2 tsp
Curry Leaves - 1 Stem
Dry Red Chillies - 2 Medium

For the Curd Gravy
Fresh Curd / Plain Yogurt - 2 Cups
Turmeric Powder - 1 tsp
Salt - To Taste
Hing / Asafoetida - Little
Grounded Paste - Fully ( Make a paste of 1 medium size green chilli, 1 inch of Ginger, 1 tsp of cumin seeds / jeera in a mixer grinder and add it to the fresh curd ).

Method
  • Wash the Okra / Ladies finger thoroughly and cut them into small size. In a kadai / frying pan, add the oil first and finish the tempering first by adding mustard seeds, urad dal, dry red chillies, curry leaves. When its done, add the cut Okra into the pan along with all powders and required amount of salt. Mix them well and cover the lid for the Okra to get cooked with the steam inside. No need to add water while making Okra fry.
  • During this time, make the curd gravy ready. Add all the required things to the fresh curd and whisk them properly and keep the curd gravy ready. Curd Gravy itself would taste good with a flavour of fresh ginger and jeera.
  • When its cooked, open the lid and allow them to get fried on a medium flame slowly. Stir the Okra fry in the middle and let them get fried nicely. I prefer to use Non-Stick pan to fry the Okra with less oil. Its somehow easier for me, as it does not stick to the bottom and also it gets fried nicely with very less oil.
  • Just before serving, add the Okra fry into the curd gravy. Garnish with coriander leaves on its top.
Tips / Variations
You can add some thick Buttermilk to dilute the curd gravy if the curd is too thick.
You can add a stem of fresh coriander leaves while grinding the paste for the Yogurt / curd gravy.
Instead of adding the powders to the curd gravy, I prefer to add to the Okra while frying as it gives a nice aroma.

Tuesday, August 21, 2012

Cauliflower Manchurian / Gobi Manchurian / Gobi 65

Ever since i stepped into Bangalore after my college days, I fell in love deeply with this yummy appetizer or snack..Due to my great love towards this manchurian, I tasted this yummy dish in street side, mediocre hotel, good restaurants and in five star hotels. Out of all, my love looks beautiful and tastes terrible in one small fast food joint in Jayanagar, Bangalore. Its my tendency to try out things which I love so much at home since my childhood. Likewise, I tried and made some manchurian in my kitchen too. With trial and error, initial versions were ok...but not satisfactory. After trying out different versions, I arrived at one final recipe which is simpler and tastier. My friends and dear bloggers, try this version in your kitchen and enjoy this mouthwatering appetizer along with some Chinese veg fried rice / noodles and a suitable side dish.

There are two methods to make this Manchurian. You can either fry the Gobi / Cauliflower florets or bake them in the oven. In both the cases, coat every cauliflower florets with the batter and fry or bake them as you like. I made Manchurians using both the methods earlier and they tasted equally good in both the cases. If you are deciding to fry, please follow the method as described below.

I will append the Baking Method version at the end of this post very soon with corresponding pictures.
Ingredients
Gobi / Cauliflower - 1 Big
Oil - To Fry the Manchurian
For the Batter :
All Purpose Flour - 3/4 cup
Corn Flour - 2 tbsp
Salt - Little
Ginger Garlic Paste - 2 tsp
Food colour ( Orange or Red Orange) - 1 pinch ( Optional )
Chilli powder - 1 tsp
 
Gobi Manchurian - Final Process
Red Onion shredded - 1/2 cup
Spring Onion - 3
Garlic Pods finely shredded - 5 or 6
Spicy Tomato Ketchup / Tomato Sauce - 1 tbsp
Soy Sauce - 1 tbsp
Salt - To Taste
Black Pepper Powder - 3 tsp
Green Chilli shredded finely - 1 tbsp
 
 Method
 
  • Take out the cauliflower florets and wash them thoroughly. Drain the water completely and cook the cauliflower florets in a microwave and keep them ready.
  • Meantime, make a batter using the ingredients as mentioned above ( just like bajji batter) and keep the batter ready.
  • In a frying pan, add oil and heat the pan. When you see light fumes emerging out of the oil surface, take a cooked cauliflower floret and coat the floret with the manchurian batter on all sides and gently drop the floret into the heated oil.
  • Fry them to golden brown and fry all the other florets using the same method and finish the entire process. Keep all the fried cauliflower florets on a flat plate openly.
  • In a cooking pan / vessel, add oil first. When its heated, add finely shredded garlic, red onion pieces into the vessel and fry them for a minute.
  • Then, add the tomato ketchup, soy sauce, black pepper powder, shredded green chilli, required amount of salt into the cooking vessel / pan and stir them nicely for nearly 3-4 minutes on a medium flame.
  • Add all the fried manchurian into the manchurian sauce and fry them gently. Add the spring onion into the vessel and stir them again for a minute and switch off the flame.
  • Transfer the Gobi Manchurian into a serving plate and place small toothpicks on the side or on top of the Manchurian pieces individually.

Tuesday, August 7, 2012

Mushroom Soy Chunks Biryani / Protein Rich Biryani / Soy Chunks Mushroom Biryani


Both Mushrooms and Soy Chunks are powerhouse of good protein, their individual powers vary. Mushrooms are used in many cuisines in the world now due to its flavour and health benefits. Its an idealistic food option for many weight watchers due to their high water content and low calorie value. They are an excellent source of Potassium and helps in reducing blood pressure, boosts the immune system, help prevent cancer. Soy Chunks are vegetable protein which contain no fat when compared to animal protein.Also they are rich in fiber, Omega 3 fatty acids, iron and calcium. Nowadays, they are widely added in the preparation of many food items. Though I add Soy Chunks in many of my recipes, the combination of Mushroom and Soy Chunks is unbeatable due to its exclusive aroma. This biryani is a very good option for parties, lunch with a side of a simple raita. Try this out in your kitchen and enjoy.
Ingredients
Basmati Rice - 2 Cups
Red Onion Sliced - 1/2 Cup
Mushrooms Sliced - 2 Cups
Soy Chunks - 1 Cup
Peas - 1 Handful
Salt - To Taste
Oil - 1 tbsp
Melted Ghee - 3 tsp ( For Good Flavour )
Bay Leaves - 3 or 4
Ginger Garlic Paste - 1/2 tbsp
Garam Masala Powder - 1 tsp
Green Chillies shredded - 1
Green chillies slit - 1
Red Chilli Powder - 1 tsp
For Tadka / Tempering :
Cumin Seeds / Jeera - 2 tsp
Cinnamon Sticks - 2-3 Medium
Lavang / Cloves - 5 or 6
Cardamom - 3
Somfu / Fennel Seeds - 1 tsp
Star Anise - A small piece


Method
  • Soak the Basmati Rice in water. Meantime, cut the onion, mushroom and keep them ready.
  • In the cooking pan / vessel, add oil and ghee together. Finish the tempering process by adding the ingredients mentioned as above.
  • Once its done, add the ginger garlic paste on medium flame. Fry them till the raw smell completely takes off.
  • Fry the red onion slices next till they become translucent. Add the green chillies,mushrooms, soy chunks and peas next to the cooking pan and fry them for 4-5 minutes.
  • Add the powders into the pan now and stir them well. Add the sona masoori rice which is completely drained from water into the cooking vessel and fry them for a minute. Add the Bay leaves too into the pan now.
  • Add 3.75 cups of water and required amount of salt into the cooking pan and allow them to cook on a low flame.
  • Once its done, serve this nutritious, protein rich biryani loaded with flavours with a side of cool raita and your favourite side dish.

Aloo Palak / Palak Aloo / Spinach Potato Gravy


Aloo Palak is one of the quickest side dish for rotis and pulao and its easier to make it. I prepare aloo palak in two different ways. In the simpler version, to the cooked spinach and potato cubes the tadka would be added along with some spice powders. In this version, the preparation is little elaborate and tried in restaurant style. This version is best suited for special occasions whereas the first simpler version is for regular day cooking.
Ingredients
Spinach Leaves - 10 to 12 Cups packed.
Potato - 2 Medium ( cut into medium cubes )
Green Chilli - 1 Medium ( shredded )
Oil - 1 tbsp
Melted Ghee - 2 tsp
Jeera / Cumin Seeds - 1 tsp
Cinnamon Sticks - 1
Ginger Garlic Paste - 1/4 tsp
Red Onion shredded - 1/2 cup
Ripe tomato - 1 big
Turmeric Powder - 1 tsp
Dhana Jeera Powder / Coriander Cumin Powder - 1 tsp
Red Chili Powder - 1 tsp
Garam Masala Powder - 1 tsp
Salt - To Taste
Sugar - 1 pinch
Water - As desired.

Method
  • Wash the spinach and chop them nicely and keep ready. Cut the onion, tomato, potato, green chilli into desired size and keep them ready. Microwave the potato cubes and keep the cooked potato cubes ready.
  • In the cooking pan / kadai, add oil and melted ghee. When its heated, add the cumin seeds, cinnamon sticks followed by ginger garlic paste. Fry them till the raw smell goes off.
  • Then add the onion, shredded green chilli, tomato and fry them till they get cooked and look mashy.
  • Add the finely chopped spinach leaves into the pan and cook them till the quantity gets reduced considerably and cooked to your satisfaction. No need to water to the pan at this stage. Close the lid in the middle and allow the spinach to get cooked with the steam itself.
  • Add all the powders into the pan now and mix them well.  Add the cooked potato cubes into the pan and mix them all.
  • Add required amount of salt and a pinch of sugar into the pan and fry them for 2-3 minutes. If they get very thick, add little water and make the gravy consistency perfect.
  • Switch off the flame and add a tsp of ghee or little butter on its top just before serving. Its totally optional and I generally do this topping if its made for a special occasion.
Variations / Tips
Potato cubes can be substituted with fried Tofu cubes to make it more healthier.

Friday, August 3, 2012

Maavilakku / Mavilakku / Maa Vilakku

 
Maa vilakku poojai is performed during Adi month mostly on Fridays. Tradition of putting Maa Vilakku differs from family to family but the basic concept behind this tradition remains the same. We chant prayers and offer Maa Vilakku to our respective Goddesses like Mariamman, Family deity or the main deity of that region. Being a native of Thanjavur, we dedicate this pooja to our main goddess Bangaru Kamakshi Amman.
Maa Vilakku means vilakku made out of "Maa/ Maavu ". We make two special lamps on this auspicious day using a mix of rice flour, jaggery and ghee and put them on a silver plate or on a plantain leaf spread over the silver plate. Some people light a single Maa Vilakku as per their family tradition.
During my childhood, my mom used to perform this pooja in the kamakshi amman temple on Adi friday. I and my sisters used to wait patiently in the temple for her to finish off the pooja and distribute a small ball of Maa Vilakku sweet to us. Until then, we would not move out of the temple. Being a sweet lover, I love this sweet and also this poojai.
Maavilakku poojai at my Mom's Home, chennai in 2011
Ingredients 
Rice Flour - 2 Cups ( Homemade Rice Flour )
Powdered Jaggery - 1.5 Cups
Ghee - 1 tbsp
Cardamom Powder - 3 tsp

Method
  • Soak the raw rice in water for half an hour. Filter the water and spread the wet rice uniformly on a thin cloth or tissue paper for sometime till all the water gets evaporated.
  • When its dried completely, grind them finely using a mixer grinder. Meantime, powder the jaggery and cardamom powder and keep them ready.
  • Mix the powdered jaggery, cardamom powder and ghee into the rice flour thoroughly till you are able to form a small ball out of it.
  • Make two rounds of uniform size and place them over the silver plate or on the plantain leaf if its available. Make two deep small rounds at the centre of each sweet balls.
  • Fill the small rounds with melted ghee and put a nice thread into it.
  • Decorate the plate with thamboolam, flowers as per your tradition and interests. Before offering the Maa Vilakku to the Goddess, light them at the centre. Chant the prayers and do the neivedhyam. During this pooja, its good to recite Kamakshi Stothram.


Sarva Mangala Mangalye Shive Sarvaartha Sadhikey
Sharanye Trayambakey Gowri Narayani Namostutey
 

Thursday, August 2, 2012

Manathakkali Keerai Poriyal / Manathakkali Keerai Sundal / Manathakkali Keerai Curry

Manathakkali Plant is very common in South India and I think I saw this plant in every household and they make different food items using its leaves, green berries, flowers, black ripe berries.  Its a medicinal plant and used widely in Ayurvedic medicine. Leaves of this plant are believed to cure stomach related problems and liver problems. We make Manathakkali Vathal Kuzhambu, Manathakkali Keerai Kootu / curry / paruppu usili / Usiliyal etc., This item I tried Manathakkali Keerai Usiliyal / Poriyal which my mom prepared almost weekly. I loved to pluck the good leaves from the plant during my childhood and we had few plants in our backyard during that time. My mom tried to make different varieties using this Manathakkali Keerai and one of the varieties is this simple usiliyal. Its an excellent and healthy side dish in any healthy meal. I am very proud to present this in my blog as I have used our home grown manathakkali leaves in my preparation.


Ingredients
Fresh Manathakkali Leaves - Between 2 to 3 cups packed.
Moong Dal / Payatham Paruppu / Pesara Pappu - 1 Handful
Salt - To Taste
Hing / Asafoetida - 1 Dash
Oil - 3 tsp
Mustard Seeds - 1 tsp
Jeera / Cumin Seeds - 1 tsp
Urad Dal / Ulutham Paruppu - 1 tsp
Dry Red Chillies - 2 Medium
Fresh Coconut Flakes - 1/2 cup
Method
  • Pluck the good manathakkali leaves from the plant. Wash them thoroughly and chop them nicely.
  • Soak the Payatham Paruppu in water and cook them separately and keep the cooked dal ready.
  • In a kadai / pan, add oil first. Finish the tempering process by adding hing, mustard seeds, urad dal , dry red chillies into the pan.
  • Add the chopped leaves into the pan. Sprinkle some water and allow them to cook for 2-3 minutes with the lid closed.
  • When its cooked, add the cooked Moong Dal, required amount of salt into the pan and fry for another 2 minutes.
  • Switch off the flame and garnish with some fresh coconut flakes on its top. A healthy side dish is ready to be served.

Tuesday, July 31, 2012

Varalakshmi Vratham / Varalakshmi Pooja / Varalakshmi Puja


Varalakshmi Vratham / Varalakshmi Pooja is one of the important hindu festivals celebrated in South India. This festival falls on the friday before the full moon day in the month of Adi / Sharavana month every year and this year we celebrated this pooja on July 27th, friday 2012. Varalakshmi, the goddess of wealth is worshipped on this day by many women and its believed that the goddess grants the boon/varam to them after performing the varalakshmi pooja. I started performing this vratham right after my marriage as its a tradition in my husband's side.
Early Morning, women get up and put traditional kolams in the frontyard. After taking headbath and wearing new or clean clothes, they make neivedhyams/prasadams to Goddess Varalakshmi. After that, they decorate the Kalasam in a grand way with all jewelleries and perform the varalakshmi vratham in detail. They tie a yellow thread with nine knots while performing this pooja and read the varalakshmi vratham story at the end. On this day, they invite many married women for thamboolam and give them prasadams. They all sing songs prasing Goddess Varalakshmi in the evening and chant "Varalakshmi Ashtothranamavali".

Kalasam Decoration :

Take a silver plate or your traditional pooja plate and spread it with raw rice. Coat the silver varalakshmi sombu/pot with turmeric paste and decorate the pot /kalasam with kumkum dots. Fill half the sombu with water. Add a coin,a small jewellery, a flower, a betal leaf and nut inside the pot. Coat the coconut with turmeric paste and keep it ready. Once its dried, draw the goddess face on its side perfectly and keep it ready. Spread five mango leaves on the top of the kalasam uniformly. Keep the coconut on its top such that the amman face should be clearly visible from the centre. After placing the coconut properly, take a new cloth and decorate the amman as shown in the picture. While decorating, make sure that the amman pot is not disturbed. After the kalasam is nicely decorated, keep it ready. Just before starting the pooja, invite the amman to your pooja by placing the kalasam on the layer of rice in the pooja plate. If mango leaves are not available in the region you live, substitute it with betal leaves. 

Pooja Place Arrangements :

Pooja place should be cleaned and arranged nicely before the day of varalakshmi pooja. On the pooja day, keep the flowers, other pooja items handy before starting the pooja. Keep few paper napkins on your side to wipe your hands in the middle. Keep the pooja vidhanam book ready with the pages pointing to Varalakshmi Pooja.

Prasadams :

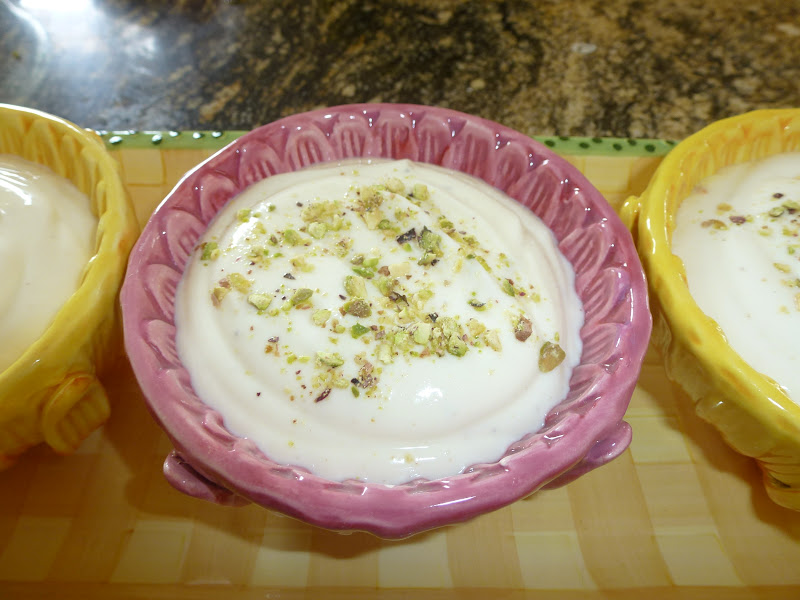
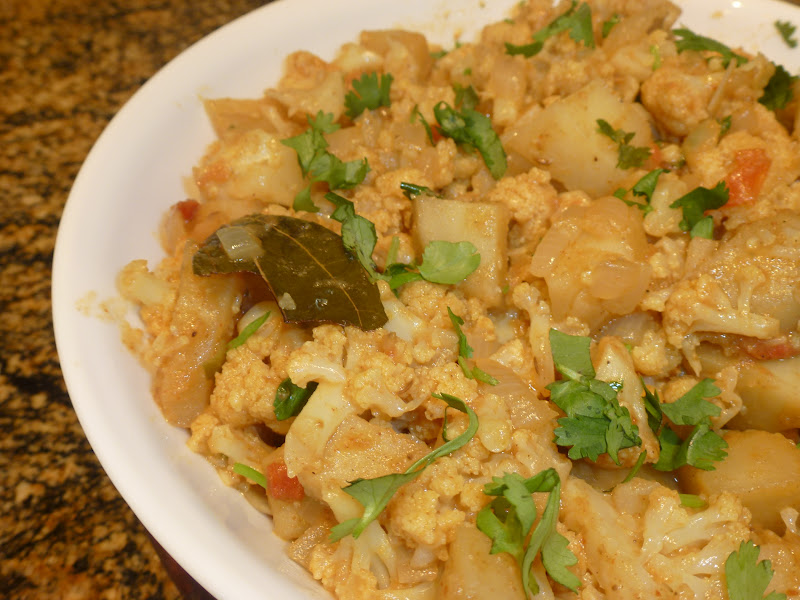
In our household, we make 5 prasadam varieties and offer to the Goddess. We generally make Paramannam ( Sweet Rice ), Puliodhara, Medhu Vadai, Sundal, Boorelu, Appam, Payasams, Annam.
You can choose your prasadams based on your interests and item availability. Please see the recipes in the blog for your preparations.

Above all, doing the vratham with good devotion is much more important than doing all the decorations, prasadams in a grand way. Somehow in my perspective, honest and deep prayers would give an immense satisfaction to your soul than creating a big hungama during any pooja or vratham day. My dear friends and family, kindly forgive me if my idea conflicts with any of yours.

Basic Pesto / Simple Pesto / Italian Pesto


Italian Lunch : Pennie coated with pesto, garden salad using home grown
cherry tomatoes dressed with raspberry vinaigrette

Ever Since I tasted the Pennie Pasta coated with the green delicious pesto, I have become addicted to that greenish oil and herb sauce. I never fail to taste this pesto at least once a month. Not only me, my family loves this pesto and urge me to make this more often in my kitchen. As its abundant during summer, we could enjoy our home made pesto this time using our home grown fresh basil leaves.

Though Basil leaves are prominently featured in Italian cuisine, its originally a native of India. Health benefits of basil is mainly due to the essential oils present in basil, and its widely used in the treatment of cancer, diabetes, stress related issues due to its antiviral, antioxidant properties. There are many varieties of basil found in the world and their culinary use varies with different regions.

Basil Plant in our home garden


Ingredients


Fresh Basil Leaves - 2 Cups packed
Garlic Pods - 3
Olive Oil - 1/2 cup
Parmesan Cheese - 1/2 cup
Broken Walnuts - 1/2 cup
( Pine nuts can be substituted if available ).
Black Peppercorns - 1/2 tbsp
( Add more pepper powder if you want to ).
Salt - To Taste.

Method

Wash the basil leaves and keep ready. Dry roast the walnuts and black peppercorns first. Then grind them in a mixer grinder coarsely along with other ingredients. Add salt and black pepper powder according to your taste at the end. Keep the sauce in an air tight container. Add portions of this pesto to the cooked pasta and thoroughly mix this with the pasta and enjoy with a side of  a garden salad and fresh sparkling apple cider. A perfect Italian meal on any special day in your life.

Monday, July 16, 2012

Raspberry Smoothie / Raspberry Lassi


Thirst quenching smoothies are always healthier, a great energizing drink especially after doing  rigorous workouts. At home, we are smoothie lovers and we love to transform any fruits into lassi/smoothie form for a refreshing dessert. Fresh sweet and tangy raspberries are seen everywhere in the markets during this summer.  To enjoy these mini berries, I made a super cool raspberry lassi / smoothie along with our tomato basil pasta salad. Try this out and enjoy your summer with healthy desserts. 

Somehow, I prefer to give these healthy smoothies to kids at any time rather than offering them unhealthy desserts like sugar candy, gelato, sugar coated creamy pastry, desserts made with high fat whipped cream.

Ingredients
Fresh ripe raspberries - 2 Cups
Greek Yogurt or regular yogurt - 2 cups
Ice Cubes - 4 or 5
Honey - 2 tbsp
Sugar - 4 tsp ( optional , you can omit if you enjoy the slight tangyness of raspberries )
Water - 1 glass
Method
Put all the ingredients into the mixer grinder and grind them using the whipper for few rounds.When the smoothie is done to your satisfaction, transfer them into serving glasses. Decorate the drink with one or two fresh raspberries on its top and serve.

Sunday, July 15, 2012

Tomato Basil Pasta Salad


We've been growing vegetables and herbs in our small vegetable garden this summer and we are quite happy with the results too. Upon looking at the freshness, we get tempted to make some good healthy recipes using these home grown vegetables. Out of those, we decided to make a healthy pasta salad using our organic, home grown heirloom tomatoes, basil leaves, Green Pepper ( Capsicum ) and few red cherry tomatoes and pearl yellow tomatoes ( heirloom variety) as well. We included few black olives, Smoked cheese cubes ( as we like ) in our preparation too..Freshly made pasta salad tossed with olive oil, black pepper powder and Parmesan cheese was an ultimate dinner for us last night. Of course, we had few pita chips and red bell pepper home made hummus ( which i will post separately ) as sides and our favourite raspberry smoothie for our yummy dessert.

This menu would be best suited for lunch. As we could hardly feel a perfect dinner time during this summer due to very late sunset, we are fine with this dinner menu.!!!!

This is a good and easy option for picnic as its mostly liked by kids. Try this in your home and let me know your feedback.

I will post our favorites "Raspberry Smoothie" and "Red Bell pepper Hummus" in my following posts.

Home grown fresh vegetables except olives and smoked cheese
Ingredients
Tomatoes  - 2 Medium
Fresh Basil Leaves - 2 Cups ( finely crushed )
Red Cherry Tomatoes - 1 cup
Green Bell Pepper -- 1 Medium
Pitted Black Olives cut into halves - 3/4 cup
Salt - To Taste
Black Pepper Powder - As required.
Olive Oil - 1 tbsp
Lemon Juice - 3 tsp
Smoked Cheese cubes - 1/2 cup
Shell Pasta ( Small size ) - 2 cups uncooked.
Parmesan Cheese - To garnish.
Method
  • Wash all the vegetables and keep them ready. Keep all the ingredients handy with a big salad mixing bowl.
  • Cook the shell pasta in a separate container and keep the drained cooked pasta ready. In the mixing bowl, first add a layer of pasta and add the chopped green bell pepper. Follow this method till you add all the bell pepper into the bowl. Mix them gently.
  • Secondly add all the cut tomatoes and the whole cherry tomatoes , crushed basil leaves, cheese cubes and the cut olives.
  • Add Olive oil, required amount of salt,black pepper powder, lemon juice and mix the salad uniformly.
  • Add Parmesan cheese at the end and mix gently. Now its ready to be served in your meal.


Tips / Variations
  • You can add other cheese varieties of your choice in your salad. As we all like smoked cheese cubes, I added them in my salad. You can omit the cheese cubes too if you dont want to include cheese in your salad.
  • I don't prefer to add other vegetables in this version of pasta salad. This is mainly to enjoy the freshness of basil and tomatoes and to retain its original flavour.
  • Try to use small size pasta in your salad as it easily blends with the rest of the ingredients and looks good too in the salad.

Friday, July 13, 2012

Alu Gobi / Aloo Gobi / Aloo Gobi Masala

 Aloo Gobi / Potato Cauliflower Curry is one of the quickest and easiest curry for rotis / chapathis and its mostly liked by all ages. I regularly make this curry for my rotis when I have very less preparation time. If its made with fresh Gobi ( cauliflower ), the aroma is very good. Aloo Gobi flavored with all the aromatic spices is definitely a very good accompaniment to rotis or pulav.
Ingredients
Gobi / Cauliflower - 1 Medium
Aloo / Potato - 4 or 5 Medium
Tomato - 1 Medium
Onion shredded - 1/2 cup
Oil - 1 tbsp
Cumin Seeds / Jeera - 1 tsp
Pattai / Cinnamon Stick - 1 Medium
Bay Leaves - 2 Medium
Ginger Garlic Paste - 1/2 tbsp
Green Chili - 1 finely chopped
Coriander Leaves - To Garnish
Turmeric Powder - 1 tsp
Garam Masala Powder - 2 tsp
Coriander Cumin Powder / Dhana Jeera Powder - 1 tsp
Red Chili Powder - 1 tsp
Salt - To Taste
Method
  • Peel the skin off from the potatoes and cut them into cubes of any size as desired. I cut them into medium chunks. Take out the cauliflower florets and wash them with warm water.
  • Cut the onions, tomato, green chili and keep all the other ingredients ready.
  • In a frying pan / kadai, add oil first. When its heated, add cumin seeds, cinnamon stick, bay leaves, ginger garlic paste and fry them well.
  • Then, add the shredded onion, green chili into the kadai and fry them for a minute. When the raw smell goes off, add the tomato pieces and fry for a minute.
  • Add the cauliflower florets and the cooked potato cubes ( in case if you cook the potatoes separately in a microwave ) to the kadai. If you don't intend to cook the potatoes separately, then add the potatoes into the kadai with enough water for them to get cooked.
  • When the potatoes are cooked three fourth, then add all the washed cauliflower florets into the kadai
  • and cook them again on medium flame.
  • When the vegetables are cooked to your satisfaction, add all the powders into the kadai and required amount of salt.
  • Make sure that the aloo and gobi pieces are coated uniformly with all the powders. Fry them on medium flame for 4-5 minutes.
  • Garnish with coriander leaves and serve with your hot rotis or rice pulav.
Variations / Tips
  • You can either cook the potatoes separately and add to the kadai or add the uncooked potatoes directly into the kadai and cook them during the process.
  • Don't cut the cauliflower florets smaller as they might get smashed while cooking.
  • Instead of adding tomato, sometimes i do substitute with Mango powder to inject some sourness into the dish. 

Wednesday, July 11, 2012

Vazhaipoo Adai / Banana Flower Lentils Crisp / Vaazhaipoo Adai


Banana Flower which is called as "Vaazhaipoo" in Tamil is a purple flower which blossoms at the edge of the banana bunch in its tree. Its widely used in many regional cuisines of India. Due to its dietary fiber and high protein value, including this healthy vegetable in our regular cooking is wiser. Also, its very good for stomach related problems. My mom often made this vegetable during our thanjavur childhood days, she generally made Vaazhaipoo Curry, Vaazhaipoo Paruppu Usili, Vadai, etc., Also I remember her Vaazhaithandu Mor Kootu which is one of my favourites. Though we dont get the Vaazhai Thandu ( Banana Stem ) here, I am lucky to see some fresh Banana Flowers atleast in a nearby China Market. Though I make many versions of food items using this great flowery vegetable, this time I made a protein rich Adai ( Lentils Dosa ) and its so... yummy and healthy. Try this out during tiffin time with a side of fresh curd and a spicy pickle. A very healthy tiffin item for all ages...

Cleaning the Banana flower seems to be a little time consuming job initially. Once you know the technique of it, its a matter of few minutes.
  • Rub your hands with little oil while doing this job as your hands might turn sticky and black during this process.
  • Open the purple petals one by one and take out the yellow colour florets carefully.
  • Remove the two parts from every floret carefully.
  • In the picture I added, I showed the two parts that are to be taken out from each floret. One part looks like a plastic ear phone and the other part is a thick long stem with a thick dot on its top.
  • Chop the cleaned florets under each petal and immediately put them in a diluted buttermilk in a vessel. This is mainly to prevent colour changing.
  • Follow the same process for all the petals till you notice a small cone shaped yellow tender bud. As this tender yellow cone is also highly nutritious, chop them too finely and add it to the vessel. Keep it ready.


Ingredients

Toor Dal / Thuvaram Paruppu / Kandhi pappu  - 1 Cup
Channa Dal / Kadalai Paruppu / Senaga pappu - 3/4 Cup
Moong Dal / Payatham Paruppu / Pesara Pappu - 1/4 Cup
Rice / Idly Rice / Par Boiled Rice - 1/2 Cup
Dry Red Chillies - 4 or 5
Hing / Asafoetida - 1 Dash
Salt - As required
Curry Leaves - 1 Stem
Chopped banana flower - 2 to 3 cups.
Oil - For making the Adais / Crisps.


Method
  • Soak all the dals and rice in one vessel for nearly 2 hours.
  • Grind them coarsely in a mixer grinder along with dry red chillies.
  • To the mix, add required amount of salt, hing, curry leaves.
  • Drain the chopped banana flower florets from the diluted buttermilk vessel and add them to the Adai batter.
  • Just grind it for another few seconds with these additional ingredients. Now the Adai batter is ready to make. Make sure that the batter is neither too thick nor too watery.
  • Heat the griddle or frying pan  make the surface smooth and ready for making adais.
  • Pour one full ladle of the adai batter and spread them uniformly and make a thin circle. Pour oil along the edges and allow them to cook on both sides.
  • Flip to the other side and take out the adai from the tawa after both sides are completely cooked and crispy.
  • Serve with a cup of fresh curd and a spicy pickle or chutney.

Tuesday, July 10, 2012

Shrikand / Kesar Pista Shrikand / Healthy Shrikand - Using Greek Yogurt


Sweets / Desserts always make our soul happy and if its a healthy sweet, then a guilt free enjoyment would take us to heaven.  Shrikand sweet was first introduced to me by my husband and I started enjoying it very much. Instead of  our regular  curd / Yogurt, I substituted Greek Yogurt in my preparation ( as it has more protein value ) and its absolutely delicious. Amount of sugar is also very less..Above all, its a quick dessert which can be made at any time and enjoy with. 
Ingredients
Green Yogurt - 6  ( 20 oz pack - 2 .I used )
Cardamom Powder - 1 tbsp
Saffron soaked in warm water - 2 pinch.
Nutmeg Powder - 1 tsp
Honey - 3 tbsp
Crushed Pista - 1 cup
Sugar - 3/4 cup to 1 cup ( Add more if you like )
 Method
  • In a big mixing bowl, add all the ingredients one by one and blend them well. 
  • Transfer them into small serving bowls and chill them in refrigerator for few hours.
  • Enjoy this cool healthy dessert after a meal. 
Tips / Variations

Add more sugar to the Shrikand if you like more sweetness.


Thursday, June 21, 2012

Vegetable Kichidi / Veg Khichidi / Khichidi / Kichidi - North Indian Style

Its really difficult to arrive at a conclusion especially when we are very tired and exhausted by end of the day. And when it comes to making a quick dinner with less time, its much more difficult to finalise on one item. My wish is to include good amount of veggies in any meal, so there comes the one pot Kichidi for my rescue.  With a side of some cool raita and crunchy potato chips ( not for me!!!) on its side, this veg Kichidi would be delicious and healthy. Though we make Bisibelebath, Vegetable pongal in South Indian flavour and taste, this vegetable Kichidi is made in a north indian style. And I love all the versions and each version is unique in its own taste and preparation. This Kichidi is so tastier with all the goodness of vegetables, lentil and the process is also simpler and quicker.
Ingredients
Sona Masoori Rice - 1 Cup
Toor Dal / Thuvaram Paruppu / Kandhi Pappu - 1/2 Cup
Hing / Asafoetida - 1 Dash
Turmeric Powder - 1 tsp
Garam Masala Powder - 1 tsp
Dhana Jeera Powder / Coriander Cumin Powder - 1/2 tsp
Cumin Seeds / Jeera - 1 tsp
Dry Red Chillies - 2 Medium
Crushed Ginger Paste - 1 tsp
Cinnamon Stick - 1
Cloves - 2
Bay Leaves - 1 or 2
Salt - To Taste
Sugar - 1/4 tsp
Ripe Tomato - 2 Medium
Onion - 1/2 cup nicely shredded
Cut Vegetables - 1 Cup or 1.5 cup ( Carrots, Peas, Potato, Brinjal, Beans, Chayote or Chow Chow or any veggies of your choice ).
Oil - 1 tbsp
Ghee - 2 tsp ( Optional )
Procedure
  • In a pressure cooker, on a medium flame, first add oil. When its heated, add Hing, Mustard Seeds, Cumin Seeds, Cinnamon Stick, Cloves, Dry red chillies, Bay Leaves in succession.
  • When the tempering is done, add the onion pieces next and fry them till golden brown.
  • Next all the tomato pieces into the cooker and fry them for a minute. Add all the powders into the cooker along with the cut vegetables, ginger paste into the vessel. Mix them well and fry for another 2 minutes.
  • Then add the washed toor dal into the vessel and fry them for a minute. Add a cup of water and cover the cooker and allow them to boil for another 4-5 minutes till the toor dal gets half cooked.
  • Open the lid and add the sona masoori rice, salt and sugar. Add four cups of water again and cover the cooker.
  • Cook the Kichidi for 3 whistles and siwtch off the flame. After you open the cooker, add 2 tsp of ghee on its top and serve this with raita..
Tips
If  the Kichidi is made for a party or special occasion, add few ghee roasted cashew nuts on its top just before serving.

LinkWithin

Related Posts Plugin for WordPress, Blogger...