Monday, May 23, 2016

White Pumpkin Kootu / Vellai Poosanikai Kootu - Simple, No Grinding Method


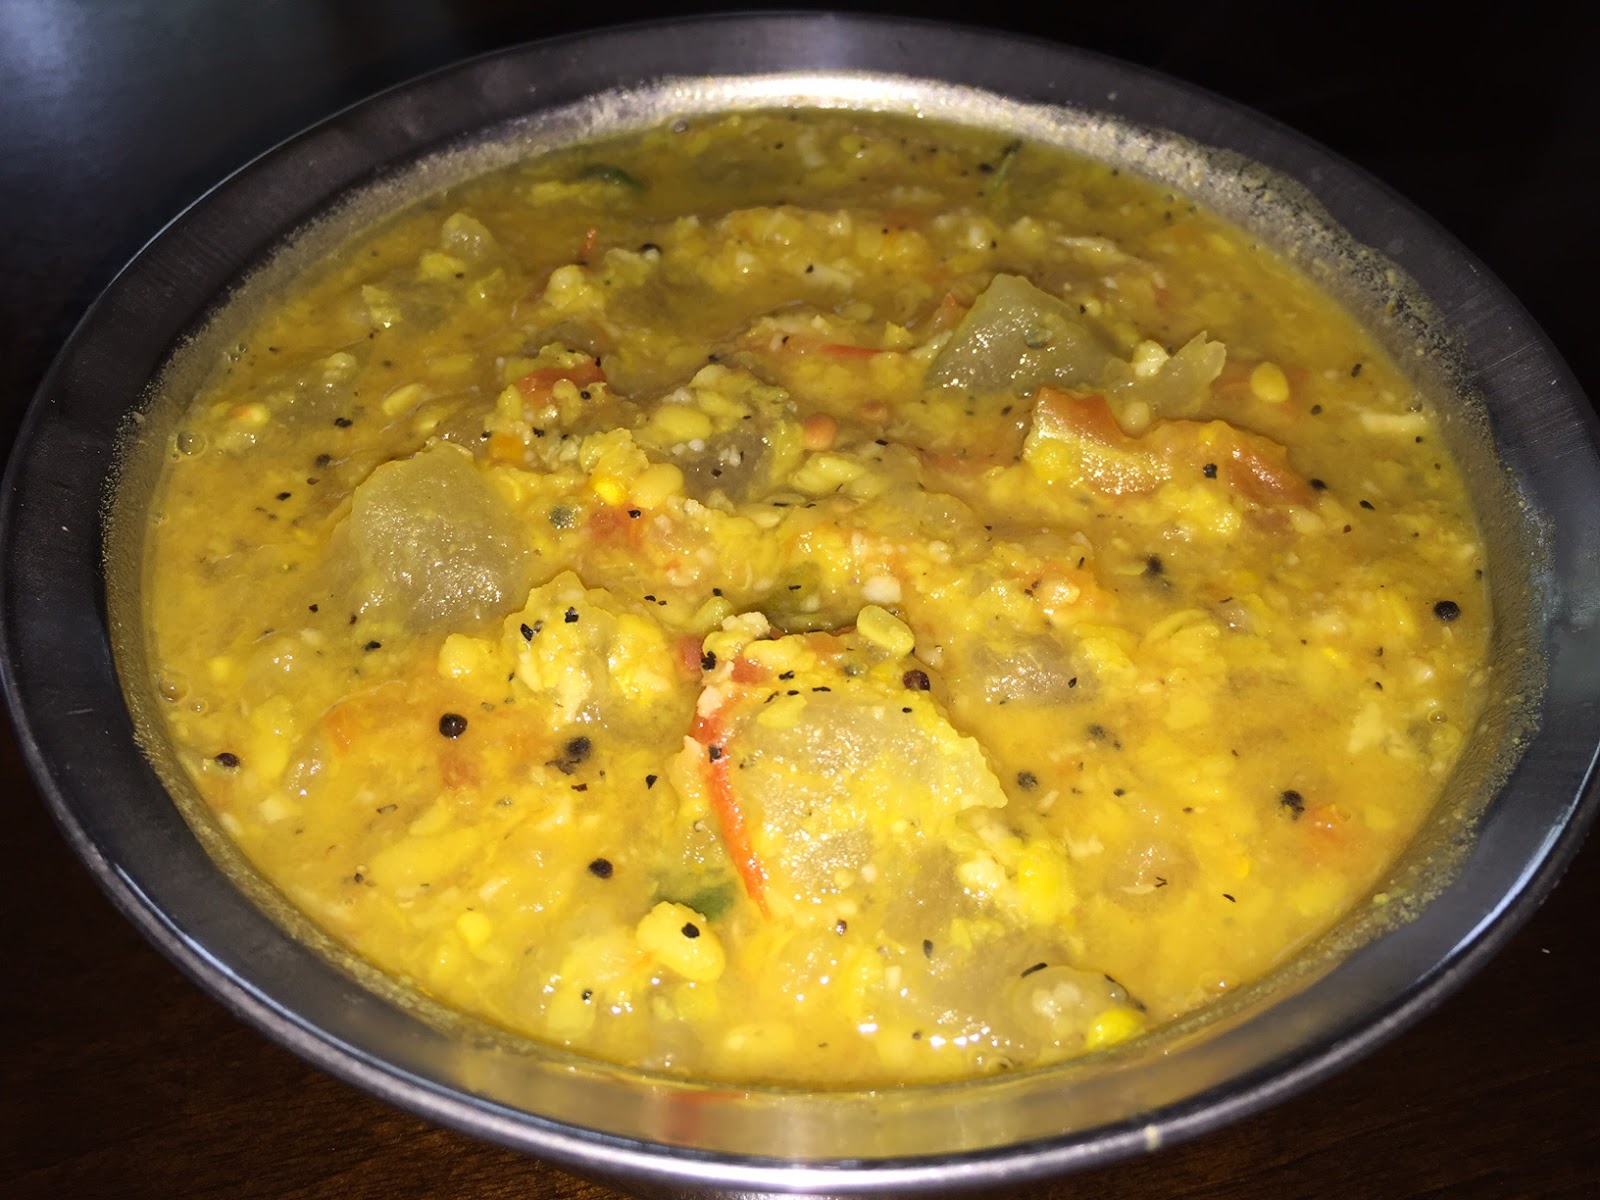
In any Tamilian Meal, kootu will be served along with other vegetable curries. There are many varieties of Kootu served with different vegetables like white pumpkin, Sorakai ( Bottle Gourd ), Avaraikai ( Flat Beans ), Beans,  Red Pumpkin, Chow Chow ( Chayote ), etc., I always love to include a Kootu in my complete meal, especially with water based vegetables as it tastes very well.
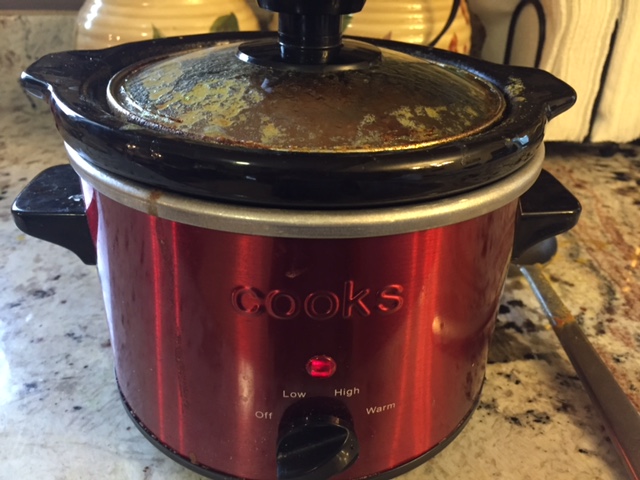
This version of White Pumpkin Kootu is my mom's version with no grinding required. As she was a busy mom, she preferred to make healthy items with small short cuts at times. This kootu is just a one pot item which can be cooked in a pressure cooker for 2 whistles and served after tempering right away.  With less time, you can comfortably add a healthy accompaniment to your meal.

Ingredients
Into the Pressure cooker :
White Pumpkin pieces - 3 cups
Moong Dal / Payatham Paruppu - 3/4 cup
Turmeric Powder - 1 tsp
Tomato chopped - 1/2 cup
Green Chillies - 2
Water - Little. ( Enough for the dal to get cooked ).

Tempering / Tadka :
Hing / Asafoetida - 1 Dash
Mustard Seeds - 1 tsp
Cumin Seeds - 1/2 tsp
Urad Dal - 1 tsp
Dry Red Chillies - 1
Curry Leaves - 1/2 stem
Oil / Ghee - 2 tsp

Salt - As Required
Fresh Coconut flakes - 1.5 tbsp.

Method
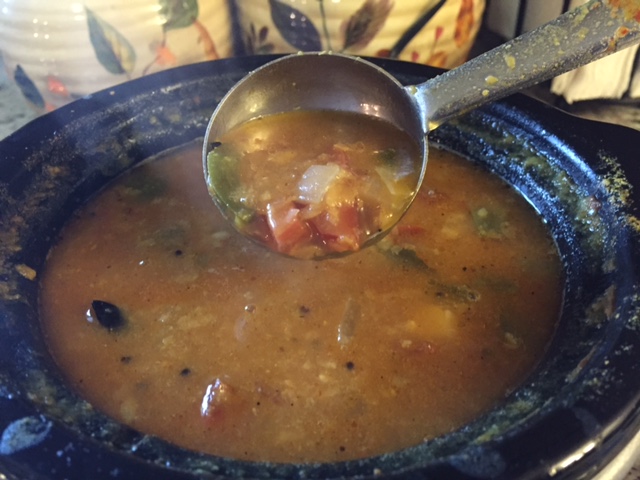
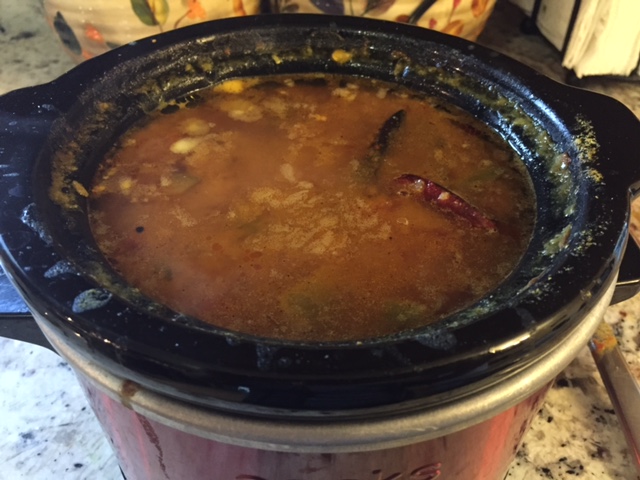
  • Cut the white pumpkin into bigger chunks and keep ready. Chop the tomato, green chillies and keep ready. Add all the ingredients mentioned under "Into the Cooker" in a pressure cooker and cook for 2 whistles.
  • After the pressure is released completely, open the cooker and add required amount of salt and coconut flakes into the cooked kootu.
  • Let it cook for a minute. Then prepare the tadka in a separate tempering pan. Pour the tempering over the cooked kootu in the pressure cooker.
  • Serve with hot rice and as a nice accompaniment in your meal.

Tips / Suggestions
  • If you have a small pressure cooker, you can add the ingredients directly into the cooker and cook.
  • If you have a medium / big cooker, then you can cook them in a separate vessel inside, even along with rice.
  • If you don't have a pressure cooker, no need to worry. You can cook them over the stove in a thick bottomed pan and follow the same steps.
  • Don't add too much water while cooking. Otherwise you wont get the right kootu consistency.
  • Add only fresh coconut flakes to the kootu. If the coconut is smelly or little bit old, then it spoils the kootu totally after making, wont stay for a longer time.

Wednesday, May 18, 2016

Easy Hotel Sambar using Crockpot / Slow Cooker


Morning Breakfast is an important meal for the family. A simple hot breakfast will kick start the day with lots of energy. To decide on the menu for the weekday breakfasts is really challenging. Whether its a pongal, kichidi, idli , dosa, vada or any other item, the main accompaniment "Sambar" comes as a rescue. Sambar is a South Indian gravy which combines the goodness of lentils, vegetables, aromatic spices and tangy tamarind extract cooked and simmered on the stove for its delicious taste.
To make my life simpler, I always hunt for short cut ways to satisfy my need. Crockpot / Slow cooker helps me a lot nowadays in my kitchen.
Crockpot Sambar is very easy to make, take less efforts. If you fill your crockpot / slow cooker with all the ingredients, then in the morning, a nice aroma will emanate from your kitchen which in turn will greet you with a steaming smile.

Ingredients

To the Crockpot / Slow Cooker 
Shredded Red Onion - 1/2 cup or Small Pearl Onion - 10 or 12.
Shredded Ripe Tomato - 1/2 cup
Shredded Green Bell Pepper - 1/4 cup
Small Brinjal - 1
Green Chillies Medium - 2
Hing / Asafoetida - 1 Small Dash
Turmeric Powder - 1 tsp
Toor Dal / Thuvaram Paruppu - 3/4 cup
Moong Dal / Payatham Paruppu - 1/4 cup
Water - 6 cups
Tamarind Extract - 1/2 cup ( Not too thick, medium thickness is enough )

For Tempering / Tadka 
Ghee / Clarified Butter - 1 tbsp
Hing / Asafoetida - 1 Dash
Mustard Seeds - 1.5 tsp
Methi Seeds / Fenugreek Seeds - 1 tsp
Dry Red Chilli - 1
Fresh Curry Leaves - 1 Stem
Sambar Powder - 1 tbsp
Coriander Powder - 1/2 tbsp
Red Chili Powder - 1/2 tsp

Towards the End to Slow Cooker 
Salt - As Required
Water - As required to adjust the consistency level.
Ghee - 1 tsp for flavour.
Jaggery - small cube

Coriander Leaves - To Garnish.


Method

  • First cut the vegetables as specified and keep the other ingredients handy.
  • Add all the ingredients as mentioned under "To the Crockpot / Slow Cooker". Allow them to cook under "High" for 7 to 8 hours.
  • After 8 hours, check the slow cooker. By this time, the gravy would have been mushy and well cooked.
  • Finish the tempering / tadka in a separate pan. When its sizzling, pour the tadka over the sambar.
  • Add the other ingredients mentioned under "Towards the End to Slow cooker".
  • Allow the sambar to cook for another 5 minutes under "Low".
  • Garnish with coriander leaves on top and enjoy this warm hotel sambar with any of your favourite tiffin.

Tips / Suggestions
  • If you want to serve Sambar for breakfast, then you can set the Slow cooker in the night before going to sleep. If you need this for dinner, set the slow cooker after breakfast to High.
  • Sambar will not overflow or spill from the Crockpot / Sambar while cooking on High setting. So, no need to worry.
  • Add salt before adding tadka / tempering.
  • Moong dal enhances the taste of the Sambar, enriches its texture. So, dont forget to add.
  • Do not forget to add Jaggery into the Sambar.
  • I added a tsp of Tamicon to half a cup of water, diluted it and added to the Sambar. It tasted well though. So, its your choice. You can either add real tamarind juice or Tamicon.

Sunday, May 15, 2016

Spicy Okra Curry / Vendaikai Masala Curry


Okra / Vendaikai / Bendakaya / Ladies Finger / Bindi is one of the favourite vegetables which is almost seen in all Indian Kitchen. I cannot live without having few bindi in my refrigerator. I always love to make something out of bindi in any form. Though we make many varieties using this tender green fingers, this spicy okra curry is one of our home favourites. Sometime, if you get bored of making the same okra fry in standard form in your meal, you can very well substitute this okra masala curry to make it interesting.

Ingredients

Tender Okra / Bindi cut into small squares - 2 full bowls.

Oil - 1 tbsp
Hing / Asafoetida - 1 Dash
Urad Dal / Ulutham Paruppu - 2 tsp
Curry Leaves - 1/2 stem
Dry red chillies - 2
Turmeric Powder - 1/2 tsp
Grounded Powder - 1 tbsp
Garam Masala Powder - 2 tsp
Salt - As Required
Fresh Ginger Garlic Paste - 3 tsp
Shredded Tomato - 1 tbsp
Shredded Onion - 1/2 cup

For Grinding 
  2 tsp of coriander seeds
  2 dry red chillies
  1/2 tsp cumin seeds

Method

  • Wash ,clean the okra and cut into small squares as shown in the photo above. Cut the onion, tomato and keep them ready.
  • Grind the powder as described above in a blender and keep it ready.
  • In the cooking vessel, add oil first. When its heated, add mustard seeds, urad dal, dry red chillies, curry leaves.
  • After the tadka is done, add chopped onion pieces and fry them for a minute.
  • Add the freshly made ginger garlic paste into the cooking vessel and fry till the raw smell vanishes.
  • Add the okra, tomato pieces and all other ingredients including salt into the vessel.
  • Coat the okra/bindi thoroughly with all the powders. Allow them to cook for 4-5 minutes with the lid closed.
  • Remove the lid and allow the okra to get nicely roasted on a medium flame.
  • When they look crispy enough for you, switch off the stove.
  • Serve this spicy, delicious okra curry either with hot rice or roti.

Tips / Suggestions 
Try to prepare this curry using fresh tender okra / bindi only to get a delicious taste.

Thursday, May 12, 2016

Pineapple Rasam / Annasipazha Rasam


Pineapple Rasam is one of my favourite rasams / soups. The unique flavours of this rasam emanating from the vessel during the preparation process itself  kindles your hunger and the spicy delicious rasam is an excellent accompaniment in any South Indian Meal. Whenever I see a pineapple at my kitchen, I make sure that a portion of this golden yummy fruit gets transformed as I like.!!!

Coming to the preparation process, it takes less than 15 minutes to make this rasam. Quality of the pineapple plays a key role in this rasam. 

Ingredients

Fresh Tasty Pineapple chunks - 2 cups

Tamarind extracted water - 1/2 cup

Tomato Puree - 3/4 cup

Pineapple Puree - 1 1/2 cup

Water - As Required

Turmeric Powder - 1 tsp

Rasam Powder - 1 tsp

Cumin & Black Pepper Powder - 1/2 tbsp

Salt - To Taste

Green Chilli - 1 

Fresh Ginger- A small cube

Cooked toor dal - 1/4 cup

For Tempering

Asafoetida - A Dash

Tomato pieces - 1 tbsp

Pineapple pieces tiny - 1 tbsp

Cumin Seeds - 1 tsp

Mustard Seeds - 1 tsp

Curry Leaves - 1 Stem

Dry Red Chillies - 2 

Ghee / Clarifies Butter - 1/2 tbsp

Method

Soak the tamarind in warm water and extract the juice and keep the filtered thick tamarind extract water ready.

Cook the toor dal and dilute 1/2 cup of the cooked toor dal and keep it ready.

Make the Pineapple puree by grinding the cleaned pineapple chunks, a green chili and the ginger cube in a blender without adding any water and keep it ready.

Make the tomato puree by grinding a fully ripen tomato in a blender and make it ready.

In a cooking vessel, add the tamarind extract, pineapple puree, tomato puree. To that, add turmeric powder, rasam powder, little asafoetida, half the quantity of cumin&black pepper powder and required amount of salt.. Add a cup of water and cover the vessel with a lid. 

Allow the content to cook till the raw smell of the tamarind goes off.  At this stage, add the diluted dal water into the rasam vessel. Add required amount of water into it. 

Cover the lid and allow them to cook on a low flame.

Meantime, do the tempering process. In a tadka / tempering pan, add ghee first. When its heated, add mustard seeds, cumin seeds, dry red chili, curry leaves, asafoetida and the remaining cumin/black pepper powder in order. When they are nicely tempered, pour them over the rasam.

Keep it on the stove till you notice nice froth on the top layer of the rasam. Switch it off once you get enough froth on the top.

Serve the hot, spicy, aromatic rasam with hot rice and ghee and enjoy. It can be a good appetizer too.


Tips /  Suggestions

Addition of  tamarind extract is optional. I basically like to blend the pineapple flavour with tamarind in my rasam. 
Do not boil the rasam for more time, then you might loose the real flavour and freshness. As soon as you get enough froth at the top layer, switch off the stove.

Thursday, May 5, 2016

Kale Pesto with Walnuts


Kale is one among the most nutrient dense foods on the planet. It is rich in Protein, fiber and has vitamins A,C, and K. Folate content and Omega - 3 is high in Kale which is the main key for brain development. Kale can help lower cholesterol which in turn reduces the risk of heart disease.  It has numerous cancer fighting substances.

Using this super food, I made a super Kale Pesto with toasted walnuts. It can be stored in air tight refrigerator for 2-3 weeks but its better to enjoy its real freshness.

Ingredients

Kale leaves without stem --  2  cups
Garlic Pods --- 6 or 7
Peppercorns - 1 tbsp
Extra Virgin Olive Oil - 1/2 cup
Parmesan Cheese - 1/4 cup
Toasted Walnuts - 1/2 cup
Salt - To Taste
Lemon Juice - Juice of One lemon completely.

Method 


Pulse the washed kale leaves, garlic pods, peppercorns, olive oil, salt, lemon juice in a food processor or blender until smooth.

Add the Parmesan cheese and walnuts and pulse until the walnuts are ground to your desired consistency.

Store it in glass jars and enjoy with hot pasta, bread, crackers, sandwiches, etc.,

Notes


I did not add any basil leaves in this pesto as I wanted to enjoy the Kale taste as much as possible.
Trust me, your dinner rocks with this pesto sauce. With any kind of Pasta, this simple pesto completely enhances the meal. With a side of fresh, crunchy Italian salad, its divine.

Wednesday, May 4, 2016

Quinoa Chickpea Salad


Quinoa , a tiny high protein grain from South America  is seen in many Indian Kitchens nowadays. Though I don't use it regularly in my kitchen, I try to make some attractive dishes using this grain. One of my favourite quinoa recipe is this colourful quinoa salad. To add to its richness, I have added some chick peas to the salad.

It can be a perfect meal for any time of the day with a side of Masala Chas / Buttermilk. Due to its crunchy, spicy taste and excellent aroma, even salad haters could have a plate of this salad as it swings away from the blandness side. Also its not cold like a regular green salad. 

Ingredients

Cooked Quinoa -   2 Cups
Cooked Chickpeas -  1 Cup
Shredded Red Onion - 1/2 cup
Finely Shredded Green Chillies - 1 tbsp
Finely crushed garlic - 2 tsp
Grated Carrot - 1/2 cup
Grated Beetroot - 1/2 cup
Tiny tomato pieces - 1/2 cup
Red chili powder / Paprika - 1 tsp
Cumin Powder - 2 tsp
Lemon Juice - 2 tsp
Salt - To Taste
Shredded Coriander leaves - 1/2 cup
Oil - 3 tsp


Method
  • Cook the quinoa, chickpeas using the regular cooking method. For cooking a cup of quinoa, add 2 cups of water. On medium heat, cook the quinoa for around 15 minutes till it gets fluffy.
  • For cooking the chickpeas, soak the chickpeas overnight and pressure cook them for 4-5 whistles. 
  • Grate the vegetables and keep all the ingredients ready.
  • In the cooking pan / kadai, add oil first. Then, add the crushed garlic, onion, green chillies one by one and fry them till the raw smell goes away.
  • To the pan, add the cooked chickpeas and the powders and mix them well.
  • Add the cooked quinoa along with the grated vegetables. Add required amount of salt into the pan.
  • Switch off the flame. Turn the salad upside down and squeeze little lemon juice over the top.
  • Mix them well and transfer the salad into the serving bowl.


Tips / Suggestions

Do not overcook the chickpeas as it gets mushy, making it difficult to be added in the salad.Similarly, cook the quinoa till they get fluffy. You can customize the spice level to your taste. Do customize as you like and enjoy in the summer.

LinkWithin

Related Posts Plugin for WordPress, Blogger...