Showing posts with label Sweet Varieties. Show all posts

Tuesday, March 14, 2017

Annavaram Sathyanarayana Swamy Prasadam


Sathyanarayana Swamy Vratham is one of the main poojas which we try to do at home at least once a year. Though this vratham can be performed at any day of the month with at most dedication, ekadasi and pournami days are considered to be the most auspicious days for performing this vratham. When I think of this vratham, I cannot stop thinking about the yummy prasadham we make at home for this vratham. In Annavaram where the Sathyanarayana Swamy temple is located, they make this everyday as Neivedhyam and distribute it to the devotees. Its made of broken wheat , jaggery and plenty of ghee. Oh, the aroma of this prasadam will take you to heaven and it just melts in your mouth.I made with 3 cups of broken wheat as we all have sweet tooth. You can make it with 1 cup of broken wheat rava too. Reduce the other quantities while making and enjoy. 

Ingredients

Broken Wheat Rava - 3 Cups
Jaggery powdered - 2 cups
Sugar - 2 cups
Cardamom Powder - 3 tsp
Pachai Karpooram / Cooking camphor - 1 small pinch
Saffron - Few Strands
Whole Milk - 2 Cups
Water - 6 Cups
Ghee - 1 Cup
Cashew Nuts - 2 tbsp
Dry Grapes / Raisins - 2 tbsp


Method

  • In a thick bottomed cooking vessel, add a tbsp of ghee and fry the Cashew nuts and raisins till they get golden brown. Store them in a container separately as they need to be added at the end.
  • In the remaining ghee, add the broken wheat rava and fry them for few seconds. Add the milk, saffron strands and water and cook them well.
  • Once they are cooked perfectly, add jaggery and sugar into the vessel. It would start melting and the mixture would turn slightly watery. 
  • Add 1/4 cup of ghee and stir the mixture on medium heat. Slow cook the mixture till the consistency gets little thicker. 
  • Add the crushed cardamom powder, cooking camphor into the mixture and add the remaining amount of ghee into the vessel at intervals.
  • Cook the prasadam on medium heat till the consistency gets perfect and comes to a thick semi solid halwa.
  • Garnish with the roasted cashews and raisins and offer the prasadham to Sathyanarayana Swamy.


Notes / Tips 
  • Slow cooking greatly helps in getting the right consistency.  
  • The ghee you added will ooze out on its sides completely after its cooked perfectly.
  • Addition of cooking camphor, saffron strands, cardamom greatly enhances the aroma and taste of this prasadam.
  • Some people make this prasadam using only Sugar too but I added Jaggery and Sugar equally just to get the exact taste of the Annavaram prasadam.

Wednesday, November 19, 2014

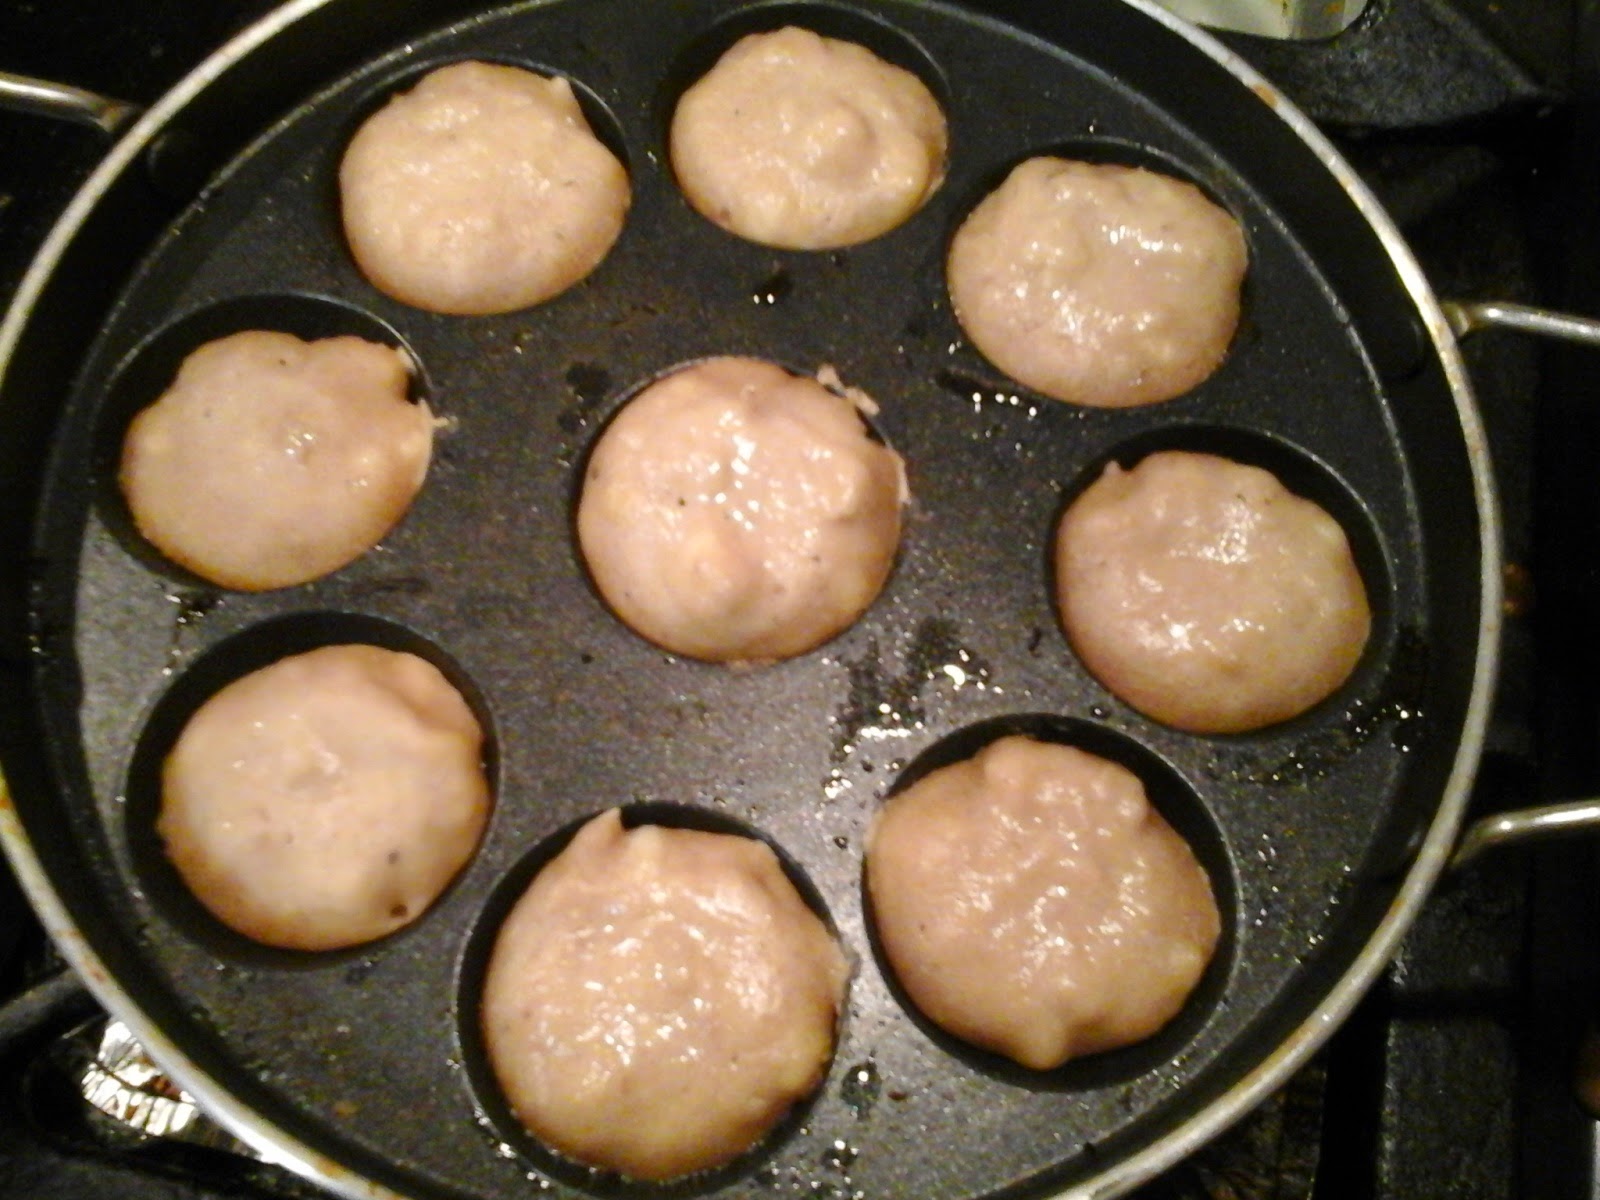
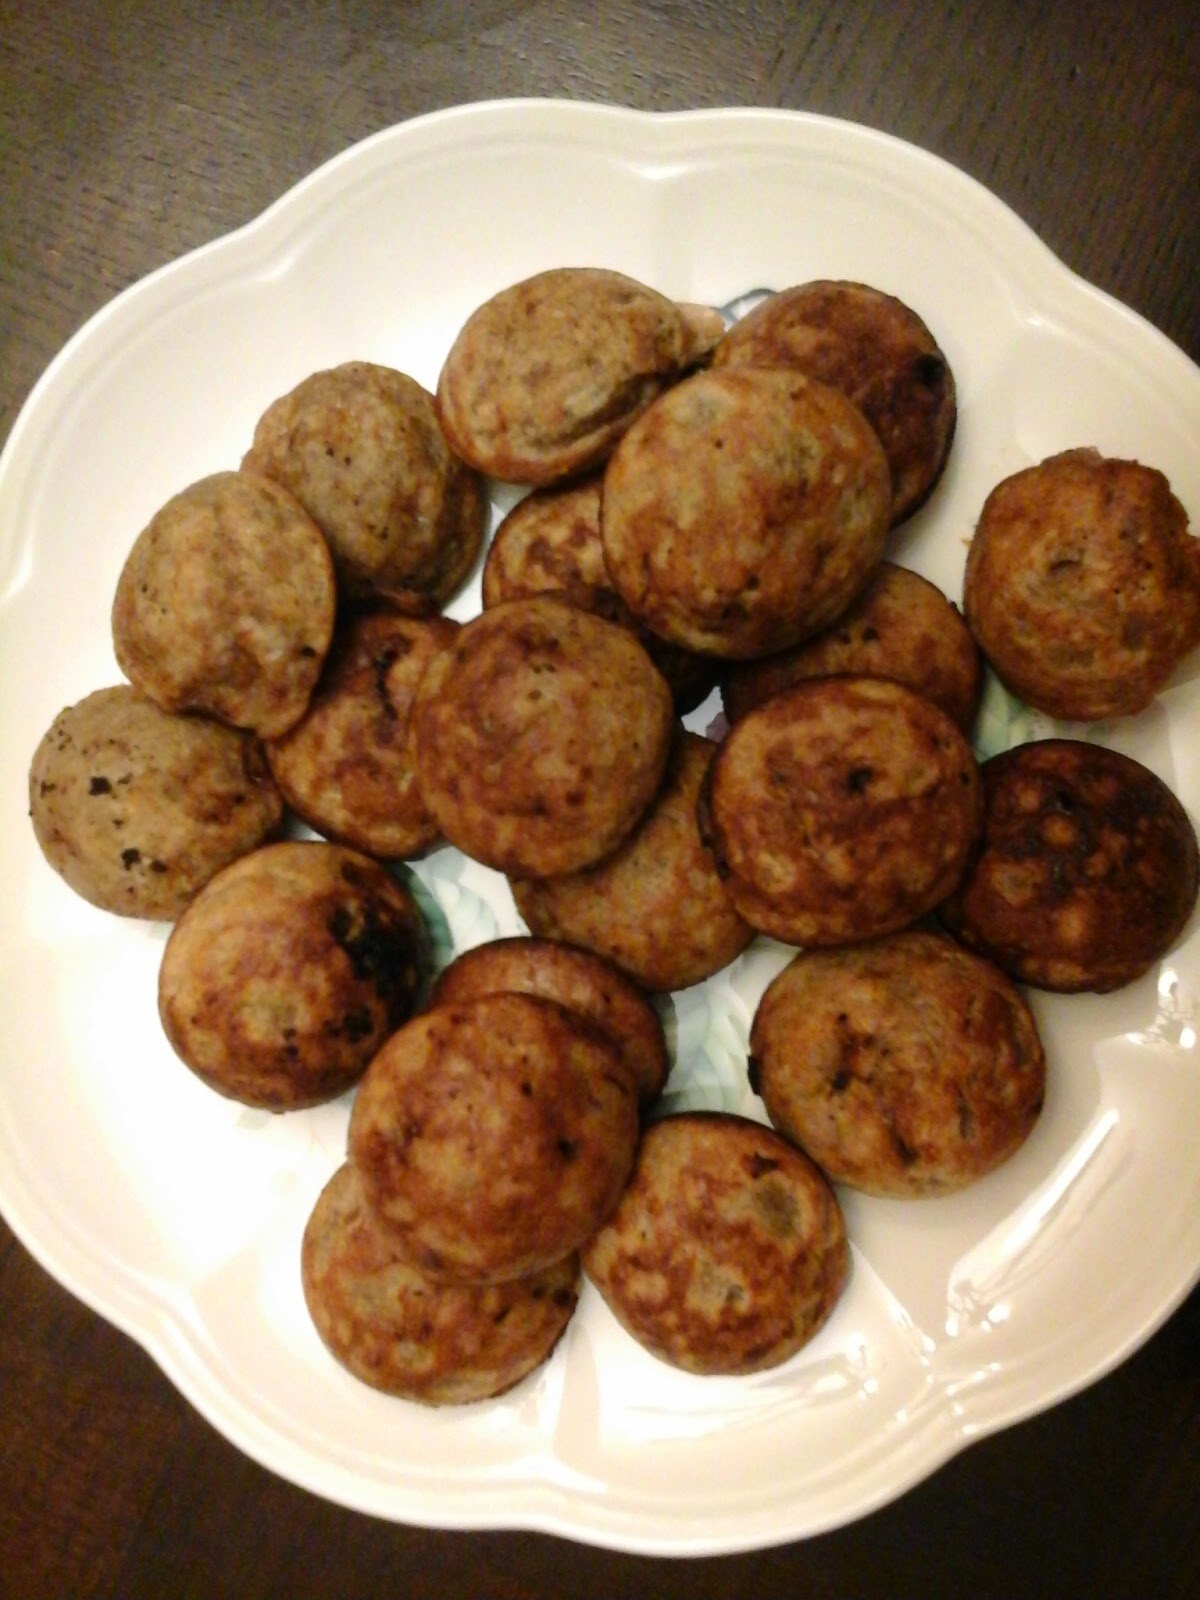
Banana Walnut Kuzhi Paniyaram / Vella Kuzhi Paniyaram / Kuzhi Paniyaram / Sweet Paniyaram

Fully ripened bananas in the banana stand will always be sympathized and thrown away in our home. Just wanted to rescue those ripened soggy bananas, I made these yummy sweet treats called as "Banana Walnut Kuzhi Paniyaram".  Tiny round shaped muffin like Paniyarams melted in the mouth and its an excellent treat for the kids at any time. Well, I served these sweet Paniyarams for breakfast one day. Kids loved those paniyarams and more than them, my husband loved those. So, he's got into the habit of leaving 2 or 3 bananas in the stand nowadays.!!! Creativity starts once you wish to transform something in your kitchen and make an edible food item. Like that, we moms do this everyday and come out with great ideas, right. My dear bloggers, try to ignite the spark in you and share with us your thoughts and findings.

Ingredients
Fully ripened bananas - 4 or 5
Chopped walnuts - 1/2 cup
Powdered Jaggery or Brown Sugar - 1 Cup
Whole wheat flour - 1 Cup
Cardamom Powder / Elachi - 2 tsp
Water - As required to make the batter.
Ghee - Enough to brush the moulds and paniyarams.

Procedure
  • In a big mixing bowl, add the powdered jaggery first with little water. Let it completely get dissolved in the water. Then, add the other ingredients into the bowl and mix them into a thick batter. Consistency of the batter should not be too thick ( like chappathi dough ) and not too thin ( like rava dosa batter ). It should be in a medium thick consistency enough to pour them into the small round moulds. 
  • While preparing the batter, heat the Kuzhi Paniyaram pan on medium heat. Brush the rounds with little ghee.
  • When its heated enough, reduce the flame and pour the batter into the paniyaram moulds carefully. Spilling the batter or improper pouring might result in shapeless paniyarams or might spoil the round shaped treats.
  • After pouring into the moulds, slowly heat the pan on medium heat with the lid closed. Rotate the pan slightly so that the heat is spread uniformly across the entire pan. 
  • After 3 minutes, open the lid and check whether the sweet paniyarams are steamed properly. Flip the paniyarams onto the other side carefully using a thin spoon. Brush the top of the paniyarams with little ghee. 
  • After 3 minutes, check if the paniyarams are fully cooked and turned into golden brown colour. Take out the paniyarams from the moulds and repeat the process with the rest of the batter.


Tips and Suggestions
  • Make sure the flame is not high while making the paniyarams. Otherwise they might turn black very quickly.
  • You can add chopped nuts like almonds, cashewnuts, pistachios into the batter as well and make it more nutritious and tastier.
  • You can add ghee drops on the sides of the moulds if you wish to. I just brushed the moulds with little ghee and brushed the paniyarams with little ghee for flavour.

Saturday, October 11, 2014

Bellam Sunnundalu / Bellam Minapa Sunnundalu / Minapa Sunnundalu / Sunnundalu


"Sunnundalu" is one of the mouth watering recipes of Andhra which could be prepared either using Jaggery or Cane Sugar. I opted for the Jaggery version as my other sweets for the festival were made out of Cane Sugar.  Bellam Sunnundalu is a healthy sweet treat for the kids as its made out of Urad Dal totally. Due to Jaggery, Bellam Sunnundalu might be little... sticky in your mouth compared to the Sunnundalu made with just sugar.  Very simple to make with less ingredients and less time. Try making these yummy laddoos for the coming diwali and enjoy.

Ingredients

Urad Dal Flour / Minapappu Flour  - 1 Cup
Cardamom Powder / Elachi Powder - 2 tsp
Jaggery - 1 Cup
Melted Ghee - 1/2 cup 

Method 
  • Dry Roast the urad dal / Mina pappu on medium flame till you get a nice aroma and turns golden yellow.  Dont fry on high flame as it might turn the dal into black before we notice.
  • After the roasted dal cools down completely, blend them with jaggery pieces together to a coarse powder.
  • In a big mixing bowl, transfer the blended powder. Add the cardamom powder into the bowl and slowly add the melted ghee into the mixture.
  • Shape the flour into small round balls and enjoy.  

Monday, June 16, 2014

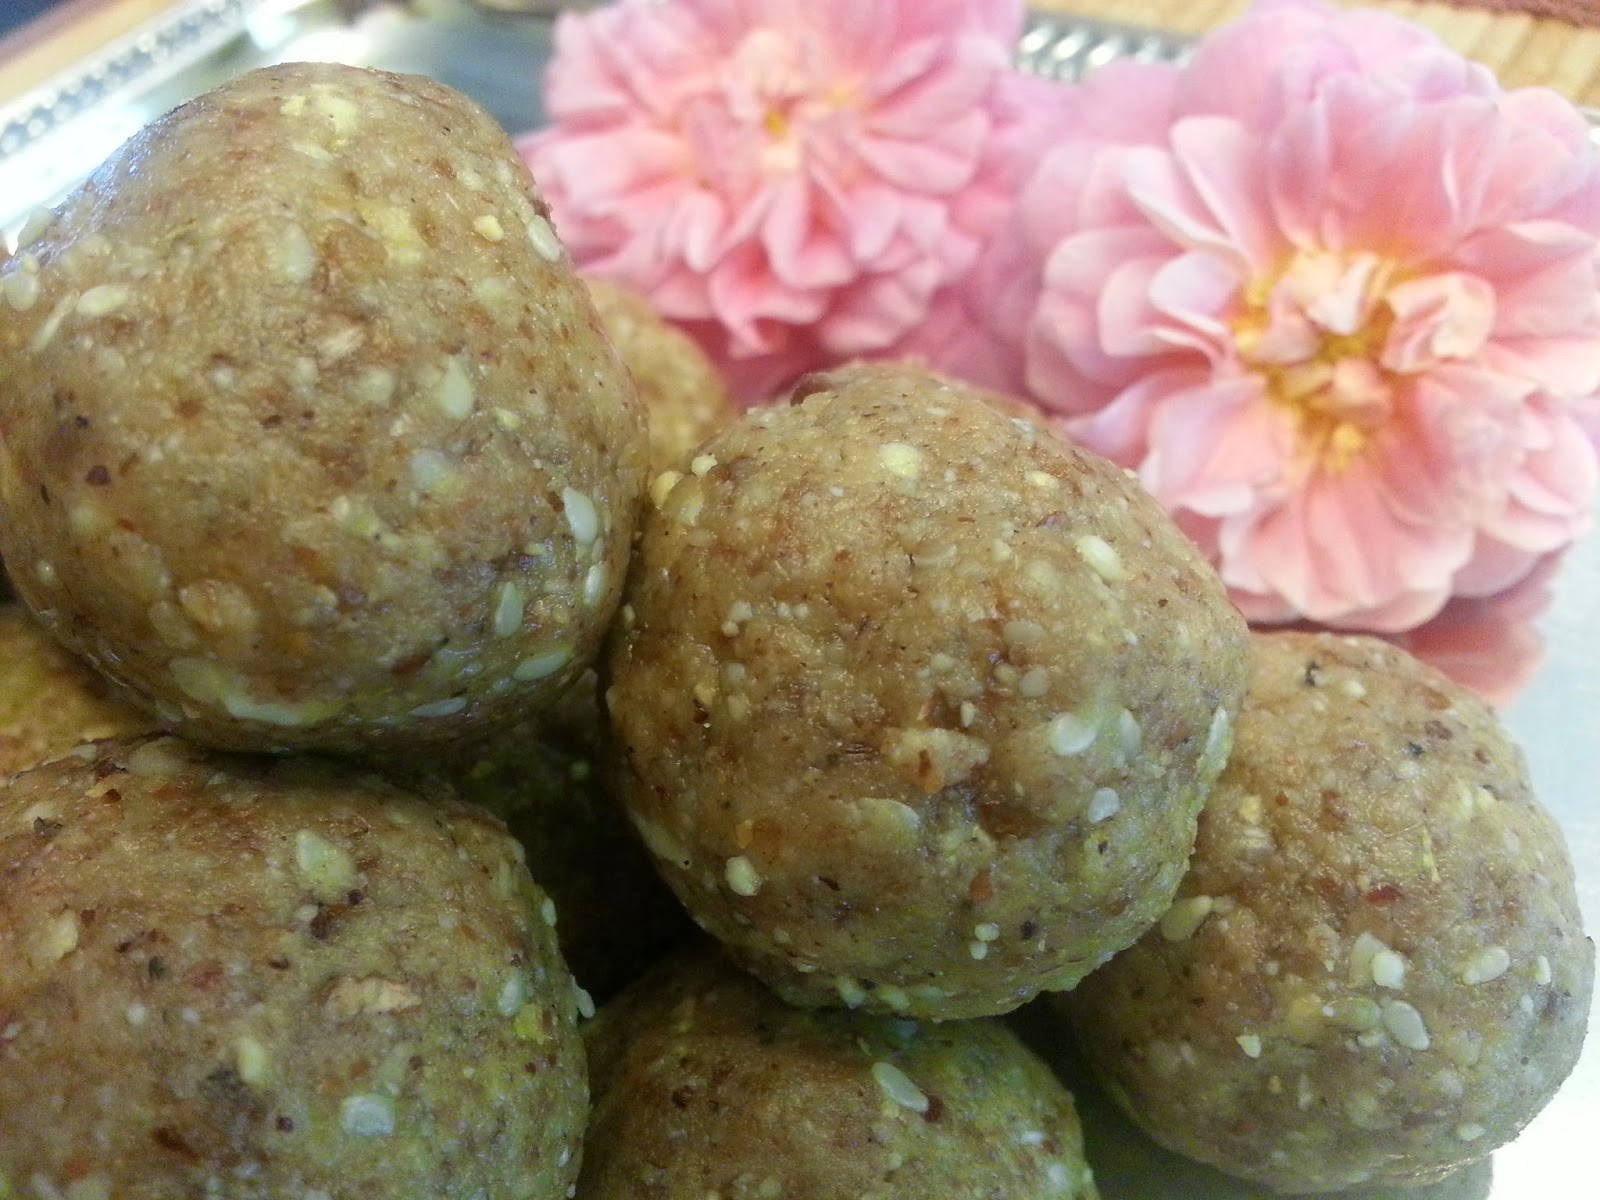
Healthy Ladoo / Nutty Ladoo / Ladoo - With No Sugar / Sugarless

On a sunny hot afternoon, my little one was asking for a dessert and wanted a yummy one. I was breaking my head and did not have an idea of what to offer. I had dates, dry grapes, jaggery as sweety things in my kitchen except multi vitamin gummy vites. Then I realized that i did not have any sweety things in my kitchen at all. ( In a way, its good!!)  I offered the dates but the demand was for a dessert only. So, in minutes, a nutty ladoo was made with all the available ingredients. Brownish nutty ladoo was made in a quick fashion with the goodness of almonds, pistachios, walnuts, peanuts, white sesame seeds, dates and little jaggery. No need to add ghee to make these ladoos as the dates itself act as a good binding agent while forming them.. But for good flavour, add a tsp of ghee and cardamom powder to the nutty mix. This ladoo can be made in minutes and its highly nutritious too...Its definitely a healthy dessert to the kids at any time.
Ingredients
Almonds - 1/2 cup
Walnuts - 1/4 cup
Pistachios - 1/4 cup
Sesame seeds - 1/2 cup
Peanuts - 1/2 cup
Dry Grapes - 1/2 cup
Cardamom Powder - 2 tsp
Jaggery - 1/4 cup
Dates seedless chopped into pieces - 1 cup
Ghee - 1 or 2 tsp
Note : You can adjust the ratio of the ingredients as you like and enjoy.!!
Method
Dry roast the nut ingredients except dry grapes,dates,jaggery for 2-3 minutes on medium flame till a nice aroma emanates.Grind all the roasted ingredients as mentioned in the list except ghee to a fine powder in a good blender. Transfer them into a mixing bowl and add ghee. Mix them well and form laddoos of small lemon size. 

Monday, June 9, 2014

Tiramisu / Tiramisu Dessert / An Italian Dessert - Tiramisu / Tiramisu Cake

"Tiramisu Cake" is a very popular Italian Dessert with a mild coffee flavour which stole our heart few years before. Since then, our family never fail to enjoy this dessert at the end of any Italian dinner. Due to its mild sweetness we could enjoy this Tiramisu Cake comfortably more. My kids love this cake and when I announced them that I would make them at home, their eyebrows went up and were really worried whether I would be able to duplicate the dessert perfectly or not. Well, with a list of right ingredients and at right proportions, I successfully duplicated the great "Tiramisu" at home. ( for them!!!). Of course, it has to be presented at the end of an Italian meal. So, last Friday we enjoyed a complete Italian Meal from soup to dessert comprising of Minestrone Soup, Penne Pasta with homemade Marinara Sauce sauteed with vegetables , a side of grilled vegetables seasoned with Italian herbs and Tiramisu Cake. This meal is mainly made to please our dear son on his Kindergarten Graduation Day. A change in the routine always refreshes the mind and it proved to be true. We had a terrific weekend followed by with tons of housework.!!!  My Dear bloggers, if you are calorie conscious or weight watchers, you could enjoy only a little portion of this cake sadly...

Making tiramisu is not at all a cumbersome process. With all the right ingredients in place, its an effortless job with less preparation time. You need to be patient only during the refrigeration time. Its an ideal dessert to be made well in advance during a big get together or birthdays.

Ingredients

Mascarpone Cheese - 1 Cup
Whipped Cream -2 cups
Sugar - 1/4 cup
Vanilla Extract - 1 tsp
Unsweetened Cocoa Powder - 1/4 cup ( For Dusting )
Lady Finger Biscuits - 20 to 25
Leftover Coffee or Espresso - 1 Cup ( Enough to dip to the finger biscuits )
Chocolate Powder or Chocolate shaved curls - For decorating on top ( Optional )

Method
Make the coffee / espresso ready first. In a big mixing bowl, mix the mascarpone cheese, whipping cream and sugar and whip them.
Keep the tray or rectangular pan with good depth to assemble. Soak the lady finger biscuits into the coffee espresso lightly and arrange them in order. 
 After you place one complete layer of lady finger biscuits, coat the layer with the creamy mascarpone filling on top uniformly.
 Dust the creamy layer with cocoa powder uniformly using the tea filter on all directions.

On top of it, arrange the lady finger biscuits again and repeat the process. 
Finally on top of the cocoa layer dusting, dust the chocolate powder or decorate the cake with the shaved chocolate curls. Refrigerate the Tiramisu Cake for 7 to 8 hours. Make triangular pieces or rectangular as you desire and serve the cake on a dessert plate. Just stick a dry lady finger biscuit on its top to get the restaurant style look. 

Tips / Suggestions
  • I prefer to freeze the Tiramisu for half an hour before serving as it helps out while making pieces without cracking.
  • For making chocolate curls, you can use a dark chocolate bar and peel at the corners using a vegetable peeler. It works well.
  • Refrigerate well enough for achieving good results. 
  • Don't add more sugar to this cake than mentioned. Mild sweetness gives a divine taste to Tiramisu.
  • For big parties if you decide to make the dessert well in advance, its ideal to make it as individual dessert piece for any guest. If you have individual dessert rectangular serving cups or any deep serving cups, you can adopt the same method and make mini versions of the Tiramisu cake for all the guests. In this way, there are no hastles in cutting the big Tiramisu cake before serving and worrying about cracking them. Instead, you arrange the dessert cups in a serving tray and in no time your dessert will be fixed perfectly. 

Monday, May 12, 2014

Mango Lassi / Mango Smoothie


No one could resist a glass of chilled mango lassi and that too given during a hot mid day. I grabbed a cart of sweet organic mangoes on mother's day. So, this week would be a "Mango week" in our home and you would be glad to see some yummy recipes out of my sweet mangoes.!! Well, I started with our traditional mango lassi / mango smoothie in a healthier way by adding plain greek yogurt and some honey. As the mangoes were sweeter, it tasted heavenly. This lassi would be a nice addition during any parties as it compliments the entire menu with its flavour, richness and taste. Feeling happier to blog this recipe during the Mothers Day time as this is my mom's favourite too. She always love to enjoy the mango lassi with more...sweetness by adding more secret sugar.!!! Mom, this treat is specially for you on Mothers Day.
Ingredients
Sweet Ripe Mango - 2
Plain Greek Yogurt - 1/2 cup
Honey - 1 tbsp
Crushed Pistachio - 3 tsp ( To Garnish at its top )
Water - As required.

Method
  • Peel the Mango skin and extract the pulp. Add the mango pulp, greek yogurt and honey to the blender.
  • Grind them smoothly for 1-2 minutes. Add some water to get the consistency as desired. If you decide to have a thick mango lassi, omit the water and enjoy the thick lassi.
  • If you wish to sip it little by little and enjoy the smoothie in a glass, add some water and acquire the right consistency.
  • Pour the lassi over the serving glasses and garnish the lassi with crushed pistachios.


Tips / Suggestions
  • Sweetness of the mangoes decide the sugary taste of the smoothie. So, add more honey if the mangoes are not that sweet. If you wish to add white sugar, add 11/2 tbsp of white sugar to the blender.
  • You can pre-prepare the mango smoothie and pour them over the serving glasses well in advance. Cover the top of the glasses with a wrapping plastic sheet and chill them in a refrigerator. During parties, its a pure blessing to us while taking out these yummy treats in the mid of all hungama.

Tuesday, May 6, 2014

Carrot Beetroot Halwa - Low Calorie With No Sugar


Its really difficult to satisfy the sweet tooth especially if you are working on a weight loss program but its easy to choose a healthy dessert which does not add any extra calories to your daily count. Bags of sweet organic carrots sitting in the refrigerator along with some fresh beets triggered my mind to make some colourful dessert. Natural sweetness from carrots and beets are just enough if you prefer a milder version but a little jaggery and honey could be added to make it more sweeter. During the process, you might even wonder that the final halwa is going to be a Gerber Baby product.!!! ( Well, that's the comment I honestly got from my husband when he looked at the cooking pan in the mid of the process...) Just ignore the comments and continue the process. Trust me, the final product would be appreciated and enjoyed by all.

I did not add any ghee to my halwa but the consistency did not disappointment me at all. It came out well in a pasty form with good sweetness and flavour. 

Ingredients

Carrots - 15
Beetroots - 2 Medium
Jaggery - 1/2 cup
Honey - 1/4 cup
Cardamom Powder - 3 tsp
Rose Essence - 2 to 3 drops
Melted Ghee - 2 to 3 tsp at the end ( OPTIONAL) ( I did not add a bit of extra ghee ).
Ghee roasted Cashew nuts - 1 tbsp

Method

  • Wash the carrots and beets and peel the skin off. Cut them into squares and pressure cook them for 2-3 whistles.
  • In a cooking pan, add the mashed carrots and beets along with powdered jaggery and honey. Cover the lid and allow them to cook till it gets reduced in quantity on medium heat.
  • Stir the halwa content constantly so that the halwa does not get burned at the bottom. 
  • When the consistency of that halwa becomes little pasty, add the cardamom powder, rose essence and the melted ghee. 
  • Keep the halwa on medium heat for another 2-3 minutes. Finally add the melted ghee and ghee roasted cashew nuts at its top.
  • Serve this colourful healthy dessert to the kids in small cups and enjoy.


Sunday, April 20, 2014

Ganapathi Homam Prasadam - Fried Kozhukattai and Fried Modak

Ganapathi Homam is generally performed  before starting any new venture or businesses, getting into a new job, before getting into a new home, etc., Its always good to perform Ganapathy Homam once a year to get happiness, prosperity, health and wealth and be victorious in all the deeds we perform. This homam can also be performed to please Kethu so if any person has Kethu Dasa, he could participate in this Homam. In Southern part of India, people starts all rituals first by performing the Ganapathy Homam.
Mostly people do a special kind of Modak ( Kozhukattai ), appam and offer to Lord Ganesha. In addition to these prasadams, the priest prepares a very special prasadam using nuts, dry grapes, honey, aval ( Poha thin flakes ), kalkandu , chopped dates, little rose water. In that, small pieces of  fried modaks and appam will also be added which in turn make the prasadam so tasty. I love this prasadam very much and used to store it for a week atleast and enjoy by myself. Also its a very healthy treat.!!!

Preparing fried Kozhukkati / Modak in specified numbers ( like 16, 21, 51 or 108 as mentioned by the priest ) is a must during Ganapathy Homam. Making the inside poornam is the same as the one we make for the regular white Kozhukattai. For the outer cover, I used whole wheat flour, little all purpose flour and rava ( sooji ). You can either fry the modaks in pure ghee or in regular cooking oil. In temples, they fry the modaks in pure ghee only. So, the modaks which come from the Ganapathy Agraharam temple will always taste the best.!!!

Ingredients ( For Making 28 Kozhukattai )
Outer Cover 
Whole Wheat Flour - 2 Cups
All Purpose Flour - 1/2 cup
Rava - 1 Handful
Salt - As Required ( Should be less )
Water - As required to make a thick dough for the outer cover.

Poornam
Fresh Shredded Coconut - 2 Cups
Jaggery - 1.5 Cup
Cardamom Powder - 2 tsp
Ghee - 1 tbsp

Oil for frying the Modaks. ( In that, I added few tsps of Ghee just for flavour ).

Method

Make a thick dough using the above ingredients using little water. Consistency of the dough is very important otherwise the outer cover might crack while frying.

Make the poornam in a thick pan by mixing all the ingredients as mentioned above. Keep the poornam in the stove till you get a consistency enough to make small balls for the Modak.

After its cooled down a bit, make small balls and keep ready.
Take a portion of the outer cover dough and spread them using a Chappathi roller. It should be thicker than the regular chappathi. Using a small lid or coffee filter lid, make small rounds as shown below.

Put the poornam inside the rounds and close the Modak carefully. Make sure that the poornam is safely covered in all directions so that it does not ooze out while frying. Continue this process and keep the Modagams ready for frying.
Then fry the Modaks slowly in the boiling oil on medium heat only. If you fry them on high heat, the modaks might get fried faster and turn darker. So, fry them carefully on low or medium heat and yield golden coloured ones.


Vakratunda Mahakaaya
Suryakoti Samaprabha
Nirvighnam Kuru Mey Deva
Sarva Kaaryeshu Sarvada


Thursday, November 14, 2013

Carrot Halwa / Gajar Ka Halwa


I have been trying to blog the recipe of Carrot Halwa and Carrot Badam Kheer since a year. Somehow it was not getting included due to two main reasons. First the sweet might get over before I take a picture or the picture taken might be extremely bad to upload. But this time, I managed to get a decent picture of Carrot Halwa. Every time I make the sweets, I try to tell myself not to eat more than few bites. Oh, its really difficult to resist the temptation though.!!!

Ingredients
Grated Carrot - 7 Cups
Ricotta Cheese / Kova / Mawa - 1 Cup
Sugar - 3 Cups
Melted Butter / Ghee - 1/2 cup ( As Required )
Roasted Cashewnuts - To Garnish
Dry Grapes - To Garnish
Cardamom Powder - 2 tsp
Thick Milk - 2 Cups
 
Method
Peel the carrot skin and grate them nicely and make 7 cups of grated carrot ready.
 
In a round thick bottomed vessel, cook them in milk on medium heat till they get cooked fully. You would notice the change in its texture and colour once its cooked thoroughly.
 
Add powdered sugar into the pan and mix them well. Add the cardamom powder and 1 tbsp. of ghee into the pan. Cook them on medium heat and stir constantly.
 
When the sugar syrup completely blends with the cooked carrot, add the mawa / kova or ricotta cheese into the cooking vessel now. Mix them well and slowly add the remaining ghee at regular intervals. When the carrot halwa solidifies little bit, garnish with ghee roasted cashew nuts and dry grapes and enjoy.
 

Tuesday, November 5, 2013

Apple Jam / Sweet Apple Jam


Since few weeks, bowls and bowls of fresh juicy red delicious apples showered by our neighbour were decorating our counter top beautifully. We have been eating those apples almost daily. But I really wish to make something out of those sweet apples like spicy thokku or Sweet Jam. I tried both and presenting you friends both the recipes.

Natural sweetness of the red delicious apples was quite enough for this jam. I added 2 cups of Sugar for almost 7 cups of crushed apple. Though the process got over after an hour, its much much simpler and does not need any high end efforts except grinding. Friends, i just grounded the apple pieces in my blender without any water than grating them. But its choice to make the jam with grated apples. Also, i did not peel the apple skin at all as it contains many nutrients.

Sweet Apple Jam 

Ingredients

Red Apples -- Around 10 Medium which could yield 7 cups of grated apples or crushed apples.
Sugar - 2 Cups
Lemon Juice - 1/4 cup
Nutmeg Powder - 1 tsp
Cinnamon Powder - 1/2 tsp ( Optional , I did not add )

Method 

  • Wash all the apples thoroughly and cut them into medium squares. Carefully take out the middle part which contains the apple seeds.
  • In the grinder, grind them coarsely or to a fine paste ( as you wish ) and keep it ready.
  • In a thick bottomed vessel / pan, add all the ingredients and mix them well. Cook the jam on medium heat for about an hour.
  • Stir the cooking jam inside the vessel at intervals. When it comes to a thick jam consistency, switch off the flame.
  • Allow the jam to cool completely. Once its cooled, store the jam in an air tight container.
  • Enjoy the apple jam with fresh baked sandwich breads.

7 Cup Cake / Seven Cup Cake / 7 Cup Burfi


Seven Cup Cake flashed in my mind when I was trying to make a very quick sweet for Diwali. It came out very well and got over first also as my kids loved this cake. At the end, almost i cut the cake into halves and distributed them in order to avoid fights between them. Though the whole world knows about this 7 cup cake, I am just blogging the recipe for future reference. 
Ingredients

Besan Flour / Channa Dal Flour / Kadalai Maavu / Senaga Pindi - 1 Cup
Powdered Sugar - 3 Cups
Melted Butter or Ghee - 1 Cup
Fresh Shredded Coconut - 1 Cup
Whole Milk - 1 Cup

Method
  • In a thick bottomed pan, fry the besan flour on a medium flame until you get a nice aroma. 
  • To that, add all other ingredients and stir them continuously so that no lumps are formed.
  • When it comes to a thick consistency and leaves its sides,switch off the flame. 
  • Pour them over a plate greased with ghee and spread uniformly. Once it cools down little bit and before it becomes hard, cut them into desired shapes.
  • Once the plate completely cools down, take out the cake pieces carefully and store them in an airtight container.
Tips
  • I prefer to make this sweet in a Non Stick Vessel as it comes out very easily and does not stick to the bottom. 
  • Flame should be constantly maintained at a medium level and not too high.
  • Take out the cake mix at the right point to get softy,spongy and tasty cake.

Thursday, October 31, 2013

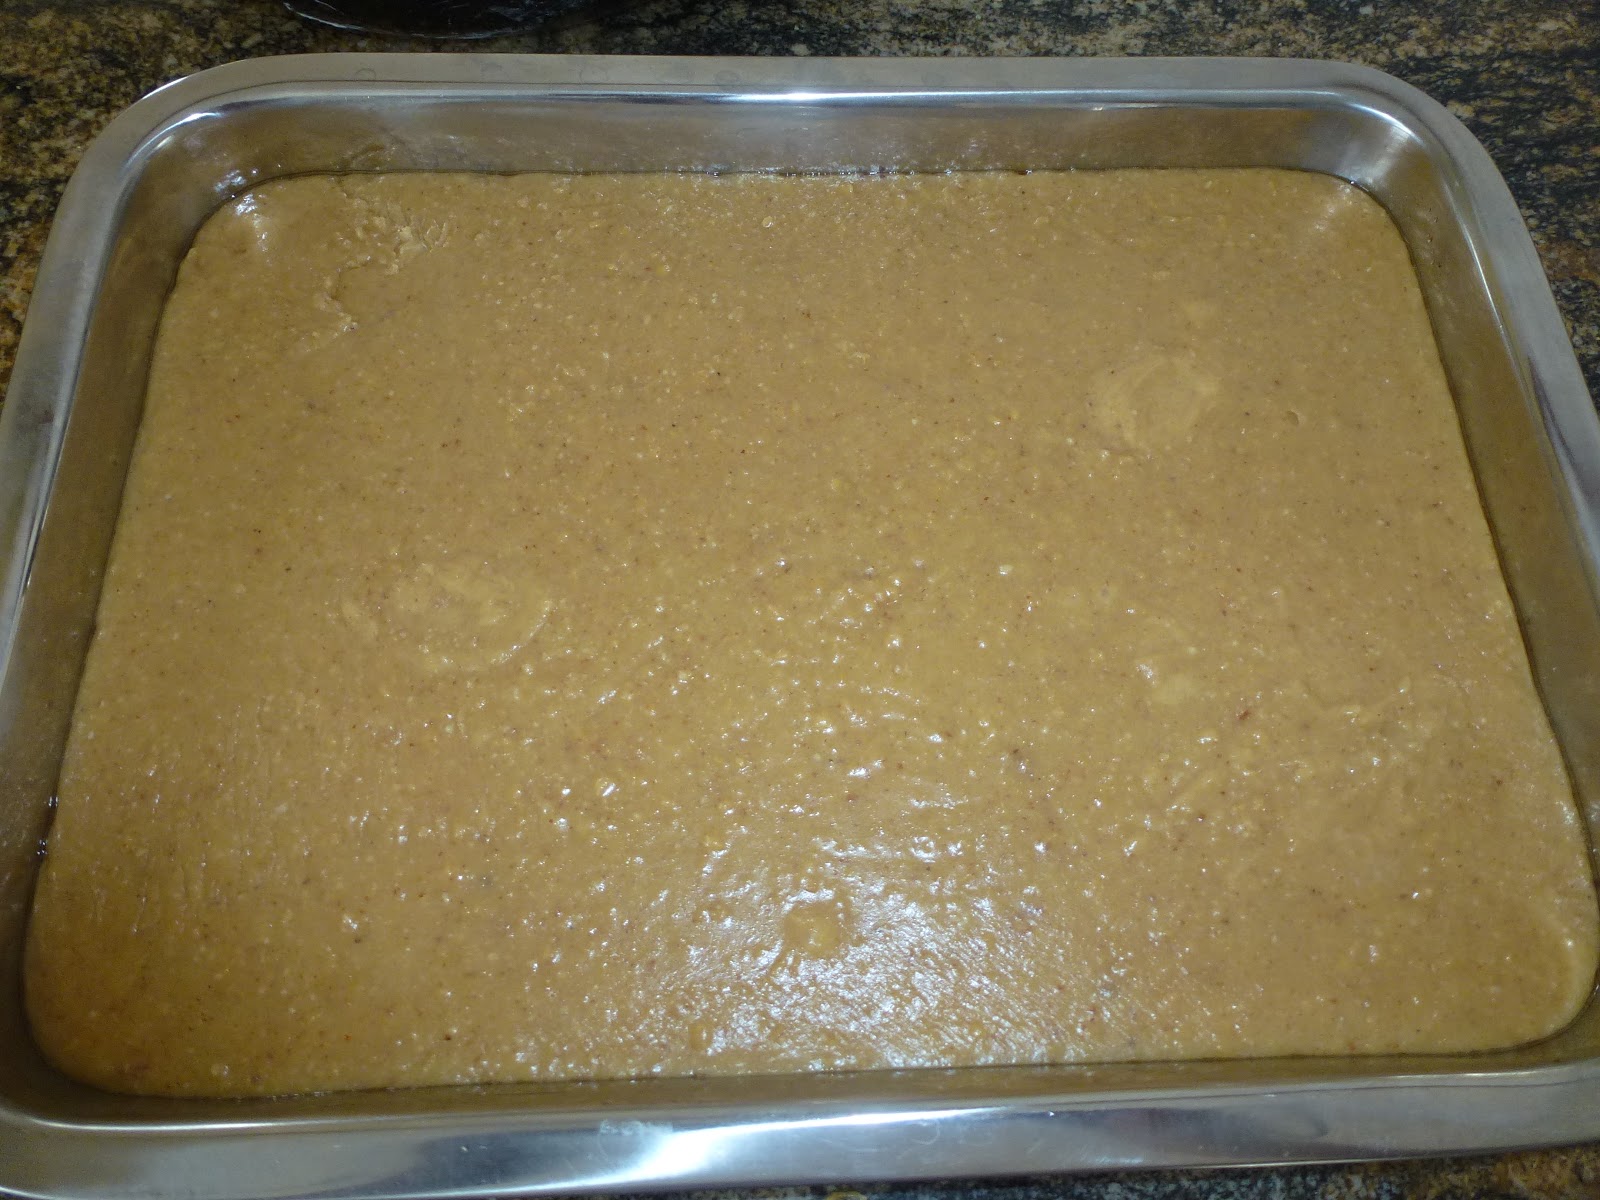
Badam Besan Milk Burfi / Badam Besan Milk Cake

Ever since I made the regular MysorePak, I wanted to try out the classic combination of milk, badam ( almonds ) and Besan. I really enjoyed making this rich and creamy cake / burfi and it yielded a decent amount of burfis for the amount of ingredients I used. Mostly its a tension free sweet which could be made during Diwali. You can either prepare this sweet on the stove or using the Microwave method. This time, I adopted the Stove Method and made around 30-40 burfis. I doubled the quantity as mentioned under the ingredients in order to get more burfis. So don't get confused with the number of burfis and the ingredients measure.!!! Definitely not a cumbersome process and its a easy, quick sweet to be made with no mistakes.
 
Ingredients
 
Milk Powder / Mawa  -  1 Cup
Besan / Kadalai Maavu - 1 Cup
Almond Powder - 1.5 Cup
Sugar - 3 Cups
Ghee / Clarified Butter -  1.5 cups
Elachi Powder ( Cardamom Powder ) - 2 tsp
Broken Almonds - For Garnishing ( Optional )
( I did not sprinkle broken almonds on top of the burfi as I wanted to present them like MysorePak ).
 
Method 
  • In a thick bottomed cooking pan, dry roast besan flour till you get a nice aroma. Slightly roast the Badam Powder too and keep all the other ingredients ready.
  • In a separate vessel, make a sugar syrup using little water and sugar. When it melts and thickens a bit, switch off the flame. No need to wait for any string consistency. Purpose is to melt down the sugar completely and make a sugar syrup.
  • In the heated kadai, add the roasted Besan Flour, Badam Powder, Milk Powder and half a cup of ghee and the sugar syrup. Stir them well so that no lumps are formed.
  • Continue stirring till you get a nice appetizing aroma and the Badam Besan Milk Burfi froths up. Add the remaining ghee little by little while stirring.
  • Pour it on a plate greased with ghee and spread the mixture evenly by gently shaking the plate. Allow the burfi to cool down .
  • When it cools down to three fourth, cut them into equal squares with a greased knife.
  • Once it completely cools down, remove the burfis carefully and store them in an airtight container.
Tips
  • Use pure ghee in order to obtain the perfect taste and texture.
  • If you don't have almond powder, use the rich and creamy Badam Paste instead. Soak the almonds in water and peel off its skin and then grind them into a smooth paste.
  • If you don't have milk powder, replace them with a rich and full fat milk instead. But it might slows down the preparation process as you need to continuously stir them till it thickens. 
  • To get a flavourful colourful burfi, soak few strands of Kesar ( Saffron ) into the warm milk and pour them over the mixture while stirring. It injects good Kesar flavour and taste into the cake and make it more colourful and yummy. If you have Saffron available, don't omit this choice.

Friday, March 8, 2013

Pumpkin Halwa / Parangikkai Halwa / Gummudukaya Halwa - Microwave Version


I dedicate this super tasty Pumpkin Halwa to all my dear friends and bloggers on "Women's Day". Heard about this Halwa from my friend Gai long back. Finally on women's day, I made this halwa for all of you.!!!
As she mentioned, its definitely difficult to identify its source if you taste a spoonful of halwa. Even my husband who is a great foodie could not identify the source and asked me whether it was Badam / Almond Halwa. Oh, that's a huge success to me!!! He could not believe that its made out of Pumpkin. Well, it tastes so good and because of this yummy dessert, I am forced to make a huge holiday meal just to balance the delicious dessert at the end. 

Happy Women's Day to all of you.

My Dear friends, take a break from your routine, life. Take a moment to enjoy your achievements in life. Take a moment to cherish the past good memories in your life. Take a moment to enjoy your dreams. Enjoy your women hood. 


Ingredients
Pumpkin Cubes - 3 Cups
Sugar - 1.5 Cups
Milk Powder / Mawa - 1 Cup
Saffron Strands - 1 pinch Generously.!!
Melted Ghee - 1 tbsp 
Not added any Cardamom Seeds as I wanted to enjoy the unique flavor of saffron.

Method 
  • Peel the Pumpkin Skin and cook them in the microwave till they get cooked perfectly.
  • In a big mixing microwave bowl ( preferably a big glass bowl ), add the mushy cooked pumpkin, mawa ( milk powder ), sugar and saffron strands into it. 
  • Mix them well and cook for totally 10-12 minutes in the microwave.
  • Take the bowl out after every 3 minutes and stir them well again. Continue the process till the halwa consistency is achieved. 
  • It took nearly 12 minutes for me to get that consistency in my microwave. The cooking time varies with microwaves and depends on its power level.
  • Add ghee just before 2 minutes and stir them well. You would notice the slight yellowish kesar colour halwa in the bowl with an excellent aroma of saffron. 

Friday, February 22, 2013

Dates Nuts Cake / Nutty Dates Cake - Eggless and Butterless


Dry Dates also called as "Perichampazham" in Tamil and "Kajoora Pandu" in Telugu are beneficial for overall well being due to the abundance of vitamins, minerals and  rich in dietary fiber. Using these dates as my main sweetener, I wanted to try out the Dates cake by following a very traditional recipe which I found in an Indian Food Magazine. Of course, I did few customization into the main recipe in order to suit my taste and inject few more nutrition into it. Neither eggs nor butter are included in this process but I generously added Nuts and made it so...delicious.Absolutely a very healthy treat to the kids and a guilt free dessert to all ages too...

Ingredients
Seedless Dates - Between 30 to 35.
Dry Grapes Seedless - 1/2 cup
Chopped Nuts - 1 Cup. ( Used Walnuts, Almonds,Cashew nuts, Pistachios )
Refined Oil - 1/2 Cup
Whole Wheat Flour - 1 cup
All Purpose Flour / Maida - 1/2 cup
Baking Soda - 1 tsp
Milk - 1/2 cup
Powdered Sugar - 1/4 Cup
( If you want the cake sweetish, you could add 1/2 cup, we just want to enjoy the sweetness of the dates and dry grapes more..)

Method 
  • Soak the dry dates in warm water for 3-4 hours. Grind the soaked dates along with the dry seedless grapes in a blender and make a paste. 

  • In a big mixing bowl, add the sugar, milk, oil and baking soda. Stir them thoroughly and then add the flours and the grounded paste into the bowl.


  • Add the chopped nuts too into the bowl and stir them till the contents mix well and get into smooth paste without any lumps. 
  • Preheat the over to 375 F initially. Meantime, grease the baking pan with little oil and all purpose flour. 
  • Transfer the cake mix into the Baking pan now. Shapes of the baking pan could be selected based on the occasion and your taste.
  • Bake the cake in the over for 30-35 minutes at 200 F. After 25 minutes, definitely check whether the cake is nearing completion. Insert a fork or small stick into the cake and check to see whether it comes out cleanly or not. 
  • If it comes out clean, then the dates cake is done. Carefully take out the pan and allow the cake to get completely cooled.
  • After its cooled and come to the room temperature, turn it upside down and cut into desired shapes.

Dates cake is so rich, moist and nutty with an excellent tint of the dates flavour. You can also decorate the cake on its top and enjoy during special occasions.

Tips / Variations 
  • Mix the baking soda with the flour and also with the contents uniformly.
  • If you are calorie conscious, reduce the amount of oil to 1/4th and use 2% milk instead of full fat milk.
  • If the dates are too dry, soaking them for overnight would be really helpful. 

Tuesday, February 12, 2013

Jangiri - Homemade


Jangiri, one of the tastiest and a very attractive sweet is generally liked by all. It may be due to its beautiful shape, wonderful colour or its yummy taste. It had been a dream for me to make it at home. My Mom regularly makes this sweet in our home during diwali or any other small occasions. She never hesitated to start the preparation and all the time she would make it with a big smile and kindness. In fact, she thoroughly enjoyed the preparation part. I finally tried this sweet during diwali 2012 but not alone. My husband who equally enjoys everything he does, helped me during the preparation. If you are a fan of Jangiri, please do try making it at home on your hand and treat the kids. Don't fail to see the sparkling eyes and happy smiles on their faces. We loved.....our Jangiris and distributed to many of our beloved friends.

Ingredients

Whole Urad Dal - 2 Cups
Rice Flour - 1 tbsp
Sugar - 4 Cups
Kesar Yellow Colour - 1 pinch 
Rose Essence - 1/4 tsp or 3 drops
Saffron Strands - 2 pinch
Oil - Enough for frying the Jangiris.
Flat round Plate - For Frying the Jangiris.
Lemon juice -  4 or 5 drops into the syrup ( This is mainly to prevent crystallization of the sugar ).

Method 
  • Soak the urad dal in water for an hour. After an hour, grind the urad dal by adding very less water like how we grind for Vadai. Just dissolve the kesar food colour in water and add the coloured water while grinding. That way, we will get a light orangish Jangiri after frying. To that batter, add the rice flour and mix it thoroughly. Keep the batter ready.
  • For making Jangiri, take a thick Ziplog Bag and put a big round hole into one of the corners of the Ziplog. The needle can be heated little bit before making a hole. Keep this bag ready. For safety, make 2 or 3 Ziplog bags ready just in case if it gets spoiled in the middle of the process.
  • Meantime, in a big round thick bottomed vessel, make sugar syrup by adding Sugar, enough water to dissolve the sugar. Keep stirring the Sugar syrup till it thickens and sticks to our hand.
  • Add a pinch of Rose Essence, a pinch of Saffron Strands and few drops of lemon juice into the syrup. Keep it on a low flame.
  • Add oil into a flat round plate with 2-3 inches deep as shown in the picture for frying the Jangiris. Heat the oil on a medium flame. Oil should not be heated too much.
  • Fill the Ziplog bag with the Jangiri batter and hold the Ziplog at its top.
  • Carefully squeeze the Ziplog from its top and make small circles into the pan as shown in the picture. Adjust the Batter in the ziplog and bring it to the bottom and squeeze and make more Jangiri designs into the pan.
  • When its fried enough, you would notice them emerging at the top of the oil with no bubbles around the Jangiri.
  • Carefully take out the fried jangiri using a fork or any thin suitable spatula and soak it into the sugar syrup.
  • Likewise, continue the same process for the rest of the jangiri batter. Keep looking at the Sugar syrup and take out the perfectly soaked  jangiris from the syrup. Arrange the jangiris on a plate in order.


Tips / Variations

Keep everything that are required during the preparation ready before starting.
Do not fry the jangiris too much in the oil. Fry them on a low flame till golden brown and immediately soak them into the sugar syrup.
 

LinkWithin

Related Posts Plugin for WordPress, Blogger...