Sunday, July 15, 2012

Tomato Basil Pasta Salad


We've been growing vegetables and herbs in our small vegetable garden this summer and we are quite happy with the results too. Upon looking at the freshness, we get tempted to make some good healthy recipes using these home grown vegetables. Out of those, we decided to make a healthy pasta salad using our organic, home grown heirloom tomatoes, basil leaves, Green Pepper ( Capsicum ) and few red cherry tomatoes and pearl yellow tomatoes ( heirloom variety) as well. We included few black olives, Smoked cheese cubes ( as we like ) in our preparation too..Freshly made pasta salad tossed with olive oil, black pepper powder and Parmesan cheese was an ultimate dinner for us last night. Of course, we had few pita chips and red bell pepper home made hummus ( which i will post separately ) as sides and our favourite raspberry smoothie for our yummy dessert.

This menu would be best suited for lunch. As we could hardly feel a perfect dinner time during this summer due to very late sunset, we are fine with this dinner menu.!!!!

This is a good and easy option for picnic as its mostly liked by kids. Try this in your home and let me know your feedback.

I will post our favorites "Raspberry Smoothie" and "Red Bell pepper Hummus" in my following posts.

Home grown fresh vegetables except olives and smoked cheese
Ingredients
Tomatoes  - 2 Medium
Fresh Basil Leaves - 2 Cups ( finely crushed )
Red Cherry Tomatoes - 1 cup
Green Bell Pepper -- 1 Medium
Pitted Black Olives cut into halves - 3/4 cup
Salt - To Taste
Black Pepper Powder - As required.
Olive Oil - 1 tbsp
Lemon Juice - 3 tsp
Smoked Cheese cubes - 1/2 cup
Shell Pasta ( Small size ) - 2 cups uncooked.
Parmesan Cheese - To garnish.
Method
  • Wash all the vegetables and keep them ready. Keep all the ingredients handy with a big salad mixing bowl.
  • Cook the shell pasta in a separate container and keep the drained cooked pasta ready. In the mixing bowl, first add a layer of pasta and add the chopped green bell pepper. Follow this method till you add all the bell pepper into the bowl. Mix them gently.
  • Secondly add all the cut tomatoes and the whole cherry tomatoes , crushed basil leaves, cheese cubes and the cut olives.
  • Add Olive oil, required amount of salt,black pepper powder, lemon juice and mix the salad uniformly.
  • Add Parmesan cheese at the end and mix gently. Now its ready to be served in your meal.


Tips / Variations
  • You can add other cheese varieties of your choice in your salad. As we all like smoked cheese cubes, I added them in my salad. You can omit the cheese cubes too if you dont want to include cheese in your salad.
  • I don't prefer to add other vegetables in this version of pasta salad. This is mainly to enjoy the freshness of basil and tomatoes and to retain its original flavour.
  • Try to use small size pasta in your salad as it easily blends with the rest of the ingredients and looks good too in the salad.

Friday, July 13, 2012

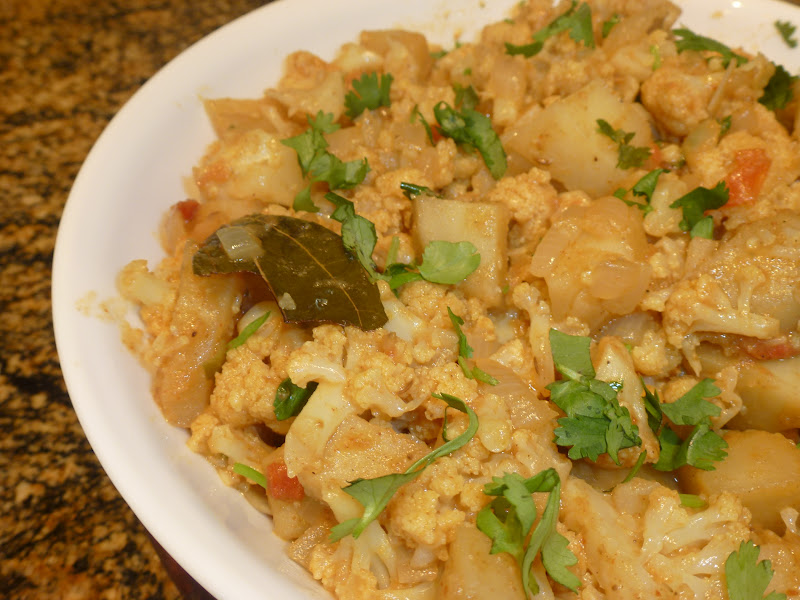
Alu Gobi / Aloo Gobi / Aloo Gobi Masala

 Aloo Gobi / Potato Cauliflower Curry is one of the quickest and easiest curry for rotis / chapathis and its mostly liked by all ages. I regularly make this curry for my rotis when I have very less preparation time. If its made with fresh Gobi ( cauliflower ), the aroma is very good. Aloo Gobi flavored with all the aromatic spices is definitely a very good accompaniment to rotis or pulav.
Ingredients
Gobi / Cauliflower - 1 Medium
Aloo / Potato - 4 or 5 Medium
Tomato - 1 Medium
Onion shredded - 1/2 cup
Oil - 1 tbsp
Cumin Seeds / Jeera - 1 tsp
Pattai / Cinnamon Stick - 1 Medium
Bay Leaves - 2 Medium
Ginger Garlic Paste - 1/2 tbsp
Green Chili - 1 finely chopped
Coriander Leaves - To Garnish
Turmeric Powder - 1 tsp
Garam Masala Powder - 2 tsp
Coriander Cumin Powder / Dhana Jeera Powder - 1 tsp
Red Chili Powder - 1 tsp
Salt - To Taste
Method
  • Peel the skin off from the potatoes and cut them into cubes of any size as desired. I cut them into medium chunks. Take out the cauliflower florets and wash them with warm water.
  • Cut the onions, tomato, green chili and keep all the other ingredients ready.
  • In a frying pan / kadai, add oil first. When its heated, add cumin seeds, cinnamon stick, bay leaves, ginger garlic paste and fry them well.
  • Then, add the shredded onion, green chili into the kadai and fry them for a minute. When the raw smell goes off, add the tomato pieces and fry for a minute.
  • Add the cauliflower florets and the cooked potato cubes ( in case if you cook the potatoes separately in a microwave ) to the kadai. If you don't intend to cook the potatoes separately, then add the potatoes into the kadai with enough water for them to get cooked.
  • When the potatoes are cooked three fourth, then add all the washed cauliflower florets into the kadai
  • and cook them again on medium flame.
  • When the vegetables are cooked to your satisfaction, add all the powders into the kadai and required amount of salt.
  • Make sure that the aloo and gobi pieces are coated uniformly with all the powders. Fry them on medium flame for 4-5 minutes.
  • Garnish with coriander leaves and serve with your hot rotis or rice pulav.
Variations / Tips
  • You can either cook the potatoes separately and add to the kadai or add the uncooked potatoes directly into the kadai and cook them during the process.
  • Don't cut the cauliflower florets smaller as they might get smashed while cooking.
  • Instead of adding tomato, sometimes i do substitute with Mango powder to inject some sourness into the dish. 

Wednesday, July 11, 2012

Vazhaipoo Adai / Banana Flower Lentils Crisp / Vaazhaipoo Adai


Banana Flower which is called as "Vaazhaipoo" in Tamil is a purple flower which blossoms at the edge of the banana bunch in its tree. Its widely used in many regional cuisines of India. Due to its dietary fiber and high protein value, including this healthy vegetable in our regular cooking is wiser. Also, its very good for stomach related problems. My mom often made this vegetable during our thanjavur childhood days, she generally made Vaazhaipoo Curry, Vaazhaipoo Paruppu Usili, Vadai, etc., Also I remember her Vaazhaithandu Mor Kootu which is one of my favourites. Though we dont get the Vaazhai Thandu ( Banana Stem ) here, I am lucky to see some fresh Banana Flowers atleast in a nearby China Market. Though I make many versions of food items using this great flowery vegetable, this time I made a protein rich Adai ( Lentils Dosa ) and its so... yummy and healthy. Try this out during tiffin time with a side of fresh curd and a spicy pickle. A very healthy tiffin item for all ages...

Cleaning the Banana flower seems to be a little time consuming job initially. Once you know the technique of it, its a matter of few minutes.
  • Rub your hands with little oil while doing this job as your hands might turn sticky and black during this process.
  • Open the purple petals one by one and take out the yellow colour florets carefully.
  • Remove the two parts from every floret carefully.
  • In the picture I added, I showed the two parts that are to be taken out from each floret. One part looks like a plastic ear phone and the other part is a thick long stem with a thick dot on its top.
  • Chop the cleaned florets under each petal and immediately put them in a diluted buttermilk in a vessel. This is mainly to prevent colour changing.
  • Follow the same process for all the petals till you notice a small cone shaped yellow tender bud. As this tender yellow cone is also highly nutritious, chop them too finely and add it to the vessel. Keep it ready.


Ingredients

Toor Dal / Thuvaram Paruppu / Kandhi pappu  - 1 Cup
Channa Dal / Kadalai Paruppu / Senaga pappu - 3/4 Cup
Moong Dal / Payatham Paruppu / Pesara Pappu - 1/4 Cup
Rice / Idly Rice / Par Boiled Rice - 1/2 Cup
Dry Red Chillies - 4 or 5
Hing / Asafoetida - 1 Dash
Salt - As required
Curry Leaves - 1 Stem
Chopped banana flower - 2 to 3 cups.
Oil - For making the Adais / Crisps.


Method
  • Soak all the dals and rice in one vessel for nearly 2 hours.
  • Grind them coarsely in a mixer grinder along with dry red chillies.
  • To the mix, add required amount of salt, hing, curry leaves.
  • Drain the chopped banana flower florets from the diluted buttermilk vessel and add them to the Adai batter.
  • Just grind it for another few seconds with these additional ingredients. Now the Adai batter is ready to make. Make sure that the batter is neither too thick nor too watery.
  • Heat the griddle or frying pan  make the surface smooth and ready for making adais.
  • Pour one full ladle of the adai batter and spread them uniformly and make a thin circle. Pour oil along the edges and allow them to cook on both sides.
  • Flip to the other side and take out the adai from the tawa after both sides are completely cooked and crispy.
  • Serve with a cup of fresh curd and a spicy pickle or chutney.

Tuesday, July 10, 2012

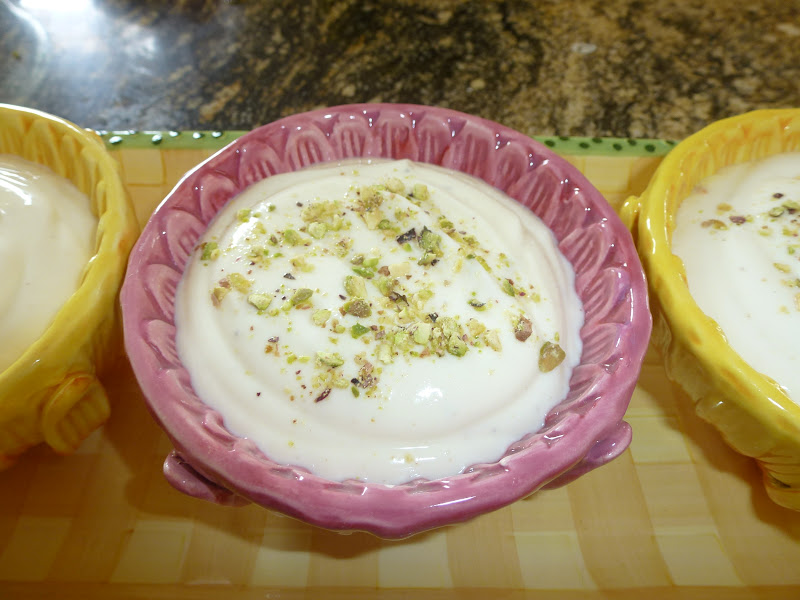
Shrikand / Kesar Pista Shrikand / Healthy Shrikand - Using Greek Yogurt


Sweets / Desserts always make our soul happy and if its a healthy sweet, then a guilt free enjoyment would take us to heaven.  Shrikand sweet was first introduced to me by my husband and I started enjoying it very much. Instead of  our regular  curd / Yogurt, I substituted Greek Yogurt in my preparation ( as it has more protein value ) and its absolutely delicious. Amount of sugar is also very less..Above all, its a quick dessert which can be made at any time and enjoy with. 
Ingredients
Green Yogurt - 6  ( 20 oz pack - 2 .I used )
Cardamom Powder - 1 tbsp
Saffron soaked in warm water - 2 pinch.
Nutmeg Powder - 1 tsp
Honey - 3 tbsp
Crushed Pista - 1 cup
Sugar - 3/4 cup to 1 cup ( Add more if you like )
 Method
  • In a big mixing bowl, add all the ingredients one by one and blend them well. 
  • Transfer them into small serving bowls and chill them in refrigerator for few hours.
  • Enjoy this cool healthy dessert after a meal. 
Tips / Variations

Add more sugar to the Shrikand if you like more sweetness.


Thursday, June 21, 2012

Vegetable Kichidi / Veg Khichidi / Khichidi / Kichidi - North Indian Style

Its really difficult to arrive at a conclusion especially when we are very tired and exhausted by end of the day. And when it comes to making a quick dinner with less time, its much more difficult to finalise on one item. My wish is to include good amount of veggies in any meal, so there comes the one pot Kichidi for my rescue.  With a side of some cool raita and crunchy potato chips ( not for me!!!) on its side, this veg Kichidi would be delicious and healthy. Though we make Bisibelebath, Vegetable pongal in South Indian flavour and taste, this vegetable Kichidi is made in a north indian style. And I love all the versions and each version is unique in its own taste and preparation. This Kichidi is so tastier with all the goodness of vegetables, lentil and the process is also simpler and quicker.
Ingredients
Sona Masoori Rice - 1 Cup
Toor Dal / Thuvaram Paruppu / Kandhi Pappu - 1/2 Cup
Hing / Asafoetida - 1 Dash
Turmeric Powder - 1 tsp
Garam Masala Powder - 1 tsp
Dhana Jeera Powder / Coriander Cumin Powder - 1/2 tsp
Cumin Seeds / Jeera - 1 tsp
Dry Red Chillies - 2 Medium
Crushed Ginger Paste - 1 tsp
Cinnamon Stick - 1
Cloves - 2
Bay Leaves - 1 or 2
Salt - To Taste
Sugar - 1/4 tsp
Ripe Tomato - 2 Medium
Onion - 1/2 cup nicely shredded
Cut Vegetables - 1 Cup or 1.5 cup ( Carrots, Peas, Potato, Brinjal, Beans, Chayote or Chow Chow or any veggies of your choice ).
Oil - 1 tbsp
Ghee - 2 tsp ( Optional )
Procedure
  • In a pressure cooker, on a medium flame, first add oil. When its heated, add Hing, Mustard Seeds, Cumin Seeds, Cinnamon Stick, Cloves, Dry red chillies, Bay Leaves in succession.
  • When the tempering is done, add the onion pieces next and fry them till golden brown.
  • Next all the tomato pieces into the cooker and fry them for a minute. Add all the powders into the cooker along with the cut vegetables, ginger paste into the vessel. Mix them well and fry for another 2 minutes.
  • Then add the washed toor dal into the vessel and fry them for a minute. Add a cup of water and cover the cooker and allow them to boil for another 4-5 minutes till the toor dal gets half cooked.
  • Open the lid and add the sona masoori rice, salt and sugar. Add four cups of water again and cover the cooker.
  • Cook the Kichidi for 3 whistles and siwtch off the flame. After you open the cooker, add 2 tsp of ghee on its top and serve this with raita..
Tips
If  the Kichidi is made for a party or special occasion, add few ghee roasted cashew nuts on its top just before serving.

Methi Kadhi / Methi Kadi / Methi in Buttermilk gravy


Kadhi / Kadi is a lightly sour gravy made using thick curd or thick buttermilk and its an excellent choice for jeera rice, methi parathas or any types of pulav or parathas. In South India, the gravy made using curd or buttermilk is called as "Mor Kuzhambu" whereas in north india, they name the gravy as "Kadhi / Kadi". Preparation of both the versions is totally different and each version have their unique taste. Whenever I have leftover curd in large quantities, I always make this kadhi either plain or with methi leaves or pakodis. This version is made using our fresh home grown methi leaves. My Husband loves to have a side of Kadhi every night with his rotis and parathas. As its summer, I often include this item in our meal along with our regular subzis.
Ingredients
Thick Sour / Lightly Sour Curd - 2 Cups
Turmeric Powder - 1 tsp
Mustard Seeds - 1 tsp
Cumin Seeds / Jeera - 1 tsp
Curry Leaves - 3 or 4
Dry Red Chillies - 2
Fresh Methi leaves - 1 cup washed and chopped.
Salt - To Taste
Sugar - 1 tsp
Green Chillies - 1 medium finely chopped.
Besan Flour - 1 tbsp
Oil - 4 tsp
Water - As Required.
Procedure
  • Wash and chop the fenugreek / methi leaves and keep it ready. In a bowl, add the besan flour and thick sour curd and beat them well.
  • In a vessel, add oil first. When its heated, add mustard seeds, jeera, dry red chillies, curry leaves in succession. When the tempering is done, add the chopped green chillies and methi leaves, turmeric powder, Hing and fry the leaves on a low flame for 2 minutes.
  • Add little water to the vessel and cover the lid so that the methi leaves get cooked inside with the steam thoroughly.
  • When its done, add the beaten curd into the vessel along with salt and sugar. Add water if the desired consistency is not achieved. I generally make this kadhi not too thick or watery. I prefer the middle consistency, so add water according to the consistency you prefer.
  • Allow the Kadhi to boil for 4-5 minutes and switch off the flame.
  • Healthy methi kadhi is now ready to be enjoyed in your meal. Serve this in small bowls as a side during the meal time.

Milagu Kuzhambu / Black Pepper Kuzhambu / Pathiya Kuzhambu


Milagu Kuzhambu / Black Pepper Gravy is a spicy gravy made by boiling the tamarind extract with lots of freshly ground spices in it. Its generally eaten with hot rice and ghee. An excellent choice during rainy days and its given to ladies after delivery as  Pathiya Kuzhambu. Its ideal to make this Kuzhambu after festivals as we would have eaten lots of high calorie food during festivals. You can either prepare this without any additions or can add little small onions or garlic pods or some sliced brinjals into the Pepper Gravy. I made it with small onions this time and the aroma and flavour is unique. Addition of Gingelly Oil ( Nalla Yennai ) to this Kuzhambu definitely enhances its taste.
 
Ingredients
Tamarind Extract - 5 to 6 Cups
Small Onion - Between 12 and 15 peeled.
Salt - To Taste
Jaggery - 1 small pinch
Oil - 1 tbsp
Gingelly Oil / Nalla Yennai -  2 tbsp
Hing / Asafoetida - 1 Dash
Mustard Seeds - 2 tsp

For Grinding

Coriander Seeds - 2 tbsp
Fenugreek seeds - 1 tsp
Jeera / Cumin Seeds - 1 tsp
Channa Dal  / Kadalai Paruppu - 2 tsp
Urad Dal / Ulutham Paruppu - 3 tsp
Black Peppercorns - 3 tbsp
Dry Red Chillies - 5 Big ones

Procedure  
  • Soak the tamarind in warm water for half an hour and extract its juice completely. Prepare an extract of around 5-6 cups and keep it ready.
  • In the kadai, dry roast all the ingredients mentioned under Grinding till you get a nice aroma. Then make a spicy grounded powder and keep it ready.
  • In the same kadai / cooking pan, add oil first. When its heated, add Hing / Asafoetida and mustard seeds. When it starts sputtering, add small onions, curry leaves  in succession. Fry them for 2-3 minutes.
  • Finally add the tamarind extract and the grounded powder, salt, jaggery into the cooking pan. Mix them well and allow them to reduce in quantity.
  • When the quantity gets reduced to nearing half, add the Gingelly oil and allow them to cook for another 3-4 minutes.
  • Switch off the flame and serve this with hot white rice and little ghee. After its cooled completely, it can be stored in a container and it would stay for at least 10 days. 

LinkWithin

Related Posts Plugin for WordPress, Blogger...