Tuesday, May 6, 2014

Green Gram Sprouts Sundal / Sprouted Green Gram Sundal / Sprouted Green Gram Salad / Pachai Payaru Sundal


Read in magazines that "Sprouts are Super Foods and called as the Powerhouse of Nutrients". In modern life, we run around aisles in departmental stores looking for healthy and organic super food but failing to eat the natural home made sprouts. Sprouts are considered to be the cheapest source of nutrients which has good amount of protein, fiber and vitamins. We can make sprouts out of grains ( wheat for ex ), legumes and seeds. Sprouted seeds of alfalfa, mustard and sesame are used while making healthy salads and sandwiches. Out of that, alfalfa sprouts are considered to be the "father of sprouts". I love to put bunches of alfalfa sprouts or some spicy mustard sprouts into my sandwich all the time. Addition of sprouts into the sandwich always enhances the taste to a greater extent, i feel.

Sprouting Process :
Soak the grains / legumes overnight for 6-7 hours. Drain the water completely and cover the soaked legumes or seeds with a dry muslin cloth. Time span for soaking depends on the size of the seeds / legumes. Generally it takes 2-3 days for the seeds to germinate and become sprouts. Over soaking may harm the seeds to rot and ferment so the seeds should be soaked only for a limited period. After they sprout, store them in the refrigerator till you actually consume them.

Ingredients
Green Gram Dal / Pachai Payaru - 2 Cups
Oil - 2 tsp
Hing / Asafoetida - 1 Dash
Mustard Seeds - 2 tsp
Jeera / Cumin Seeds - 1 tsp
Green Chili - 2 Medium ( slit them into halves, I used green chili paste instead. )
or Green Chili paste - 2 tsp
Salt - As required
Fresh coconut flakes - 1 tbsp
Coriander Leaves - To Garnish
Curry Leaves - 5 or 6

Method

  • Make the Green Gram Sprouts by following the process as mentioned above.
  • In a cooking pan, add oil first. Add mustard seeds, cumin seeds, green chili paste, curry leaves to the oil.
  • When they sputter, add the drained sprouted green gram into the pan. 
  • Sprinkle some water into the pan and cover the lid. Allow them to get cooked with the steam inside for 3-4 minutes on medium heat.
  • When they get cooked to desired level, add required amount of salt into the pan and stir them well. Do not overcook the sprouted green gram as the nutrients might be washed away. 
  • Fry them for another 1-2 minutes. Switch off the flame and finally add the fresh coconut flakes and coriander leaves to the pan.
  • Enjoy this healthy sundal / curry as a snack or as a healthy accompaniment in your regular meal.

Carrot Beetroot Halwa - Low Calorie With No Sugar


Its really difficult to satisfy the sweet tooth especially if you are working on a weight loss program but its easy to choose a healthy dessert which does not add any extra calories to your daily count. Bags of sweet organic carrots sitting in the refrigerator along with some fresh beets triggered my mind to make some colourful dessert. Natural sweetness from carrots and beets are just enough if you prefer a milder version but a little jaggery and honey could be added to make it more sweeter. During the process, you might even wonder that the final halwa is going to be a Gerber Baby product.!!! ( Well, that's the comment I honestly got from my husband when he looked at the cooking pan in the mid of the process...) Just ignore the comments and continue the process. Trust me, the final product would be appreciated and enjoyed by all.

I did not add any ghee to my halwa but the consistency did not disappointment me at all. It came out well in a pasty form with good sweetness and flavour. 

Ingredients

Carrots - 15
Beetroots - 2 Medium
Jaggery - 1/2 cup
Honey - 1/4 cup
Cardamom Powder - 3 tsp
Rose Essence - 2 to 3 drops
Melted Ghee - 2 to 3 tsp at the end ( OPTIONAL) ( I did not add a bit of extra ghee ).
Ghee roasted Cashew nuts - 1 tbsp

Method

  • Wash the carrots and beets and peel the skin off. Cut them into squares and pressure cook them for 2-3 whistles.
  • In a cooking pan, add the mashed carrots and beets along with powdered jaggery and honey. Cover the lid and allow them to cook till it gets reduced in quantity on medium heat.
  • Stir the halwa content constantly so that the halwa does not get burned at the bottom. 
  • When the consistency of that halwa becomes little pasty, add the cardamom powder, rose essence and the melted ghee. 
  • Keep the halwa on medium heat for another 2-3 minutes. Finally add the melted ghee and ghee roasted cashew nuts at its top.
  • Serve this colourful healthy dessert to the kids in small cups and enjoy.


Friday, May 2, 2014

Cabbage Subzi for Roti / Chappathi


Green Cabbage will always be sitting  in my refrigerator like carrots. I love to include cabbage in fried rice, curries often as its a good source of fiber, helps in weight loss, well known for its anti cancer compounds and various other health benefits. Read in some health magazine that red cabbage has the highest amount of power nutrients. 

For rotis / chappathis, I made a healthy side dish with cabbage, some tomato, red onion and lilva ( thuvar seeds / Pigeon Peas ). Its wise to store some chopped cabbage in a sealed storage box in the refrigerator. In less than 5-6 minutes, the dish can be made as the process is much simpler. This is a very good accompaniment for roti, chappathi or any parathas.

Ingredients
Green Cabbage - 1/2 Medium 
Chopped Red Onion - 1/2 cup
Tomato - 1 Medium
Tuvar Lilva - 1 Handful ( Substitute Peas if you want )
Grated Ginger - 1/2 tsp
Chopped Coriander Leaves - To Garnish
Salt - To Taste

For Tempering / tadka :
Oil - 3 tsp
Jeera / Cumin Seeds - 2 tsp
Sombu / Fennel Seeds - 1 tsp
Green Chillies - 1 Medium
Chopped Garlic - 1 tsp

Powders to Add :
Turmeric Powder - 1 tsp
Red Chili Powder - 1 tsp
Coriander Cumin Powder - 1/2 tsp
Garam Masala Powder - 1 tsp

Method
  • Chop the green cabbage, tomato and red onion and keep all the other ingredients ready.
  • In the cooking pan, add oil first and finish the tempering process by adding the ingredients one by one.
  • Add the red onion next to the pan and fry them for a minute. Add tomato, lilva and fry them till the tomatoes get mushy.
  • Add the chopped cabbage and grated ginger into the pan now. Cover the lid and allow them to cook on medium heat for 2-3 minutes. Occasionally stir them in the middle. No need to add water at any stage while cooking.
  • Only with the inside developed steam, the cabbage could easily get cooked. After the contents are cooked perfectly, add all the powders and required amount of salt to the pan.
  • Mix them thoroughly and fry them for another 3-4 minutes. Garnish with coriander leaves and serve.

Tuesday, April 29, 2014

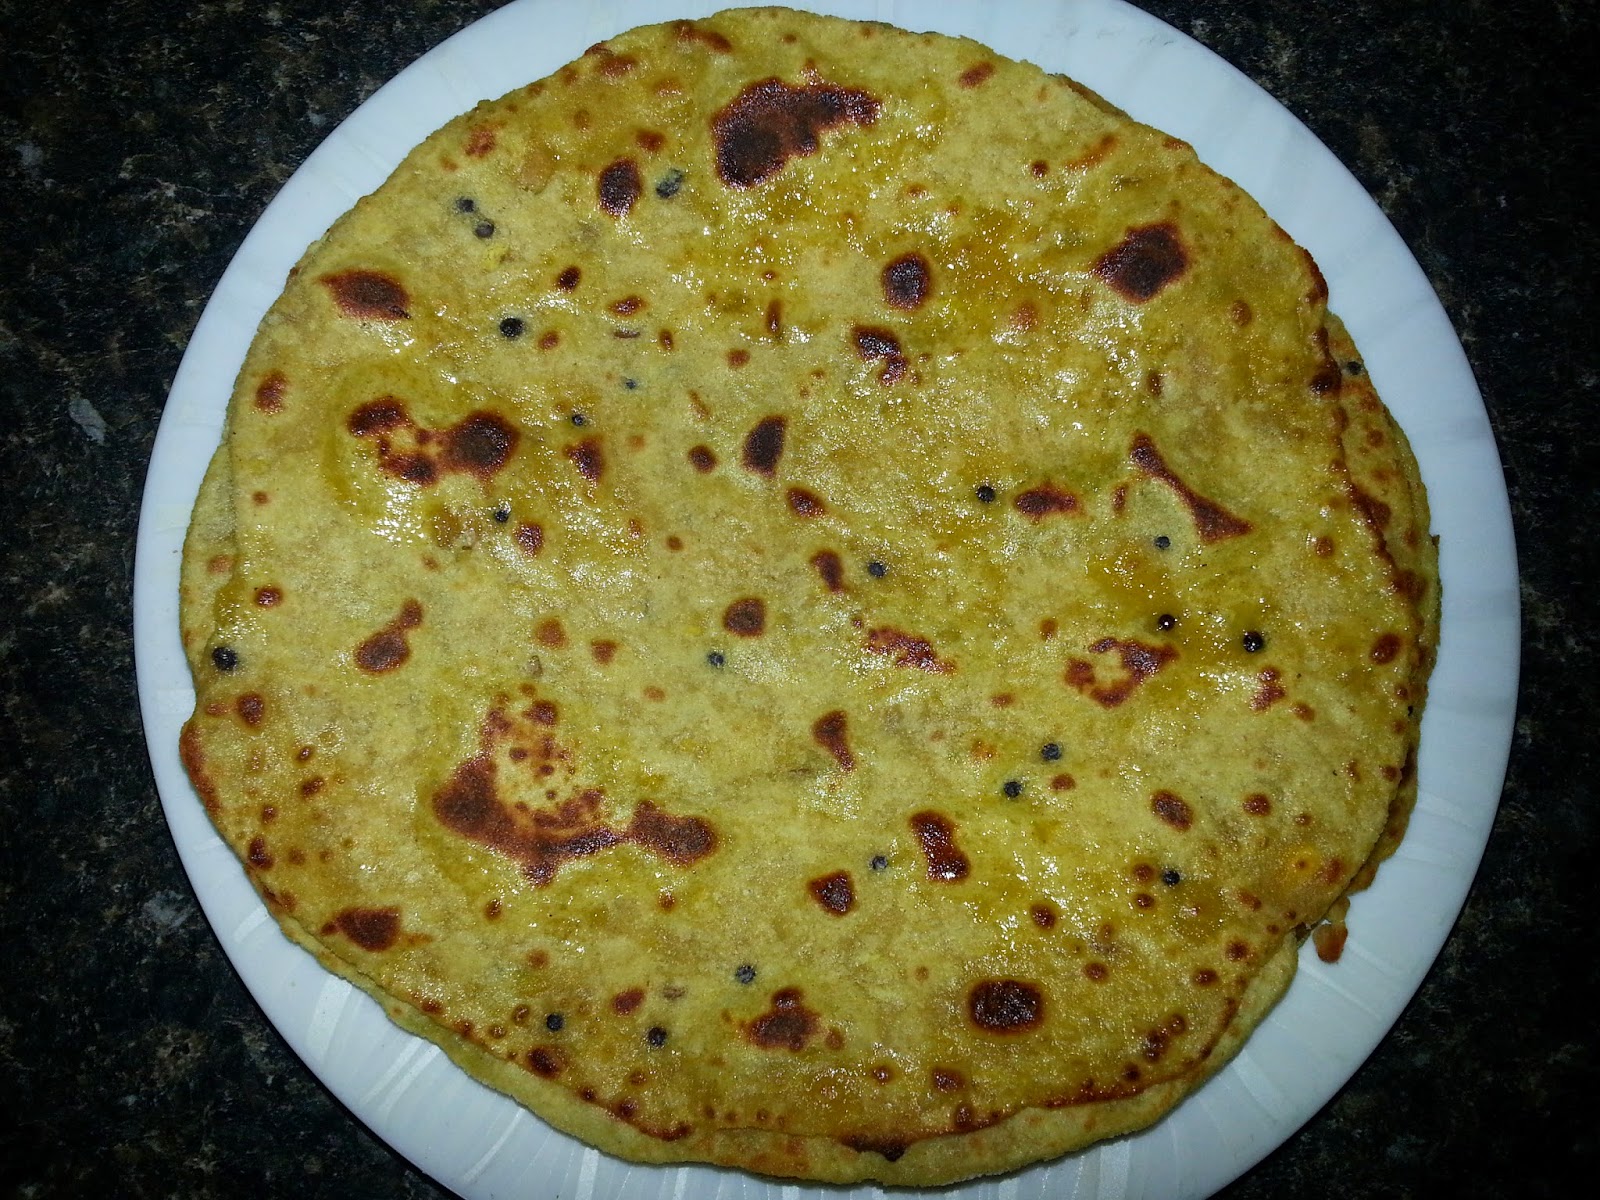
Dal Paratha / Dal Chappathi / Dal Roti / Protein Rich Paratha - Using Leftover Dal


Just had some leftover Sorakai Dal / Lauki Dal in my fridge and needed to make a yummy after school tiffin with less time...I decided to transform this Dal into a Dal Paratha by adding few cups of whole wheat flour. No need to add any water while kneading this paratha dough. May be few drops of oil might help you to knead the dough.Trust me, the texture of the dough was extremely soft and easy to spread though. Its definitely not a cumbersome process and makes our life easier with less efforts. And the process yields a healthy protein rich parathas. With some good accompaniments,these parathas will vanish from the plates quickly and makes you satisfied. 
After I decided to blog this recipe, I tried the same with leftover dals like methi dal, spinach dal and plain Dal and it all came out more than I expected. 

Ingredients
Leftover Dals - 3 cups
Whole Wheat Flour - 3 to 4 cups
Oil - 2 tsp to knead the dough. 

NO NEED TO ADD WATER.

Method
  • In a mixing bowl, add the leftover Dal and whole wheat flour and knead perfectly. Add oil little in the middle to ease the process. 
  • Take a small ball out of the kneaded dough, spread them into a thin round using a Chappathi / Roti roller.
  • Fry the Dal paratha on both sides with or without oil on a frying pan. Complete the process with the rest of the Dal paratha dough and make yummy golden parathas.
  • Enjoy these protein rich ones with a side of a pickle, fresh curd and few cucumber slices.

Friday, April 25, 2014

Vaazhaipoo Curry / Banana Flower Curry / Banana Blossom Curry


A purple colourish blossom which develops at the tip of the bunch of bananas called as the "Banana Blossom" which has numerous medicinal benefits. This flower is used in many cuisines of India and especially in Tamil Nadu, they make Vaazhaipoo VadaiVaazhaipoo Adai , Vaazhaipoo Paruppu Usili, etc., This time I made a simple Vaazhaipoo Curry which is an excellent accompaniment to all South Indian gravies. Out of great interest, I picked a big banana blossom so it yielded more quantity though.!! For cleaning and extracting the banana blossom completely, please refer to my previous post "Vaazhaipoo Adai".

Ingredients
Banana Blossom / Vaazhaipoo -  1 Big One
Red Onion shredded - 1/2 cup
Turmeric Powder - 2 tsp
Salt - As Required.

Tadka / Tempering :
Oil - 1/2 tbsp
Hing / Asafoetida - 1 Dash
Mustard Seeds - 2 tsp
Cumin Seeds / Jeera - 1 tsp
Urad Dal / Minapappu / Ulutham Paruppu - 2 tsp
Channa Dal / kadalai paruppu - 1 tsp
Curry Leaves - 5 or 6

To Grind a Paste :
Fresh Coconut Flakes - 1 tbsp
Garlic Pods - 2
Green Chillies - 3 Big ones

Method 

  • Extract the small florets from the banana blossom and chop them nicely. Meantime, take 3 cups of water in a mixing bowl diluted with a tbsp of curd. Drop the chopped banana florets into this diluted water to prevent them turning black.
  • Grind a thick coarse paste using the ingredients as mentioned above and keep ready.
  • In a frying pan, add oil first and finish the tempering process by adding all the ingredients as mentioned.
  • When the dals turn golden brown,add the onion and fry for a minute. Finally add the chopped banana florets from the diluted water after draining them thoroughly.
  • Add turmeric powder to the pan and mix them well.
  • Sprinkle some water into the pan and allow them to cook well by closing the lid for 3-4 minutes.
  • After it gets cooked, add required amount of salt and add the grounded paste into the pan.
  • Mix them well and fry them on medium heat for another 3-4 minutes. Once the raw smell goes off, switch off the flame. Enjoy this delicious curry in your meal.

Tips / Suggestions

  • While cleaning the banana blossom, its better to coat your hand with little sesame oil which in turn does not make your hand sticky. 
  • Adjust the green chilli quantity according to the size of the Banana Flower. If its too big, may be you could add 1 or 2 more. As we are not adding any red chilli powder in this curry, its important to add correct number of green chillies while grinding itself. 

Thursday, April 24, 2014

Sambar using Black Chole Broth / Healthy Sambar using Black Chickpeas Broth / Sambar with Karuppu Kondakalai Water


"Idly Sambar and Chutney Combo" is an all time special combo for anyone. But this time I made a small twist while making the regular Sambar. Instead of adding the tamarind juice, I used a healthy broth of Black Chick Peas ( Karuppu Kondaikadalai ). To replace the sourness of tamarind juice, I added a ripe large tomato. This is a good accompaniment to dosas and Pongal too. Enriched with proteins, a cup of this healthy sambar with idlies will definitely kick start the day with full of energy..Have a terrific day ahead by making healthy choices in your food !!!! and with lots of smile.

Black ChickPeas Broth :  Save the drained water of the cooked Black Chickpeas which is nothing but the Broth. 


Ingredients

Black Chickpeas Broth ( Karuppu Kondaikadalai / Black Chole) - 4 to 5 cups.
Tomato - 1 Ripe Large
Onion  - 1/2 cup shredded
Green Chilli - 2 or 3 slit into halves ( I used 3 chillies )
Fresh Coriander Leaves shredded - 1 tbsp ( To Garnish )
Curry Leaves - 5 to 6
Cooked Toor Dal - 1 Cup
Turmeric Powder - 1 tsp
Sambar Powder - 1/2 tbsp
Coriander Powder - 2 tsp
Salt - To Taste
Hing / Asafoetida - 1 Dash
Mustard Seeds - 1 tsp
Jeera / Cumin Seeds - 1 tsp
Vendhayam / Fenugreek Seeds - 1/2 tsp
Oil - 1/2 tbsp ( For tadka / tempering )
Ghee - 2 tsp ( Optional ) ( Just before serving, add 2 tsp on its top to add more flavour and yummy.!!!)


Method

  • Keep the Black Chickpeas Broth, cooked toor dal and the other ingredients ready.  If all the ingredients are ready, this sambar can be prepared before the idli gets steamed as the preparation time is very less.
  • In the cooking pan, add oil first and finish the tempering process by adding Hing, Mustard Seeds, Cumin Seeds and fenugreek seeds. When they sputter, add onions, green chilli, curry leaves next. When the onions get fried, then add tomato and all powders.
  • No need to add salt at this stage. Cover the lid and allow them to cook for 2 minutes.
  • Add the cooked dal and the broth now. Mix them well and add more water according to the consistency you desire.
  • Let the sambar boil for another 3-4 minutes. Finally add required amount of salt and cook for another minute.
  • Switch off and garnish with coriander leaves.
  • Drop 2 tsp of melted ghee on its top before serving.
Tips / Suggestions

  • Never drain the broth of White Chick peas, Black Chick Peas or any Beans. You can very well add the broth while making Kurmas, gravies in place of water which in turn enriches the dish.

Sunday, April 20, 2014

Ganapathi Homam Prasadam - Fried Kozhukattai and Fried Modak

Ganapathi Homam is generally performed  before starting any new venture or businesses, getting into a new job, before getting into a new home, etc., Its always good to perform Ganapathy Homam once a year to get happiness, prosperity, health and wealth and be victorious in all the deeds we perform. This homam can also be performed to please Kethu so if any person has Kethu Dasa, he could participate in this Homam. In Southern part of India, people starts all rituals first by performing the Ganapathy Homam.

Mostly people do a special kind of Modak ( Kozhukattai ), appam and offer to Lord Ganesha. In addition to these prasadams, the priest prepares a very special prasadam using nuts, dry grapes, honey, aval ( Poha thin flakes ), kalkandu , chopped dates, little rose water. In that, small pieces of  fried modaks and appam will also be added which in turn make the prasadam so tasty. I love this prasadam very much and used to store it for a week atleast and enjoy by myself. Also its a very healthy treat.!!!

Preparing fried Kozhukkati / Modak in specified numbers ( like 16, 21, 51 or 108 as mentioned by the priest ) is a must during Ganapathy Homam. Making the inside poornam is the same as the one we make for the regular white Kozhukattai. For the outer cover, I used whole wheat flour, little all purpose flour and rava ( sooji ). You can either fry the modaks in pure ghee or in regular cooking oil. In temples, they fry the modaks in pure ghee only. So, the modaks which come from the Ganapathy Agraharam temple will always taste the best.!!!

Ingredients ( For Making 28 Kozhukattai )
Outer Cover 
Whole Wheat Flour - 2 Cups
All Purpose Flour - 1/2 cup
Rava - 1 Handful
Salt - As Required ( Should be less )
Water - As required to make a thick dough for the outer cover.

Poornam
Fresh Shredded Coconut - 2 Cups
Jaggery - 1.5 Cup
Cardamom Powder - 2 tsp
Ghee - 1 tbsp

Oil for frying the Modaks. ( In that, I added few tsps of Ghee just for flavour ).

Method

Make a thick dough using the above ingredients using little water. Consistency of the dough is very important otherwise the outer cover might crack while frying.

Make the poornam in a thick pan by mixing all the ingredients as mentioned above. Keep the poornam in the stove till you get a consistency enough to make small balls for the Modak.

After its cooled down a bit, make small balls and keep ready.
Take a portion of the outer cover dough and spread them using a Chappathi roller. It should be thicker than the regular chappathi. Using a small lid or coffee filter lid, make small rounds as shown below.

Put the poornam inside the rounds and close the Modak carefully. Make sure that the poornam is safely covered in all directions so that it does not ooze out while frying. Continue this process and keep the Modagams ready for frying.
Then fry the Modaks slowly in the boiling oil on medium heat only. If you fry them on high heat, the modaks might get fried faster and turn darker. So, fry them carefully on low or medium heat and yield golden coloured ones.


Vakratunda Mahakaaya
Suryakoti Samaprabha
Nirvighnam Kuru Mey Deva
Sarva Kaaryeshu Sarvada


LinkWithin

Related Posts Plugin for WordPress, Blogger...