Sunday, April 14, 2013

Iniya Tamizh Puthandu Nal Vazhthukkal / Happy Tamil New Year - 2013 / Tamil Varusha Pirappu

 Tamil Varusha Pirappu Feast - White Rice, Araichuvitta Sambar, Vendaikkai Mor Kuzhambu, Cabbage Pattani Curry, Aviyal, Potato Pattani Kara Curry, Vendaikai Podipotta Curry, Mango Neemflower Sweet Pachidi, Semiya Payasam, Poorna Boli, Pudina Paruppu Crispy Vadai, Tempered Curd Rice.

Wishing my dear bloggers, friends and family, a very Happy Prosperous Tamil New Year.

Tamil New Year 2013 is a special New Year for all of us,as it falls on a weekend. This in turn gives us enough time to do prayers, cooking and enjoy the lunch leisurely. I tried to make Poli, Pachidi which are generally prepared during the New Year festivals this time too. Mango Pachidi is the main pulse of the New year Festival which is made out of raw mango, neem flower, jaggery which combines the taste of Sweet, Sour, Bitter and Salt.  This pachidi depicts the entire colours of life. New Year Feast is always elaborate with more traditional recipes followed by generations to generations in every household. 

I am sure you all would have celebrated the Tamil New Year at your home with lots of fun.  

Spread the word of "Love and Peace" and enjoy the whole year with lots of success, good health and wealth.

Thursday, April 11, 2013

Ugadi Subhakanshalu - 2013

Ugadi Bhojanam - 2013   Paramannam, Black Channa Dal Sundali, Ugadi Pachadi, Mammidikaya Puliohara, Minnapa Garelu, Odiyalu, Pappu Chaaru, Annam.

Sri Vijaya Nama Samvatsara Ugadi Shubhakanshalu.


Wishing you all a very Happy Ugadi. This year brings you all more happiness, prosperity, good health and peace. 

We celebrated Ugadi with lots of prayers and prasadams. !! This Day became more special and fulfilling after attending the Evening Ugadi Special Pooja at our temple. Well, day after tomorrow, we are again gearing up for another festival,Tamil New Year( Chithirai Vizha 2013 ).Feeling happier that it falls on a weekend day as the whole family could sit and enjoy the festival together. Of course, with our special guests for the day. ( Athithi Devo Bhava!!)

By end of the day, I feel satisfied that I also tried to make some good memories to my kids. Still, the childhood memories I had during the festivals were priceless and I cherish those moments many times by talking about the varieties of food my mom made, the special prayers and pooja my Dad performed, etc., Hoping to make such good memories for my daughter and son too...atleast to some extent.

Wishing you all once again a very Happy Ugadi. 

Wednesday, April 10, 2013

Indian Style Vegetable Tofu Pizza / Veggie Tofu Pizza / Vegetable Pizza / Veggie Pizza


Pizza remains a magic word all the time to make the kids smile. Though we don't regularly dine at Pizza restaurants, I like the idea of making pizza start from scratch at home, even the Pizza Base. My love towards Italian Cuisine is very special and I have been trying out different pestos and experimenting various kinds of Pasta, Soups in my kitchen with my testers ( my family of course!!!) at home. Somehow, I decided to inject the Indian flavor and taste into this vegetable pizza this time. So I made the Pizza Sauce on Indian Style and built the Pizza according to our home taste.  It came out very well and I assure you, my dear friends, its not a time consuming recipe at all if you have all the ingredients ready at one shot. Just  prepare the Pizza Dough before 5-6 hours with the yeast and keep it ready. By the time the dough sets up, keep all the other ingredients required for making the Pizza like the Sauce, vegetables, black pepper powder, Mozzarella cheese,etc., ready. Its a wise decision to prepare the Pizza Sauce in advance and store it in an airtight container and in refrigerator for later use. We can surprise the kids by giving them a quick Mini Cheese Pizza or any favourite pizza of their choice as an after school snack if the Pizza Sauce is readily available.

I used the All-Purpose Flour and the wheat flour in the ratio of 4:1 this time. This ratio is purely based on your taste and choice. You can either make a whole wheat pizza or can use both the wheat flour and all purpose flour equally. Generally, 2 cups of flour yield a large pizza. So decide your flour portion accordingly.

I replaced Paneer cubes with fresh Extra Firm Tofu Cubes. Try this out in your kitchen and let me know your feedback and suggestions. 

Ingredients

For the Pizza Dough

( This is to make 2 large pizza and a Medium sized cheese pizza. Adjust your portion for making a single large pizza )

All Purpose Flour - 4 Cups
Whole Wheat Flour - 1 Cup 
Salt - To Taste
Rapid Rising Yeast - 1 small packet. ( 1.5 tbsp )
Sugar - 1 tsp
Black Pepper Powder - 2 tsp 
Italian Seasoning Powder - 1 tsp
Garlic Powder - 1.5 tsp
Light Olive Oil - Between 1/2 cup and 3/4 cup ( Reduce it to 1/4 cup while making a single large pizza )
Warm Milk - 3/4 cup ( Should not be too hot or too cold )
Water - Little for making the perfect dough.

For the Pizza Sauce

Olive Oil - 2 tsp
Minced Garlic - 2 tsp
Shredded Onion - 1/4 cup
Shredded Green Bell Pepper / Capsicum - 1/4 cup
Tomato Puree - 2 cups
Salt - To Taste
Kasoor Methi Leaves - 1 tsp
Red Chilli Powder - 1/2 tsp ( Could use red chili flakes instead )
Tandoor Masala Powder - 1.5 tsp ( I used Store made Tandoor Masala Powder )
Italian Seasoning Powder - 1 tsp
Coriander Cumin / Dhana Jeera Powder - 1/2 tsp
Sugar - 1 Pinch

For the Pizza Toppings

Mozzarella Cheese Shredded - 3/4 cup ( For 1 Large Pizza )
Green Bell Peppers , Sliced Black Olives, Sliced fresh Jalapeno Peppers, Fresh Spinach Leaves, Sliced Red Onions, Pineapple Squares, Sliced Mushrooms, Fresh Coriander Leaves ( To Garnish and Flavor ).
Olive Oil - 2 tsp ( To Brush the Sides )

Method 

Pizza Sauce

In the frying pan, add oil first. When its heated, add the minced garlic, onion, green bell peppers and saute them well. Once the raw smell takes off, add all the powders,salt and sugar and  tomato puree and cook them well for 3-4 minutes on a medium heat. After it gets cooled, store them in an airtight container. For future use, its good to store the leftover sauce in the refrigerator.

Pizza Dough

First warm the milk in the microwave. Then add the yeast and sugar into the warm milk. Yeast gets activated nicely in warm milk and allow them to froth for 4-5 minutes. In a big mixing bowl, add the other ingredients for making the Pizza Dough and knead them thoroughly. While kneading, add the frosted yeast milk into the dough mixture too. Kneading at this stage really helps us to get a nice, fluffy pizza dough. Cover the pizza dough with a wet cloth and keep it in a warm place till it doubles in quantity. This process might get over between 1.5 to 2 hours which totally depends on how you knead the dough, proportions of the dough and the place where you kept.

Pizza Toppings

Keep all the vegetables that are required ready. Keep the shredded Mozzarella cheese ready too. Knead the dough once again so that the air bubbles get released equally in all directions. 
Preheat the Over to 400 Degrees first. 
Divide the dough equally for the number of pizzas you are going to make. Take the portion of the dough and spread it on the floured surface. You can either use the roller to spread the pizza dough or use your strong hands to make the pizza. I used the roller initially to spread it into round shape and later i used my hands to spread it out uniformly in all directions. 
If you wish a thin crust, spread the dough large enough and make it thin using your hands. 
Brush the top layer of the pizza with little oil. Apply the Pizza Sauce and spread them across uniformly. Leave quarter inch around the edges of the Pizza which could be brushed with little oil later before baking starts.
On top of the Pizza Sauce, spread the shredded Mozzarella Cheese evenly and generously. Don't finish the entire Mozzarella Cheese at this stage. Keep some for the final layer too.
On top of the Mozzarella Cheese, arrange the sliced / cut veggies, paneer cubes or Tofu cubes as you like. Sprinkle some more Mozzarella Cheese over the toppings and cover them. 


Similarly, make the rectangular thin  crust pizza with different toppings. I made a thin crust rectangular pizza with Pineapple, Black Olives, Jalapeno Peppers, Red Onions. Also, I made a medium size thick crust Cheese Pizza with a single topping of Black Olives. For the thick crust cheese pizza, I generously added more Cheese to balance the thickness. Keep the arranged pizzas for baking into the oven now. 

After 25 minutes, I noticed a slight brownish colour around the edges of the pizza. This indication clearly tells the completion process. Check all the pizzas in the oven for the completion individually. Slowly remove the pizzas from the oven and you would notice the nicely baked pizzas with melted cheese at their center. When its hot, slice the pizzas into desired shapes and distribute it to the kids happily. Sprinkle some hot red chilli flakes and Parmesan cheese on top of the Pizza slices and enjoy the Pizza Party with a side of strawberry lemonade.
Tips and Variations
  • You can add any toppings to your pizza and you can totally drive your imaginations high while making this yummy treat to your kids.
  • Use a good quality Mozzarella cheese to get a hot restaurant style pizza.
  • Don't compromise on the pizza sauce at all. The quality of the pizza sauce upgrades the Pizza taste considerably well. 
  • If you want to make it more healthy, make the Pizza Dough with whole wheat flour and enjoy.

Sunday, March 17, 2013

Malai Kofta / Restaurant Style Malai Kofta / Malai Kofta Curry


Malai Kofta is a rich creamy north indian side dish which is generally made on special occasions. Whenever we go to restaurants, I never fail to order Malai Kofta for my rotis / Naans but our family always like to enjoy the Malai Kofta with little punch in it. Somehow, we could not enjoy the sweetish version of the Malai Kofta. So, my version would not be too sweetish, its medium and could be made with extra punch too. To enjoy this dish without guilt, I made it without any cream and butter. Trust me, the taste of this Malai Kofta is outstanding and you would earn more appreciations from your family and friends. Don't get overwhelmed during the process of  preparation. Make your process simpler by making things in parallel. The result would be amazing and would leave you with no leftovers for sure.

Ingredients 

For Making the Kofta :

Paneer Cubes / Paneer shredded - 1 Cup
Boiled Mashed Potatoes - 5 Medium
Shredded Onion - 1/2 cup
Shredded Coriander Leaves - 2 tbsp
Green Chillies - 1 Medium or 1/2 tbsp green chili paste.
Turmeric Powder - 1 tsp
Garam Masala Powder - 1 tsp
Red chili powder - 1/2 tsp
Coriander Cumin Powder - 1/2 tsp
Salt - To Taste
Ginger Garlic Paste - 1/2 Tbsp.
Broken Cashew Nut Pieces - 2 tbsp ( Optional )
Cooked Carrot - 1 Medium ( Optional )
Cooked Peas - 1/2 cup ( Optional )
Bread Slices - 4
All Purpose Flour - 1 tbsp

For Making the Gravy :

Tomato - 3 Medium or Tomato Puree - 1 Cup
Shredded Onion - 2 Cups
Ginger Garlic Paste - 1 tbsp
Oil - 1 tbsp
Cumin Seeds - 2 tsp
Kasoor Methi - 1 tsp
Cashew Nuts - 1/2 cup ( Grind them in mixer grinder and make a fine powder )
Turmeric Powder - 1 tsp
Red Chili Powder - 1 tsp
Coriander Powder - 3 tsp
Garam Masala Powder - 3 tsp
Green Chili Paste - 1 tsp
Milk - 1 cup
Salt - To Taste
Coriander Leaves - To Garnish
Adjust the red chili powder and green chili according to your taste buds.This level is meant for medium spicyness. No need to add any cream or butter.

Method of Preparation
  • In the big mixing bowl, add all the ingredients for making the Kofta except the bread slices. Knead them well without any water first. 
  • Soak the break slices in water and squeeze them thoroughly and add the moist bread slices into the kofta mix. Once again knead them well and make balls out of the Kofta mix as shown in the picture. 
  • Fry them in heated oil till golden brown and keep all the fried Kofta balls ready. You can either fry them in heated oil or bake them in the oven under 400 degrees for 15-20 minutes on both sides.
  • Meantime, we need to make the gravy for the Malai Kofta. In the cooking pan, add oil first. When its heated, add cumin seeds, ginger garlic paste, green chili paste and shredded onion. 
  • Saute them well so that the raw smell goes off. Add the spice powders into the pan and saute them for another 2 minutes.
  • Add the tomato puree, cashew powder into the cooking pan. Mix them well and cook for 2-3 minutes.
  • Finally add the milk and required amount of water into the cooking pan and cook them on medium heat for another 2-3 minutes. Add required amount of salt at the end.
  • Switch off the flame when the gravy consistency is achieved. Now the gravy is ready to be served. 
  • Just before serving, add the kofta balls into the gravy. Enjoy this yummy malai kofta with hot rotis, Naan or any mild pulao. 
 Sunday Lunch - Roti, Peas Pulao, Malai Kofta &
 Jalapeno Pickle

Tips / Variations 
  • As Malai Koftas are bit rich and creamy, its ideal to have this side dish with milder pulaos like Jeera Pulao, Peas Pulao. 
  • If you are making Malai Kofta for a big crowd or party, its better to use little bit of cream while making the gravy. Decorate the top of the Koftas in the serving plate with thin layers of fresh cream to make it more attractive. 
  • If you want to make it sweetish, you can add little bit of sugar into the gravy and add the koftas. But the sweetness from the milk, cream, cashews would be more than sufficient I guess.
  • Presenting the Malai Kofta on the table is much more important than making it. So, serve this side dish on a fancy restaurant style serving vessel. Add the gravy first and arrange the koftas in a fashion into the gravy. Garnish with coriander leaves and pour a thin layer of fresh cream on top of the kofta balls. 

Wednesday, March 13, 2013

Andhra Pesarattu / Pesarattu / Green Gram Adai


Andhra Pesarattu, a crispy greenish dosa / adai / crepe is best suited for breakfast as its loaded with food amounts of protein. Its an ideal food to kick start the day. With a side of a spicy ginger chutney and some fresh curd, its complete. As this tiffin is bit on the heavier side and fills your tummy, I prefer to have it only  for breakfast and avoid during the end of the day. You will definitely smell the Pesarattu in our kitchen especially during the exam days.!! 

Ingredients


For Grinding the Batter :
Green Gram Lentil / Green Pasipayaru / Green Pesarupappu - 1 cup
Idly Rice / Raw Rice - 1 Handful
Ginger - 1 square inch
Garlic Pods - 1 Medium
Cumin Seeds / Jeera - 1 tsp
Salt - To Taste
Green Chillies - 1 Medium
Hing / Asafoetida - 1 Dash

For Making the Pesarattu :
Oil - Enough to fry the Pesarattu
Red Onion - 1 cup ( finely shredded )

Method
  • Soak the Green Gram Moong Dal overnight or for 6-7 hours. Grind them nicely with all the ingredients as mentioned in a mixer grinder. Add salt to the batter only at the end. Add water little by little while grinding the batter which in turn makes the Pesarttu batter fluffy.
  • Keep the Pesarattu Batter ready. Meantime, keep the shredded red onion and oil ready. Heat the tawa / pan for frying the Pesarattus. Add little water to the Pesarattu Batter is its too thick. 
  • On medium heat, pour a full ladle of the batter at the center of the pan. Uniformly spread it and make a thin circle as shown in the picture. Sprinkle some red onion pieces on its top and add oil at the edges of the circle. 
  • Fry them on both sides and serve the crispy thin Pesarattus with a side of ginger chutney and some fresh curd to cool down the stomach.

Tips / Variations 

  • If you grind the batter in wet grinder, the quantity almost doubles and its super fluffy compared to the batter grinded in a regular mixer grinder.
  • You can even spread a spoonful of ginger chutney on the pesarattu before adding the red onion. Generally in andhra hotels, they coat a thin layer of allam chutney / ginger chutney on the pesarattu before adding the onion which makes it more spicy and tasty. But its optional.
  • You can even sprinkle some finely cut green chillies along with the red onions on its top. But it purely depends on your taste buds.

Friday, March 8, 2013

Pumpkin Halwa / Parangikkai Halwa / Gummudukaya Halwa - Microwave Version


I dedicate this super tasty Pumpkin Halwa to all my dear friends and bloggers on "Women's Day". Heard about this Halwa from my friend Gai long back. Finally on women's day, I made this halwa for all of you.!!!
As she mentioned, its definitely difficult to identify its source if you taste a spoonful of halwa. Even my husband who is a great foodie could not identify the source and asked me whether it was Badam / Almond Halwa. Oh, that's a huge success to me!!! He could not believe that its made out of Pumpkin. Well, it tastes so good and because of this yummy dessert, I am forced to make a huge holiday meal just to balance the delicious dessert at the end. 

Happy Women's Day to all of you.

My Dear friends, take a break from your routine, life. Take a moment to enjoy your achievements in life. Take a moment to cherish the past good memories in your life. Take a moment to enjoy your dreams. Enjoy your women hood. 


Ingredients
Pumpkin Cubes - 3 Cups
Sugar - 1.5 Cups
Milk Powder / Mawa - 1 Cup
Saffron Strands - 1 pinch Generously.!!
Melted Ghee - 1 tbsp 
Not added any Cardamom Seeds as I wanted to enjoy the unique flavor of saffron.

Method 
  • Peel the Pumpkin Skin and cook them in the microwave till they get cooked perfectly.
  • In a big mixing microwave bowl ( preferably a big glass bowl ), add the mushy cooked pumpkin, mawa ( milk powder ), sugar and saffron strands into it. 
  • Mix them well and cook for totally 10-12 minutes in the microwave.
  • Take the bowl out after every 3 minutes and stir them well again. Continue the process till the halwa consistency is achieved. 
  • It took nearly 12 minutes for me to get that consistency in my microwave. The cooking time varies with microwaves and depends on its power level.
  • Add ghee just before 2 minutes and stir them well. You would notice the slight yellowish kesar colour halwa in the bowl with an excellent aroma of saffron. 

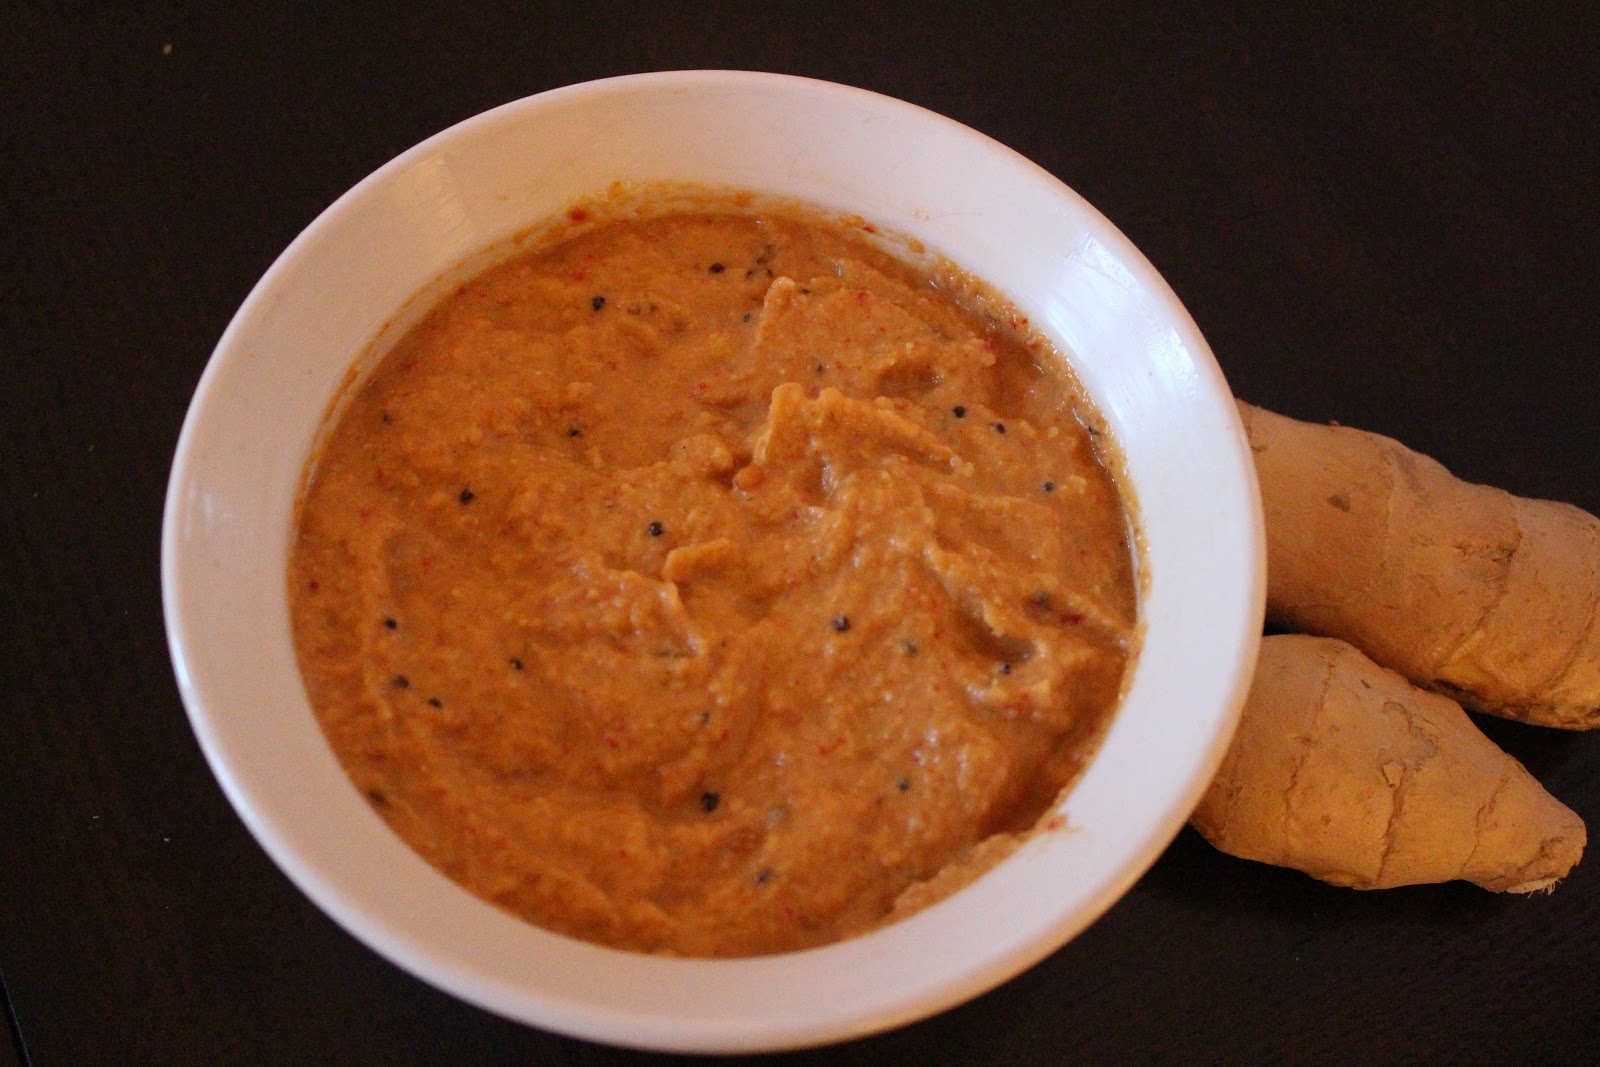
Ginger Chutney / Allam Chutney / Allam Pachidi / Inji Chutney


Ginger Chutney is a very good accompaniment for Idly, Dosas and Adais. As its very good for the stomach, its wise to have a teaspoon of this chutney in our meal plate all the time. I lick this chutney even for my curd rice.

Ingredients
Ginger - 2 Big Ones
Urad Dal / Ulutham Paruppu / Minna Pappu - 2 tsp
Coriander seeds - 1/2 tsp
Cumin Seeds / Jeera - 1/2 tsp
Tamarind - 1 square inch
Dry Red Chillies - 2 Medium ( According to your taste buds. )
Jaggery - 1 tiny cube
Salt - To Taste
Oil - 2 tsp
Hing / Asafoetida - 1 Pinch
Mustard Seeds - 1 tsp
Curry Leaves - 3 or 4

Method
  • Peel the skin and cut the ginger into small pieces and keep ready.
  • In the frying pan, add 1 tsp of oil. When its heated, add urad dal, cumin seeds,coriander seeds and saute them till golden brown on medium heat.
  • Add the dry red chillies, tamarind and ginger pieces next and saute them till you get a nice aroma of Ginger.
  • Switch off the flame and grind them together with required amount of salt, jaggery after the contents get cooled.
  • In the same frying pan, add the remaining oil and finish the tempering process with mustard seeds, hing and curry leaves. Pour them over the ginger chutney.
  • Include this healthy chutney / dip in your plate along with any meal.

LinkWithin

Related Posts Plugin for WordPress, Blogger...