Showing posts with label Italian Varieties. Show all posts

Thursday, May 5, 2016

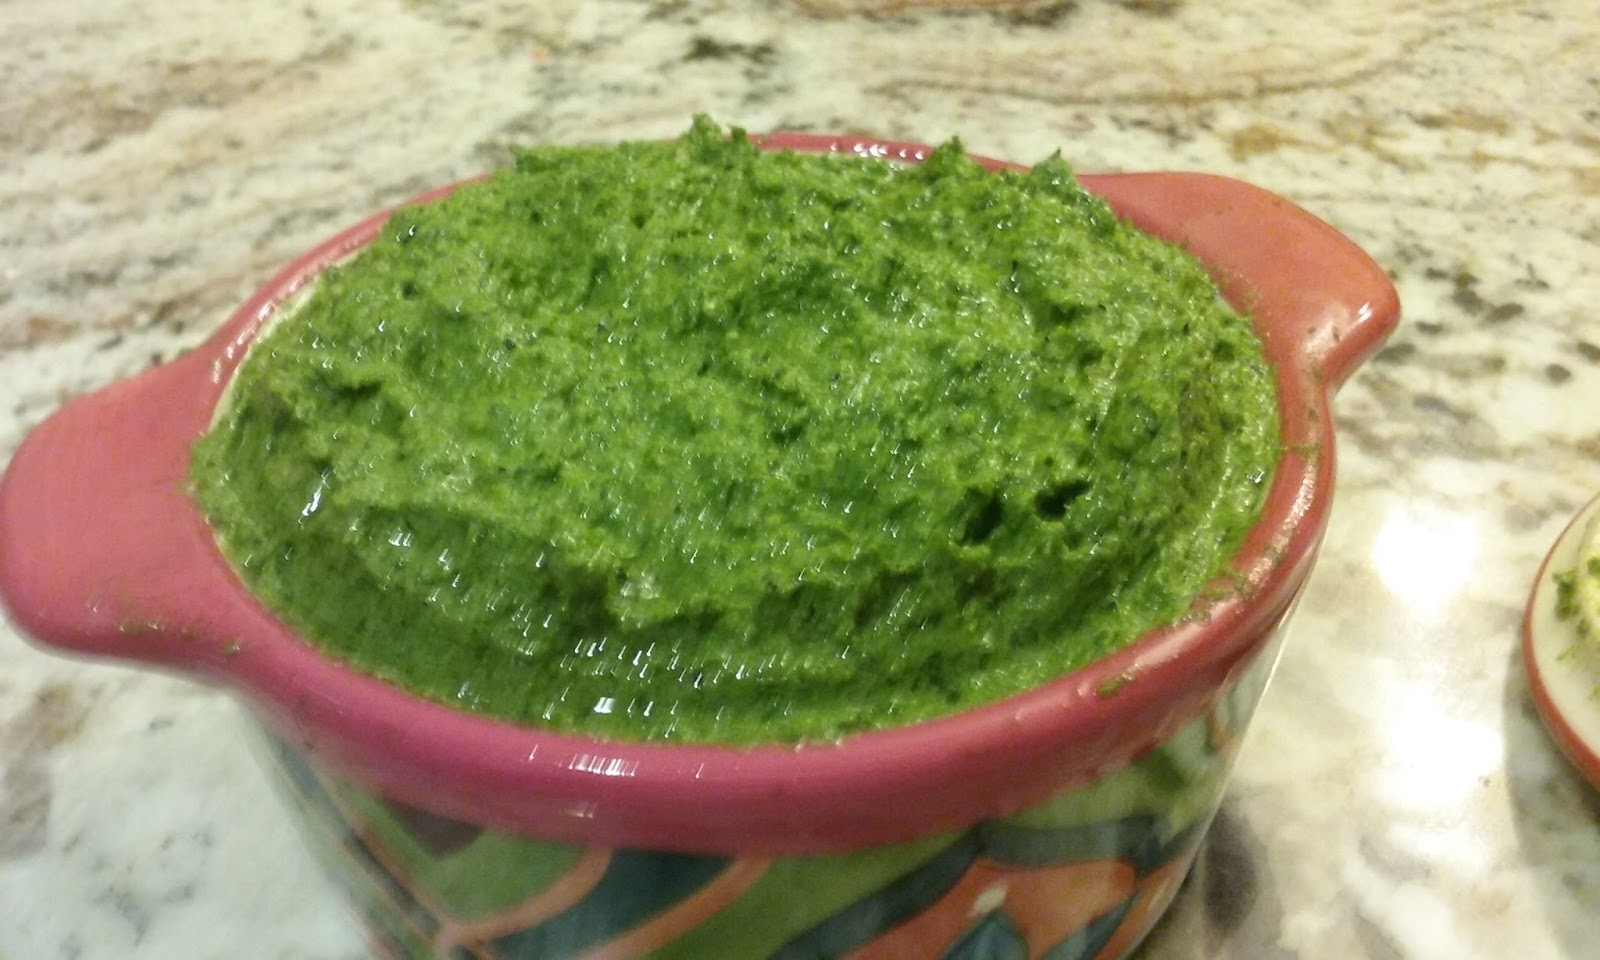
Kale Pesto with Walnuts


Kale is one among the most nutrient dense foods on the planet. It is rich in Protein, fiber and has vitamins A,C, and K. Folate content and Omega - 3 is high in Kale which is the main key for brain development. Kale can help lower cholesterol which in turn reduces the risk of heart disease.  It has numerous cancer fighting substances.

Using this super food, I made a super Kale Pesto with toasted walnuts. It can be stored in air tight refrigerator for 2-3 weeks but its better to enjoy its real freshness.

Ingredients

Kale leaves without stem --  2  cups
Garlic Pods --- 6 or 7
Peppercorns - 1 tbsp
Extra Virgin Olive Oil - 1/2 cup
Parmesan Cheese - 1/4 cup
Toasted Walnuts - 1/2 cup
Salt - To Taste
Lemon Juice - Juice of One lemon completely.

Method 


Pulse the washed kale leaves, garlic pods, peppercorns, olive oil, salt, lemon juice in a food processor or blender until smooth.

Add the Parmesan cheese and walnuts and pulse until the walnuts are ground to your desired consistency.

Store it in glass jars and enjoy with hot pasta, bread, crackers, sandwiches, etc.,

Notes


I did not add any basil leaves in this pesto as I wanted to enjoy the Kale taste as much as possible.
Trust me, your dinner rocks with this pesto sauce. With any kind of Pasta, this simple pesto completely enhances the meal. With a side of fresh, crunchy Italian salad, its divine.

Tuesday, June 10, 2014

Basic Marinara Sauce / Marinara Sauce / Italian Marinara Sauce


For making a quick pasta, we use the store bought Marianara Sauce of various combinations generally. But I noticed that the  marianara sauce served at Italian restaurants would be so rich in texture and tastes much better than the store bought ones. I tried to venture out the possibility of making marinara sauce at home by following a very good marinara recipe. I followed Giada's Marinara Sauce recipe almost with few additions from my side to suit our taste. Trust me, the regular pasta plate looked so different in texture and looked delicious. Ah, why not execute this with some real shredded picorino romano cheese? Adding a feather to the crown, this paste sauce topped with the Italian cheese melts in your mouth. Above all, I like the sauce so much and try making the sauce with vine tomatoes. I added few toasted baby bella brown mushrooms in my marinara sauce. You can store it in refrigerator for 4-5 days and consume. As I don't add more oil, I prefer to exhaust them quickly. 
Ingredients
 
2 Cans Tomato Puree - 32 Oz
Carrots - 2 peeled and shredded
Celery Stalks - 2 finely chopped
Garlic cloves - 2 finely chopped
Salt - As Required
Extra Virgin Olive Oil - 1/4 cup
Bay Leaves - 2
Yellow Onions - 2 finely chopped
Black Pepper Powder - 2 tsp ( We wanted little punch, so added more but you adjust )
Dried Oregano - 1 tsp
Dried Thyme - 1 tsp
Dried Basil Leaves - 2 tsp

Method
  • Ziti Pasta coated with homemade marinara sauce 
    In a thick bottomed pan, add oil first followed by shredded garlic and onion pieces.
  • Sprinkle little water and fry them for 5 minutes till the onion get translucent.
  • Add the shredded carrot, celery into the pan and saute them for another 3-4 minutes.
  • Add the tomato puree with all the spices except salt into the pan and allow them to cook on low flame with the lid open for nearly 30-45 minutes till the quantity reduces and get into a thick sauce consistency.
  • Add salt at the end and allow them stand on the stove for 2-3 minutes.
  • Let the sauce cool completely and store them in the refrigerator for later use.
  • Enjoy some fresh sauce with cooked pasta with a side of pickled olives, toasted rosemary bread and fresh arugula salad.
Tips
  • I used dried spices while making the sauce as the dried herbs hold the flavor for longer time when cooked on low flame. If you prefer to use the fresh herbs, try to add them at the end to hold the fresh flavours in the sauce.
  • I prefer to puree the tomato before making the sauce which gives an unique taste and texture.
  • Caramelize the onions perfectly before putting the carrots and celery into the pan.

Monday, June 9, 2014

Tiramisu / Tiramisu Dessert / An Italian Dessert - Tiramisu / Tiramisu Cake

"Tiramisu Cake" is a very popular Italian Dessert with a mild coffee flavour which stole our heart few years before. Since then, our family never fail to enjoy this dessert at the end of any Italian dinner. Due to its mild sweetness we could enjoy this Tiramisu Cake comfortably more. My kids love this cake and when I announced them that I would make them at home, their eyebrows went up and were really worried whether I would be able to duplicate the dessert perfectly or not. Well, with a list of right ingredients and at right proportions, I successfully duplicated the great "Tiramisu" at home. ( for them!!!). Of course, it has to be presented at the end of an Italian meal. So, last Friday we enjoyed a complete Italian Meal from soup to dessert comprising of Minestrone Soup, Penne Pasta with homemade Marinara Sauce sauteed with vegetables , a side of grilled vegetables seasoned with Italian herbs and Tiramisu Cake. This meal is mainly made to please our dear son on his Kindergarten Graduation Day. A change in the routine always refreshes the mind and it proved to be true. We had a terrific weekend followed by with tons of housework.!!!  My Dear bloggers, if you are calorie conscious or weight watchers, you could enjoy only a little portion of this cake sadly...

Making tiramisu is not at all a cumbersome process. With all the right ingredients in place, its an effortless job with less preparation time. You need to be patient only during the refrigeration time. Its an ideal dessert to be made well in advance during a big get together or birthdays.

Ingredients

Mascarpone Cheese - 1 Cup
Whipped Cream -2 cups
Sugar - 1/4 cup
Vanilla Extract - 1 tsp
Unsweetened Cocoa Powder - 1/4 cup ( For Dusting )
Lady Finger Biscuits - 20 to 25
Leftover Coffee or Espresso - 1 Cup ( Enough to dip to the finger biscuits )
Chocolate Powder or Chocolate shaved curls - For decorating on top ( Optional )

Method
Make the coffee / espresso ready first. In a big mixing bowl, mix the mascarpone cheese, whipping cream and sugar and whip them.
Keep the tray or rectangular pan with good depth to assemble. Soak the lady finger biscuits into the coffee espresso lightly and arrange them in order. 
 After you place one complete layer of lady finger biscuits, coat the layer with the creamy mascarpone filling on top uniformly.
 Dust the creamy layer with cocoa powder uniformly using the tea filter on all directions.

On top of it, arrange the lady finger biscuits again and repeat the process. 
Finally on top of the cocoa layer dusting, dust the chocolate powder or decorate the cake with the shaved chocolate curls. Refrigerate the Tiramisu Cake for 7 to 8 hours. Make triangular pieces or rectangular as you desire and serve the cake on a dessert plate. Just stick a dry lady finger biscuit on its top to get the restaurant style look. 

Tips / Suggestions
  • I prefer to freeze the Tiramisu for half an hour before serving as it helps out while making pieces without cracking.
  • For making chocolate curls, you can use a dark chocolate bar and peel at the corners using a vegetable peeler. It works well.
  • Refrigerate well enough for achieving good results. 
  • Don't add more sugar to this cake than mentioned. Mild sweetness gives a divine taste to Tiramisu.
  • For big parties if you decide to make the dessert well in advance, its ideal to make it as individual dessert piece for any guest. If you have individual dessert rectangular serving cups or any deep serving cups, you can adopt the same method and make mini versions of the Tiramisu cake for all the guests. In this way, there are no hastles in cutting the big Tiramisu cake before serving and worrying about cracking them. Instead, you arrange the dessert cups in a serving tray and in no time your dessert will be fixed perfectly. 

Tuesday, September 10, 2013

Italian Pesto Pizza / Pizza with Pesto Sauce / Pesto Pizza

Festivals are over and we heartfully enjoyed the special offerings we made to God. A small change in the tracks, today I decided to gear towards something easier and  exotic. Suddenly, this Pesto Pizza flashed in my mind as I had all the ingredients luckily available. Trust me, it was not at all a cumbersome process. Pretty easier as the sauce was ready.

Ingredients

Pizza Base :
All Purpose Flour - 1.25 Cups
Baking Soda - 1/4 tsp
Salt - 1 tsp
Sugar - 1/2 tsp
Black Pepper Powder - 1 tsp
Italian Seasoning Powder - 1.5 tsp
Olive Oil - 1 tbsp ( To knead the Dough )
Water - As required to Knead the Dough.
Yeast - 2 tsp ( Soaked in 1/4 cup of warm milk )

Pizza Sauce 
Pesto Sauce - As required. ( Either Homemade or Store bought , I used Costco Brand Pesto Sauce).

Toppings
Red Onion Rings - 6
Black Olives - 5 or 6 cut into thin rounds
Mushrooms - 4 or 5 cut into thin slices.
Mozzarella Cheese - Between 2 to 3 Cups. ( As desired ).

Method

Knead the Pizza Dough by adding all the ingredients mentioned under the "Pizza Base". Cover the dough with a wet cloth and leave aside for 2-3 hours till the dough rises up.

Using a roller, roll the dough and make a thin crust pizza base. It can be well achieved by using hands too..
Spray some oil onto the base of the pizza baking tray. Carefully transfer the handmade thin crust into the pizza tray. Spread the Pesto Sauce on top of the Pizza base equally in all directions as shown in the picture below.


After that, apply the shredded mozzarella cheese on top of the Pesto Sauce uniformly in all directions. Its better to make the edges of the Pizza crust little thicker as it might prevent the cheese spills during the baking process.

On top of the Mozzarella cheese spread, throw the toppings in any fashion you like. Press them gently.Now the Pizza is ready to be baked. You can either bake it in the conventional oven by following the regular process or choose other handy methods. This time I baked this Pesto Pizza in my Bella Pizza Maker. Its an awesome Kitchen Appliance which makes my life pretty easier. Especially for baking just a single pizza or for any sudden pizza craving, this Bella Pizza Maker comes as a rescue.!!! It took nearly 8-9 minutes in the Pizza Maker and the Pizza is ready to be served. 

Make slices using the Pizza cutter and serve the slices with Parmesan cheese and  red chilli flakes on top.
Enjoy with a side of some chilled Apple cider. You will remember me then....Enjoy this recipe my dear friends and let me know your experience.

Wednesday, April 10, 2013

Indian Style Vegetable Tofu Pizza / Veggie Tofu Pizza / Vegetable Pizza / Veggie Pizza


Pizza remains a magic word all the time to make the kids smile. Though we don't regularly dine at Pizza restaurants, I like the idea of making pizza start from scratch at home, even the Pizza Base. My love towards Italian Cuisine is very special and I have been trying out different pestos and experimenting various kinds of Pasta, Soups in my kitchen with my testers ( my family of course!!!) at home. Somehow, I decided to inject the Indian flavor and taste into this vegetable pizza this time. So I made the Pizza Sauce on Indian Style and built the Pizza according to our home taste.  It came out very well and I assure you, my dear friends, its not a time consuming recipe at all if you have all the ingredients ready at one shot. Just  prepare the Pizza Dough before 5-6 hours with the yeast and keep it ready. By the time the dough sets up, keep all the other ingredients required for making the Pizza like the Sauce, vegetables, black pepper powder, Mozzarella cheese,etc., ready. Its a wise decision to prepare the Pizza Sauce in advance and store it in an airtight container and in refrigerator for later use. We can surprise the kids by giving them a quick Mini Cheese Pizza or any favourite pizza of their choice as an after school snack if the Pizza Sauce is readily available.

I used the All-Purpose Flour and the wheat flour in the ratio of 4:1 this time. This ratio is purely based on your taste and choice. You can either make a whole wheat pizza or can use both the wheat flour and all purpose flour equally. Generally, 2 cups of flour yield a large pizza. So decide your flour portion accordingly.

I replaced Paneer cubes with fresh Extra Firm Tofu Cubes. Try this out in your kitchen and let me know your feedback and suggestions. 

Ingredients

For the Pizza Dough

( This is to make 2 large pizza and a Medium sized cheese pizza. Adjust your portion for making a single large pizza )

All Purpose Flour - 4 Cups
Whole Wheat Flour - 1 Cup 
Salt - To Taste
Rapid Rising Yeast - 1 small packet. ( 1.5 tbsp )
Sugar - 1 tsp
Black Pepper Powder - 2 tsp 
Italian Seasoning Powder - 1 tsp
Garlic Powder - 1.5 tsp
Light Olive Oil - Between 1/2 cup and 3/4 cup ( Reduce it to 1/4 cup while making a single large pizza )
Warm Milk - 3/4 cup ( Should not be too hot or too cold )
Water - Little for making the perfect dough.

For the Pizza Sauce

Olive Oil - 2 tsp
Minced Garlic - 2 tsp
Shredded Onion - 1/4 cup
Shredded Green Bell Pepper / Capsicum - 1/4 cup
Tomato Puree - 2 cups
Salt - To Taste
Kasoor Methi Leaves - 1 tsp
Red Chilli Powder - 1/2 tsp ( Could use red chili flakes instead )
Tandoor Masala Powder - 1.5 tsp ( I used Store made Tandoor Masala Powder )
Italian Seasoning Powder - 1 tsp
Coriander Cumin / Dhana Jeera Powder - 1/2 tsp
Sugar - 1 Pinch

For the Pizza Toppings

Mozzarella Cheese Shredded - 3/4 cup ( For 1 Large Pizza )
Green Bell Peppers , Sliced Black Olives, Sliced fresh Jalapeno Peppers, Fresh Spinach Leaves, Sliced Red Onions, Pineapple Squares, Sliced Mushrooms, Fresh Coriander Leaves ( To Garnish and Flavor ).
Olive Oil - 2 tsp ( To Brush the Sides )

Method 

Pizza Sauce

In the frying pan, add oil first. When its heated, add the minced garlic, onion, green bell peppers and saute them well. Once the raw smell takes off, add all the powders,salt and sugar and  tomato puree and cook them well for 3-4 minutes on a medium heat. After it gets cooled, store them in an airtight container. For future use, its good to store the leftover sauce in the refrigerator.

Pizza Dough

First warm the milk in the microwave. Then add the yeast and sugar into the warm milk. Yeast gets activated nicely in warm milk and allow them to froth for 4-5 minutes. In a big mixing bowl, add the other ingredients for making the Pizza Dough and knead them thoroughly. While kneading, add the frosted yeast milk into the dough mixture too. Kneading at this stage really helps us to get a nice, fluffy pizza dough. Cover the pizza dough with a wet cloth and keep it in a warm place till it doubles in quantity. This process might get over between 1.5 to 2 hours which totally depends on how you knead the dough, proportions of the dough and the place where you kept.

Pizza Toppings

Keep all the vegetables that are required ready. Keep the shredded Mozzarella cheese ready too. Knead the dough once again so that the air bubbles get released equally in all directions. 
Preheat the Over to 400 Degrees first. 
Divide the dough equally for the number of pizzas you are going to make. Take the portion of the dough and spread it on the floured surface. You can either use the roller to spread the pizza dough or use your strong hands to make the pizza. I used the roller initially to spread it into round shape and later i used my hands to spread it out uniformly in all directions. 
If you wish a thin crust, spread the dough large enough and make it thin using your hands. 
Brush the top layer of the pizza with little oil. Apply the Pizza Sauce and spread them across uniformly. Leave quarter inch around the edges of the Pizza which could be brushed with little oil later before baking starts.
On top of the Pizza Sauce, spread the shredded Mozzarella Cheese evenly and generously. Don't finish the entire Mozzarella Cheese at this stage. Keep some for the final layer too.
On top of the Mozzarella Cheese, arrange the sliced / cut veggies, paneer cubes or Tofu cubes as you like. Sprinkle some more Mozzarella Cheese over the toppings and cover them. 


Similarly, make the rectangular thin  crust pizza with different toppings. I made a thin crust rectangular pizza with Pineapple, Black Olives, Jalapeno Peppers, Red Onions. Also, I made a medium size thick crust Cheese Pizza with a single topping of Black Olives. For the thick crust cheese pizza, I generously added more Cheese to balance the thickness. Keep the arranged pizzas for baking into the oven now. 

After 25 minutes, I noticed a slight brownish colour around the edges of the pizza. This indication clearly tells the completion process. Check all the pizzas in the oven for the completion individually. Slowly remove the pizzas from the oven and you would notice the nicely baked pizzas with melted cheese at their center. When its hot, slice the pizzas into desired shapes and distribute it to the kids happily. Sprinkle some hot red chilli flakes and Parmesan cheese on top of the Pizza slices and enjoy the Pizza Party with a side of strawberry lemonade.
Tips and Variations
  • You can add any toppings to your pizza and you can totally drive your imaginations high while making this yummy treat to your kids.
  • Use a good quality Mozzarella cheese to get a hot restaurant style pizza.
  • Don't compromise on the pizza sauce at all. The quality of the pizza sauce upgrades the Pizza taste considerably well. 
  • If you want to make it more healthy, make the Pizza Dough with whole wheat flour and enjoy.
Thursday, March 7, 2013

Rotini Pasta in Red Bell Pepper Pesto / Rotini Pasta in Spicy Red Sauce


Ever Since I started venturing out different recipes in Italian Cuisine, the pesto varieties really triggered my imagination. Keeping the colors of the Pesto as green, red and white constantly, I am in the process of switching the respective ingredient for making those colors and trying the Pesto in various forms. This Red Bell Pepper is one of those and the spicy red pesto came out super delicious with good flavor. As such, red bell peppers have good amounts of anti oxidants and health benefits. In addition to that, this pesto is made more nutritious using Pine Nuts, Garlic, Black Pepper, Parmesan Cheese. This Pesto could be made in good amounts and stored in refrigerator for future use. Generally it gets over faster within a week. Definitely a colorful healthy treat to the kids and they love it. Try this out in your kitchen and let me know your comments for further improvements, my dear friends.

Ingredients

For the Red Pesto :
Red Bell Pepper / Red Capsicum - 2 Big Ones
Garlic Pods - 5
Black Pepper - 3 tsp
Pine Nuts - 2 tbsp
Parmesan Cheese - 1/2 cup
Extra Virgin Olive Oil - 1/4 cup
Fresh Basil Leaves - 1/2 cup

For making the Pasta Plate :
Rotini Whole Grain Pasta - 2 Cups
Salt - To Taste
Olive Oil - 2 tsp
Mushrooms - 1/2 cup ( cut in any desired shapes ) ( Optional )
Green Zucchini - 1/4 cup ( cut into small squares ) ( Optional )
Italian Seasoning powder - 1/4 tsp
Black Pepper Powder - To Taste
Red Bell Pepper Pesto Sauce - As Desired.
Parmesan Cheese or any romano cheese of your choice - To Garnish.

Method
For the Red Pesto :
  • Toast the Red Bell Pepper either in the oven or on the stove. If you are roasting them on the stove, keep the Red Bell Pepper pieces on top of the Pulka making grill and toast them slowly on both sides till they turn light black.
  • After its cooled down, grind them along with other ingredients in a blender and make the spicy red pesto. Store it in an airtight container. 
For the Pasta Plate :
  • Cook the Rotini pasta in a separate vessel, drain them and keep ready.
  • In the cooking pan / vessel, add oil first. When its heated, add the cut vegetables and saute them with a pinch of salt. 
  • Add the Italian seasoning powder, little black pepper powder to taste and saute them again for a minute.
  • Add few tablespoons of the prepared red pesto sauce into the pasta plate and serve immediately. 
  • Garnish with either Parmesan cheese on its top or Romano Cheese of your choice.
Tips / Variations :
  • Choose any shapes or varieties of Pasta while making this in your Kitchen.
  • While making the Pesto Sauce, if you dont have Basil Leaves on hand, just add dried basil powder or add a tbsp of Basil Pesto Sauce into it. This is a shortcut i follow generally if its not available then. Honestly, nothing could be compared to adding the fresh basil leaves while making Pesto.
  • If you dont want any veggies in your pasta plate, its purely optional. I know some people prefer to enjoy the pasta only with the Pesto Sauce and its richness. Agreed.
  • Richness of the Pasta is determined by the type of cheese we use and garnish at the top. 

Tuesday, July 31, 2012

Basic Pesto / Simple Pesto / Italian Pesto


Italian Lunch : Pennie coated with pesto, garden salad using home grown
cherry tomatoes dressed with raspberry vinaigrette

Ever Since I tasted the Pennie Pasta coated with the green delicious pesto, I have become addicted to that greenish oil and herb sauce. I never fail to taste this pesto at least once a month. Not only me, my family loves this pesto and urge me to make this more often in my kitchen. As its abundant during summer, we could enjoy our home made pesto this time using our home grown fresh basil leaves.

Though Basil leaves are prominently featured in Italian cuisine, its originally a native of India. Health benefits of basil is mainly due to the essential oils present in basil, and its widely used in the treatment of cancer, diabetes, stress related issues due to its antiviral, antioxidant properties. There are many varieties of basil found in the world and their culinary use varies with different regions.

Basil Plant in our home garden


Ingredients


Fresh Basil Leaves - 2 Cups packed
Garlic Pods - 3
Olive Oil - 1/2 cup
Parmesan Cheese - 1/2 cup
Broken Walnuts - 1/2 cup
( Pine nuts can be substituted if available ).
Black Peppercorns - 1/2 tbsp
( Add more pepper powder if you want to ).
Salt - To Taste.

Method

Wash the basil leaves and keep ready. Dry roast the walnuts and black peppercorns first. Then grind them in a mixer grinder coarsely along with other ingredients. Add salt and black pepper powder according to your taste at the end. Keep the sauce in an air tight container. Add portions of this pesto to the cooked pasta and thoroughly mix this with the pasta and enjoy with a side of  a garden salad and fresh sparkling apple cider. A perfect Italian meal on any special day in your life.

Sunday, July 15, 2012

Tomato Basil Pasta Salad


We've been growing vegetables and herbs in our small vegetable garden this summer and we are quite happy with the results too. Upon looking at the freshness, we get tempted to make some good healthy recipes using these home grown vegetables. Out of those, we decided to make a healthy pasta salad using our organic, home grown heirloom tomatoes, basil leaves, Green Pepper ( Capsicum ) and few red cherry tomatoes and pearl yellow tomatoes ( heirloom variety) as well. We included few black olives, Smoked cheese cubes ( as we like ) in our preparation too..Freshly made pasta salad tossed with olive oil, black pepper powder and Parmesan cheese was an ultimate dinner for us last night. Of course, we had few pita chips and red bell pepper home made hummus ( which i will post separately ) as sides and our favourite raspberry smoothie for our yummy dessert.

This menu would be best suited for lunch. As we could hardly feel a perfect dinner time during this summer due to very late sunset, we are fine with this dinner menu.!!!!

This is a good and easy option for picnic as its mostly liked by kids. Try this in your home and let me know your feedback.

I will post our favorites "Raspberry Smoothie" and "Red Bell pepper Hummus" in my following posts.

Home grown fresh vegetables except olives and smoked cheese
Ingredients
Tomatoes  - 2 Medium
Fresh Basil Leaves - 2 Cups ( finely crushed )
Red Cherry Tomatoes - 1 cup
Green Bell Pepper -- 1 Medium
Pitted Black Olives cut into halves - 3/4 cup
Salt - To Taste
Black Pepper Powder - As required.
Olive Oil - 1 tbsp
Lemon Juice - 3 tsp
Smoked Cheese cubes - 1/2 cup
Shell Pasta ( Small size ) - 2 cups uncooked.
Parmesan Cheese - To garnish.
Method
  • Wash all the vegetables and keep them ready. Keep all the ingredients handy with a big salad mixing bowl.
  • Cook the shell pasta in a separate container and keep the drained cooked pasta ready. In the mixing bowl, first add a layer of pasta and add the chopped green bell pepper. Follow this method till you add all the bell pepper into the bowl. Mix them gently.
  • Secondly add all the cut tomatoes and the whole cherry tomatoes , crushed basil leaves, cheese cubes and the cut olives.
  • Add Olive oil, required amount of salt,black pepper powder, lemon juice and mix the salad uniformly.
  • Add Parmesan cheese at the end and mix gently. Now its ready to be served in your meal.


Tips / Variations
  • You can add other cheese varieties of your choice in your salad. As we all like smoked cheese cubes, I added them in my salad. You can omit the cheese cubes too if you dont want to include cheese in your salad.
  • I don't prefer to add other vegetables in this version of pasta salad. This is mainly to enjoy the freshness of basil and tomatoes and to retain its original flavour.
  • Try to use small size pasta in your salad as it easily blends with the rest of the ingredients and looks good too in the salad.

Thursday, February 16, 2012

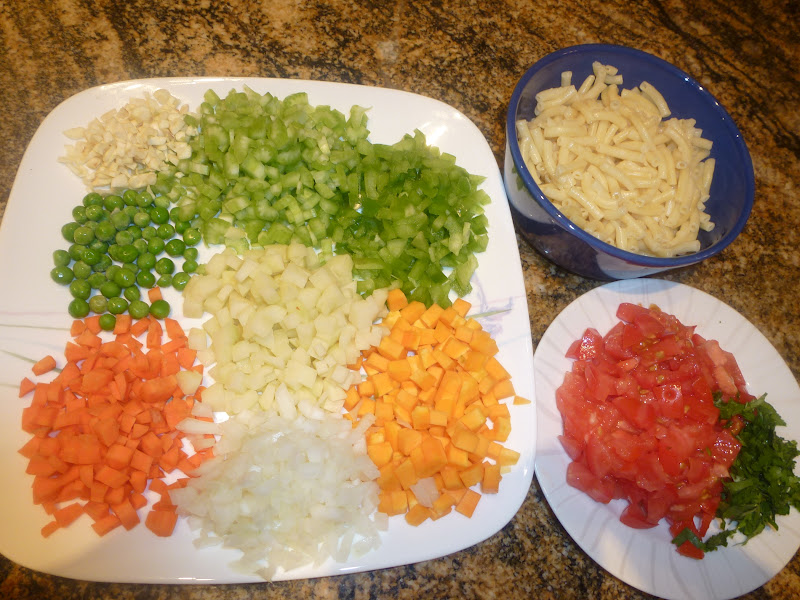
Minestrone Soup


Minestrone Soup, is a thick Italian Soup which is made with vegetable stock, tomatoes, onion, celery, carrots and other vegetables with an addition of some pasta and beans. If you wish to have a wholesome meal at nights, you can very well go for this soup. It fills the stomach and the soup contains everything needed for an one time meal. Happy to mention that some leftover soup was totally enjoyed by my daughter and she requested me to make this often.!!!

Ingredients
Tomato - 3 Big or 32 Oz Tomato Puree Can
Carrot -- 1 Medium
Potato - 1 Medium
Butternut Squash - 1 Cup cubed
Zucchini - 1 Medium
Green Pepper / Capsicum - 1/2 Medium
Celery Sticks - 2
Green Peas - 1 handful
White Onion - 1/2 Medium
Cooked Pasta - 1 Cup ( preferably mini size pasta )
Coriander Leaves or  Parsley  - 2 tbsp
Crushed Garlic - 2 tbsp
White beans / Red Beans cooked - 1/2 cup
Beans - 7 to 8 Medium
Vegetable Stock - 4 to 5 cups
Salt - To Taste
Dried Oregano Seasoning - 1 tsp
Dried Thyme Seasoning - 1 tsp
Dried Basil Seasoning - 1 tsp
Black Pepper Powder - As required
Olive oil - 1 tbsp
Parmesan Romano Cheese - To Garnish on its top before serving


Method
  • Wash and cut all the vegetables into tiny cubes. Keep them ready.
  • In a thick bottomed soup pot or vessel, add the Olive Oil first. When its heated, add the crushed garlic and onion and fry them till golden brown. Then, add the other vegetables and fry them for 2-3 minutes. Cover the lid for a while tilll the tomatoes get mashy and cooked. Cook all the vegetables for another 3-4 minutes on a low flame.
  • Add the vegetable stock now and if required, add some water into the pot and cook everything on a medium flame till the vegetables get cooked completely.
  • Finally add the italian seasoning powder, required amount of salt, black pepper powder into it and allow them to get blended well for few more minutes.
  • Garnish with parmesan cheese and shredded coriander leaves or Parsley ( of your choice ) and serve in a soup bowl. Serve with a side of toasted garlic bread.

Tips / Variations
You can add any seasonal vegetables of your choice while making this soup. I have not added few due to unavailability. In addition to Italian seasoning powder, we can add crushed basil leaves to make it more flavourful.

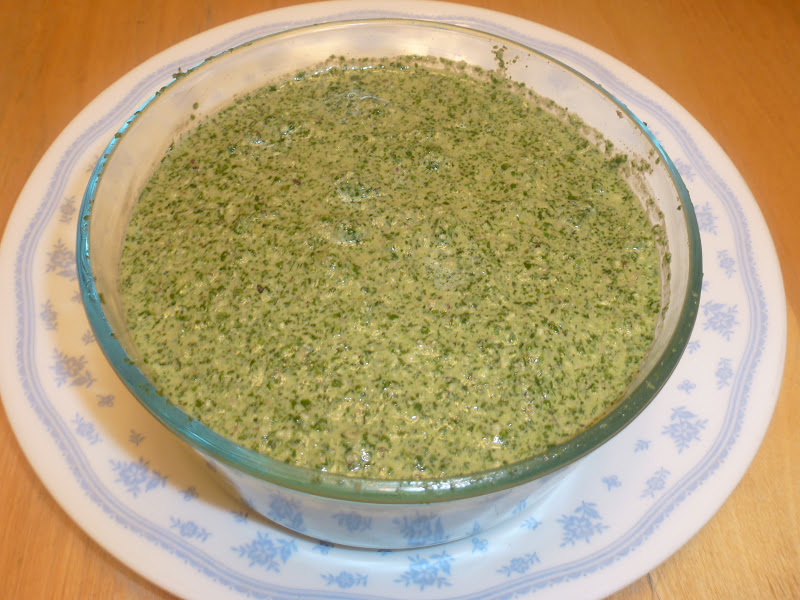
Mint Coriander Pesto

Lots of fresh mint leaves and coriander bunches in the fridge really tempted me to make this Pesto. Though I am a hardcore fan of the regular Basil Pesto, I tried this version and served with a butterfly shaped Farfalle Pasta. It was indeed very tasty with few coats of Olive Oil, Parmesan Cheese on its top. I customized the Pesto and made it little spicy as we wanted. With a side of Minestrone Soup, I tried to bring some Italian Flavour into our Kitchen during dinner last night....

Ingredients
Coriander Leaves Bunch - 1 Big
Mint Leaves - 1 Bunch
Walnuts - 1 Full Handful or 1 Cup
Garlic Pods - 2 or 3
Black Pepper Seeds - 1 tsp
Lemon Juice - 1/4 Cup
Grated Parmesan Cheese - 1 tbsp
Green Chili - 1 Medium
Salt - To Taste
Olive Oil - 1 tbsp

Method
Roast the raw walnuts slightly on medium heat. Switch off the flame. On the heated pan, add the coriander leaves, mint leaves, garlic pods, green chili, black pepper seeds and toast them slightly with the existing heat. Grind them together with all the other ingredients in a mixer grinder coarsely. ( Not a fine paste ). Store it in a glass container as we might use it for a week.

Pasta with Mint Coriander Pesto


Cook the Pasta with little salt and keep them ready. In the cooking pan, add 3 tsp of Olive Oil. When its heated, add the cooked pasta and few spoons of Pesto as required and required amount of salt, black pepper powder and stir them nicely for 2-3 minutes. Add grated Parmesan cheese on its top just before serving on the plate. A healthy, quick meal is fixed and also a good treat for the kids.

Thursday, September 15, 2011

Penne Pasta with fresh tomato, Zuccini and Basil Sauce


Italian cuisine is loved by all in our house and  I make ( or try!!!) Italian pasta with different sauces at home often. Last week, we were loaded with lots of fresh homegrown tomatoes, zucchinis, fresh basil given by our kind neighbour. So, I decided to make a tasty,creamy pasta sauce with these fresh homegrowns. The pasta was delicious with the side of  toasted fresh Jalapeno Olive Oil Bread.  Fresh basil leaves garnishing enhances the taste of the pasta dish definitely.
We could not resist extra servings to our plate and finally the kadai was empty..An excellent Italian dinner at home.!!!(Of course with very less cost).
Ingredients
Penne Pasta - 3 Cups
Fresh Tomatoes -  3 Big ones or 4 or 5 Medium Ones
Fresh Zucchini - 1 Medium
Fresh Basil Leaves Shredded - 1 cup
Garlic Pods - 3
Olive Oil - 3 tbsp
Black Pepper Powder - 2 tsp
Italian Seasoning Powder - 1 teaspoon
Oregano Seasoning Powder - 1\2 teaspoon
Salt - To Taste
Kraft Shredded Cheese ( Italian ) -  2 tbsp
Parmesan Cheese - To Taste
Method
  • Cook the Penne Pasta in a big vessel with little Olive Oil and some salt. Mean time, cut the tomato, zucchini and basil leaves and keep them ready. Cut the Garlic Pods into small pieces and keep it ready.
  • Keep all the ingredients that are required for making this pasta closer before starting the process.
  • Drain the pasta after its cooked and keep it ready.
  • In the kadai, add 2 tbsp of Olive Oil first. When its heated up, add the shredded garlic pieces into it. Fry them for a minute and then add tomatoes to it.
  • After few minutes, add the zucchini pieces to it and add little bit of salt and close the kadai with the lid. Let them cook on a medium flame for few minutes.
  • Then, add black pepper powder and the seasoning powders to the kadai and mix them well.
  • Add half a cup of fresh basil leaves ( shredded ) into the kadai and mix it well.
  • Add the cooked Penne Pasta into the mixture now. Add required amount of salt to the kadai and mix them well.
  • Add 1 tbsp of Olive Oil now and let everything cook on a medium flame for a minute or more.
  • Switch off the flame. Now add the Italian shredded cheese into the pasta and stir it. You can add more black pepper to the pasta if you want it to be more spicy.
  • Now garnish the Penne Pasta with some shredded fresh basil leaves and serve the pasta into a pasta plate.
  • Add a dash of Parmesan Cheese on top of the pasta and serve with a side of some toasted speciality bread.
Variations
I used the Kraft Shredded Cheese Italian Variety for making this pasta. You can use any other good cheese variety of your choice.
You can adjust the spice level with the black pepper powder to your taste.
You can add more Italian cheese if you like a rich creamy pasta.

Tips
Add the cheese after you switch off the flame and just before serving the pasta. Melted Cheese makes the pasta dish creamy just before serving.
Don't forget to garnish the pasta with fresh basil leaves at the end.
Don't over cook the zucchini pieces and also the penne pasta.

Wednesday, April 13, 2011

Pasta in Spinach Almond Gravy

Instead of having the regular food for lunch, I made a healthy, wholesome pasta which is an all time favourite for my kids. With some nutrient vegetables and with a tasty supporting gravy, we can enjoy pasta anytime during the day. It would be heavenly if you have this wholesome pasta with a side of a yummy smoothie.

Pasta in Spinach Almond Gravy with mixed fruit smoothie - Lunch on a spring day.


Ingredients
Mini farfalle Pasta - 2 Cups
Yellow Onion - 1/4 cup
Broccoli florets - 12 small florets
Peas - 1/4 cup
Carrots - 1/4 finely cut into cubes
Olive Oil - 4 tbsp.
Salt - To Taste.
Italian Seasoning Powder - 2 tsp.
Shredded Cheese - 2 tbsp.
Gouda Cheese - 1 tbsp.

For Grinding
Spinach - 1 cup.
Tomato - 1 medium.
Black pepper - 1 1/2 tbsp.
Garlic Pods - 3
Almonds - 8.

Method
1. Cook the pasta with little Olive oil and salt in a separate vessel and keep it ready.
2. Similarly cook the vegetables ( broccoli,peas,carrots ) in microwave separately and keep it ready.
3. In the kadai, on a medium flame, start adding onions, cooked vegetables and saute it in Olive Oil for 2-3 minutes.
4. Add the grounded mixture onto the kadai and add salt, Italian seasoning powder and mix it perfectly.
5. Stir the mixture for another 4-5 minutes till the raw smell of the gravy goes off.
6. Add shredded cheese to the pasta and switch off the stove.
7. On top of the pasta, grate some Gouda cheese if you have and mix it perfectly.
8. While serving, add some Parmesan cheese on top of the pasta.

Variations
You can add more pepper powder if you want it little more spicy. Sometimes, after adding cheese it might reduce the spiciness of the pasta.

LinkWithin

Related Posts Plugin for WordPress, Blogger...