Showing posts with label Rice Varieties. Show all posts

Monday, February 1, 2021

Vankaya Biryani / Brinjal Biryani


During lockdown,  I made Vankaya Biryani ( Brinjal Biryani ) just for using my tender purple brinjals in a different form for lunch. Whenever I get baby brinjals from the store, either I make brinjal gravy or curry. Big brinjals would be mostly consumed for making Baigan bhartha, Brinjal Thogayal, baba ghanoush, kathirikai Gothsu. Our foodie family totally love this biryani. Flavor of this biryani is so unique due to the addition of baby brinjals. Try this only with fresh baby brinjals as the taste is totally determined by the freshness of the brinjals. We can enjoy this hot biryani with a side of mixed veg raita. This brinjal biryani is an excellent alternative to our regular vegetable biryani. Next time, if you have abundant baby brinjals, Vankaya biryani should hit in your mind.!!!

Ingredients

Baby Brinjals ( Purple ) --  12 to 15
Red Onion - 2 Medium or 1 big one
Green Chili - 5
Tomato - 1 Medium
Basmati Rice - 2 Cups
Salt - As Desired
Ghee - 1 tbsp.
Cooking Oil - 1 tbsp.
Ginger garlic Paste - 1/2 tbsp.
Turmeric Powder - 1 tsp
Chili Powder - 1 tsp
Coriander Powder - 1/2 tbsp.
Biryani Masala Powder - 1 tbsp.
Water - 3.75 cups of water.
Lemon Juice - 1 tsp
Roasted Cashew nuts - To Garnish
Coriander Leaves - To Garnish

Masala Ingredients - For First Tadka 

Cinnamon Stick - 2 or 3
Marathi Moggu - 1
Lavang - 3 or 4
Sombhu / Fennel Seeds - 1 tsp
Jeera / Cumin Seeds - 1 tsp
Kali jeera - 1 tsp
Cardamom - 2
Bay Leaves - 2 or 3

Procedure 


Wash the brinjals and slit them into four keeping the stem intact and keep it ready.  Cut tomato, onions, green chilies and keep it aside.

Cook the Basmati Rice Separately
Soak the basmati rice and keep it ready. Cook the basmati rice separately in a vessel or pressure cooker along with a cinnamon stick, 2 lavang, 1 bay leaf, 1 tsp of ghee. Add 3.5 cups of water for 2 cups of basmati rice. Basmati rice should be cooked three fourth and not mushy.  

While the rice is getting cooked, finish the remaining process as below.

Brinjal Cooking Process
  • Take a wide deep vessel to prepare the biryani. Add 1 tbsp. of ghee and 1/2 tbsp. of oil first. 
  • Add all the masala ingredients and fry them little on medium heat. Then add the red onion slices into the vessel. Fry them till it turns light golden brown and not burnt. Add the ginger garlic taste then and fry them till the raw smell goes away.
  • Add the tomato, green chili into the vessel now and let it cook till they get mushy.
  • Add the slit brinjals into the vessel now along with the remaining oil.  Fry the brinjals on medium heat for 2 to 3 minutes.
  • Add all the powders required for making the biryani. Add salt just enough for the brinjals sitting in the vessel. Don't add all the salt.
  • Mix them thoroughly with the brinjals. Cover the lid and allow them to get cooked on medium heat till the brinjals get cooked completely.
  • When its done, layer the vessel with the cooked basmati rice and the cooked brinjal masala. 
  • Press them and cover the lid. On a low flame, let the biryani cook for 5 to 6 minutes.
  • After its done, switch off the flame. Add a tsp of lemon juice and mix it. 
  • Garnish the biryani with coriander leaves and roasted cashew nuts.
  • Enjoy with a side of mixed veg raita. 

Tips
  • Good quality basmati rice to get a rich flavor.
  • Small baby brinjals should be fresh.
  • Brinjals should be well coated with all the masala powders and get cooked.
  • Keeping the layered biryani on low flame will give a well cooked biryani with tiny light crispy brinjals.
  • You can add some fried onions on its top just before serving.

Friday, May 24, 2013

Mamidikaya Pulihora / Mango Rice / Mangai Puliodarai


Made this Mango / Mamidikaya Pulihora on Ugadi day 2013 along with other delicacies. Tangy taste of the raw mango along with the spices made this Pulihora a divine treat. This is very much suited for people who cannot have tamarind for some reasons. Simpler process and less preparation time makes it more easier especially during festive time as you will be focusing on many festive treats at the same time. Mango rice along with just appalams / papads  is a good lunch combo on normal days.
Ingredients
Raw Mango - 1
Sona Masoori Rice - 1.5 cup uncooked.
Green Chillies - 2 Big
Dry Red chillies - 2 Big
Mustard Seeds - 2 tsp
Urad Dal / Ulutham Paruppu - 2 tsp
Cumin Seeds / Jeera - 1 tsp
Channa Dal / Kadalai Paruppu - 2 tsp
Ground nuts / Peanuts - 1 Full Handful
Curry Leaves - 1 stem.
Hing / Asafoetida - 1 Dash
Turmeric Powder - 2 tsp
Spice Powder - 1 tbsp ( Dry Roast 1 tsp of coriander seeds, 1/2 tbsp of white sesame seeds, 1 dry red chili and grind them to a fine powder )
Salt - As required
Sesame Oil - 1 tbsp 
Method
  • Cook the Sona Masoori and keep ready. Peel the skin off and grate the raw mango and keep ready.
  • Make the spice powder as described above and keep ready.
  • In a big cooking pan, add oil first and finish the tempering process by adding the above mentioned ingredients. 
  • Add the turmeric powder, grated raw mango into the pan and fry for a minute.
  • Add the cooked rice, spice powders, salt into the pan and mix them thoroughly. Let the Mamidikaya Pulihora remains for atleast an hour before you actually serve. In this way, the tangyness of the raw mango and spiciness from the powders will get into the cooked rice which in turn makes the Pulihora even more tastier.
  • Enjoy with a side of Appalams/ Papads, Vadams or crispy vada or Potato fry.

Tips / Variations 
  • Reduce the amount of the spice powder if the raw mango is not too tangy. Also, the amount of spice powder  can be decided according to your taste buds.
  • Cook the rice to the desired level which is the key point while making any mixed rice.

Tuesday, August 7, 2012

Mushroom Soy Chunks Biryani / Protein Rich Biryani / Soy Chunks Mushroom Biryani


Both Mushrooms and Soy Chunks are powerhouse of good protein, their individual powers vary. Mushrooms are used in many cuisines in the world now due to its flavour and health benefits. Its an idealistic food option for many weight watchers due to their high water content and low calorie value. They are an excellent source of Potassium and helps in reducing blood pressure, boosts the immune system, help prevent cancer. Soy Chunks are vegetable protein which contain no fat when compared to animal protein.Also they are rich in fiber, Omega 3 fatty acids, iron and calcium. Nowadays, they are widely added in the preparation of many food items. Though I add Soy Chunks in many of my recipes, the combination of Mushroom and Soy Chunks is unbeatable due to its exclusive aroma. This biryani is a very good option for parties, lunch with a side of a simple raita. Try this out in your kitchen and enjoy.
Ingredients
Basmati Rice - 2 Cups
Red Onion Sliced - 1/2 Cup
Mushrooms Sliced - 2 Cups
Soy Chunks - 1 Cup
Peas - 1 Handful
Salt - To Taste
Oil - 1 tbsp
Melted Ghee - 3 tsp ( For Good Flavour )
Bay Leaves - 3 or 4
Ginger Garlic Paste - 1/2 tbsp
Garam Masala Powder - 1 tsp
Green Chillies shredded - 1
Green chillies slit - 1
Red Chilli Powder - 1 tsp
For Tadka / Tempering :
Cumin Seeds / Jeera - 2 tsp
Cinnamon Sticks - 2-3 Medium
Lavang / Cloves - 5 or 6
Cardamom - 3
Somfu / Fennel Seeds - 1 tsp
Star Anise - A small piece


Method
  • Soak the Basmati Rice in water. Meantime, cut the onion, mushroom and keep them ready.
  • In the cooking pan / vessel, add oil and ghee together. Finish the tempering process by adding the ingredients mentioned as above.
  • Once its done, add the ginger garlic paste on medium flame. Fry them till the raw smell completely takes off.
  • Fry the red onion slices next till they become translucent. Add the green chillies,mushrooms, soy chunks and peas next to the cooking pan and fry them for 4-5 minutes.
  • Add the powders into the pan now and stir them well. Add the sona masoori rice which is completely drained from water into the cooking vessel and fry them for a minute. Add the Bay leaves too into the pan now.
  • Add 3.75 cups of water and required amount of salt into the cooking pan and allow them to cook on a low flame.
  • Once its done, serve this nutritious, protein rich biryani loaded with flavours with a side of cool raita and your favourite side dish.

Thursday, June 21, 2012

Vegetable Kichidi / Veg Khichidi / Khichidi / Kichidi - North Indian Style

Its really difficult to arrive at a conclusion especially when we are very tired and exhausted by end of the day. And when it comes to making a quick dinner with less time, its much more difficult to finalise on one item. My wish is to include good amount of veggies in any meal, so there comes the one pot Kichidi for my rescue.  With a side of some cool raita and crunchy potato chips ( not for me!!!) on its side, this veg Kichidi would be delicious and healthy. Though we make Bisibelebath, Vegetable pongal in South Indian flavour and taste, this vegetable Kichidi is made in a north indian style. And I love all the versions and each version is unique in its own taste and preparation. This Kichidi is so tastier with all the goodness of vegetables, lentil and the process is also simpler and quicker.
Ingredients
Sona Masoori Rice - 1 Cup
Toor Dal / Thuvaram Paruppu / Kandhi Pappu - 1/2 Cup
Hing / Asafoetida - 1 Dash
Turmeric Powder - 1 tsp
Garam Masala Powder - 1 tsp
Dhana Jeera Powder / Coriander Cumin Powder - 1/2 tsp
Cumin Seeds / Jeera - 1 tsp
Dry Red Chillies - 2 Medium
Crushed Ginger Paste - 1 tsp
Cinnamon Stick - 1
Cloves - 2
Bay Leaves - 1 or 2
Salt - To Taste
Sugar - 1/4 tsp
Ripe Tomato - 2 Medium
Onion - 1/2 cup nicely shredded
Cut Vegetables - 1 Cup or 1.5 cup ( Carrots, Peas, Potato, Brinjal, Beans, Chayote or Chow Chow or any veggies of your choice ).
Oil - 1 tbsp
Ghee - 2 tsp ( Optional )
Procedure
  • In a pressure cooker, on a medium flame, first add oil. When its heated, add Hing, Mustard Seeds, Cumin Seeds, Cinnamon Stick, Cloves, Dry red chillies, Bay Leaves in succession.
  • When the tempering is done, add the onion pieces next and fry them till golden brown.
  • Next all the tomato pieces into the cooker and fry them for a minute. Add all the powders into the cooker along with the cut vegetables, ginger paste into the vessel. Mix them well and fry for another 2 minutes.
  • Then add the washed toor dal into the vessel and fry them for a minute. Add a cup of water and cover the cooker and allow them to boil for another 4-5 minutes till the toor dal gets half cooked.
  • Open the lid and add the sona masoori rice, salt and sugar. Add four cups of water again and cover the cooker.
  • Cook the Kichidi for 3 whistles and siwtch off the flame. After you open the cooker, add 2 tsp of ghee on its top and serve this with raita..
Tips
If  the Kichidi is made for a party or special occasion, add few ghee roasted cashew nuts on its top just before serving.

Friday, March 2, 2012

Mint Pulav/ Mint Pulao / Pudhina Pulav/ Pudina Pulav

Mint Leaves also called as "Pudina" is one of the oldest medicinal herb grown around the world. Its widely used in many range of dishes in Indian Cuisine and its an essential ingredient in many food items. Looking at its medicinal benefits, mint is the best cleanser for the entire body and blood. Crushed mint leaves whiten the teeth and fight against bad breath. Though we regularly stock atleast a bunch of Mint Leaves in the kitchen, we mostly exhaust the bunch by adding them in all of our regular food items.  This time, I exclusively got 2 additional bunches mainly to make my favorite Mint Pulao, which i had forgotten for a while. Nice Aroma was emanating from the Kitchen while making the Mint Pulao, which in turn triggered the tongue to taste it immediately...Definitely an awesome pick for any gathering, parties..
Photo Courtesy by Wiki
Ingredients
Basmati Rice - 3 Cups
Mint Leaves Bunch / Pudina Bunch - 2 Big or 3 Medium
Green Chillies - 5 Big
Oil - 2 tbsp
Melted Butter or Ghee - 3 tsp
Salt - To Taste
Sugar - 1/2 tsp
Red Onion shredded - 1/2 cup
Ginger Garlic Paste - 1 tbsp
Cinnamon Sticks - 2 Big
Lavang/ Cloves - 5 or 6
Marathi Moggu - 1
Bay Leaves - 4 or 5
Cardamom Seeds / Elachi - 4 or 5
Cashew Nuts - 1 Handful
Red Potato / Golden Potato cubes - 1 Cup
Method
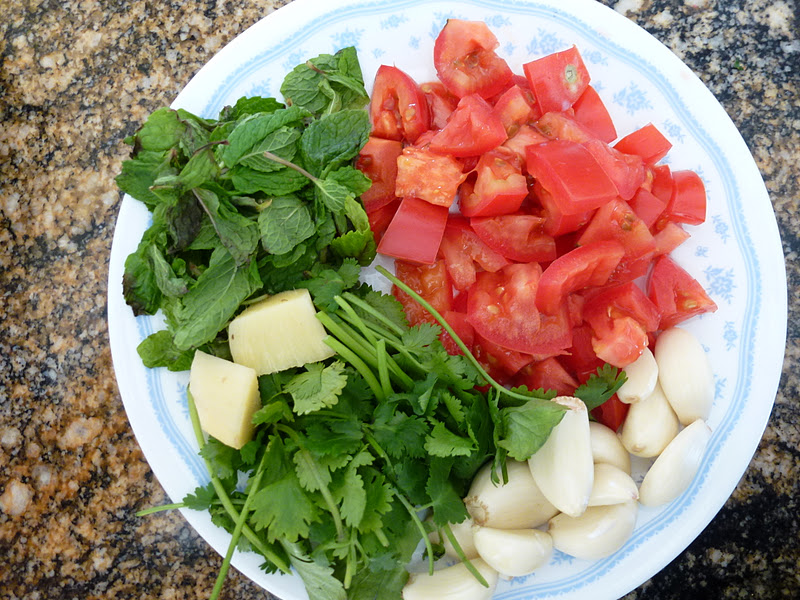
  1. Wash the Pudina leaves and make a smooth paste of Pudina and green chillies using a mixer grinder and keep them ready. Soak the Basmati Rice in water while starting the process.
  2. In the big cooking pan ( I used a big non-stick pan), add ghee and oil first. When its heated, add the cinnamon stick, lavang, marathi moggu, cardamom seeds and fry them for a minute.
  3. Add the ginger garlic paste next and fry them till the raw smell goes off. Next add the onions and fry them to golden brown. After that, add the grounded paste of mint leaves and green chillies to the pan and fry them for 2-3 minutes. A nice aroma would start filling the kitchen now...
  4. Finally add the cashew nuts, potato cubes, bay leaves to the contents and fry them again for a minute.
  5. Add 6 cups of water to the cooking pan / vessel, required amount of salt, 1/2 tsp of sugar and mix them well. Allow them to cook on  a low flame directly. When its completely cooked, the cooked mint rice would nicely come up till the rim of the vessel.
  6. Switch off the flame and allow them to settle down for a while.
  7. Serve this with a side of any raita and enjoy...A healthy mixed rice treat with excellent aroma for us.!!!
Tips / Variations
If its for a special party, add little more ghee and make it rich. Instead of cooking directly on the vessel, you can transfer the contents to an electric rice cooker and cook them outside too...

Tuesday, February 28, 2012

Tomato Puliogare / Thakkali Puliodharai / Tomato Puliodarai

 Puliodarai / Puliogare is an authentic south indian rice variety which is generally made during festivals or on special occasions. Puliodarai is mostly liked by all and we love to taste this tangy rice during odd days also. As we all know that puliogare is generally made with thick tamarind paste along with other ingredients, I wish to try making "Tomato Puliogare" by adopting the method of making Puliogare with thickened tomato gravy instead of  tamarind gravy/paste. And I named my yummy, tangy Puliodarai as "Tomato Puliodarai". If you have "sour" tomatoes, then the taste would be heavenly. With an addition of few drops of Gingelly oil, the flavour of Puliodarai would be upgraded. With good accompaniments like Appalam, Vadams, or just with Potato chips, we can enjoy the Tomato Puliodarai at any time of the day. A good lunch box recipe, of course...
Ingredients
Tomato - 10 to 12 Medium size
Salt - To Taste
Gingelly Oil - 3 tbsp
Oil - 1 tbsp
Basmati Rice / Sona Masoori Rice - 2.5 Cups
Hing/Asafoetida - 1 Dash
Mustard Seeds - 1 tbsp
Cumin Seeds - 1 tsp
Dry Red Chillies - 5
Urad Dal /Minna Pappu/Ulutham Paruppu -  1 tbsp
Channa Dal/Senaga Pappu/Kadalai Paruppu - 1 tbsp
Ground nuts / Peanuts - 2 handful ( Adjust according to your taste )
Curry Leaves - 2 stems
Jaggery - 1 tsp
For the powder
Channa Dal / Senaga Pappu / Kadalai Paruppu - 1.5 tbsp
Urad Dal / Ulutham Paruppu / Minapa Pappu - 1 tbsp
Vendhayam / Fenugreek seeds / Methi Seeds - 1 tsp
Coriander Seeds - 3 tsp
Dry Red chillies - 5 or 6 big
Method
  1. Wash the tomatoes and chop them ready. In the frying pan, add a tsp of oil and fry all the ingredients for making the spice powder till a nice aroma emanates. Then, grind them nicely using a mixer grinder and keep the spice powder ready.
  2. Cook the Basmati Rice / Sona Masoori Rice and keep it ready. For 1 cup of basmati rice add 2 cups of water. For 1 cup of Sona Masoori rice, add 2.5 cups of water. But this ratio totally depends on the type and age of the rice.
  3. In a separate frying pan, add a tbsp of oil and when its heated, add the chopped tomatoes and a pinch of salt and fry them till they become mashy. Make a thick paste of this tomato gravy and keep it ready.
  4. In a big frying pan, add the remaining oil and start adding the ingredients for the tempering process like Hing, Mustard seeds, Urad Dal, Channa Dal, Ground nuts, Dry red chillies, curry leaves. Roast them till they turn golden brown.
  5. Then, add the thicken tomato paste and the spice powder to the pan. Mix them well and fry them for about 2-3 minutes till they all blend together.
  6. Add the cooked rice to the pan and spread them using a spatula. Add the Gingelly Oil, required amount of salt to the rice and mix them well with the spicy paste.
  7. Leave the rice in the pan as it is for couple of minutes and transfer the rice to the serving container.
  8. Tomato Puliodarai is now ready to enjoy with a side of few papads and crunchy vadas.
Tips / Variations 
  • Instead of directly adding the chopped tomatoes, you can add the crushed tomato puree into the frying pan while making the thick tomato paste.
  • You can add cashew nuts too while making this Puliodarai for a special occasion.
  • Try not to forget the Gingelly Oil as its the main taste maker in Puliodarai.
  • Cook the rice to the right consistency so that its not sticky or pasty. Rice should look separate but cooked.

Saturday, February 11, 2012

Tomato Pulav / Tomato Rice - Type 1

Tomato Pulav is one of  the easiest option for a quick lunch. It goes well with a simple onion raita. Though there are different versions of Tomato rice, this is the first version of Tomato Rice I am posting...Will post my different versions I tried earlier in due course. When I talk about this tomato rice, I first get into my hostel days..They used to serve a watery white chutney for the tomato rice. Till today, I am unable to find out what ingredients they would have used for making the chutney.But still I remember the taste of the Tomato rice given in the hostel. Though we used to criticize the hostel food a lot during that time, those good memories and the taste still goes through the mind often and fills the heart happily...
Ingredients
Ripe Tomatoes - 2 Big
Green Chillies - 3 Big
Oil - 2 tbsp
Basmati Rice - 1.5 Cup
Salt - To Taste
Fennel Seeds / Sombu - 1 tsp
Cinnamon Sticks - 2
Lavang / Cloves - 4 or 5
Bay Leaves - 3
Garlic Paste or crushed garlic - 2 tbsp
Turmeric Powder - 1 tsp
Method
  • Cut the tomatoes, green chillies and soak the basmati rice in water. Keep all the ingredients handy.
  • In a big non-stick cooking vessel, add oil first. When its heated, add sombu, pattai/cinnamon sticks, lavang followed by garlic paste, green chillies and fry them well till the rawness completely takes off.
  • Add the tomatoes, turmeric powder into the vessel and leave it for a minute.
  • When its soggy, slightly mash them and add the basmati rice and fry for another minute.
  • Add required amount of salt, bay leaves and 3 cups of water into the vessel.
  • Allow them to cook on a low flame. When the pulav is done completely, switch off the flame.
  • Serve this tomato pulav with a cup of Onion raita / cucumber raita.

Monday, January 23, 2012

Green Capsicum Rice / Capsicum Rice

Fresh Green Capsicums sitting on the fridge was really tempting me since two days..Felt like making a spicy mixed rice for lunch as the weather was too cold and snowing..a bit. Definitely no mood to make an elaborate meal. Three fresh capsicums, little red onion and a tomato was quite enough to make this spicy rice. With a side of fresh raita or just chips or papad, this rice tastes good. We can confidently deviate from our regular menu and try this out for lunch or dinner...Also, its a good Lunchbox menu item for all ages. Try this yummy rice and let me know your feedback...
Ingredients
Fresh Green Capsicums - 2 Big or 3 Medium
Red Onion Shredded - 1/2 cup
Ripe Tomato - 1 Big
Oil - 2 tbsp
Hing/Asafoetida - 1 Dash
Mustard Seeds - 2 tsp
Cumin Seeds - 1 tsp
Urad Dal - 1 tsp
Channa Dal - 2 tsp
Curry Leaves - 1 stem
Groundnuts / Peanuts - 1 Handful
Turmeric Powder - 3 tsp
Sugar - 1 Small Pinch
Salt - To Taste
Basmati Rice - 1.5 cups
For the Grounded Powder
Channa Dal / Senaga Pappu / Kadalai Paruppu - 2 tbsp
Urad Dal / Minna Pappu / Ulutham Paruppu - 1 tbsp
Coriander Seeds - 1 tbsp
Dry Red Chillies - 4 to 5 ( Depending on your taste buds)
Dry Coconut Powder - 1 tbsp
Cinnamon Sticks - 1 medium
Black Pepper Seeds - 5 or 6
Method
  1. Wash and cook the Basmati Rice separately and keep it ready.
  2. Meantime, cut all the vegetables into smaller size and keep them ready.
  3. Roast the ingredients for making the grounded powder and grind them after they get cooled and keep the grounded powder also ready.
  4. In the cooking pan, add oil first. When its heated, add Hing, Mustard Seeds, channa dal, urad dal, groundnuts, curry leaves and fry them till they all get roasted. Do this process on a low flame and care to see that the dals and groundnuts don't turn black.
  5. After this, add shredded onion pieces into the pan and fry them for a minute with a pinch of little salt.
  6. Then, add the finely sliced green capsicums into the pan and allow them to cook for two minutes with the lid closed. Add a pinch of sugar and fry them for two minutes.
  7. Then add the tomato pieces and fry them till they get mashed.
  8. Finally add the powder and fry them well with all other contents for nearly 3-4 minutes.
  9. Add the cooked rice into the cooking pan now and add required amount of salt into the pan. Mix everything together so that the rice get coated well.
  10. Close the lid and allow the contents to get cooked on a very low flame for another 3-4 minutes.
  11. Switch off the flame. Garnish with fresh coriander leaves and serve this hot spicy rice with some raita or chips, papad.
Tips/Variations
  1. You can adjust the spice level while grinding the powder according to your taste buds.
  2. I specifically add at least one tomato while making this rice in order to get a little tangy taste and to obtain some moistness in the rice. Without tomato, the rice turned out to be little dry and the taste was also not satisfactory for me when I made it earlier. You can try with/ without tomato and decide later.
  3. Instead of dry coconut powder, you can even add some fresh coconut flakes which in turn would enhance the flavour and taste.

Tuesday, December 13, 2011

Vegetable Biryani - Hotel Style / Vegetable Biriyani - Hotel Style / Veg Biryani - Hotel Style


Vegetable biryani served in hotels have a very different taste all the time for me. I tried several times to get to the right version of the Hotel Biryani but somehow it was failing all the times. Finally I got the secret recipe from my friend aunt in Bangalore couple of years ago and she explained to me in detail how they would do that biryani in large and small quantities in restaurants. From that time, I could feel confident that my biryani almost tasted like the Hotel ones. I tried the recipe several times at home and it did not disappoint me at all. This is the first version of the vegetable biryani which I learnt in my life and all other rice varieties were later tried by me, learnt from others..in the recent years.
I use our regular rice for making this biryani but not the Basmati Rice mainly to resemble the "Kadai Biryani".
Ingredients
For grinding:
Tomato - 2 Medium or 1 Big ripe
Pudina Leaves/Mint Leaves - 5-6 stems
Ginger - 2 small pieces
Coriander Leaves - 1 Cup
Garlic Pods - 9-10.
Red Onion cut - 1/2 cup
Green Chillies - 8 or 9
Sombu / Fennel Seeds - 1 tsp
Cinnamon Sticks / Pattai - 1 Stick Medium
Krambhu / Lavang / Cloves - 4 or 5
Cashew Nuts - 1 tbsp
Marathi Moggu - 1 tiny piece
Biryani Flower - 1 tsp
In a big non stick pan, add 1 tsp of ghee and 1 tbsp of oil and fry the above mentioned ingredients for few minutes and make a thick paste of it using a mixer grinder and keep it ready.
For the Biryani Main Process :
Red Onion - 1 Medium
Capsicum - 1/2 finely shredded or cut
Carrots - 1 medium
Beans - 15 to 20 cut into finger size
Potato - 1 Big
Peas - 1 Cup
Mint Leaves / Pudina Leaves - 2 tsp
Cinnamon Stick - 1
Marathi Moggu - 1
Sombhu / Fennel Seeds - 2 tsp
Kala Jeera - 1 tsp
Biryani Leaves - 3 or 4
Thick Coconut Milk - 1 Big Tumbler / Glass
Sona Masoori Rice - 2 Cups
Salt - To Taste
Red Chilli Powder - 1 tsp
Coriander Powder - 1 tsp
Turmeric Powder - 2 tsp
Ghee or Butter - 2 tsp
Oil - 2 tbsp 
Actual Preparation Process :

Make the Gravy as mentioned above.
Extract the Coconut Milk and keep it ready.
Soak the Rice in water till you switch on the flame.
Cut the vegetables and keep the other ingredients as mentioned above and keep them handy.

  1. In a non-stick vessel or in a big pressure cooker, add the ghee / butter and oil first.
  2. When they get heated, add the masala spices first followed by Onion and capsicum. Add  a pinch of salt and fry them till golden brown.
  3. Add the grounded paste ( gravy ) into the cooker and fry patiently on low flame till the raw smell is completely gone.
  4. Add the cut vegetables into the cooker now and fry them for a minute.
  5. Add all the powders into the cooker at this stage and fry everything well for another 2 minutes.
  6. Drain all the water from the rice and add them to the cooker and fry it along with all other ingredients till the rice get dried and slightly fried.
  7. For 2 cups of Sona Masoori Rice, add a cup of thick coconut milk and a cup of little watery coconut milk and 2.5 cups of water.
  8. Mix them well and add required amount of salt into the cooker and allow them to cook for just 2 whistles on a medium flame.
  9. If you cook the biryani in a Non-stick vessel, then close the lid and allow them to cook on a low flame till the biryani is completely cooked.
  10. Switch off the flame after the biryani is done in both the cases and allow the cooker to get cool down completely.
  11. After 10-15 minutes, slowly open the cooker and check the Biryani consistency. Keep the lid open for few minutes.
  12. Add some fried bread / bun pieces ( if you like ) into the biryani and serve it with cool onion raita.
  13. You will definitely enjoy this version of the biryani though it might take little more time.
  14. Its a complete meal and an excellent choice for weekend lunch.
Tips / Variations
Don't add more water as it makes the Biryani Pasty.
Don't reduce the spice level in this version, especially don't reduce the green chillies at all. Otherwise, the biryani would be sweeter due to the addition of coconut milk. ( My experience!!!) 

Wednesday, December 7, 2011

Vegetable Pongal / Veg Bath - Quick and Simple!!!


Really difficult to decide on a menu to cook on an ice cold night with temperature in minus. Our mind automatically think about some hot, spicy food at that time. As I had very less time for dinner, I needed something which satisfy the mind and stomach and at the same time, it needs to be done in just 15 minutes. In this scenario, the most quickest and easiest Veg Bath or Veg Pongal came for the rescue. Its a simple one pot complete meal with all nutrients in it. No extra grinding is required in this process.
Ingredients
Sona Masoori Rice - 1 Cup
Toor Dal / Thuvaram Paruppu / Kandhi Pappu - 1/4 cup
Turmeric Powder - 1 tsp
Sambar Powder - 2 tbsp
Hing / Asafoetida - 1 Dash
Salt - To Taste
Jaggery - 1 small piece
Red Ripe Tomatoes - 2 Big
Carrot - 1 Big
Beans - 8
Potato - 1 Medium
Peas - Handful
Brinjal - 2 small or 1 Medium
Chayote / Chow Chow - 1 small or 1/2 medium
Red Onion shredded - 1/4 cup
Peanuts / Groundnuts - 1 tbsp ( optional )
Tempering
Oil - 1 tbsp
Mustard Seeds - 2 tsp
Cumin Seeds - 1 tsp
Dry Red chillies - 2
Curry leaves - 1 stem
Urad Dal / Ulutham Paruppu / Minna pappu - 1 tsp
Cashew Nuts - 1 tbsp ( optional )

Method
  1. Wash and cut the vegetables into small uniform portions and keep them ready.
  2. Wash the  Toor Dal and put them into the pressure cooker first. Add the turmeric powder and little bit of water and allow the Dal to boil with the lid open for 3-4 minutes.
  3. Meantime wash the rice and add it to the Pressure cooker along with all other powders, vegetables, salt and Jaggery.
  4. Add 4 cups of water to the Pressure cooker and cook the pongal for 3-4 whistles.
  5. After the Pressure cooker gets cooled completely, add the tadka to the vegetable Pongal and serve it hot with a side of Raita or Papads/Appalams.  
  6. Before serving to kids, add some ghee on top of the Veg Bath / Pongal to make more delicious.

Tuesday, December 6, 2011

Andhra Puliyogare \ Puliyodarai in Andhra Style\ Andhra Style Tamarind Rice


Puliogare \ Puliodarai \ Tamarind Rice is one of the traditional south Indian rice variety which is made during special festivals or occasions.   Every tamarind rice variety in South India is unique in its own way. In Andhra style puliogare, its flavoured with either roasted sesame seeds powder or mustard seeds powder which makes the rice so... delicious and special. Generally, the leftover tamarind rice tastes very yummy on the second day as the rice would set perfectly with the tamarind extract and spices. So, I don't remember having an excess tamarind rice or wasted tamarind rice in our house. Everything will get over.!!!!
Ingredients
Sona Masoori Rice - 2 Cups
Thick Tamarind Extract - 3-4 Cups
Salt - To Taste
Oil - 2 tbsp
Gingelly Oil - 1 tbsp
Hing/Asafoetida - 1 Dash
Mustard Powder -  2 tbsp
Mustard Seeds - 1 tbsp
Cumin Seeds - 1 tsp
Dry Red Chillies - 5
Green Chillies - 4 or 5
Ginger - 1.5 tbsp ( cut into small pieces or shredded )
Urad Dal /Minna Pappu/Ulutham Paruppu -  4 tsp
Channa Dal/Senaga Pappu/Kadalai Paruppu - 4 tsp
Ground nuts / Peanuts - 3 tbsp
Curry Leaves - 3 stems
Jaggery - 1 small piece

Method

Tamarind Paste :
     Soak a ball of raw tamarind in warm water for about 20 - 30 minutes. Then, make a thick tamarind extract out of that. Also, extract all the tamarind juice from the soaked tamarind and keep it aside. In a small round frying pan, add 1 tbsp of oil and little gingelly oil, hing, little Jaggery and the extracted tamarind extract totally into it. Allow them to boil and cook for 15-20 minutes till you get the thick tamarind paste. You might notice oil oozing out of the sides considerably which denotes that the extracting process is done.
Cook Sona Masoori Rice:
Cook the Sona Masoori Rice and transfer them into a big tray or big round vessel where you are going to make the tamarind rice. Just drop 2 tsp of oil on top of the rice and keep it open.
Mustard Powder:
Roast the Mustard seeds in a frying pan for few seconds and then grind them into a fine powder. Keep the Mustard powder also ready.
Tempering / Tadka :
In a frying pan, add remaining oil. When it gets heated, add Hing, Mustard Seeds, Cumin Seeds first. When it sputters, add the groundnuts / peanuts into the pan and fry them for a minute. Then, add the channa dal, urad dal, dry red chilli, curry leaves, green chillies, crushed ginger into the oil and fry them till they all get roasted considerably but not black or dark brown. Add turmeric powder into it and switch off the flame.
Mixing Process:
Transfer the contents from the tadka pan on top of the rice spread on the tray / vessel. Mix them once with a flat big spoon. Add the tamarind extract slowly and keep mixing it with the rice. Add required amount of salt, gingelly oil, mustard powder into the mixing tray / vessel. Mix everything upside down till everything gets mixed uniformly. Add some more tamarind extract if you find the thickness and sourness is not enough. If its for a prasadam or Neivedhyam, then its ruled out. We would be discovering the missing tastes after its being offered to God, and we could later add or modify the missing tastes. Generally this version of tamarind rice tastes heavenly after 2-3 hours as all the spices set with the tamarind extract and rice perfectly. Enjoy this tamarind rice with a side of papads and appalams.
Variations / Tips
You can add some cashew nuts too to this tamarind rice if you are making it for a party or a very special occasion.
You can add another 1 or 2 tsp of oil / gingelly oil if you like..
Dont overcook the rice at all and if the Puliogare is made with sticky or pasty rice, then our efforts are waste and it wont look good and taste good too...
Dont forget to add the Jaggery while making this Puliogare.

Friday, October 28, 2011

Curd Rice / Perugannam / Dhadhojanam


Without curd rice at the end, any good meal is not complete totally..In South India, curd rice is mostly eaten at the end in any regular meals or in any special occasion thalis. With a side of a spicy pickle, it concludes the meal with greater satisfaction. Taste of the curd rice totally depends on the curd culture, sourness and the rice texture. To me, preparing curd rice is a special art as I have tasted the best curd rice as well as the worst curd rice in my life. I am just writing down the method I follow for making our traditional Dadhojanam ( curd rice ).
Ingredients
Cooked rice - 1 Cup
Salt - To Taste
Pomegranate Seeds - 2 tbsp
Coriander Leaves - To Garnish
Fresh Curd - 2 -3 cups.
Milk - As required. ( Optional ).
Grated Ginger - 2 tsp
For Tempering
Oil - 3 tsp
Hing / Asafoetida - 1 Dash
Mustard Seeds - 3 tsp
Urad Dal / Ulutham Paruppu / Mina Pappu - 1 tsp
Dry Red Chillies - 2
Green Chillies - 2 Small
Curry Leaves - 4 or 5
Channa Dal - 1 tsp
Method
  • Cook the rice in the pressure cooker for 4-5 whistles. Let the cooked rice be well cooked but not pasty. Open the rice vessel after its cooked and transfer the rice into a big mixing bowl or vessel.
  • Finish the tempering by adding all the ingredients and pour them over the cooked rice.
  • Add grated ginger, little coriander leaves, salt into the mixing bowl. Mix everything nicely and slightly mash the rice while mixing. Now the rice would be loaded with the flavours of Hing, Ginger and other ingredients.
  • Now slowly add the fresh curd into the mixing bowl and and mix it thoroughly with the rice. Keep adding curd to the rice till you get the desired consistency.
  • Add little milk to the curd rice if the curd is little sour. Garnish with remaining coriander leaves and now the curd rice is ready with lots of freshness, flavour and taste.
Tips
  • Don't cook the rice like how we make for Puliogare. The rice should be well cooked and little mashy.
  • Try to add fresh curd only if you are going to eat the curd rice immediately. If you are making it for lunch, then try to use as much luke warm milk while mixing and add 2 tbsp of curd only and keep it. During lunch, it will be all set and the curd rice wont be sour at all. Of course, little sourness would give a good punch to the curd rice.
Variations
  • You can add grated carrots, finely cut onions, cucumbers into the curd rice if you wish.
  • Also, you can add tiny pieces of cashew nuts as well.

Monday, October 17, 2011

Coriander Pulav / Kothamalli Pulav / Kothimeera Pulav / Coriander Pulao


Freshness of coriander leaves always add taste and flavour to any food we make. This herb is not only used  for garnishing and its widely used in Indian cuisine for making different varieties of food like coriander chutney, coriander rice / pulav, coriander based gravy in many side dishes, etc., Whenever I go for vegetable shopping, I invariably pick up more coriander bunches than I require for the week. This time, I tried to make coriander pulav / kothamalli pulav for lunch. Without any side dish, we can have this tasty coriander pulav and its an ideal choice for kids too as they like this green colour pulav. Adding few potato pieces and peas to the pulav make the rice more captivating and make it more healthier too..
Ingredients
Fresh Coriander Leaves - 3 or 4 Big bunches.
Tomato - 1 medium
Green Chillies - 3 or 4
Basmati Rice - 1.5 cup
Sugar - 1 pinch
Salt - To Taste
Oil - 3 tbsp
Butter / Ghee - 2 tsp
Onion - 1 Medium
Jeera / Cumin Seeds - 2 tsp
Cinnamon Sticks - 2 big
Lavang - 5 or 6
Cardamom Seeds / Elachi - 4 or 5
Marathi Moggu - 1 big
Garlic Ginger Paste - 1 tbsp
Turmeric Powder - 1 tsp
Potato - 1 medium
Peas - 1 Handful
Method
  • Wash the Basmati Rice and soak the rice for sometime.
  • Grind the washed coriander leaves, one red tomato, green chillies in a mixer grinder and keep it ready.
  • n a non-stick vessel or a flat bottomed thick vessel, add ghee or butter first. Then add oil to the pan and when the oil gets heated, add the spices to the oil. Fry them for a minute.
  • Add ginger garlic paste to the vessel next. Fry them for a minute till the raw smell goes off.
  • Add onions and the grounded paste and fry them for few minutes. Add the potato pieces and peas while frying. Also add the basmati rice to the oil and fry everything for a minute.
  • Add water, enough salt, a pinch of sugar to the rice mix and cook them on a low flame.
  • For 1 cup of rice , add 1 3/4 th of water. But it depends on the Basmati Rice type too..So, add water according to the variety you use.
  • After its completely cooked, switch off the flame. Turn it upside down and garnish with few cashew nuts and coriander leaves before serving.
  • This coriander pulav can be eaten with raita or any side dish of your choice.

Friday, October 7, 2011

Tamarind Rice Tamil Style \ Pulisadham \ Puliodharai


Tamarind Rice is one of the favourites in our household. I followed my mom's style while making the powder for the tamarind rice this time. She generally makes Pulikachal first and mixes the rice with the spicy, yummy Pulikachal..But I made a simple tamarind paste and made the tamarind rice with the tamarind paste and spicy powder..which is an easier method for me.Some people like to have this tamarind rice just with papads, appalams. In some household, they make Aviyal and tamarind rice as a combo..But the taste is unique in all ways.
Ingredients
Sona Masoori Rice - 2 Cups
Thick Tamarind juice - 4 Cups
Jaggery - 1 tsp
Olive Oil - 2 tbsp for tempering.
Gingelly Oil / Nalla Yennai - 3 tbsp
Hing - 1 Big Dash
Salt - To Taste
Urad Dal / Mina Pappu / Ulutham Paruppu - 1 tbsp
Channa Dal / Kadalai Paruppu - 1 tbsp
Peanuts / Groundnuts / Kadalai - 2 Handful
Powder
Coriander Seeds - 2 tbsp
Vendhayam / Methi Seeds / Menthilu - 1 tsp
Black Pepper Seeds - 6 or 7 seeds
Dry Red Chillies - 5 or 6
Hing / Asafoetida - 1 Dash
Method
  • Cook the Sona Masoori Rice either in a pressure cooker for 2 whistles or in an electric cooker. Spread the rice over a big tray or vessel and put some oil into it just to make them separate. Let the rice cool down.
  • Mean time, in a kadai, add the extracted tamarind juice of 4 cups, 2 tsp of oil, hing, 1 tsp of jaggery and make a paste like a kuzhambu without raw smell.
  • For making the powder, fry the ingredients with little oil in a kadai and grind them into a fine powder. Keep it aside.
  • For tempering, add Olive oil in a kadai. Add the ingredients for tempering and roast them in low flame.
  • Let the channa dal, urad dal and groundnuts get roasted to golden brown.
  • Transfer all the contents from the kadai on top of the rice in the tray or big vessel.
  • Add the tamarind juice little by little. Add required amount of salt also and mix the tamarind rice uniformly without mashing the rice.
  • Add the grounded spicy powder on the rice and mix them carefully in all directions up and down.
  • Add gingelly oil into the tamarind rice too.
  • Keep adding more tamarind paste and the spicy powder into the rice while mixing as required.
  • After mixing all the contents thoroughly, the spicy and yummy tamarind rice is ready to eat. But its always a good idea to eat the tamarind rice at least an hour after its preparation. This is mainly for the spices, tamarind paste to blend together and settle down with the rice perfectly.
  • Even on the next day, the leftover tamarind rice tastes very good. Its not required to store the leftover rice in the fridge.

Sunday, September 4, 2011

Sesame Rice \ Ellu Sadham \ Nuvula Annam

This is not a traditional version of the sesame rice which you generally think of. This version is purely made for my convenience with few ingredients I like and I think...!!!! Try this out and you will surely love this spicy  rice on any day. This can be a very good option for lunch box,  a good prasadam on festive days, a different rice for potlucks...I really  wanted to make some spicy rice which should be different from the regular ones and also wanted it to be very tasty, healthy and yummy for my kids too.  This goes very well with a side of vadams \ appalams or with a simple vegetable fry.
Ingredients
Cooked Sona Masoori rice -  1.5 cup
Olive Oil - 2 tbsp
Salt - To Taste
Jaggery Powdered - 2 tsp
Seasoning Powder for the Rice
White Sesame or roasted brown sesame - 4 tbsp
Coriander Seeds - 2 tbsp
Channal Dal \ Bengal gram \ Kadalai Paruppu - 2 tbsp
Red Chillies Dry - 2 Big
Jeera - 1 tsp
Tamarind - 2 pinches of tamarind
Coconut shredded or dry coconut powder - 2 tbsp
Tempering \ Tadka
Olive Oil - 2 tbsp
Hing \ Asafoetida - 1 dash
Mustard Seeds - 3 tbsp
Jeera \ Cumin - 1 tsp
Urad Dal \ Ulutham Paruppu \ Minna Pappu - 1 tbsp
Channa Dal \ Bengal Gram \ Kadalai Paruppu - 1 tbsp
Dry Red Chillies - 3 or 4 Medium Size
Curry Leaves \ Karivepillai \ Kadipatha - 1 full stem of leaves
Ground nuts - 4 tbsp
Method
  1. Wash and cook the Sona Masoori Rice and spread it on a big bowl with little oil and keep it ready.
  2. For the seasoning powder, fry the ingredients as mentioned above with little oil and grind them nicely and keep it ready.
  3. On the same kadai, add remaining oil. When oil gets heated , add the ingredients for the tempering ( tadka ). Try to fry the contents to golden brown only and make sure that they don't turn black.
  4. After its done, switch off the flame. Add the seasoning powder to the kadai. Mix well and slowly add the rice to the kadai and stir them carefully.
  5. Add required amount of salt and jaggery powder to the rice and mix everything thoroughly so that the rice gets mixed with the salt, powder uniformly.
  6. Now the sesame rice is get to be packed. This rice tastes very good after few hours of preparation.
Variations
You can customize the seasoning powder according to your taste buds and make the sesame rice in your own way too.
You can add cashew nuts along with groundnuts if this is made for a potluck, temple prasad or any other occasions.
Tips
Don't overcook the rice and make it pasty.  Texture of the rice plays a major role in any mixed rice preparation.

Wednesday, June 1, 2011

Vegetable Pulao - Type 2


I made a different style of vegetable pulao yesterday. This version requires a grounded paste of  Khus Khus, fresh coconut and little cashew nuts. Though I am not a big fan of using high calorie gravy or paste in my cooking, I made this pulao richer as I made it for my kids.  With limited vegetables, grounded paste and some indian spices, the vegetable pulao came out richer, tastier and flavourful. Just a simple onion raita is enough to finish the plate. May be...we can have few potato chips on its side. ( if you are lucky to have those!!!).
Ingredients
Carrots - 1 Medium
Potato - 1 medium
Fresh Peas - 1 Handful
Green Capsicum - 1\2 cup finely cut
Tomato - 1 Medium
Onion - 1 Small
Mint Leaves \ Pudina Leaves - 1 Handful shredded
Green Chillies - 2 Big Ones
Olive Oil - 2 tbsp
Jeera - 1 tsp
Kala Jeera - 1 tsp
Lavang \ Cloves - 5 or 6
Cinnamon Sticks \ Pattai - 3 Medium
Marathi Moggu - 1
Cardamom \ Elachi - 3
Bay leaves - 3
Ginger Garlic Paste - 1 tbsp
Basmati Rice - 1.5 Cups
Turmeric Powder - 2 tsp
Dry Red chilli powder - 1\2 tsp
Garam masala Powder - 1\2 tsp
Salt - To Taste
Coriander Leaves - To Garnish

For Grinding
Fresh Coconut - 1\4 Cup
Khas Khas - 1 tbsp
Cashew Nuts - 2 tbsp

Method
  1. Wash and cut the vegetables into small cubes and keep it ready. Cut the onion, tomato and slit the green chillies in the middle and keep it ready too.
  2. Wash and finely cut the mint leaves and keep it aside.
  3. Prepare the paste by adding all the ingredients in a mixer grinder with some water.. Make a rich, smoothy paste and keep it ready too.
  4. Soak the basmati rice in water for few minutes.
  5. On a thick non stick kadai \ vessel, add olive oil first. When its heated, add jeera, kala jeera, lavang \ cloves, cinnamon sticks \pattai, elachi, marathi moggu, bay leaves in order and fry them for a minute.
  6. Add the finely cut onion, green chillies, ginger garlic paste into the kadai and fry them nicely till the raw smell goes off completely from the kadai.
  7. Next add the green capsicum pieces, pudina\mint leaves and fry them well with a pinch of salt.
  8. Add the chopped tomato into the kadai and fry them well till it becomes mashy.
  9. Add all the finely cut vegetables into the kadai and fry them in the kadai for 2 minutes.
  10. Add the turmeric powder, dry red chilli powder, garam masala powder, a pinch of sugar and mix everything in the kadai thoroughly so that the vegetables get coated with the powders nicely.
  11. Now add the grounded paste into the kadai and fry the contents well for 2 minutes.
  12. Add the drained basmati rice into the kadai and fry them well for a minute.
  13. Now add water ( about 2.5 cups of water for 1.5 cups of Adora basmati rice ) to the kadai directly and add required amount of salt to the contents and mix them well.
  14. On a low heat, allow the contents in the kadai to cook for nearly 15 - 20 minutes. After 15-20 minutes, the vegetable pulao would have risen till the edge of the kadai with a wonderful flavour.
  15. Open the lid and carefully turn the pulao upside down and close the lid again. Allow them to stand on low heat for another 2 minutes.
  16. Then, switch off the heat if the vegetable pulao is completely cooked to your satisfaction.
  17. Garnish with coriander leaves and serve with a side of onion raita and Potato chips.!!
Variations
You can cook the basmati rice separately and add the rice slowly to the cooked vegetable spicy mix and complete the vegetable pulao. In this way,  the basmati rice does not break and the look of the pulao is great. I generally stick on to this method if I make this pulao for more people.
You can add more vegetables of your choice in this vegetable Pulao.

Tips
Before starting the actual cooking process, keep all the required ingredients ready on its side. This will definitely fasten the process of cooking.
Amount of water required for cooking the pulao may differ with different basmati rice varieties. So, add water accordingly.

Wednesday, May 25, 2011

Veg Fried Rice-Restaurant Style-Type 2

For the potluck we had on last weekend, I made a different vegetable fried rice, not in a typical south indian style. This try is mainly due to the fried rice I tasted in Delhi couple of years ago..It would be in a mild yellow colour with small veggie pieces, little nuts and flavoured with some special spice powder. Having that in mind, I started making this type of veg fried rice since few years.  This type of fried rice would go well with any north indian dishes like Dal Tadka, Dal Makhani, paneer dishes and other vegetable dishes.
Ingredients
Basmati Rice - 3 Cups
Beans - 1 Cup cut into tiny squares
Carrot - 3/4  Cup cut into tiny squares
Potato - 1 Cup cut into tiny squares
Fresh Peas or Frozen Peas - 3/4 Cup
Green Capsicum - 1/2 cut into thin pieces
Onion - 1 Medium cut into small pieces
Cashew Nuts - 1 Handful
Jeera - 2 tsp
Cinnamon Sticks / Pattai - 2 Medium
Lavang / Cloves - 3 or 4
Bay Leaves - 5 or 6
Marathi Moggu - 1
Elachi / Cardamom - 2
Pudina Leaves - 1 Handful
Olive Oil - 2 tbsp
Ghee or clarified butter - 1 tbsp
Salt - To Taste
Turmeric Powder - 2 tsp
Ginger Garlic Paste - 1 tbsp
Green Chillies - 4 Big slit into halves
For the Powder
Cinnamon Stick / Pattai - 2
Cloves / Lavang - 5 or 6
Jeera - 1 tsp
Black Pepper - 1 tsp
Elachi - 1
Cashew Nuts - 1 tbsp
Marathi Moggu - 1
Pista - 1/2 tbsp
Method
  1. Wash and cut the vegetables into desired shapes and keep it aside.
  2. Roast the ingredients slightly for the powder and grind them in a mixer grinder and keep it ready.
  3. Wash and soak the basmati rice in a separate vessel. Now start the process of making...
  4. On a medium heat, keep a thick bottomed cooker or a thick bottomed nonstick vessel on the stove.
  5. Add 2 tbsp of Olive Oil and 1 tbsp of clarified butter into it. When its heated, add jeera, cinnamon sticks, cloves, Cardamom, Marati Moggu, Bay Leaves into it and fry them for few seconds.
  6. Add the onions and fry them for a minute with a small pinch of salt.
  7. Add the ginger garlic paste now and fry till the raw smell goes off completely.
  8. Add green capsicum, pudina leaves,green chillies in order and fry them again for a minute.
  9. Add all the cut veggies, turmeric powder, cashew nuts, little salt and fry them for a minute. Now close the lid and let the contents in the pan cook for about 3-4 minutes on a low flame.
  10. Veggies would get cooked with the steam formed inside..Open the lid and add the grounded powder now and fry all the contents in the vessel or pan for few minutes.
  11. Now drain the water from Basmati Rice and add the rice into the cooking vessel directly.
  12. Fry them again for few seconds till the basmati rice becomes little dry and get fried a bit.
  13. Now add water ( about 5 Cups ) ans required amount of salt to the vessel and close the lid. Let the vegetable fried rice cooks completely on a low flame for about 10-12 minutes.
  14. If you are making this rice in an electric cooker, transfer the contents from the pan into the cooker and then add water.
  15. Generally I prepare this veg fried rice directly in a Non stick flat bottomed vessel which makes my process easier.
  16. After 10-12 minutes, the veg fried rice would have risen upto the edge of the vessel nicely. Carefully mix the fried rice upside down without breaking the basmati rice and close it.
  17. Now the vegetable fried rice would be in a mild yellow colour with a nice aroma of Indian spices. Serve this with any good side dish and a raita.
Variations
Amount of water depends on the quality of the Basmati rice. So, add water accordingly.
You can add slightly fried cashew nuts, pista, badam into pieces on the top of the fried rice at the end instead of adding the cashew nuts in the beginning.
Tips
Take out the green chilli slits after the veg fried rice is completely done. Its very helpful especially when you are serving this in parties.
No need to add more spices during the tempering process as you would be adding the grounded spice powder too.

Friday, May 20, 2011

Bisibelebath

In Bangalore, we enjoyed this Bisibelebath many times in Darshini. It would be in a semi solid state with lots of veggies in it served with a side of raita. Darshini style bisibelebath was too tastier for me, though it would not have more ghee and sometimes little watery too...This veggie bath would be more suitable on a cold, rainy day with a side of appalams / Pappads. My whole family likes this bisibelebath and so it would be seen in our kitchen more often. I have seen more versions of Bisibelebath since the day I started to prepare. But I stick on to one method which is easier for me..
Ingredients

Vegetables :
Fresh Peas or frozen Peas - 1 Big Handful
Potato - 1 Medium Size
Beans - 10 or 12
Carrot - 1 medium
Zuccini - 1 Big
Chayote / Chow Chow - 1 Small or 1/2 Big
Onion - 1 Medium
Ripe Tomato - 2

Ingredients for the Bisibelebath Powder
Channa Dal / kadalai Paruppu / Senaga Pappu - 2 tbsp
Urad Dal - 1 tbsp
Coriander Seeds - 1.5 tbsp
Fenugreek Seeds / Vendhayam / Menthilu - 1/2 tsp
Jeera - 1 tsp
Black Pepper - 1 tsp
Cloves / Lavang - 3
Cinnamon / Pattai - 1 Stick medium size
Dry Red Chillies - 5 or 6 Big Ones
Fresh Coconut - 1 tbsp
Khus Khus - 1 tbsp

Other Ingredients
Sona Masoori Rice - 1.5 Cups
Toor Dal - Between 1/2 and 3/4th of a cup
Hing / Asafoetida - 1 Dash
Turmeric Powder - 2 tsp
Salt - To Taste
Jaggery - 1 tbsp
Ghee - 2 tsp
Tamarind Juice - 1/2 thick

Tempering
Olive Oil - 1 tbsp
Mustard Seeds - 2 tsp
Jeera - 1 tsp
Urad Dal / Ulutham Paruppu / Minna Pappu - 1 tsp
Curry Leaves - 1 stick
Dry Red Chillies - 2

Method
  1. Wash the rice and dal and add it into a  big pressure cooker.
  2. Wash all the vegetables and cut it into desired shapes as you like and add it into the cooker.
  3. Add little Hing / Asafoetida,turmeric powder, 2 tsp of salt into the mixture.
  4. Add 6 cups of water into the cooker and cook the contents in the cooker for 4 whistles. Switch off the heat.
  5. Meantime, fry the ingredients for the Bisibelebath powder to golden brown ( Not too brownish or black ) and grind them in a mixer grinder to a fine powder.
  6. On a thick bottomed pan, add 1 tbsp of Olive Oil . When its heated, add Hing, Mustard seeds, Urad Dal, Jeera, Curry Leaves, Dry Red Chillies into it in order for tempering. When it sputters, add the grounded powder too into the pan, fry it for a minute and add the extracted tamarind juice and jaggery into it. Fry all of them for a minute.
  7. Then, pour them over the Bisibelebath in the pressure cooker. Add required amount of salt to the Bisibelebath and mix everything in the pressure cooker nicely.
  8. On a very low flame, add some more water to the Bisibelebath and allow it to be on heat for 3-4 minutes for the powder to get completely mixed and cooked with the bath.
  9. Switch it off and add ghee on top of the Bisibelebath and serve this with raita and hot urad dal appalams/ Papads.
Variations
  • You can add the onions, tomatoes into the tempering pan itself and fry them along with the grounded powder and then add them to the bisibelebath.
  • You can add half green capsicum along with onions, tomatoes into the tempering pan. It adds more taste to the Bisibelebath definitely. As I don't have that vegetable now, I could not add it.
  • You can add any type of vegetables like Brinjal, Drumstick, white pumpkin,etc., into the Bisibelebath. I have added the vegetables that I have at home.
  • You can add groundnuts along with the vegetables into the Bisibelebath before cooking.
  • You can decorate the bath with fried groundnuts, cashewnuts or boondi on top before serving.
Tips
  • Don't cook the bisibelebath in the cooker into a fine, smooth paste. Because, after you add the powders, water at the end, the final cooking process will make it more pasty and you wont be able to see any rice separately.
  • If you have small onions, try to make this Bisibelebath with the small onions. The Taste of the bisibelebath definitely gets upgraded with small onions, green capsicum, drumsticks and good bisibelebath powder.
Notes
In this process, I added all the vegetables at one shot into the cooker as I made it for the kids. If you are making the Bisibelebath for a Potluck / Party,  add small onions, tomatoes, green capsicum into the tempering pan. When they get mashed and fried, add the grounded powder , tamarind extract, jaggery and then fry and pour them over the Bisibelebath.

LinkWithin

Related Posts Plugin for WordPress, Blogger...