Showing posts with label Curry Varieties. Show all posts

Tuesday, February 16, 2021

Simple Vaazhaikai Curry / Raw Banana Curry / Plantain Curry / Aratikaya Kura


Raw Banana / Vaazhaikai / Aratikaya is a powerhouse of vitamins and minerals. Though we can make many recipes using this vegetable, this version is my most favourite one which my mom used to make during amavasai day ( No Moon Day ).  This curry is very easy to make as it requires very less ingredients.

Ingredients

Raw banana - 3 medium
Turmeric Powder - 1 tsp
Red chili powder - 1/2 tsp ( optional )
Salt - As required

For Seasoning / tadka 

Coconut Oil - 2 tsp
Mustard Seeds - 1 tsp
Jeera / Cumin Seeds - 1/2 tsp
Hing / Asafoetida - 1 dash
Urad dal - 1 tsp
Channa Dal - 1 tsp
Curry leaves - 1 stem
Green chilli - 2 ( Chop them or slit them as you like )
Dry Red chilli - 1 

For Garnishing

Coconut flakes - 1 tbsp
Coriander leaves - 1/2 tbsp

Method

  • Heat oil in the cooking vessel. When heated first add mustard seeds and once it splutters, then add the other ingredients for seasoning and saute for a minute until the dals turn golden brown. 
  • Add the chopped raw banana pieces along with turmeric powder. Add 1/4 cup of water into the vessel.
  • On Medium-low flame, allow the vazhaaikai / raw banana to cook for 4-5 minutes. Once its cooked three fourth, add required amount of salt and close the lid.
  • Once the vazhaikai pieces become tender, add the red chili powder if you like. Saute it for 2 minutes.
  • Switch off the flame and garnish the curry with coconut flakes and coriander leaves.
  • Enjoy this delicious curry with hot rice and rasam. 

Tips

  • I definitely use coconut oil especially for making this curry as it gives a nice aroma to the cooked Vazhaikai / raw banana.
  • As this is not a fry, cook the vazhaikai / raw banana till the pieces become tender and soft.  The cooked pieces should be separate and not mushy.

Sunday, May 15, 2016

Spicy Okra Curry / Vendaikai Masala Curry


Okra / Vendaikai / Bendakaya / Ladies Finger / Bindi is one of the favourite vegetables which is almost seen in all Indian Kitchen. I cannot live without having few bindi in my refrigerator. I always love to make something out of bindi in any form. Though we make many varieties using this tender green fingers, this spicy okra curry is one of our home favourites. Sometime, if you get bored of making the same okra fry in standard form in your meal, you can very well substitute this okra masala curry to make it interesting.

Ingredients

Tender Okra / Bindi cut into small squares - 2 full bowls.

Oil - 1 tbsp
Hing / Asafoetida - 1 Dash
Urad Dal / Ulutham Paruppu - 2 tsp
Curry Leaves - 1/2 stem
Dry red chillies - 2
Turmeric Powder - 1/2 tsp
Grounded Powder - 1 tbsp
Garam Masala Powder - 2 tsp
Salt - As Required
Fresh Ginger Garlic Paste - 3 tsp
Shredded Tomato - 1 tbsp
Shredded Onion - 1/2 cup

For Grinding 
  2 tsp of coriander seeds
  2 dry red chillies
  1/2 tsp cumin seeds

Method

  • Wash ,clean the okra and cut into small squares as shown in the photo above. Cut the onion, tomato and keep them ready.
  • Grind the powder as described above in a blender and keep it ready.
  • In the cooking vessel, add oil first. When its heated, add mustard seeds, urad dal, dry red chillies, curry leaves.
  • After the tadka is done, add chopped onion pieces and fry them for a minute.
  • Add the freshly made ginger garlic paste into the cooking vessel and fry till the raw smell vanishes.
  • Add the okra, tomato pieces and all other ingredients including salt into the vessel.
  • Coat the okra/bindi thoroughly with all the powders. Allow them to cook for 4-5 minutes with the lid closed.
  • Remove the lid and allow the okra to get nicely roasted on a medium flame.
  • When they look crispy enough for you, switch off the stove.
  • Serve this spicy, delicious okra curry either with hot rice or roti.

Tips / Suggestions 
Try to prepare this curry using fresh tender okra / bindi only to get a delicious taste.

Thursday, March 19, 2015

Broccoli Curry


Broccoli, also called as popularly "Green Cauliflower"  is a powerhouse of nutrients. Broccoli is  a major cancer fighter and boosts the immune system of our body. It is a good source of Potassium, folate and fiber. Its good for Bone Health, Heart Health and Cholesterol reduction and in weight reduction. Broccoli is getting popular in Indian Cuisine these days. In my kitchen, I have made many Indian dishes with broccoli like Broccoli curry, Broccoli Aloo Paratha, Broccoli Pakoda, etc., Out of all, this version of Broccoli curry is very simple and takes less preparation time.

This Broccoli curry is just like how to make the Beans thoran or Cabbage Poriyal. The tiny green florets always attract the kids and they will love to bite them.

Ingredients

Broccoli Florets - 5 cups
Oil - 3 tsp
Hing - 1 Dash
Mustard Seeds - 2 tsp
Urad Dal - 2 tsp
Dry Red Chillies - 3 or 4 
Curry Leaves - 1 stick
Salt - As Required
Fresh Grated Coconut - 2 tbsp

Method

  • Wash the green tiny broccoli florets, drain them and keep ready.
  • In the cooking vessel, add oil first. When its heated, finish the tempering process by adding the hing, mustard seeds, urad dal , dry red chillies and curry leaves. 
  • When its done, add the green florets and add little water for them to cook with the steam inside.
  • Close the lid and let them cook for 3-4 minutes on medium flame.
  • When they are cooked to your desired level, add required amount of salt and fry them openly for a minute or two.
  • Finally add the coconut flakes to the broccoli florets. Switch off the flame.
  • Enjoy this curry with sambar, rasam or in any south indian meal.

Thursday, October 16, 2014

Green Dried Peas Sundal / Pachai Pattani Sundal / Green Peas Sundal


"Pachai Pattani" in tamil is mostly added in many south indian tiffin along with other vegetables. Pattani Sundal is also one of the popular navarathri sundals that can be prepared easily. Process of preparing sundals is almost the same except that the soaking time might differ. Green Peas / Pachai Pattani sundal can be made in different ways. Here I have blogged the common version. We can also add shredded carrots, tiny pieces of mango and make a colourful version called "Thenga Manga Pattani Sundal". Needless to say that the leftover sundal can be added in sambar, kootu or kuruma along with other veggies at the end.

Ingredients
Green Peas / Pachai Pattani ) - 1 Cup
Water - Enough to soak the green peas.
Oil - 2 tsp
Hing / Asafoetida - 1 Dash
Mustard Seeds - 2 tsp
Urad Dal / Ulutham paruppu / Mina Pappu - 1 tsp
Curry Leaves - 1 small stick
Dry Red Chillies - 2 
Salt - As Required
Fresh coconut flakes - 1 tbsp
Method
  • Soak the green dried peas / pachai pattani in water for 7-8 hours. Drain the water from the soaked peas.
  • Pressure cook them for 2-3 whistles.  Drain the pachai patani and keep aside.
  • In a cooking pan, add oil first. Add mustard seeds , urad dal , curry leaves, dry red chillies and temper them.
  • When the mustard seeds sputter, add the drained cooked green peas into the pan.
  • Add required amount of salt into the pan. Allow them to set for a minute with the salt.
  • Finally add the grated coconut flakes into the pan and garnish them.
  • Enjoy this sundal either as an evening snack or with meals. But its a very healthy option for kids.
Tips
  • Do not overcook the green peas in the pressure cooker.
  • You can make some special sundal powder ( using coriander seeds, red chillies) and sprinkle them at the end to enhance the taste of any sundal.

Wednesday, October 15, 2014

Yellow Dried Peas Sundal / Vellai Pattani Sundal / White Vatana Sundal


Yellow Dried Peas called as "Vellai Pattani" in tamil, "Vatana" in Hindi is a good source of Protein. Vellai Pattani sundal is definitely prepared on one day during Navarathri at my home. We all like the buttery taste of this Vellai Pattani sundal. Even if we have some leftover, it can be easily transformed into Kurma or added into sambar. I love making this Sundal at home during Navarathri and I love to do patties, kurma or other Indian delicacies using this Yellow Peas ( Vatana ) during other time.
Ingredients
White Vatana ( White Peas / Yellow Peas ) - 1 Cup
Water - Enough to soak the white peas.
Oil - 2 tsp
Hing / Asafoetida - 1 Dash
Mustard Seeds - 2 tsp
Urad Dal / Ulutham paruppu / Mina Pappu - 1 tsp
Curry Leaves - 1 small stick
Dry Red Chillies - 2 
Salt - As Required
Fresh coconut flakes - 1 tbsp
Method
  • Soak the yellow dried peas / vellai pattani in water for 7-8 hours. Drain the water from the soaked peas.
  • Pressure cook them for 2-3 whistles.  Drain the vellai patani and keep aside.
  • In a cooking pan, add oil first. Add mustard seeds , urad dal , curry leaves, dry red chillies and temper them.
  • When the mustard seeds sputter, add the drained cooked vatana / yellow peas into the pan.
  • Add required amount of salt into the pan. Allow them to set for a minute with the salt.
  • Finally add the grated coconut flakes into the pan and garnish them.
  • Enjoy this sundal either as an evening snack or with meals. But its a very healthy option for kids.

Tips
  • Do not overcook the yellow peas / vatana in the pressure cooker.
  • You can make some special sundal powder ( using coriander seeds, red chillies) and sprinkle them at the end to enhance the taste of any sundal.

Monday, June 16, 2014

Colourful Bell Pepper Besan Fry / Capsicum Besan Fry / Capsicum Subzi with Besan

 Bell Peppers generally sit in my refrigerator all the time and I wish to include them in most of my side dishes. Nowadays I am so obsessed with the colourful yellow, orange, red and green bell peppers. Especially these colourful glories are found abundant in farm markets during summer season. Out of special interests, whenever I pick bell peppers, I cannot compromise on few picks. So, to exhaust all the remaining colourful ones before I hunt for the next vegetable purchase, I made a easy side dish just with these colourful peppers for the rotis. Bell peppers coated with besan flour, flavoured with other spices slightly fried is an excellent accompaniment to rotis / chappathis. Its an easy to make side dish and it can never go wrong. As its colourful and flavourful, you will never have to worry about leftover!!!

Ingredients
Bell Peppers of any kind ( Yellow , Orange, Green, Red ) - 6 or 7
Onion chopped into 1 inch squares - 3/4 cup
Oil - 1/2 tbsp
Turmeric Powder - 1 tsp
Dry Red chili Powder - 3 tsp
Garam Masala Powder - 1 tsp ( I used Kitchen King Garam masala )
Coriander Cumin Powder - 1 tsp
Cumin Seeds - 2 tsp
Besan Flour / Bengal Gram Flour - 2 tbsp
Salt - To Taste
Coriander Leaves - To Garnish

Method
  • In a cooking pan, add oil first. When its heated, add cumin seeds first.
  • Next fry the onions till they get translucent. Then, add all the bell peppers and fry them on high flame till they get cooked and crunchy. I love to fry them on high flame in order to have them crunchy. 
  • After they get cooked and fried to a satisfactory level, reduce the flame and add all the spices, besan flour and salt and fry them again till the raw smell of the besan flour completely goes off.
  • Make sure that the fry does not turn black at the bottom. You would get a nice aroma from the bell pepper fry after the raw smell goes off. That's the point to switch off.
  • Enjoy your rotis with the bell pepper fry and some fresh raita.

Wednesday, May 14, 2014

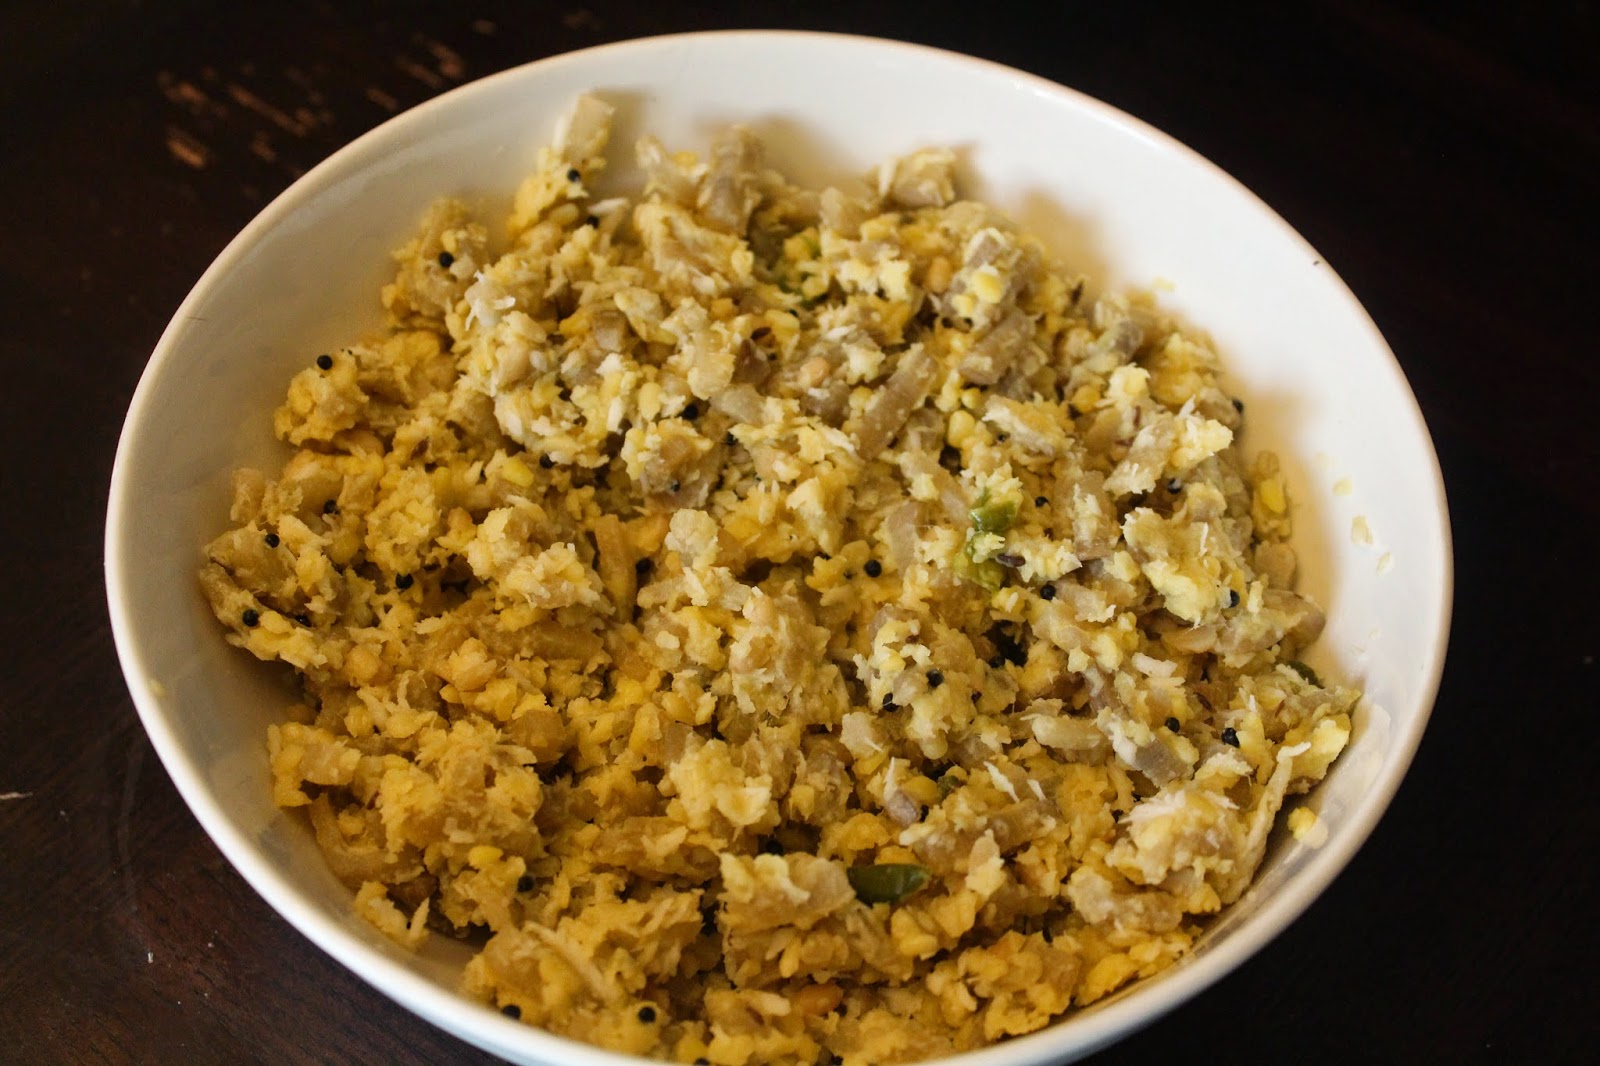
Vazhaithandu Curry / Vazhaithandu Poriyal / Banana Stem Curry / Banana Stem Poriyal


Without realising the amazing health benefits of Banana stem, I had been enjoying the Vazhaithandu recipes since childhood. My mom used to bring 2 or 3 white sticks of Banana stem from market often and she never got tired of cleaning the banana stem. I used to notice the way she cleaned and cut them into thin rounds and the way she carefully extracted them out of the thin threads that was coming in every step of cleaning. Though I did not have any interest then, I simply noticed and the process got registered in my mind. Now, due to health reasons, I wish to bring the same goodness into my kitchen by adopting her techniques in everyday cooking. Happy to see Banana Stems in the Indian Grocery stores nowadays and I grabbed them quickly fearing that it might be taken by someone like me without glancing at the price even. I will post all the recipes that we could make using this Banana Stem. We could make Vazhaithandu ( in Tamil ) curry, Vazhaithandu Mor Kootu ( Curd gravy ) and Vazhaithandu Curd Raita, etc.,Though the cleaning process is cumbersome, once you know the technique of the process, you can prepare the Banana stem recipes in no time.

I added few Moong dal ( Payatham Paruppu ) along with the Banana Stem in my curry just to inject some protein into it. You can make this even without moong dal too. Little addition of moong dal enhances the taste of curries like cabbage, banana stem, beans, etc.,  

Looking at the health benefits of Banana Stem, its has a high source of fiber, eases constipation, helps in weight reduction, can reduce stomach pains, increases body immunity, suppresses the formation of kidney stones, etc.,

Ingredients
Banana Stem - 1 of any size.
Moong dal - 1/4 cup
Oil - 3 tsp
Hing / Asafoetida - 1 Dash
Mustard Seeds - 2 tsp
Jeera - 1 tsp
Urad Dal / Ulutham Paruppu - 3 tsp
Curry Leaves - 5 or 6
Green Chillies - 2 or 3 medium. 
Salt - As required
Fresh Coconut flakes - 1 tbsp

Method
In a small cup, soak the Moong Dal in water before you start cutting the Banana stem.Take out the outer layer of the Banana stem one by one till you get the round firm banana stem at the center.
Basically, we are not going to use any of these outer covers so discard them.
Before cutting the Banana Stem, take a vessel with some diluted buttermilk ready. This is mainly to add the chopped banana stem pieces into it to avoid discolouration. Cut the Banana stem into thin rounds from one corner. Take out the thin threads coming out during the process using your fingers as below.

Continue the process by following the same process and drop the chopped banana stem pieces into the vessel.

In the cooking pan, add some oil and do the tempering by adding the hing, mustard seeds, jeera, urad dal, curry leaves. Add the soaked moong dal into the pan along with little water enough to cook the Moong dal. Cover the lid and allow the dal to get cooked three fourth. While the dal is getting cooked, drain the banana stem pieces from the vessel and keep ready. Add them into the pan and smear some water and cover the lid.
In 3-4 minutes, the banana stem along with the dal would get finely cooked with the steam inside. Add required amount of salt into the pan and allow them to cook for another minute. Finally add fresh coconut flakes at the top and switch off the flame.

Tips / Suggestions
Try to make the curry as soon as you get the Banana stem from the market as it looks more whiter and richer in all nutrients.
Avoid adding more water into the pan while cooking as they get smashed. Water content in the banana stem itself is sufficient for them to get cooked with the steam inside on low flame.
Try to include this healthy vegetable in your cooking at least once in two weeks and enjoy the benefits.
For weightloss, drink the diluted buttermilk from the vessel after draining the banana stem pieces from it. Its suggested to be taken in empty stomach.

Tuesday, May 6, 2014

Green Gram Sprouts Sundal / Sprouted Green Gram Sundal / Sprouted Green Gram Salad / Pachai Payaru Sundal


Read in magazines that "Sprouts are Super Foods and called as the Powerhouse of Nutrients". In modern life, we run around aisles in departmental stores looking for healthy and organic super food but failing to eat the natural home made sprouts. Sprouts are considered to be the cheapest source of nutrients which has good amount of protein, fiber and vitamins. We can make sprouts out of grains ( wheat for ex ), legumes and seeds. Sprouted seeds of alfalfa, mustard and sesame are used while making healthy salads and sandwiches. Out of that, alfalfa sprouts are considered to be the "father of sprouts". I love to put bunches of alfalfa sprouts or some spicy mustard sprouts into my sandwich all the time. Addition of sprouts into the sandwich always enhances the taste to a greater extent, i feel.

Sprouting Process :
Soak the grains / legumes overnight for 6-7 hours. Drain the water completely and cover the soaked legumes or seeds with a dry muslin cloth. Time span for soaking depends on the size of the seeds / legumes. Generally it takes 2-3 days for the seeds to germinate and become sprouts. Over soaking may harm the seeds to rot and ferment so the seeds should be soaked only for a limited period. After they sprout, store them in the refrigerator till you actually consume them.

Ingredients
Green Gram Dal / Pachai Payaru - 2 Cups
Oil - 2 tsp
Hing / Asafoetida - 1 Dash
Mustard Seeds - 2 tsp
Jeera / Cumin Seeds - 1 tsp
Green Chili - 2 Medium ( slit them into halves, I used green chili paste instead. )
or Green Chili paste - 2 tsp
Salt - As required
Fresh coconut flakes - 1 tbsp
Coriander Leaves - To Garnish
Curry Leaves - 5 or 6

Method

  • Make the Green Gram Sprouts by following the process as mentioned above.
  • In a cooking pan, add oil first. Add mustard seeds, cumin seeds, green chili paste, curry leaves to the oil.
  • When they sputter, add the drained sprouted green gram into the pan. 
  • Sprinkle some water into the pan and cover the lid. Allow them to get cooked with the steam inside for 3-4 minutes on medium heat.
  • When they get cooked to desired level, add required amount of salt into the pan and stir them well. Do not overcook the sprouted green gram as the nutrients might be washed away. 
  • Fry them for another 1-2 minutes. Switch off the flame and finally add the fresh coconut flakes and coriander leaves to the pan.
  • Enjoy this healthy sundal / curry as a snack or as a healthy accompaniment in your regular meal.

Friday, May 2, 2014

Cabbage Subzi for Roti / Chappathi


Green Cabbage will always be sitting  in my refrigerator like carrots. I love to include cabbage in fried rice, curries often as its a good source of fiber, helps in weight loss, well known for its anti cancer compounds and various other health benefits. Read in some health magazine that red cabbage has the highest amount of power nutrients. 

For rotis / chappathis, I made a healthy side dish with cabbage, some tomato, red onion and lilva ( thuvar seeds / Pigeon Peas ). Its wise to store some chopped cabbage in a sealed storage box in the refrigerator. In less than 5-6 minutes, the dish can be made as the process is much simpler. This is a very good accompaniment for roti, chappathi or any parathas.

Ingredients
Green Cabbage - 1/2 Medium 
Chopped Red Onion - 1/2 cup
Tomato - 1 Medium
Tuvar Lilva - 1 Handful ( Substitute Peas if you want )
Grated Ginger - 1/2 tsp
Chopped Coriander Leaves - To Garnish
Salt - To Taste

For Tempering / tadka :
Oil - 3 tsp
Jeera / Cumin Seeds - 2 tsp
Sombu / Fennel Seeds - 1 tsp
Green Chillies - 1 Medium
Chopped Garlic - 1 tsp

Powders to Add :
Turmeric Powder - 1 tsp
Red Chili Powder - 1 tsp
Coriander Cumin Powder - 1/2 tsp
Garam Masala Powder - 1 tsp

Method
  • Chop the green cabbage, tomato and red onion and keep all the other ingredients ready.
  • In the cooking pan, add oil first and finish the tempering process by adding the ingredients one by one.
  • Add the red onion next to the pan and fry them for a minute. Add tomato, lilva and fry them till the tomatoes get mushy.
  • Add the chopped cabbage and grated ginger into the pan now. Cover the lid and allow them to cook on medium heat for 2-3 minutes. Occasionally stir them in the middle. No need to add water at any stage while cooking.
  • Only with the inside developed steam, the cabbage could easily get cooked. After the contents are cooked perfectly, add all the powders and required amount of salt to the pan.
  • Mix them thoroughly and fry them for another 3-4 minutes. Garnish with coriander leaves and serve.

Friday, April 25, 2014

Vaazhaipoo Curry / Banana Flower Curry / Banana Blossom Curry


A purple colourish blossom which develops at the tip of the bunch of bananas called as the "Banana Blossom" which has numerous medicinal benefits. This flower is used in many cuisines of India and especially in Tamil Nadu, they make Vaazhaipoo VadaiVaazhaipoo Adai , Vaazhaipoo Paruppu Usili, etc., This time I made a simple Vaazhaipoo Curry which is an excellent accompaniment to all South Indian gravies. Out of great interest, I picked a big banana blossom so it yielded more quantity though.!! For cleaning and extracting the banana blossom completely, please refer to my previous post "Vaazhaipoo Adai".

Ingredients
Banana Blossom / Vaazhaipoo -  1 Big One
Red Onion shredded - 1/2 cup
Turmeric Powder - 2 tsp
Salt - As Required.

Tadka / Tempering :
Oil - 1/2 tbsp
Hing / Asafoetida - 1 Dash
Mustard Seeds - 2 tsp
Cumin Seeds / Jeera - 1 tsp
Urad Dal / Minapappu / Ulutham Paruppu - 2 tsp
Channa Dal / kadalai paruppu - 1 tsp
Curry Leaves - 5 or 6

To Grind a Paste :
Fresh Coconut Flakes - 1 tbsp
Garlic Pods - 2
Green Chillies - 3 Big ones

Method 

  • Extract the small florets from the banana blossom and chop them nicely. Meantime, take 3 cups of water in a mixing bowl diluted with a tbsp of curd. Drop the chopped banana florets into this diluted water to prevent them turning black.
  • Grind a thick coarse paste using the ingredients as mentioned above and keep ready.
  • In a frying pan, add oil first and finish the tempering process by adding all the ingredients as mentioned.
  • When the dals turn golden brown,add the onion and fry for a minute. Finally add the chopped banana florets from the diluted water after draining them thoroughly.
  • Add turmeric powder to the pan and mix them well.
  • Sprinkle some water into the pan and allow them to cook well by closing the lid for 3-4 minutes.
  • After it gets cooked, add required amount of salt and add the grounded paste into the pan.
  • Mix them well and fry them on medium heat for another 3-4 minutes. Once the raw smell goes off, switch off the flame. Enjoy this delicious curry in your meal.

Tips / Suggestions

  • While cleaning the banana blossom, its better to coat your hand with little sesame oil which in turn does not make your hand sticky. 
  • Adjust the green chilli quantity according to the size of the Banana Flower. If its too big, may be you could add 1 or 2 more. As we are not adding any red chilli powder in this curry, its important to add correct number of green chillies while grinding itself. 

Saturday, November 16, 2013

Methi Aloo Subzi / Methi Aloo Curry / Fenugreek Leaves Potato Curry


Methi aloo is an amazing accompaniment to rotis and you can never see any leftovers for sure. If you are a methi ( fenugreek ) lover, you would definitely enjoy the taste of this subzi. Slight bitterness of methi blends with the aromatic spices gives a fabulous taste with potatoes. Taking out the fenugreek leaves from the stem looks like a cumbersome process but you can make it fun while doing that  job along with kids or watching your favourite show in the television. Other than this, it takes just couple of minutes to prepare this yummy side dish.

Ingredients

Fresh Fenugreek leaves - 4 cups
Potato - 4 Medium
Red Onion  - 1/2
Green Chillies - 3 Medium
Turmeric Powder - 1 tsp
Cumin Coriander Powder - 3 tsp
Red Chili Powder - 1 tsp
Salt - As required
Sugar - One pinch
Oil - 1/2 tbsp
Ajwain Seeds ( Omam ) - 2 tsp
Garlic Pods - 3

Method
  • While taking out the fenugreek leaves from its stem, cook the potatoes simultaneously and keep them ready after peeling off its skin. Wash  and clean the fenugreek leaves to get rid off any sand or dust in them.
  • Cut the onion, green chillies and garlic pods finely and keep them ready.
  • In the cooking pan, add oil first. When its heated, add ajwain ( omam ) into the oil. Add the shredded garlic first into the pan. Fry them for a minute and add red onion pieces and shredded green chili into it.
  • Fry them till the onion gets translucent. Add the cleaned fenugreek leaves into the pan now. 
  • Mix them well and add little bit of water for the methi leaves to cook nicely. Close the lid and allow the methi leaves to cook for 2-3 minutes.
  • When they are cooked, fry them for a minute on high flame to get rid off excess water content if any. 
  • Finally add the cooked and peeled potatoes along with salt and a pinch of sugar into the pan. 
  • Fry the methi aloo till they blend together well and get fried enough.
  • Enjoy with hot rotis with a side of curd raita and a spicy pickle.


Tips / Suggestions 
Cook the subzi on a medium flame only.
Care should be taken while adding water to cook methi leaves. In fact, I sprinkled enough water on its top
and cooked carefully as the methi gets mushy while getting cooked.

Wednesday, September 4, 2013

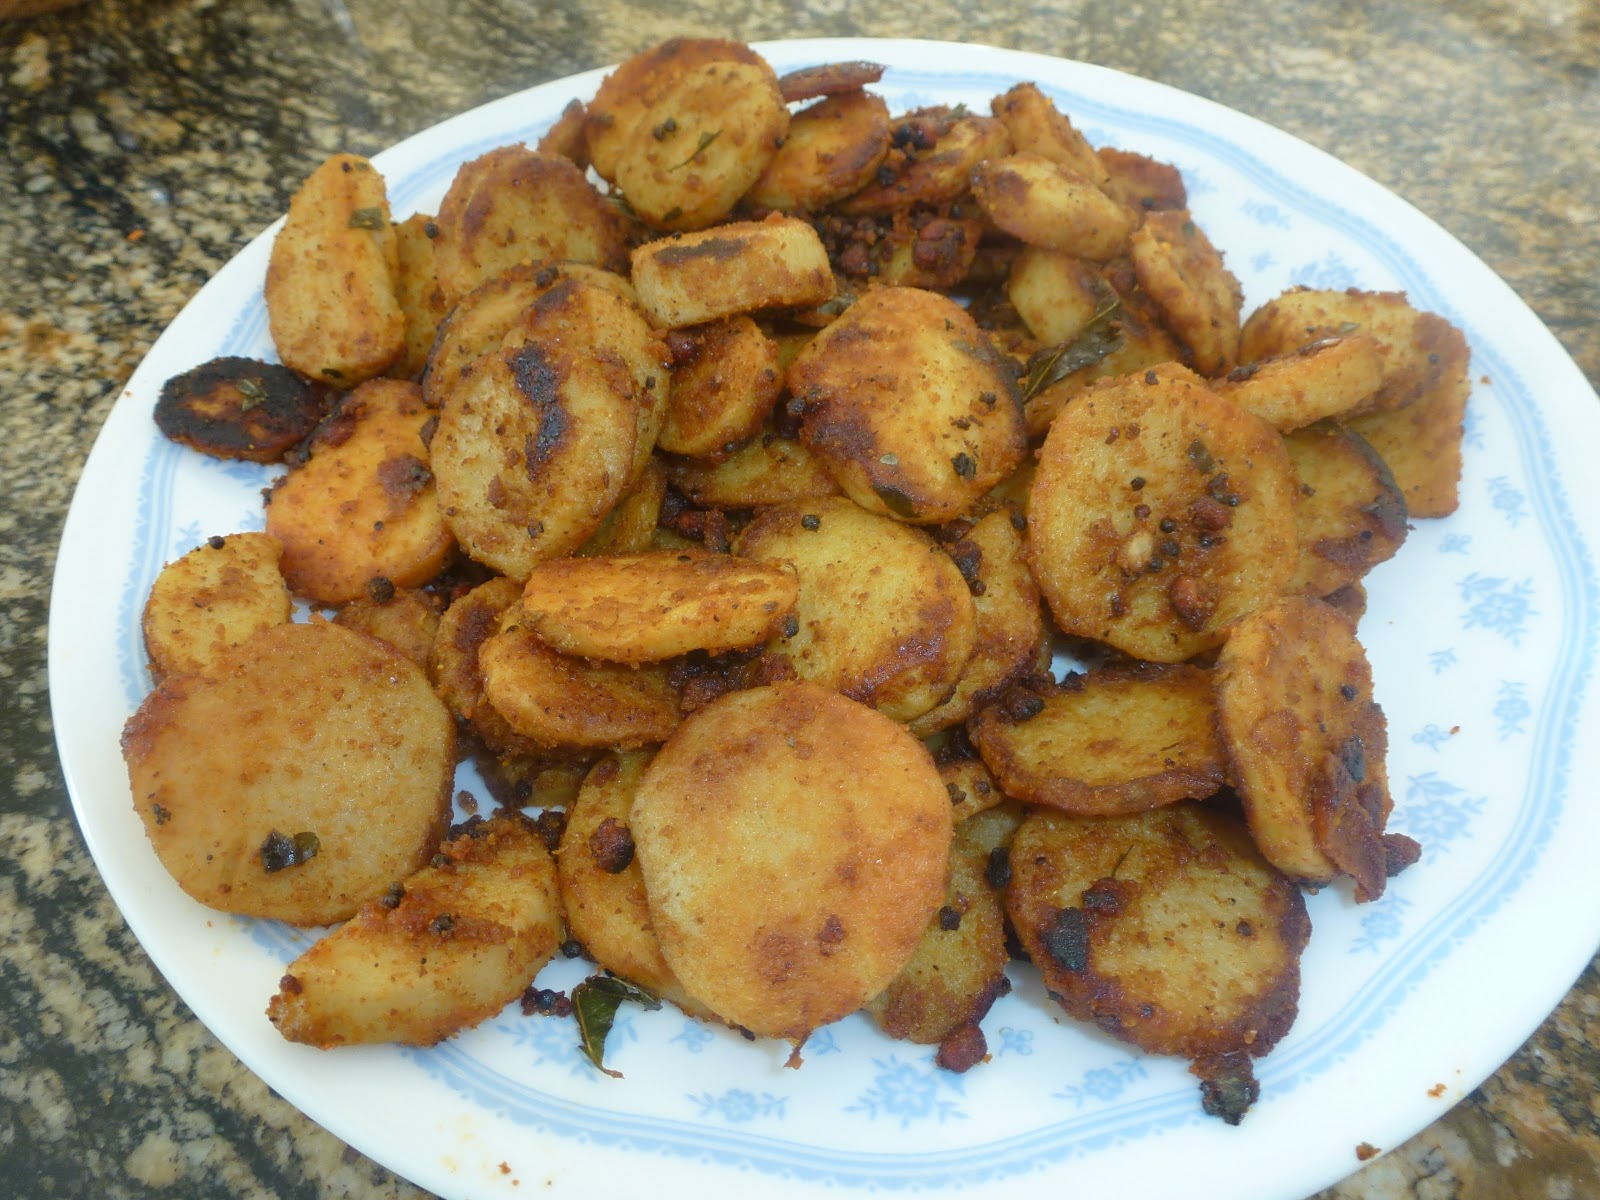
Gundu Urulaikizhangu Fry / Small Baby Potato Fry / Chinna Urulaikizhangu Curry


"Gundu Urulaikizhangu curry" makes every kid happy and in fact, my blog will not be complete without my favourite childhood recipe. Whenever my eyes get a glimpse of these yummy golden baby potatoes during my vegetable shopping, I grab a small bunch of these tiny potatoes and make this curry. Sometimes, I would fix any main dish just to go with this small potato curry in my kitchen. Of course, I made my kids too love this curry!!! 

Ingredients
Small Golden Potatoes - 15 or 18.
Oil - 2 tbsp 
Mustard Seeds - 2 tsp
Urad Dal / Ulutham Paruppu - 3 tsp 
Hing / Asafoetida - 1 Dash
Turmeric Powder - 1 tsp
Sambar Powder - 2 tsp
Red Chili Powder - 2 tsp
Dhaniya Powder / Coriander Powder - 1 tsp ( Optional ) ( If you want to taste this curry only with the chili taste, you can plug this off )
Salt - To Taste
Curry Leaves - 5 or 6 

Method
  • Cook the golden potatoes with the skin. After its cooked, peel off the skin and cut them into halves if the size is considerably bigger. If its tiny, fry the potato as it is.
  • First add the oil in the frying pan. When its heated, add the Hing, mustard seeds, urad dal, curry leaves in succession.
  • Add all the peeled potatoes into the pan now. Add all the powders and requires amount of salt into the pan.
  • Gently coat all the potatoes with the powders and fry them uniformly. For 2 minutes, just close the lid and allow them to get cooked.
  • Then fry them without lid on medium flame till you get crispy, golden potatoes. Add little more oil if required while frying them. If you use a non-stick pan, the amount of oil for frying would be less. 


Friday, March 1, 2013

Beerakayan Palu Posina Kura / Beerakaya Kura / Peerkangai Curry / Ridge Gourd Curry - Andhra Style


Heard about this curry from my husband a lot..and whenever I buy the Beerakaya from the market, he never failed to mention about this curry and its one of his favourites since his childhood. So I decided to explore this curry based on the input given by him. The dish came out well and fulfilled his expectations.!!! This curry can be eaten either with hot rice or Rotis. It is definitely one of  the recipes I like to repeat in my Kitchen.
Ingredients
Beerakaya / Peerkangai - 2 Big Ones
Onion - 1/2 cup shredded
Ginger Garlic Paste - 1/2 tbsp
Green Chillies - 1 Medium slit into halves
Oil - 1 tbsp
Mustard Seeds - 2 tsp
Cumin Seeds - 2 tsp
Urad Dal - 2 tsp
Salt - To Taste
Turmeric Powder - 1 tsp
Coriander Powder - 2 tsp
Red Chili Powder - 2 tsp
Milk - 1 cup
Coriander Leaves - To Garnish
Curry Leaves - 5 or 6

Adjust the level of red chilli powder as per your spice level. As we are adding milk in this case, 2 tsp of red chili powder and 1 green chilli is ideal for medium spice level. If you want to have more punch, add another green chili.

Method
  • Peel the Beerakaya skin and keep them separately if you are planning to make a Pachadi out of the skin.
  • Cut the Beerakaya into small squares. Likewise keep the other ingredients that are required for the preparation ready.
  • In the cooking pan, add oil first. When its heated, add mustard seeds, cumin seeds, urad dal  followed by ginger garlic paste and onion.
  • Saute them till they get translucent. Then add the Beerakaya pieces,curry leaves and saute them till they get cooked three fourth. You could close the lid in order to fasten this process.
  • Add all the spices, salt into the pan now and saute them for 2-3 minutes till the spices get blended with the cooked beerakaya pieces thoroughly.
  • Add a cup of milk into the pan and allow the contents to cook on a low flame for nearly 8-10 minutes.
  • Once it thickens, switch off the flame. Garnish with coriander leaves and serve.

Thursday, February 21, 2013

Vaazhaikai Podimas / Raw Banana Podimas / Vazhaikai Podimas / Aratikaya Curry


Raw Banana / Vaazhaikai / Arattikaya could be used in numerous ways in South Indian Cuisine. Though I make different versions at home, I completely wanted to give a twist to the regular podimas curry and upgrade its taste. This version of my raw banana curry was initially a simple try but ended up making it often at home as its liked by my family ( mainly due to its simplicity). Method is very simple and takes less preparation time.!! And above all, its not a high caloric curry as its made with less oil and steam cooked veggie. Try this out in your kitchen and enjoy the exotic flavour of this curry with a cup of hot rice and rasam. 

Ingredients

Raw Banana / Vaazhaikkai / Arattikaya - 4 Big
Oil - 1 tbsp
Salt - To Taste
Hing / Asafoetida - 1 Dash
Mustard Seeds - 2 tsp
Cumin Seeds / Jeera - 1 tsp
Urad Dal / Ulutham Paruppu - 2 tsp
Curry Leaves - 5 or 6
Coriander Leaves - To Garnish
Turmeric Powder - 1/2 tsp
Red Chili Powder - 1/2 tsp ( Optional ) or Black Pepper Powder - 1/2 tsp ( Optional )
Its optional and it purely depends on your taste buds. If the green chillies spiciness is just enough for your taste, you can leave this powder. If you want your curry to be more spicy, then you could choose either red chili powder or black pepper powder and add accordingly.

To Grind
Green Chillies - 3 Medium
Fresh Coconut Flakes - 1 tbsp
Garlic - 6 or 7 Big Pods

Method

  • Peel the skin and steam cook them in microwave or outside on a stove. Meantime, grind a paste of green chillies, fresh coconut flakes and garlic pods and keep it aside.
  • Grate the cooked raw banana and keep them ready.
  • In a frying pan / kadai, add oil first. When its heated, add Hing, mustard seeds, jeera, urad dal and curry leaves in order and fry them on a medium flame. 
  • Then add the grounded paste into the kadai and fry them gently on a low flame. When its fried for 3-4 minutes, add the turmeric powder and the grated raw banana and mix them well. 
  • Add required amount of salt and allow them to cook on a medium flame for 2 minutes with the lid on.
  • Allow them to fry openly for another 2-3 minutes and switch off the flame. Garnish with coriander leaves before serving.
Tips / Variations 

Fry the grounded paste till the raw smell of the garlic goes off. Make sure that it does not turn black at the bottom.
To make it more special, add a handful of peanuts / groundnuts just after tempering. Fry the groundnuts thoroughly before adding the grated raw banana into the kadai. 

Wednesday, January 30, 2013

Cheppankizhangu Fry / Cheppankizhangu Varuval / Chamadhumpa fry / Colocasia Fry / Taro Root Fry / Chamadumpa Fry


Hi to all my dear friends and bloggers. After a long break, I stepped in again with lots of determination to post all the drafts I have made. In this year 2013, I am going to post regularly and make it more exciting for you all.

Wishing you all a very Happy New Year 2013.

Start with, I am giving my version of Cheppankizhangu Fry ( Taro Root / Colocasia Fry ).  Though I love this fry, somehow I was not a big fan of that sticky kozha kozha Cheppankizhangu Fry. To avoid that stickiness, I tried a different method to make the curry more delicious and presentable. My family loved this version and the appreciations at home made me to present this to you all in my blog confidently. This fry is definitely going to be an excellent side curry during any occasions. Instead of having our regular Potato fry, try to substitute this yummy Cheppankizhangu Fry in your menu and see the difference. Your comments and suggestions are always welcome to improvise this dish and also my blog.

Ingredients

Cheppankizhangu -  15 to 18
Oil - 2 tbsp
Hing - 1 Dash
Mustard Seeds - 2 tsp
Urad Dal / Ulutham Paruppu - 2 tsp
Curry Leaves - 1 Stem
Turmeric Powder - 1 tsp
Red Chilli Powder - 3 tsp
Sambar Powder - 1/2 tbsp
Coriander Powder - 1 tsp
Salt - As required
Rice Flour - 1/2 tbsp

Method

  • Peel the skin of the Cheppankizhangu and cut them into mini rounds or any shapes you desire. Generally the mini rounds would get fried uniformly and are best suited.
  • In the frying pan, add the oil and heat it on medium flame. When its heated, add hing, mustard seeds, urad dal and curry leaves in order and when the tempering process is done, add the mini rounds of Cheppankizhangu into the kadai carefully.
  • Add the turmeric powder alone first into the kadai and add little water ( about 1/2 a glass ).
  • Allow the cheppankizhangus to cook on low flame for nearly 10 minutes. Stir it in the middle and add little more water if required while cooking. When its cooked three fourth, add required amount of salt into the kadai / pan.
  • When the cheppankizhangus are completely cooked to your satisfaction, add the other powders and little more oil into the pan.
  • Coat the cheppankizhangu rounds with all these powders on all sides and allow them to get fried uniformly on medium flame. Flip the rounds carefully during this process.
  • When they turn golden brown, switch off the flame. Let the curry remain in the pan till you actually serve.

Thursday, August 2, 2012

Manathakkali Keerai Poriyal / Manathakkali Keerai Sundal / Manathakkali Keerai Curry

Manathakkali Plant is very common in South India and I think I saw this plant in every household and they make different food items using its leaves, green berries, flowers, black ripe berries.  Its a medicinal plant and used widely in Ayurvedic medicine. Leaves of this plant are believed to cure stomach related problems and liver problems. We make Manathakkali Vathal Kuzhambu, Manathakkali Keerai Kootu / curry / paruppu usili / Usiliyal etc., This item I tried Manathakkali Keerai Usiliyal / Poriyal which my mom prepared almost weekly. I loved to pluck the good leaves from the plant during my childhood and we had few plants in our backyard during that time. My mom tried to make different varieties using this Manathakkali Keerai and one of the varieties is this simple usiliyal. Its an excellent and healthy side dish in any healthy meal. I am very proud to present this in my blog as I have used our home grown manathakkali leaves in my preparation.


Ingredients
Fresh Manathakkali Leaves - Between 2 to 3 cups packed.
Moong Dal / Payatham Paruppu / Pesara Pappu - 1 Handful
Salt - To Taste
Hing / Asafoetida - 1 Dash
Oil - 3 tsp
Mustard Seeds - 1 tsp
Jeera / Cumin Seeds - 1 tsp
Urad Dal / Ulutham Paruppu - 1 tsp
Dry Red Chillies - 2 Medium
Fresh Coconut Flakes - 1/2 cup
Method
  • Pluck the good manathakkali leaves from the plant. Wash them thoroughly and chop them nicely.
  • Soak the Payatham Paruppu in water and cook them separately and keep the cooked dal ready.
  • In a kadai / pan, add oil first. Finish the tempering process by adding hing, mustard seeds, urad dal , dry red chillies into the pan.
  • Add the chopped leaves into the pan. Sprinkle some water and allow them to cook for 2-3 minutes with the lid closed.
  • When its cooked, add the cooked Moong Dal, required amount of salt into the pan and fry for another 2 minutes.
  • Switch off the flame and garnish with some fresh coconut flakes on its top. A healthy side dish is ready to be served.

Thursday, March 29, 2012

Brussels Sprout Curry / Brussels Sprout Poriyal


Brussels Sprout is a kind of green leafy vegetable and looks like a mini cabbage. These tiny ones contain a chemical which has high anticancer properties. Its recommended to steam cook this vegetable in order to retain its nutrient values and fiber. As boiling this vegetable reduces its anti cancer compounds, its recommended to either steam cook, microwave or stir fry this vegetable. Its always challenging to introduce new vegetables in our regular cuisine. Initially, I added this tiny cabbage in our regular sambar, pappu charu. But I tried making few curries earlier. This version is the simplest one and also it retains the taste and nutrient values considerably as I adopt the steam cooking method.
Ingredients
Brussels Sprout -  Between 15 to 20 of uniform size
Oil - 3 tsp
Salt - To Taste
Hing/Asafoetida - 1 Dash
Mustard Seeds -1 tsp
Urad Dal / Ulutham Paruppu / Minna pappu - 1 tsp
Curry Leaves - 5 or 6
Fresh Coconut Flakes - 1 tbsp
Dry Red Chillies - 1
Green chillies - 1 slit into two.
Grated Ginger - 1/2 tsp

Method
  1. Pick tiny Brussels sprout of uniform size if possible. Take out the extra stems from the sprouts and trim them. Wash them thoroughly and slit the sprouts in the middle into four or five portions.  Don't cut the sprouts while making slits from the centre. Like how you make slits in a brinjal while making Brinjal Masala, you make similar slits into the sprouts too. Keep them ready.
  2. In a frying pan/kadai, add Oil first. When its heated, all the other ingredients for tempering. When its done, add all the Brussels sprouts at one shot and mix them well.
  3. Sprinkle few water and little salt and close the pan/kadai. Let the sprouts get cooked with the steam inside for few minutes. ( mostly 5-6 minutes)
  4. Add some more salt now and fry them openly for two minutes.
  5. Finally add the grated ginger, coconut flakes into the curry and serve.
  6. Its definitely a healthy curry and be a good substitute for our regular cabbage curry.
Tips
Don't overcook the tiny sprouts which in turn makes the curry soggy.

Monday, March 26, 2012

Dondakaya Masala / Kovakkai Masala / Tindora Masala


Kovakai / Dondakaya / Tindora / Ivy Gourd vegetable is widely used in Indian Cuisine. We prefer to make a simple fry using this vegetable as its a good accompaniment in any meal. But I tried to give a twist with an idea given by my friend and made a gravy " Kovakai Masala". It goes well with both chappathis/ rotis and rice. My dear blogger friends, try this masala once during parties or during the get-together in our regular party menu and I am sure you will elated with the appreciations.!!!
Ingredients
Kovakkai / Dondakaya - 15 to 20 fresh.
Salt - To Taste
Sugar - 1 Pinch
Turmeric Powder - 2 tsp
Oil - 1 tbsp
For Tempering
Hing / Asafoetida - 1 Dash
Mustard Seeds - 2 tsp
Urad Dal / Ulutham Paruppu - 2 tsp
Curry Leaves - 1 stick
For the Gravy Paste
Cashew Nuts - 6 or 7 full
Khus Khus - 2 tsp
Dry Red Chillies - 5 or 6
Coconut flakes - 2 tsp
Ellu / Sesame Seeds - 2 tsp
Groundnuts / Peanuts - Around 10 full
Method
  1. Wash the Ivy Gourd thoroughly and slit them lengthwise and keep them ready.
  2. In a frying pan / kadai, dry roast all the ingredients for making the gravy paste. Transfer them into a mixer grinder and grind them into a thick gravy paste.
  3. In the same pan, add oil first. When its heated, finish the tempering process by adding all the ingredients.
  4. Then, add the cut Tindora into the kadai and fry them for 2 minutes.
  5. Add the turmeric powder and a pinch of sugar and sprinkle some water for the vegetable to get cooked. Cover the pan with a lid and allow the vegetable to get cooked three fourth and not fully.
  6. When its done to that level, add required amount of salt and the grounded paste. Pour some water to the pan if its too thick and not in gravy consistency.
  7. Mix the contents completely and allow them to cook for 5-6 minutes. Stir the masala in the middle to make sure that its not turning black at the bottom.
  8. Cook for few more minutes and switch off the flame after you get the desired gravy consistency. Raw smell of the paste should be off completely and you would notice the oil getting visible on top of the gravy which indicates the completion point.
  9. Switch off the flame and transfer the Ivy Gourd Masala into a serving bowl.
  10. Enjoy this yummy Masala with your favourite rotis/ chappathis or white rice.
Tips / Variations
  1. You can add some red chili powder if the gravy spiciness is not enough.
  2. Don't overcook the vegetable in the beginning stage itself. 

Tuesday, February 21, 2012

Kale Poriyal / Kale Sundal / Kale Curry


Kale, the dark greenish vegetable is the king of all vegetables. Its rich in dietary fiber, dieter's dream food as it fights against fat. Its an excellent source of nutrients and vitamins like Vitamin A, Manganese, Calcium, beta -carotene, etc., It protects the eyes, helps the human body's immune system, prevents cancer and heart disease considerably. After knowing all these benefits, who would not stock Kale in the Kitchen. I also get tempted to buy some fresh Kale and try out different food items out of it. Kale Poriyal with lentils is the food item I tried with kale and the poriyal was very tasty, rich in protein and fiber. The taste reminded me of the Drumstick Leaves Poriyal which my mom used to make during my childhood. It can be kept as one of the sides in any vegetarian thali we make at home. A cup of Kale Poriyal, cup of brown rice and a cup of fresh cucumber raita is an excellent meal option for weight watchers.
Ingredients
Kale - 1 Bunch
Payatham Paruppu / Moong Dal / Pesara pappu - 1 Handful
Fresh Coconut Flakes - 2 tbsp
Oil - 4 tsp
Hing / Asafoetida - 1 Dash
Mustard Seeds - 2 tsp
Jeera / Cumin Seeds - 2 tsp
Dry Red chillies - 3 or 4
Turmeric Powder - 1 tsp
Salt - To Taste
Sugar - 1 Pinch
Method
  • Soak the Moong Dal in warm water. Meantime, wash the Kale leaves and chop them nicely and keep it ready.
  • Half cook the Moong dal in the cooking pan by adding little water and keep it ready.
  • In the frying pan, add oil first. When its heated, add the Hing, Mustard Seeds, Cumin seeds, red chillies and finish the tempering process.
  • To the pan, add the half cooked Moong Dal and the finely chopped Kale Leaves and turmeric powder.
  • Mix them well with a pinch of sugar and sprinkle some water into the pan.
  • Allow the contents to get cooked thoroughly on medium flame. Occasionally open the lid and check whether the water is enough for the leaves and dal to get cooked. If required, add little more water.
  • When the Kale leaves and dal are completely cooked, ( it might take roughly around 5-6 minutes or more depending upon the Kale leaves ) add required amount of salt and fry them openly for 1-2 minutes.
  • Switch off the flame and add the fresh coconut flakes at the end. Mix them well and serve this side in your healthy vegetarian thali.

Asparagus Fry


Using Asparagus, I tried few food items like MorKootu, Mor Kuzhambu, Milagu Kootu before and enjoyed the taste of every item. This time I wanted to make a fry. It came out well like a Bindi / Vendaikai fry...Just added few red onions to asparagus just to coat some indian taste. It goes very well with plain rasam rice / charu. As asparagus is one of the healthiest food item in Top 10 list, its recommended to eat this tasty vegetable at least once a week. To kids, its the most healthiest choice as it increases the immune system.
Ingredients
Tender Asparagus Stems - 1 Big Bunch
Red Onion - 1/2 finely shredded
Oil - 3 to 4 tsp
Mustard Seeds - 2 tsp
Cumin  Seeds -  1 tsp
Urad Dal / Ulutham Paruppu / Minna pappu - 2 tsp
Curry Leaves - 6 or 7
Dry Red Chillies - 3
Hing / Asafoetida - 1 Dash
Salt - To Taste
Turmeric Powder - 1 tsp
Red Chilli powder - 1 tsp ( Optional )
Method
  • Wash the Asparagus and chop into small pieces and keep them aside. Cut the red onions into small pieces and keep it ready.
  • In the frying pan, add oil first. When it gets heated, add Hing, Mustard Seeds, Cumin Seeds, Urad Dal, Channa Dal, Curry leaves, dry red chillies first. When they sputter, add the red onion pieces and fry them with a pinch of salt for 2-3 minutes till they turn golden brown slightly. Add turmeric powder now and mix them well.
  • Finally add the asparagus cuts and cover them with a lid. Let them cook with the steam inside for few minutes, say 4-5 minutes.
  • When its cooked, add required amount of salt and a tsp of red chilli powder and fry them well for another 3-4 minutes on a low flame.
  • Serve this healthy fry with any hot rice combinations.
Variations / Tips
Do not add water while cooking the asparagus. Allow them to cook with the steam inside.
Instead of red chilli powder, you can sprinkle some black pepper powder too.

LinkWithin

Related Posts Plugin for WordPress, Blogger...