Showing posts with label Tiffin Varieties. Show all posts

Monday, March 1, 2021

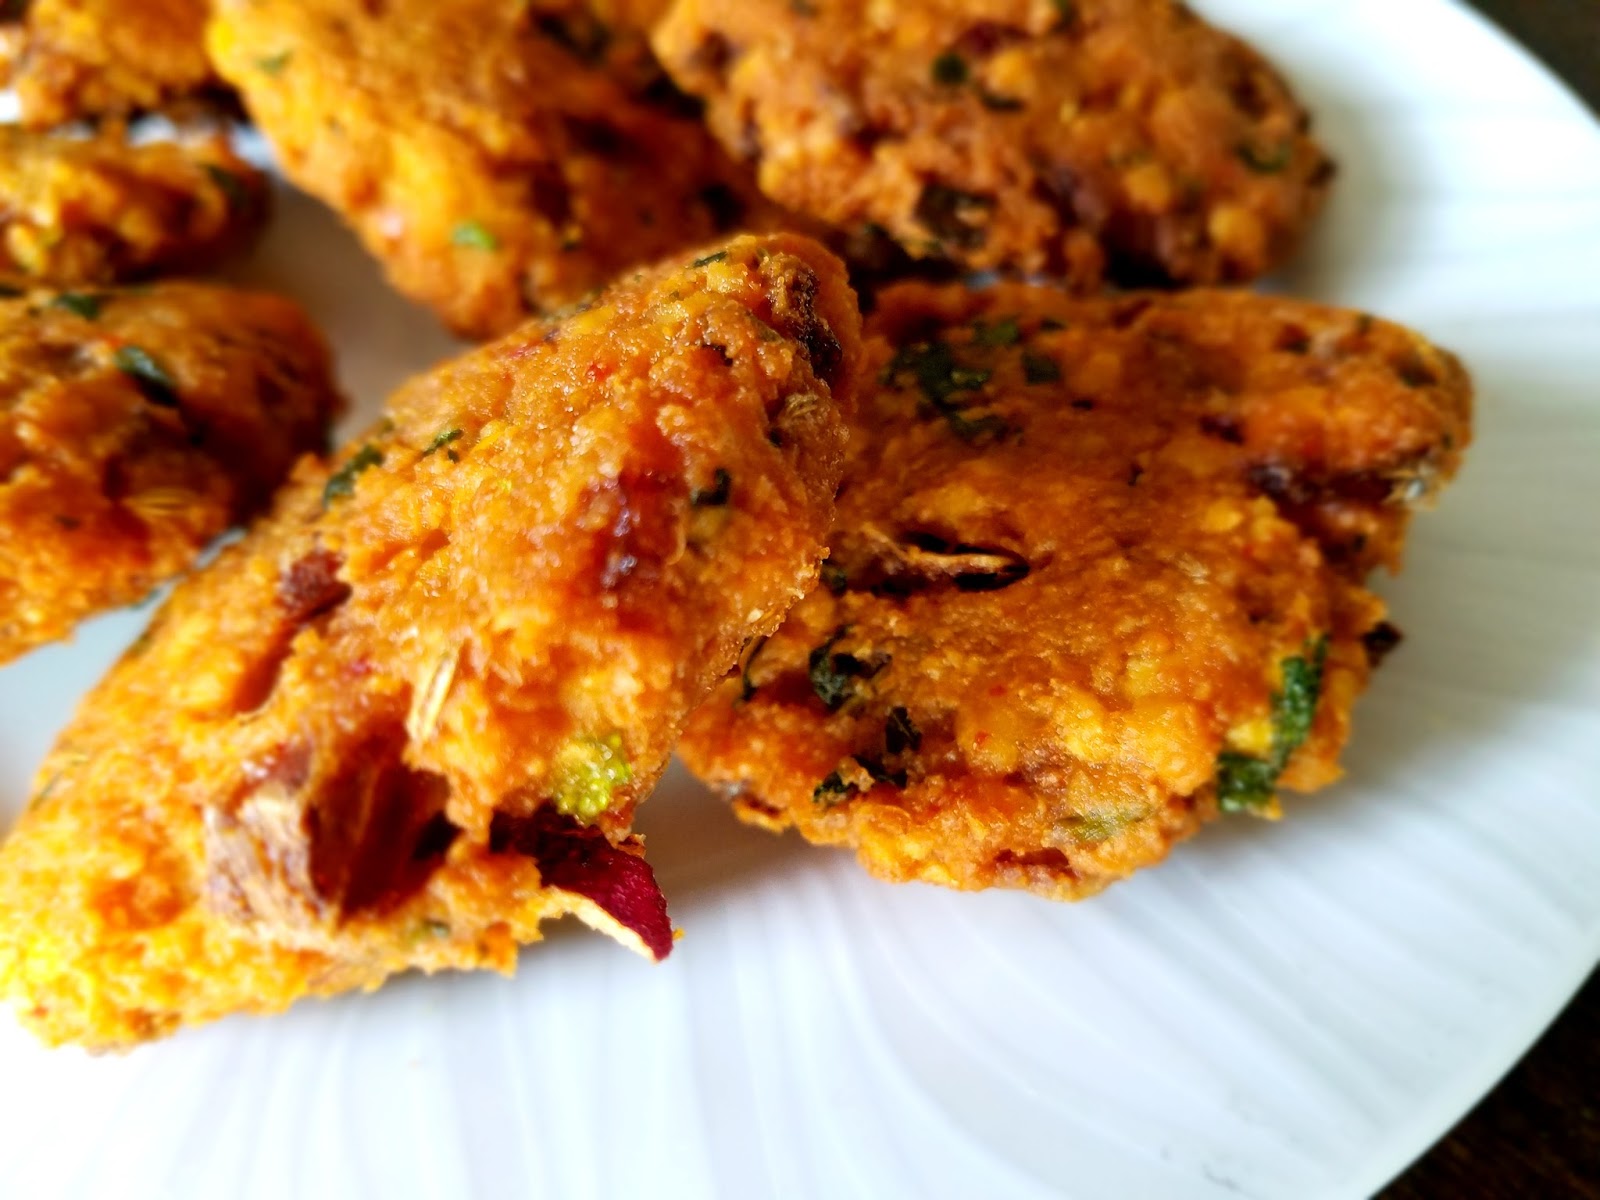
Banana Flower Vadai / Vaazhaipoo Vadai / Arati puvvu Vada


Banana Flower / Vaazhaipoo in Tamil / Arati Pavvu in Telugu is one of the Superfoods which is easily available in markets. This banana flower blossom has many medicinal properties and is highly nutritious. In TamilNadu, they widely use this flower to make many dishes in the kitchen. Though cleaning the banana flower florets is little tedious, my mom never failed to make this curry or Usili using this flower. During childhood, we often saw either banana flower curry or banana stem kootu in our meal.  Vaazhaipoo vadai / banana flower vada is one of the delicacies of Tamil Nadu. You can either fry this lentil based vadai in oil or cook them in air fryer too. 

Ingredients 

Channa Dal / Bengal Gram Lentil - 2 Cups
Fennel Seeds / Sombu - 1 tsp
Rice Flour - 1/4 tbsp
Garlic - 2 Pods
Ginger - 1 small cube
Green chillies - 4 Medium
Dry Red Chilli - 1 
Chopped coriander leaves - 1 handful
Crushed curry leaves - 1 stick
Hing / Asafoetida - 1 Dash
Salt - To Taste
Oil - Enough to fry the vadas
Water - Enough to grind the batter coarsely. 
Banana Flower florets of 1 flower thoroughly cleaned and chopped.

Preparation

Cleaning Banana flower 

Cleaning the Banana flower seems to be a little time consuming job initially. Once you know the technique of it, its a matter of few minutes and you will nail it easily everytime you buy.
  • Rub your hands with little oil while doing this job as your hands might turn sticky and black during this process.
  • Open the purple petals one by one and take out the yellow colour florets carefully.
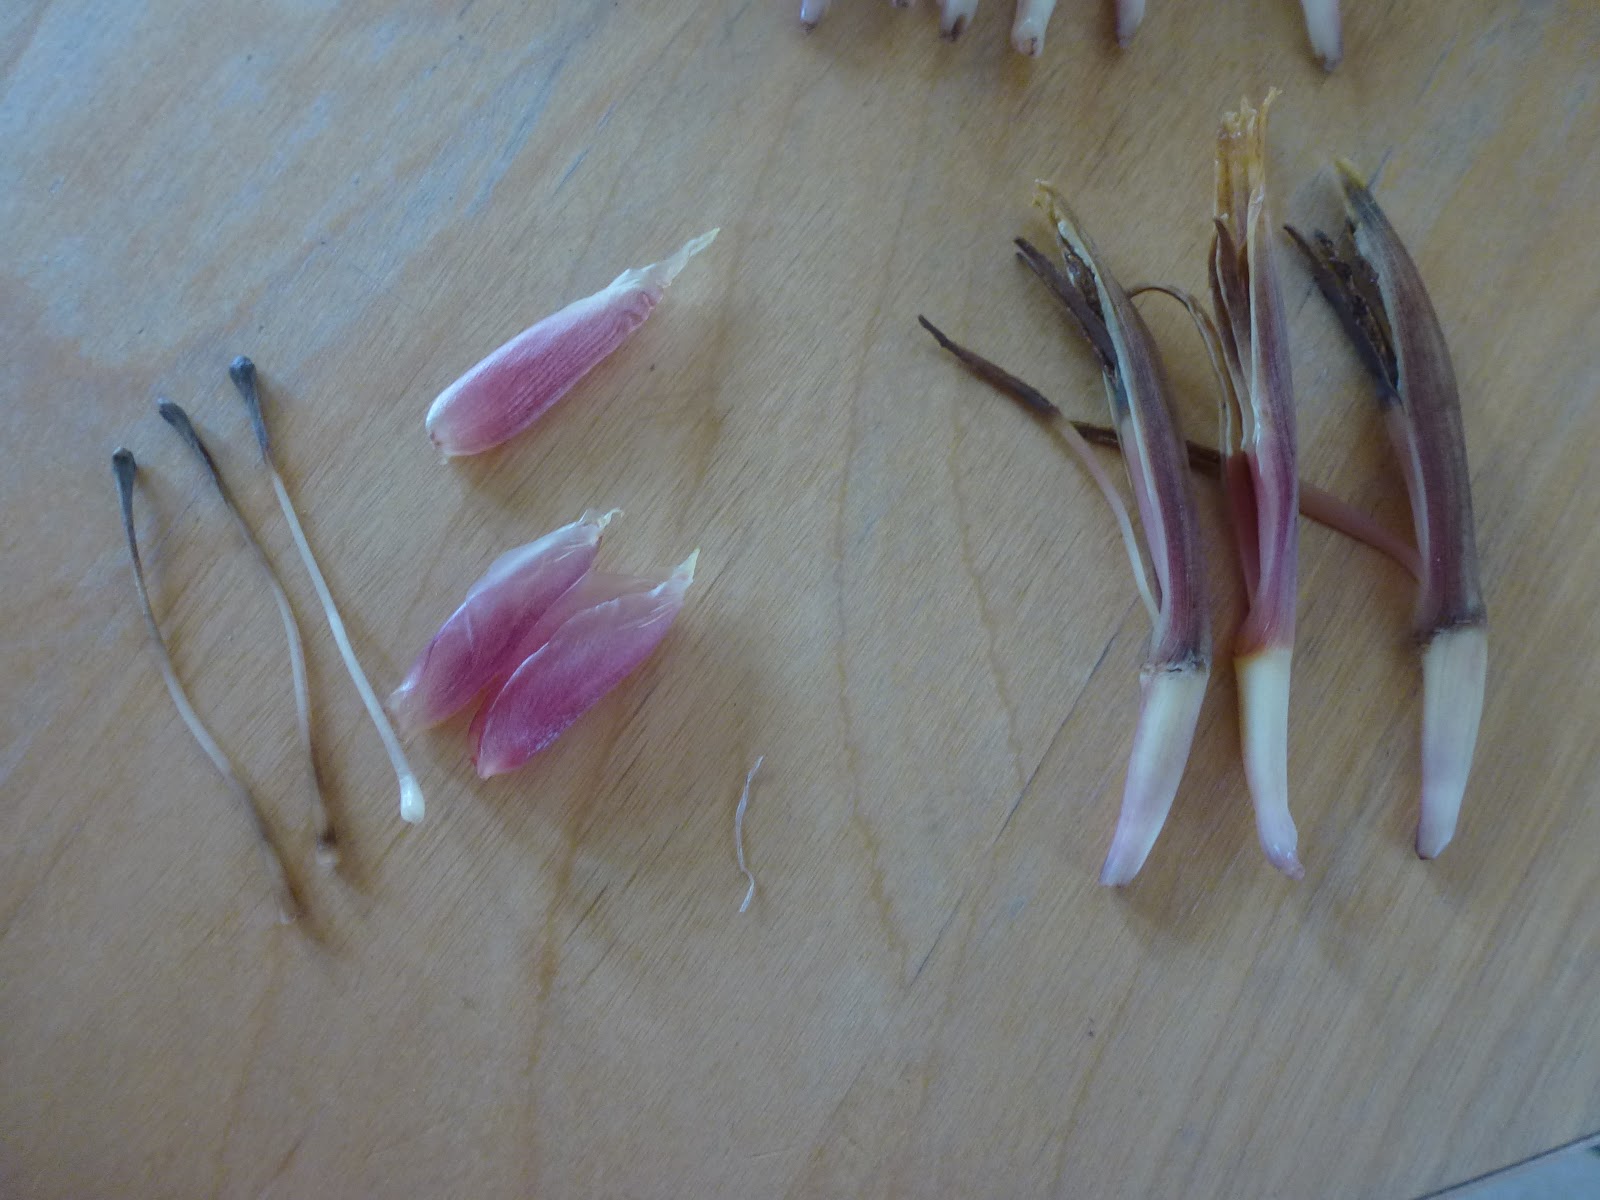
  • Remove the two parts from every floret carefully.
  • In the picture I added, I showed the two parts that are to be taken out from each floret. One part looks like a plastic ear phone and the other part is a thick long stem with a thick dot on its top.
  • Chop the cleaned florets under each petal and immediately put them in a diluted buttermilk in a vessel. This is mainly to prevent colour changing.
  • Follow the same process for all the petals till you notice a small cone shaped yellow tender bud. As this tender yellow cone is also highly nutritious, chop them too finely and add it to the vessel. Keep the chopped florets ready.

Vada Batter Preparation

  • Wash the dal thoroughly and soak them in warm water for an hour.
  • Meantime, clean the banana flower florets and keep the chopped florets ready. 
  • Grind the dal along with garlic, ginger, dry red chilli, fennel seeds to a coarse paste. Transfer the dal batter into the mixing bowl.
  • Add required amount of salt, hing, little rice flour, chopped coriander leaves and curry leaves, finely chopped green chillies, banana flower florets into the vada batter. Drain the chopped banana flower florets from the buttermilk mix and use the diluted water later. 
  • Simultaneously keep the kadai with oil on medium flame. When you notice slight smoke on top, then the oil is ready for frying.
  • Grease the palms with little oil and take a small portion of the batter and make a round pattie shaped  vada.
  • Gently drop them one by one into the heated oil. Fry them on both sides till they turn golden brown on medium heat. 
  • Serve the crispy banana flower vada / Vaazhaipoo vadai with a cup of coffee or tea.!!

Tips / Suggestions

  • Don't add too much water while grinding. Sprinkle little water which is just enough for grinding.
  • Don't fry the vadas on high flame as it will not help in getting golden vadas. It might turn them darker and also the inner part of the vadas might not get cooked perfectly.
  • Adjust the number of chillies as per your spice level.

Tuesday, January 21, 2020

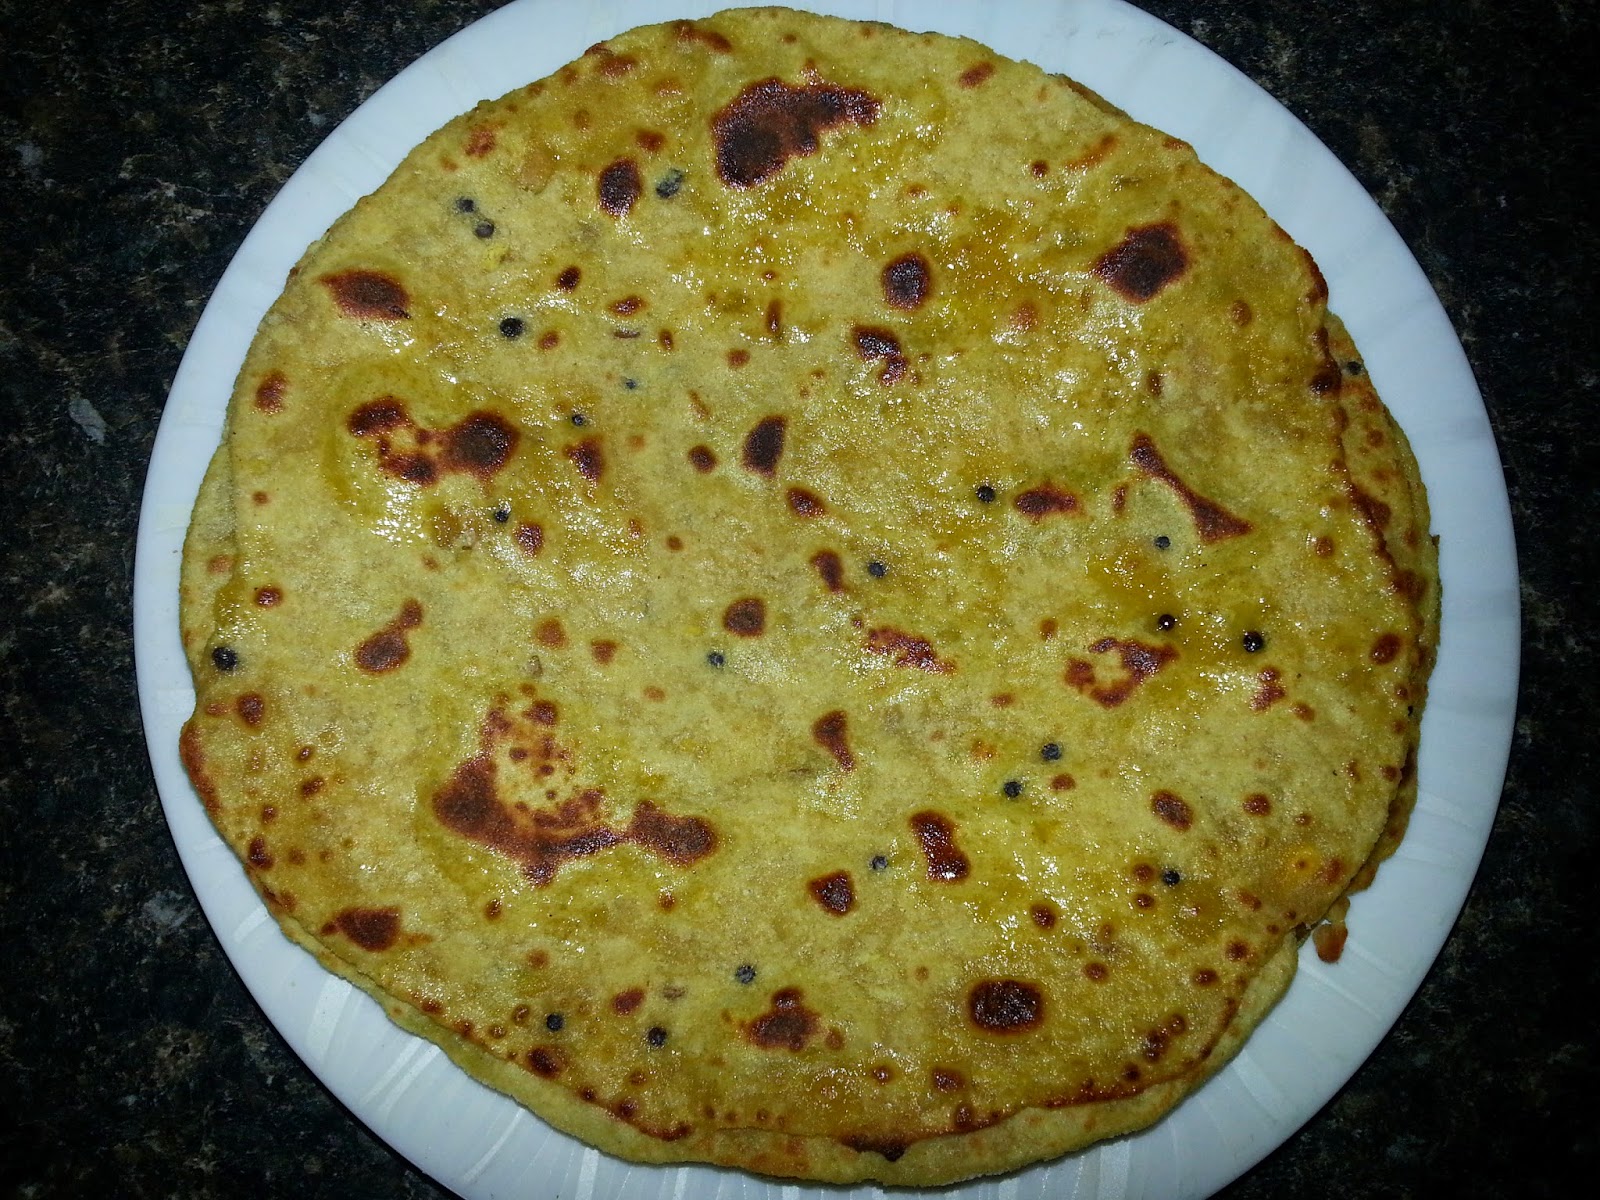
Avocado Chappathi / Avocado Roti / Avocado Paratha


Avocado is one of the veggies which always occupy a permanent space in our refrigerator. Avocado is incredibly nutritious, high in Potassium, loaded with fiber, good for heart, etc., Today I made Avocado Chappathis using a perfectly ripen Avocado, instead of making my regular guacamole. The rotis are extremely softer and it melts in your mouth. No need to add water while kneading the roti dough, the fatty texture from the avocado itself is enough to knead the roti dough. With a side of cucumber salad and spinach chole, the dinner was perfect with hot Avocado rotis.

Avocado roti dough should be made a little thicker as it would be easier to make the rounds. 

Ingredients 

Ripen Avocado - 1
Salt - As required
Ajwain Seeds - 1/2 tsp
Crushed green chili - 1 medium
Olive Oil - 1 tsp
Whole Wheat Flour - 1 Cup
Bajri Flour - 1/4 cup
NO WATER REQUIRED


Preparation

First, peel the Avocado and add it in the mixing bowl. Smash the Avocado completely and make a smooth paste. Add all the other ingredients into the mixing bowl and knead the dough without adding any water. Keep it aside. After 20 minutes, make a small round and fry the roti on the heated tawa
both sides. Apply little ghee on top of the avocado roti before serving. Enjoy the rotis with good accompaniments. 


Monday, December 11, 2017

Masala Vadai / Crunchy Masala Vadai / Masala Vada


During rain, our mind instantly thinks about enjoying a cup of chai / tea with few hot masala vadais on its side. Somehow I cannot forget the taste of the newspaper wrapped masala vadais that I and my sisters enjoyed during childhood.  Especially after school, we used to buy few crunchy masala vadais from a nearby stall where they made fresh vadas daily. Just to reminisce, still I wrap atleast 2 or 3 vadas in newspaper and have it with my tea. Though I rarely make fried vadas at home nowadays, we thoroughly enjoy each and every vadas we make. Absolutely no vadas will be left untouched.!!!

While making masala vadas , I am sticking on to this version firmly. Its mainly due to the crisp and crunch vadas it yields. Somehow in my home, they don't enjoy soggy vadas, especially soggy masala vadas.

Ingredients

Split Pea Lentil -  1 Cup
Channa Dal / Bengal Gram Lentil - 1 Cup
Fennel Seeds / Sombu crushed - 2 tsp
Hing / Asafoetida - 1 Dash
Salt - To Taste
Rice Flour - 1/2 tbsp
Crushed Garlic - 2 Pods
Crushed Ginger - 1/2 tbsp
Green chillies - 4 Medium
Dry Red Chilli - 1 
Chopped coriander leaves - 1 handful
Crushed curry leaves - 1 stick
Finely chopped red onion - 3 medium
Oil - Enough to fry the vadas
Water - Enough to grind the batter coarsely. 

Method 
  • Wash the dals thoroughly and soak them in warm water for an hour.
  • Grind them along with crushed garlic, green chillies, dry red chilli to a coarse paste.
  • Add the rest of the ingredients into the mixing bowl. Add required amount of salt and a dash of Hing into the vada batter. 
  • Simultaneously keep the kadai with oil on medium flame. When you notice flames on top, then the oil is ready for frying.
  • Grease the palms with little oil and take a small portion of the batter and make a round Pattie shaped  vada.
  • Gently drop them one by one into the heated oil. Fry them on both sides till they turn golden brown and look crunchy.
  • Serve them with a side of spicy kara chutney. Enjoy with a cup of coffee or tea.!!

Tips
  • Don't add too much water while grinding. Sprinkle little water which is just enough for grinding.
  • Don't fry the vadas on high flame as it will not help in getting golden vadas. It might turn them darker and also the inner part of the vadas might not get cooked perfectly.
  • If possible, try to keep the vada batter in the refrigerator for 15 minutes before frying. It helps in getting golden crispy vadas with inside part perfectly cooked.
  • Adjust the number of chillies as per your spice level.

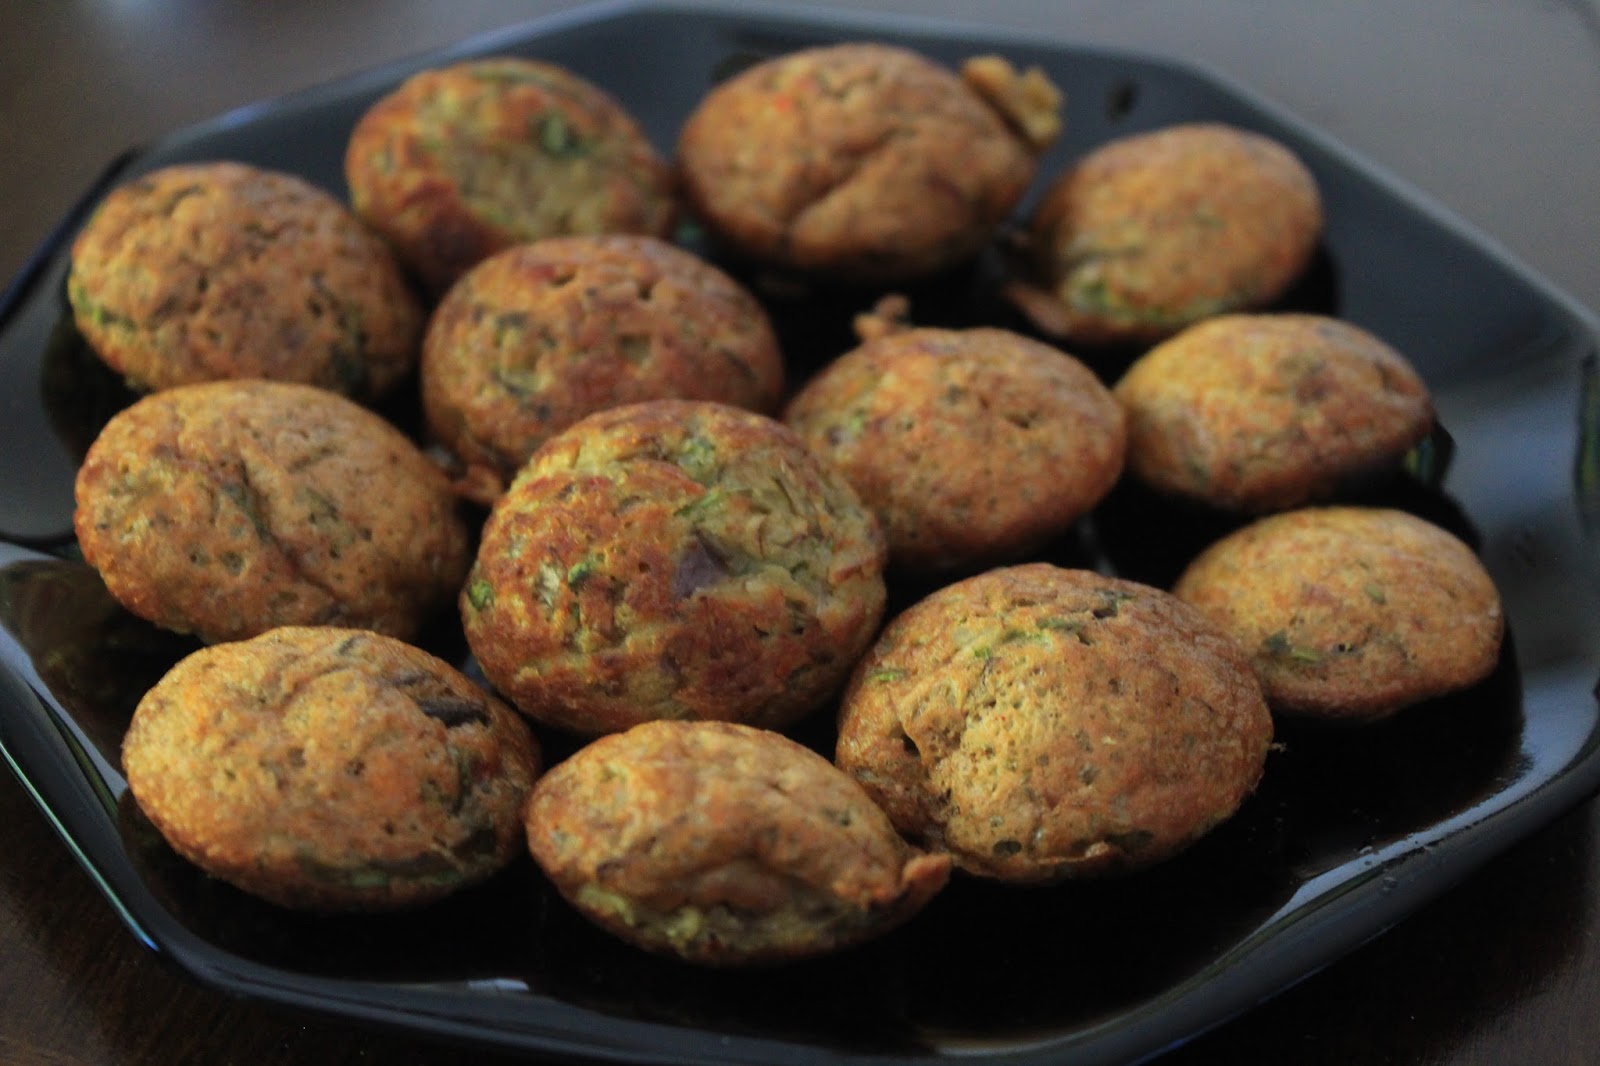
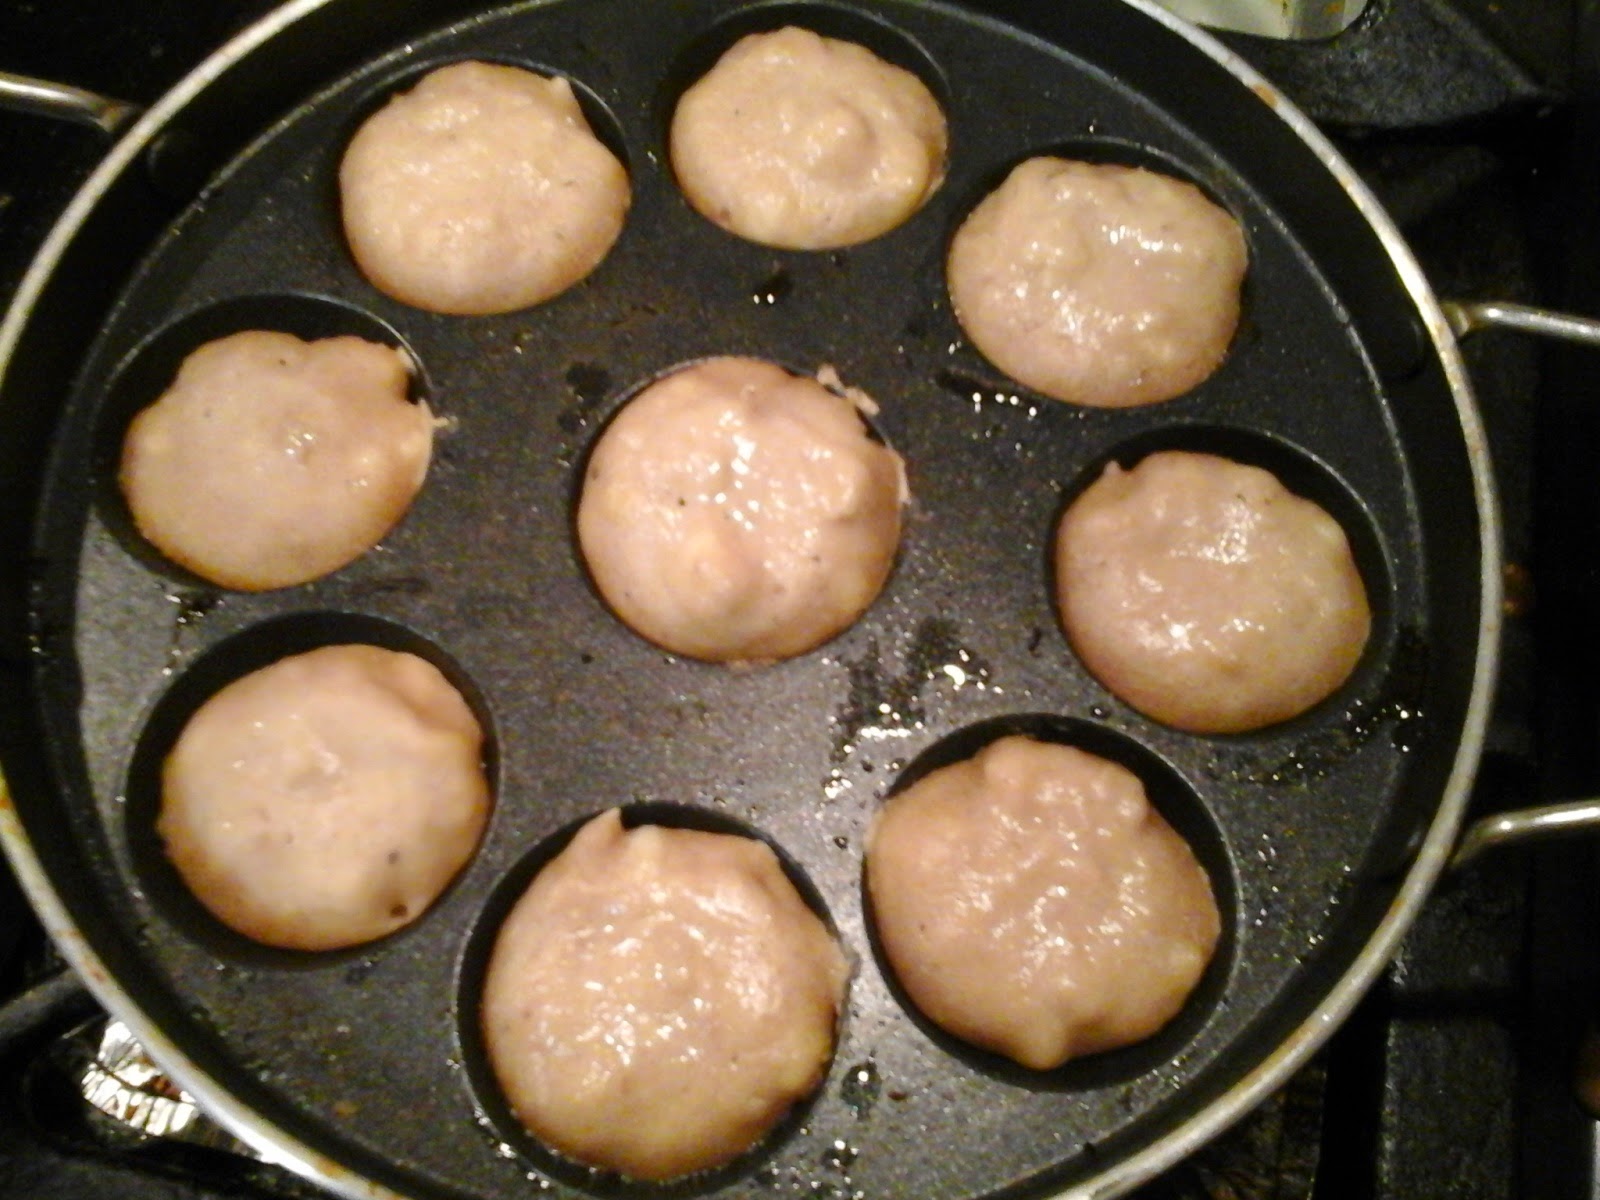
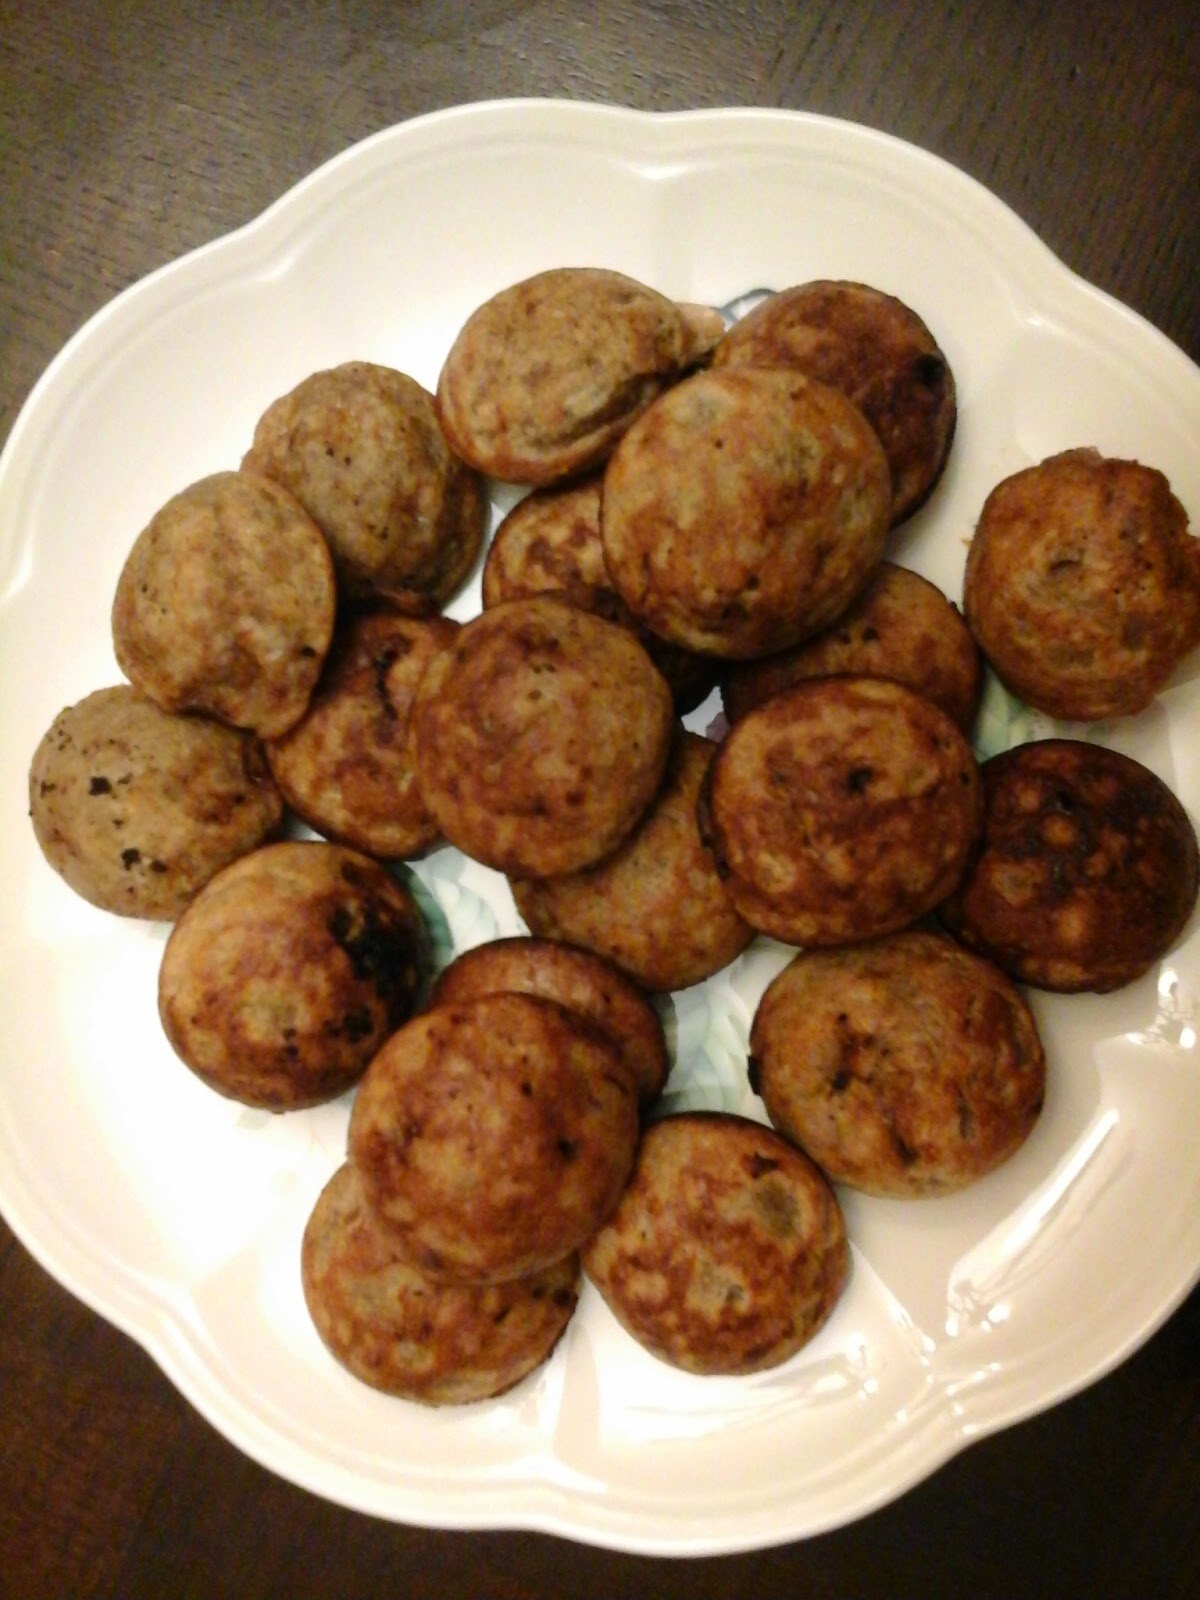
Banana Flower Paniyarams / Vaazhaipoo Paniyarams - Using Leftover Adai Batter


Banana flower / Vazhaipoo also called as Banana Blossom is an incredible, edible flower which is highly nutritious. It is considered as a Super food for women especially during the menstruating period. I wanted to make some delicious breakfast with coconut chutney but not idly or dosa. I had only some leftover Adai batter. Also, I had a full bowl of pre cleaned / pre cut cut banana flower florets soaked in diluted buttermilk sitting on my counter top. So I decided to make Paniyarams with banana flower and adai batter. As the Adai batter is salted and spicy, just add the chopped banana flower, few coriander leaves and mix them well. 

 Ingredients

Leftover Adai Batter - 5 Cups
Chopped Banana flower florets - 2 Cups
You can adjust as per the availability and your taste.

Method

  • For making the paniyarams, keep the paniyaram plate on the stove.
  • On medium flame, add drops of oil into the paniyaram moulds first. Then fill the moulds with the batter not upto the rim of the mould. Just pour only 3/4th of the mould. Fill all the moulds with the rest of the batter. 
  • Add drops of oil towards the sides of the Paniyarams.
  • Steam cook them with the lid closed on medium flame for 3 to 4 minutes.
  • Open the lid and flip the paniyarams carefully to the other side. Close the lid again.
  • Steam cook again for another 3 minutes. Turn both sides and check if they turn golden brown.
  • As the banana flower is added to the batter, its better to cook them for more minutes if not golden brown. 
  • Enjoy the Paniyarams with a side of coconut chutney or any spicy chutney.

Tips

  • Don't overcook the Paniyarams as they might turn black. 
  • Don't steam cook the Paniyarams on high flame.

Saturday, December 9, 2017

Ragi Idly / Finger Millet Idly - With No Rice


Idly is an all time comfort food and especially when it comes to breakfast, I always prefer to make varieties of Idly / Dosa along with good chutneys or nice gravies like sambar, kurma, kadappa as accompaniment. Having heard about the health benefits of millets, I also want to include those nutritious millet in our day to day meal as much as I can. Though you all would have seen this ragi idly or even have tried it in your own way either with finger millets or using ragi flour, I wish to share the way I made in my kitchen with you.  I have been making these fluffy, delicious brown idlies for breakfast. Ragi idlies taste very good if they are made with the real ragi millet grains than ragi flour. 

Ingredients

Ragi Millet / Finger Millet - 2 cups
Urad Dal - 1 Cup
Poha / Aval - 1/2 cup
Fenugreek Seeds / Methi seeds - 2 tsp
Salt - To taste
Water - Enough to grind the batter


Preparation Process

  • Wash and soak all the ingredients in a big vessel except fenugreek seeds. Soak the fenugreek seeds / methi seeds in a small cup with little water. Let it remain for 4 to 5 hours.
  • After that, wash them well thoroughly and grind them together in a mixer grinder by adding little amount of water while grinding occasionally.
  • Grind the batter to a smooth consistency. Store the batter in a large container so that there is enough space for the batter to ferment. Add required amount of salt to the ragi batter and mix it well.
  • Store it in a warm place or nearer to a heat vent which speeds up the fermentation process.
  • After good fermentation, mix the batter once or twice nicely. Now the batter is ready to make idlies.
  • Coat the idly moulds with little sesame oil, pour the ragi idly batter over the moulds uniformly.
  • Steam cook the Idly plates for 10 to 12 minutes. After few minutes, carefully open and scoop the ragi idlies out of the idly moulds. Serve the ragi idlies with either coconut chutney or tomato chutney and also with a cup of delicious sambar and enjoy!

Tips 

  • Add enough water while grinding the batter and make sure that the batter is fermented well.
  • If the batter is not fermented that good, add 1/4 tsp of baking soda and mix it well. Then you make the ragi idlies.
  • If the batter is fermented well, then the batter will increase in volume and double up the size. In that scenario, the idlies would be softer and porous.

Wednesday, April 1, 2015

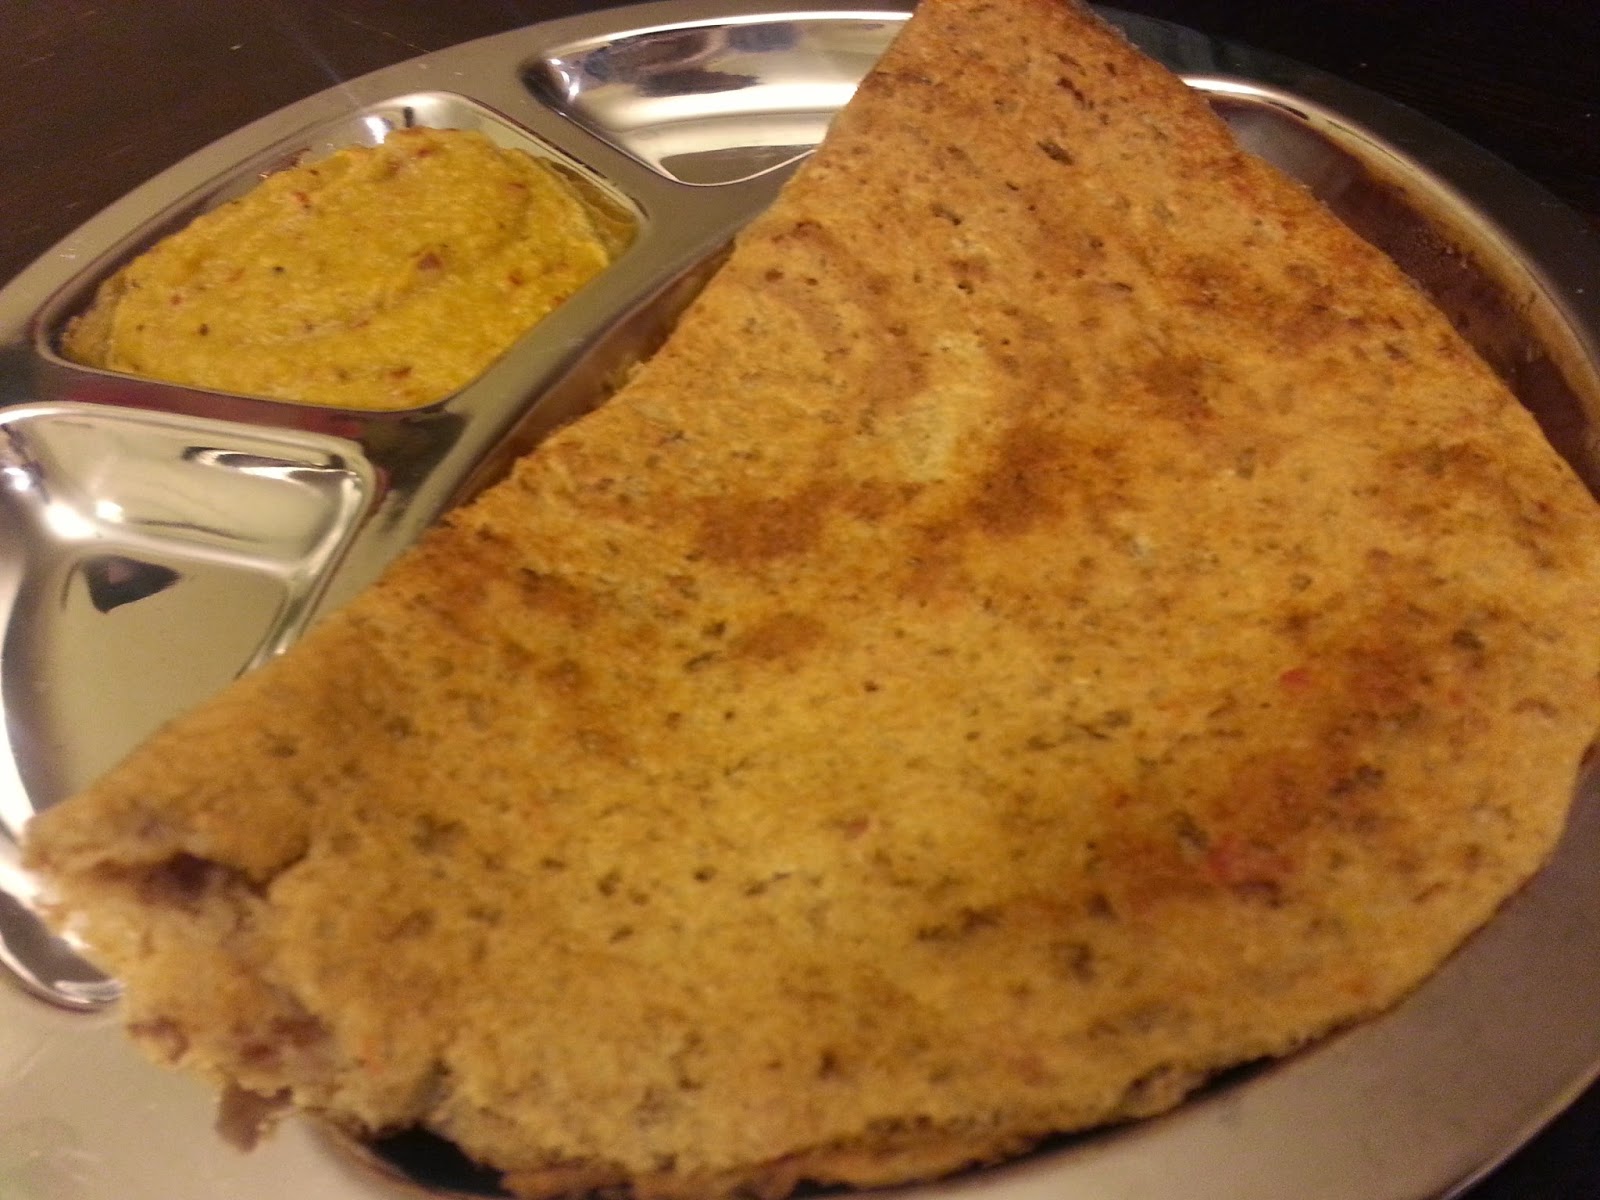
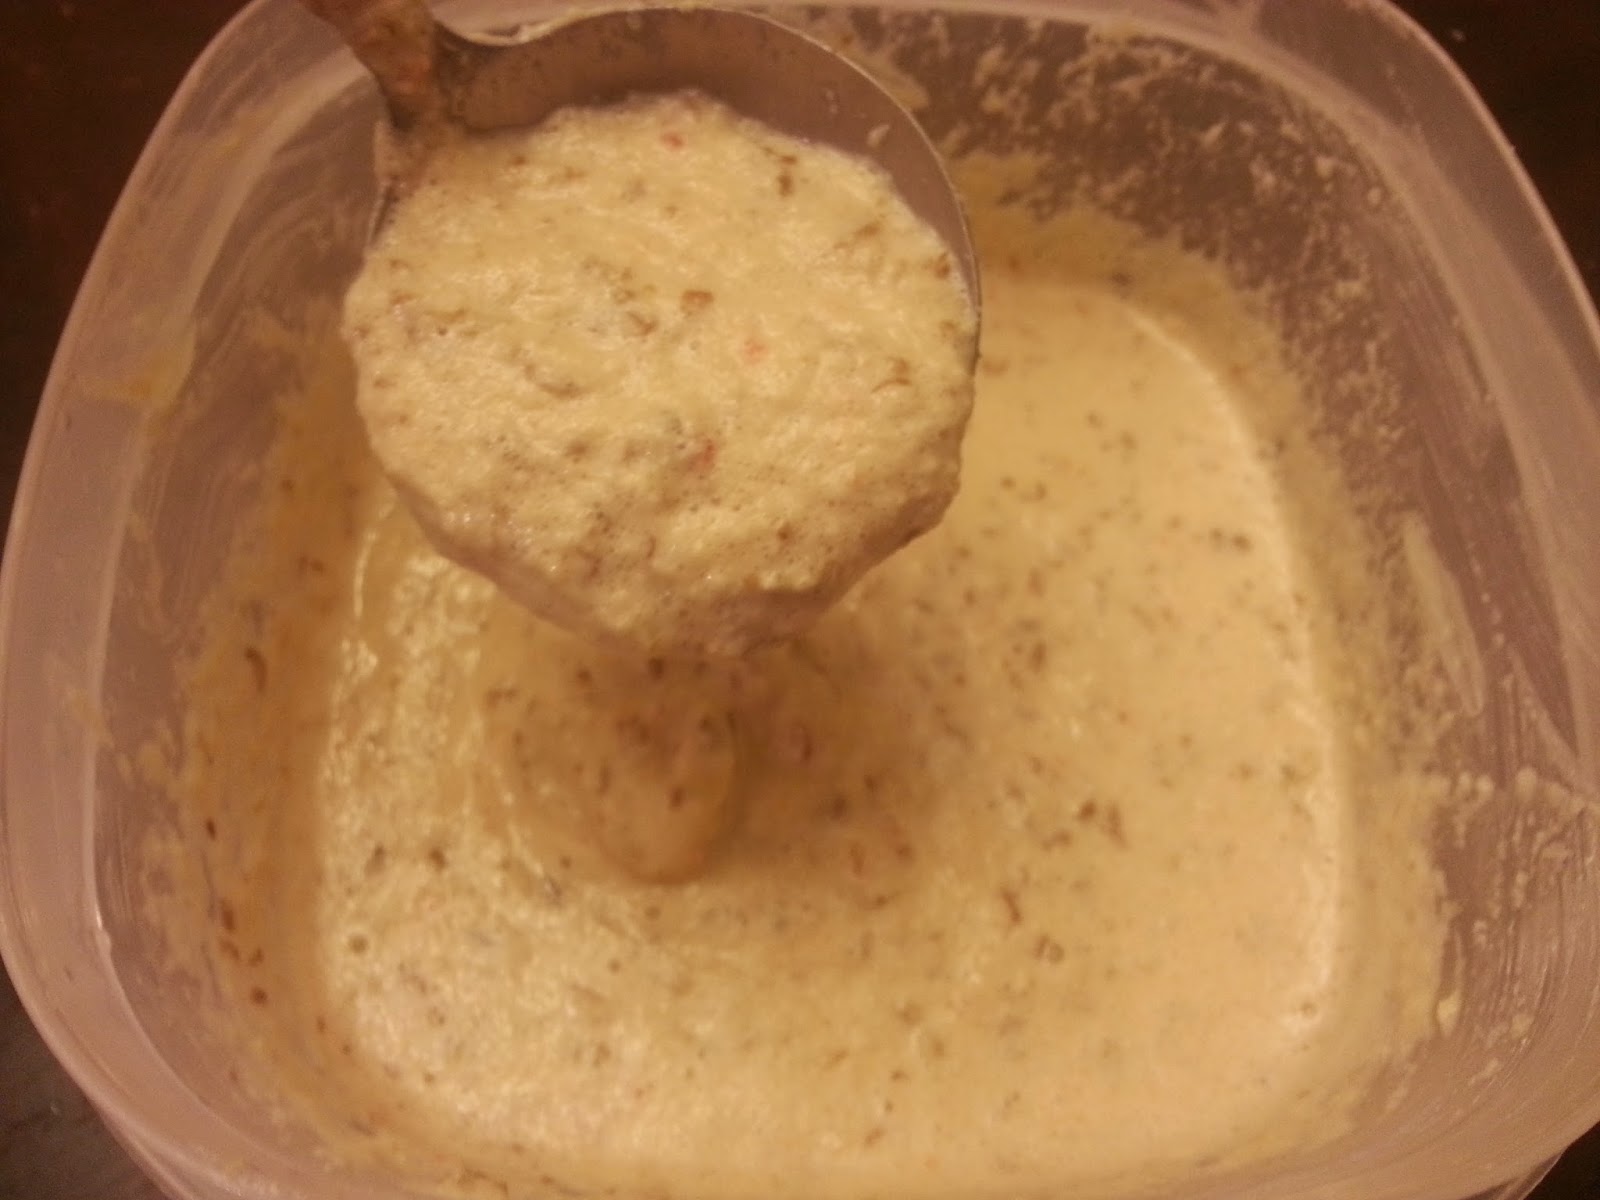
Sprouted Horsegram Dosa / Sprouted Kollu Dosa / Kollu Dosa


The biggest challenge for moms like me is deciding what to make for the next meal.Considering all the factors like a healthy option, liked by kids, less preparation time, easy process, its a bit more tough job for any responsible mom. Who says that feeding a family is easy? Mind should constantly think of healthy options and should hunt for the same. Of course, there is a saying " We need food to live but not live to eat food". But in this polluted atmosphere, seeing hundreds of infections and diseases, its essential to focus on what we eat. During this daily hunt, i came across another healthy option to satiate my mind through my good friend hema. She offered me a healthy, tasty, sprouted horse gram dosa / Kollu Dosa  grinded with red bell pepper and other ingredients. Dosas were truly delicious and I tried them in my kitchen too. My family loved the crispy golden dosas and the texture somehow reminds me of the pesarattu texture. I customized the dosa recipe slightly to our tastes and tried both plain dosas as well as dosas with carrot and onion. Dear bloggers, you can add this recipe confidently in your healthy recipe book.

Some Health Benefits of Kollu / Horse Gram 

Most Protein Rich Lentil found on the Planet
Low fat and high carbohydrate content
Lower Cholestrol Level
Slow digestible starch helps obesity and diabetic patients
Anti fungal, anti oxidant.

Some Side Effects of Kollu / Horse Gram

Should drink plenty of water as it generates lot of heat
Should be avoided by pregnant women
Excess of horse gram / Kollu can cause bile production.

Ingredients

Sprouted Horse Gram / Kollu - 2 Cups
Urad Dal - 1 Cup
Idly Rice - 1 Cup
Fenugreek Seeds - 2 tsp
Sabudana Seeds - 1 tbsp
Red Poha / Red Aval - 1 tbsp
Jeera / Cumin Seeds - 1 tsp
Salt - As Required
Water - Enough to grind the Dosa Batter
Ginger - 1 small cube
Dry Red Chillies - 4 or 5
Hing - As Required
Ripe Red Bell Pepper - 1 Big

Method

  • Wash and soak the Horse gram in water for 4-5 hours. Drain the water and make sprouts with the horse gram. It might take atleast a day or two to see some good sprouts.
  • Soak the other ingredients in water for 4-5 hours and grind them along with the sprouted horse gram in a mixer grinder. Add little water at intervals while grinding and make a smooth batter.
  • Add hing and required amount of salt to the batter and mix them well.
  • Keep the dosa batter outside for fermentation. This horsegram batter gets fermented quickly like pesarattu batter. So calculate the time accordingly and prepare the dosas. Otherwise store the batter in the refrigerator.
  • Before making the dosas, add little water to the batter and mix well.
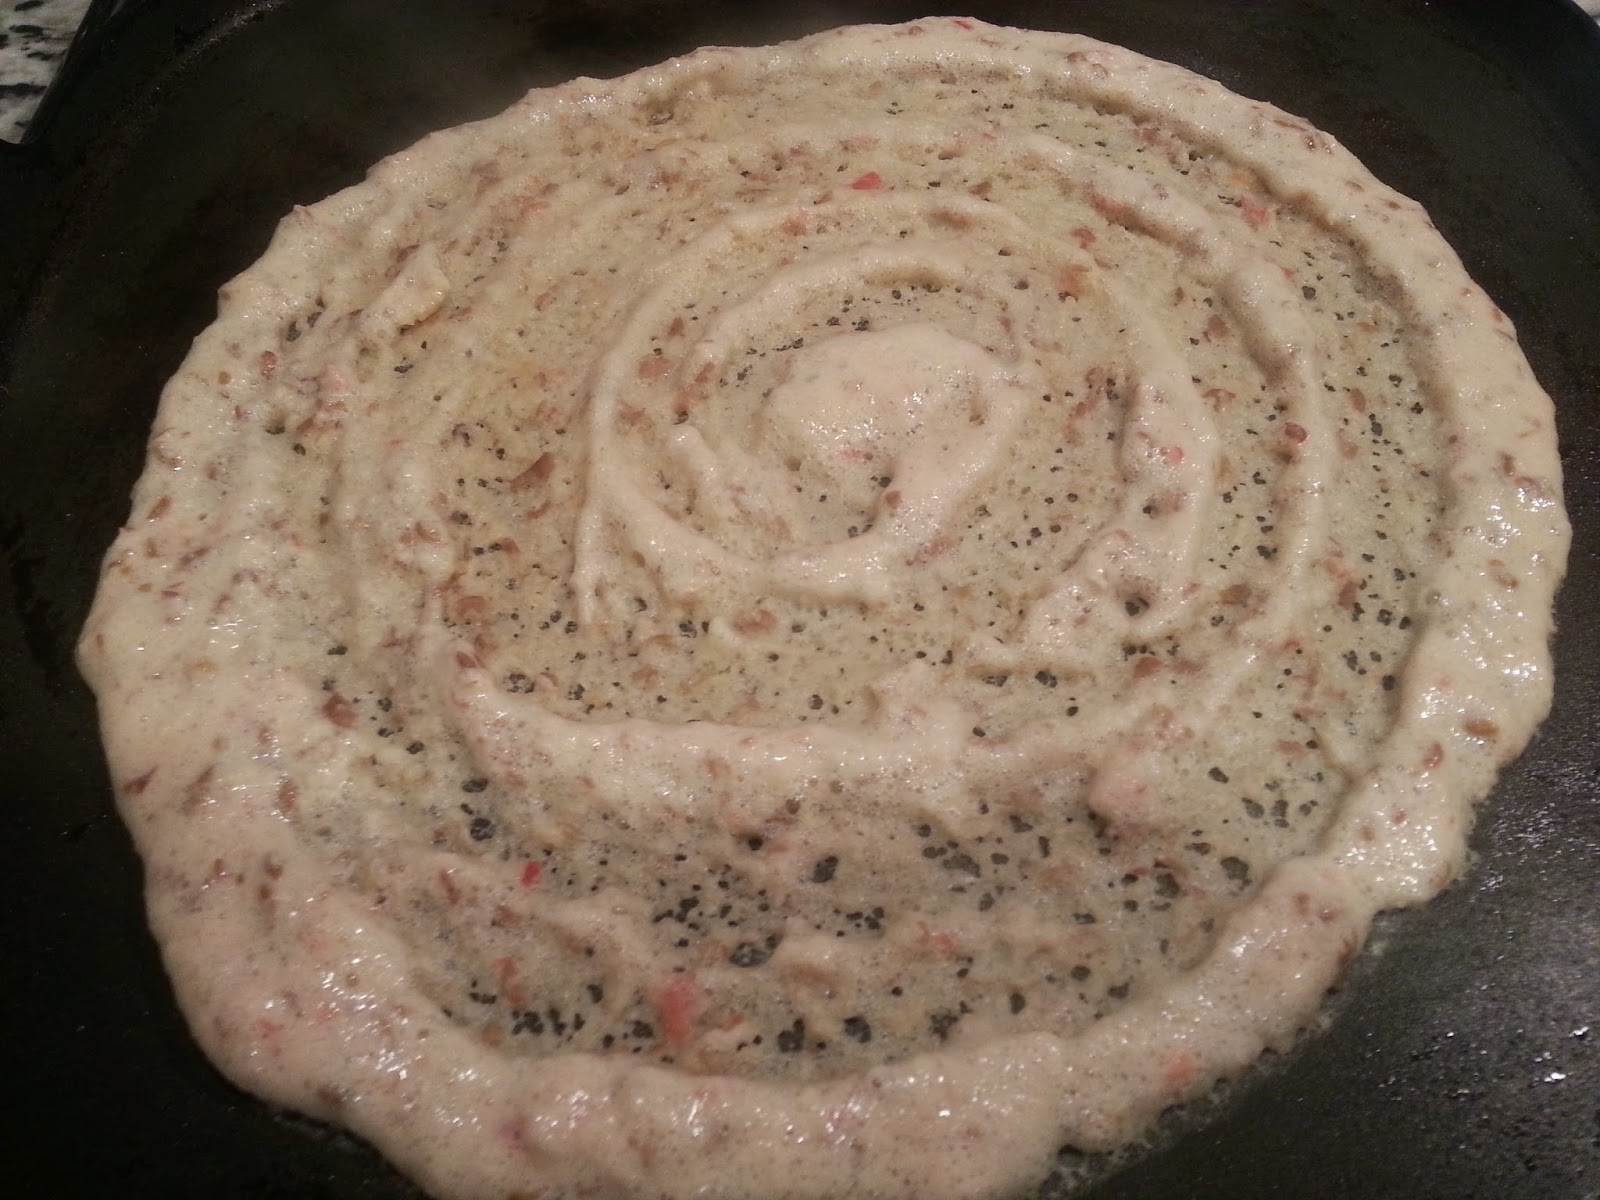
  • In a heated dosa pan, pour a cup of the dosa batter and spread the evenly on all sides. Apply drops of oil on all sides and fry them on medium heat. Flip them to the other side and fry again.
  • Serve the dosas with a side of spicy onion chutney.

Tips 

  • Soak all the lentils and rice together and grind them together for this dosa.
  • Addition of a ripe red bell pepper enhances the taste of the dosa greatly and its a healthy addition too.
  • If you wish, you can add some grated carrot,onion and coriander leaves on one side of the dosa and fry. Kids specially love this addition as its very colourful.

Monday, March 30, 2015

Idly with Idly Rice, Sprouted Quinoa and Urad Dal / Quinoa Idly


Its an evident fact that nowadays people are looking at various ways to stay fit, grow younger and maintain a healthy living. They have started considering options and try to incorporate the new findings in our Indian cuisine. Recent additions in the present Indian Kitchens include Quinoa, Oats, old style millets, etc., I have never withdrawn myself from trying out new healthy options in my kitchen. Recently, one of my good friend hema treated me with her homemade sprouted quinoa idlies and horsegram dosai. I loved the texture and taste of her quinoa idlies and felt better than the quinoa idlies i was making then. I tried her recipe and came out with fluffy quinoa filled idlies. She made her idlies with sprouted quinoa and grinded them along with the Idly rice, Urad dal and fenugreek seeds. Generally I notice a slight aroma in quinoa idlies which some people might like or dislike. But in her version, that aroma was missing though which was perfectly fine for me.

Try this recipe with Idly rice, Urad Dal, fenugreek seeds and sprouted quinoa. Serve with any spicy chutney of your choice and sambar. An ultimate breakfast to kick start the day.

Ingredients

Idly Rice - 1.5 Cups
Urad Dal - 1.5 Cups
Sprouted Quinoa - 1.5 cups
Fenugreek Seeds - 2 tsp
Water - Enough to grind the Idly batter
Salt - As Required
Gingelly Oil - Enough to spread over the Idly Moulds

Method
  • Wash the Quinoa twice and allow them to sprout by covering them for a day or two. Make sprouts just like how you make sprouts with other beans and lentils. It might take a day or two to get some good quinoa sprouts.
  • Wash the idly rice, urad dal and fenugreek seeds thoroughly and soak them together for 4-5 hours.
  • Grind them in a mixer grinder along with the sprouted quinoa seeds together into a thick fluffy Idly batter.
  • While grinding, add little water at intervals so that the batter gets fluffy and grinded properly.
  • Once you notice a good fluffyness in the batter, transfer them to an airtight container for fermentation. Add required amount of salt at this stage.
  • After 6-7 hours of fermentation, gently mix the fermented idly batter.
  • Pour them over the oil smeared Idly moulds and steam them for 6-7 minutes.
  • Switch off the flame. After 4-5 minutes, carefully take out the idlies from the moulds and serve them with spicy chutney and a cup of sambar.
Tips / Observations
  • Soak them together and grind them together in this version. It eases the process and also the helps with the cleaning part.
  • Do not add more water while grinding which might make the batter watery. In this way, your idlies might be flat and not fluffy.
  • Good fermentation really helps in getting softer, fluffy idlies so try to ferment them in a good air tight vessel.

Tuesday, March 17, 2015

Rasa Upma / Instant Upma with Leftover Rasam


My Mom invented this rasa upma during my childhood, I could say. While doing the so called "night study", I used to pester her to make something just to satisfy my late night hunger. She would do some magic and come up with a plate of hot rasa upma. Later she described us how she exactly made that tangy, spicy upma with the leftover rasam.!!! We requested her many times to make this special upma for us. With no chutneys or sides too, this upma tastes delicious and melts in your mouth. 

I decided to make this Rasa Upma today with my leftover tomato jeera rasam. It truly reminded me of my mom and my school days. 

Ingredients

Sooji / Rava - 1 cup
Leftover Rasam - Between 2 to 3 cups
Water - A Cup
Hing - 1 Dash
Mustard Seeds - 2 tsp
Peanuts / Kadalai - 1 handful
Urad Dal - 1 tsp
Channa Dal - 1 tsp
Curry Leaves - One Small Stick
Dry Red Chillies - 2 big ones
Salt - Little required as the leftover rasam itself contains good amount of salt
Oil - 1 tbsp

Method

  • In a cooking vessel, add oil and heat it on medium flame. When heated, add hing,mustard seeds into the oil. When they sputter, add peanuts and fry them on medium flame.
  • Add urad dal, channa dal, curry leaves, dry red chillies into the oil and finish the tempering process.
  • Pour the leftover rasam totally into the cooking vessel with a cup of water and allow them to boil.
  • Add little salt if required. After 4 - 5 minutes, slowly add the roasted rava into the kadai. 
  • Let it cook on low flame till the rava gets cooked and blends well with the leftover rasam.
  • After its done, enjoy a plate of  hot rasam upma and stop worrying about leftover rasam. In fact, I started making little more rasam during mealtime especially to make this rasa upma.

Thursday, February 12, 2015

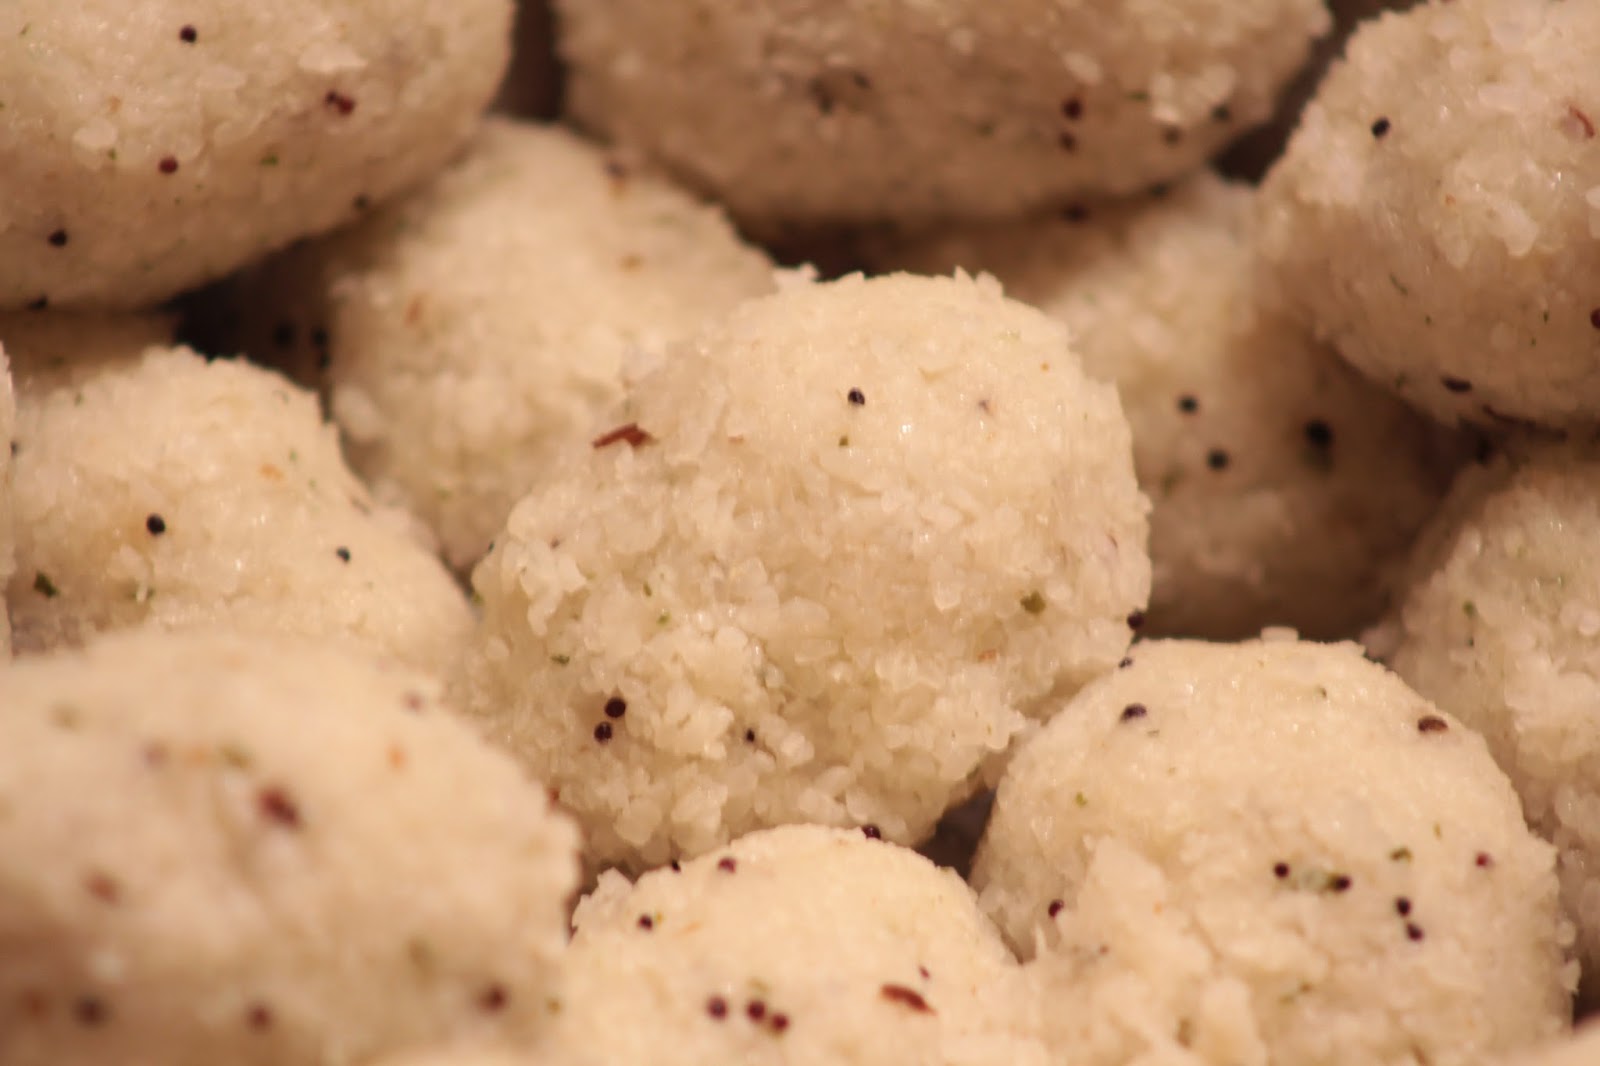
Upma Kozhukattai / Upma Kozhakattai / Pidi Kozhukattai - Steamed Rice Balls


Upma Kozhukattai is one of my favourite childhood tiffin varieties. These steamed rice balls can be made in both sweet and salty taste. Its an excellent tiffin option especially for kids who refuse to enjoy upma as such.!!! Well, my mom would have tricked us and offered these balls when we were kids. I love both the versions of this upma Kozhukattai. Sweet balls can be served with few drops of melted ghee to make it more delicious whereas the salty balls can be served with a spicy chutney on its side.

Salt Upma Kozhukattai / Salt Steamed Rice Balls

Idly Rava / Broken Rice Rava - 1.5 Cup
Hing - A Dash
Salt - To Taste
Oil - 2 tsp
Mustard Seeds - 2 tsp
Cumin Seeds / Jeera - 1 tsp
Urad Dal - 1 tsp
Channa Dal - 1 tsp

To Grind :
Fresh Coconut Flakes - 1 tbsp
Green Chillies - 2 Medium
Cut Ginger pieces - 1/2 tbsp
Fresh Curry Leaves - 4 or 5
Water - As required to grind and make a paste


Method 
  • You can make the broken rice rava at home start from scratch or can use the store brought Rice Rava / Idly Rava to make this upma balls.
  • This time, I tried with store brought Idly Rava only and it turned out very good and tasty. But it cannot compete with the taste made using the home made rice rava. I always vote for homemade Rice Rava.
  • Before starting, grind the paste with the ingredients as given above and keep it ready.
  • In a big kadai / cooking vessel, add oil first.  When its heated, add mustard seeds, cumin seeds, urad dal, channal dal in succession.
  • Then, add the grounded paste into the kadai / vessel. Stir them for a minute. 
  • Add the rice rava into the vessel and mix them well. 
  • Add 3 cups of water and required amount of salt at this stage into the vessel. 
  • Allow them to cook on medium flame with the lid on.
  • When its cooked, switch off the flame and allow them to cool down a bit.
  • When its warm enough to make balls, take a lemon size upma and make small balls and arrange them on a wide plate. 
  • Its wiser to apply a coat of oil on your hands and palms before making the balls which eases the process.
  • After making the balls with all the cooked upma, arrange the balls on a steaming plate carefully and steam them for 5- 8 minutes on medium flame.
  • You can steam them either using an Idly Steamer or any other steamer. 
  • After they are steamed properly, serve them with a side of spicy coconut chutney or any spicy chutneys of your choice. 

SWEET KOZHUKATTAI / SWEET STEAMED RICE BALLS

Ingredients

Broken Rice Rava / Idly Rava - 1 Cup
Powdered Elachi / Cardamom Powder - 1.5 tsp
Jaggery - 3/4 of a cup
Water - Enough to make the Jaggery Syrup
Ghee - 3 or 4 tsp
Grated Coconut flakes - 1 tbsp
Ghee roasted cashew flakes - 1/2 tbsp ( optional )


Method of Preparation 

  • In a cooking vessel / kadai, dry roast the idly rava on a medium flame with few drops of ghee.
  • When you get a nice aroma, add 2 cups of water into the vessel and cook them on low flame.
  • Meantime, make a jaggery syrup in a separate vessel by adding the jaggery and little water ( 1/4 cup ). The syrup is just the melted jaggery in water. So the syrup should be neither thick nor thin. It should be in melted form. Add the crushed cardamom powder and pour the jaggery syrup into the vessel and mix them thoroughly.
  • After a minute, add ghee and fresh coconut flakes, roasted cashews into the vessel.
  • Mix them well and switch off the flame.
  • After its cooled little bit, make the sweet balls as we did earlier for the salt version.
  • Steam cook them in an Idly cooker or any suitable steamer.
  • After its cooked perfectly, sprinkle some drops of ghee over the sweet balls and serve hot.

Tips and Suggestions

  • Steam the balls till you notice some sweats over the balls. I consider this as my checking point and switch off the flame. If we miss that, then the balls might get over cooked and get mushy. 
  • While making the sweet balls, apply a coat of melted ghee on your palms and apply regular oil while making salty ones.
  • I prefer to grind curry leaves, coconut flakes, green chillies everything and then add it as a paste just for my kids. Otherwise, they are patient enough to knock out every curry leaf, green chillies from the balls.

Tuesday, January 13, 2015

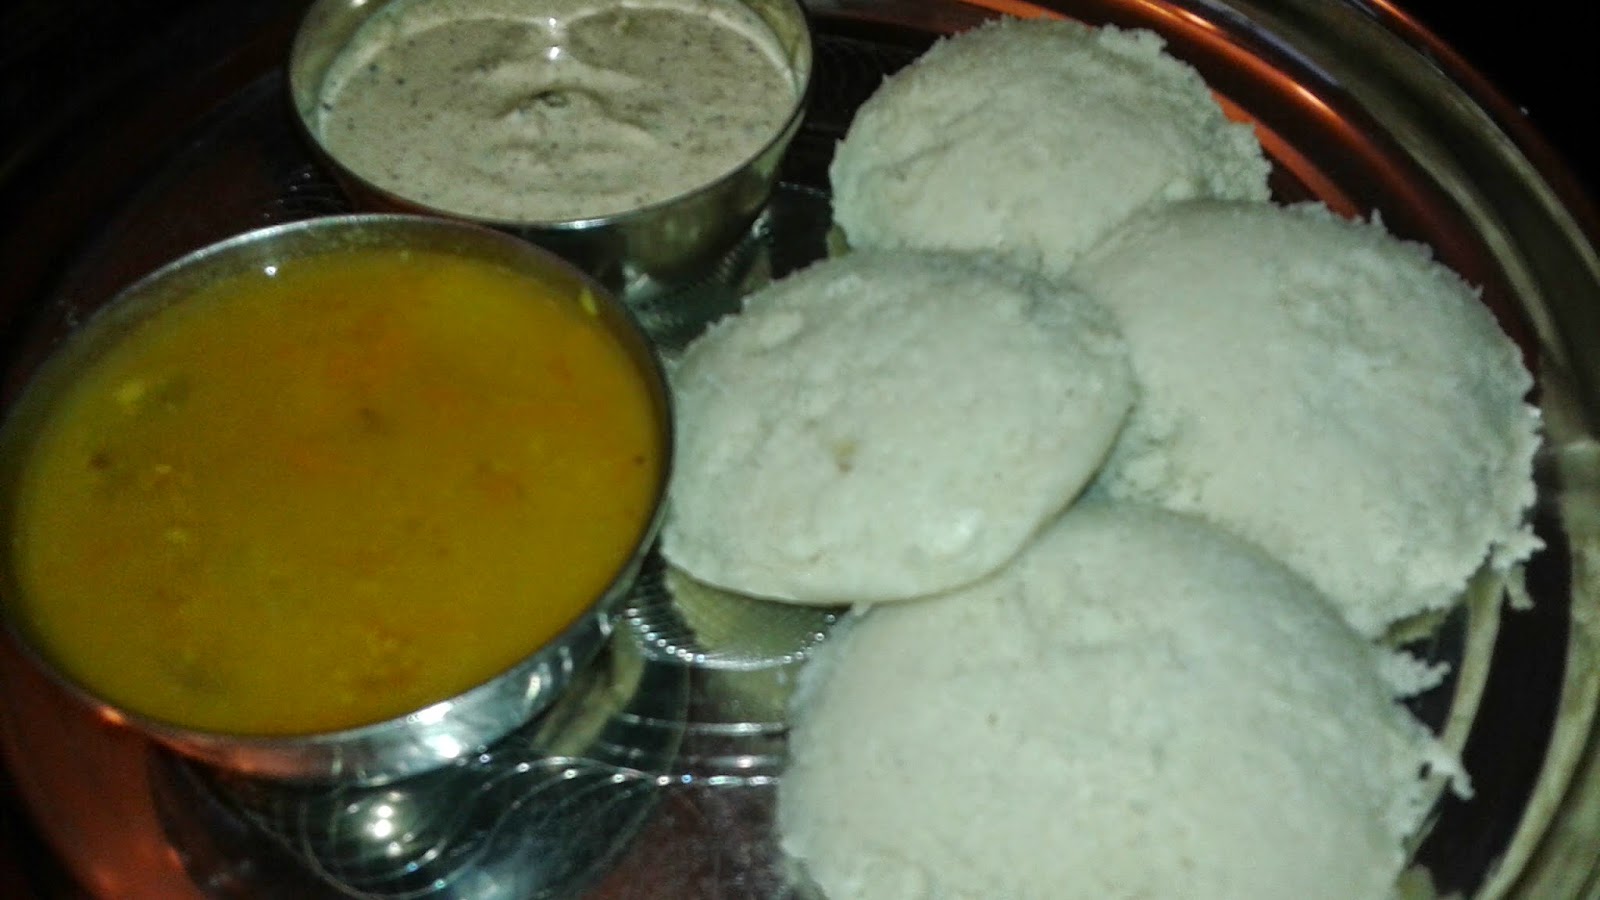
Varagu Arisi Idly / Kodo Millet Idly / Millet Idly


Wishing you all a wonderful New Year 2015. Wish to kick start the fabulous year with a healthy post as weight loss and nutrition always remain in my new year resolution list!!. Whether I achieve my goal completely or not, it motivates me every day and drives me to the right path. Recently I and my childhood Buddie Gai were talking a lot about millets and making south indian tiffin using them replacing the rice. She tried few tiffin varieties using this Kodo Millet and encouraged me to try making idlies with this millet.

Idlies made with Kodo Millet / Varagu Arisi tasted exactly the same as the ones made with Idly rice. With good accompaniments, its a healthy breakfast to the family. I served the millet idlies with garlic peanut chutney and tiffin sambar.

Kodo millets are gluten free and packed with minerals and vitamins. Due to its high protein, high antioxidant and high fiber content, its best suited for kids, diabetic people.

Ingredients

Varagu Arisi / Kodo Millet / Kodri - 3 Cups
Urad Dal / Ulutham Paruppu / Minna Pappu - 1 Cup
Fenugreek Seeds - 1 tsp
Salt - As Required
Gingelly Oil - Enough to spread over the Idly moulds.
Water - Enough to grind the Idly Batter

Method

  • Soak the Varagu / Kodo Millet  and urad dal in separate vessels in water for 3-4 hours. Add the fenugreek seeds into the urad dal vessel.
  • Grind them in a mixer grinder exactly the way you grind for making regular idly batter. First grind the millet portion and then grind the urad dal portion.This sequence helps me to scoop away the batter easily from the grinder with less efforts.
  • Store the batter in an airtight container and wait for 6-7 hours for the fermentation to complete.
  • While making the idlies, grease  gingelly oil over the idly moulds and keep them ready.
  • Mix the idly batter using a spatula and pour them over the idly moulds. Make sure that the idly batter completely fill the moulds but not overflowing.
  • Steam the idlies for around 5-6 minutes in an idly cooker or any suitable steamer you have on medium flame.
  • After its done, switch off the flame. After few minutes ( 3 to 4 ), carefully take out the idlies from the moulds and serve them with chutney and sambar. 
Tips / Suggestions
Dont grind the Kodo Millet and urad dal together. Try to grind them separately to get super soft spongy idlies.

Wednesday, November 19, 2014

Banana Walnut Kuzhi Paniyaram / Vella Kuzhi Paniyaram / Kuzhi Paniyaram / Sweet Paniyaram

Fully ripened bananas in the banana stand will always be sympathized and thrown away in our home. Just wanted to rescue those ripened soggy bananas, I made these yummy sweet treats called as "Banana Walnut Kuzhi Paniyaram".  Tiny round shaped muffin like Paniyarams melted in the mouth and its an excellent treat for the kids at any time. Well, I served these sweet Paniyarams for breakfast one day. Kids loved those paniyarams and more than them, my husband loved those. So, he's got into the habit of leaving 2 or 3 bananas in the stand nowadays.!!! Creativity starts once you wish to transform something in your kitchen and make an edible food item. Like that, we moms do this everyday and come out with great ideas, right. My dear bloggers, try to ignite the spark in you and share with us your thoughts and findings.

Ingredients
Fully ripened bananas - 4 or 5
Chopped walnuts - 1/2 cup
Powdered Jaggery or Brown Sugar - 1 Cup
Whole wheat flour - 1 Cup
Cardamom Powder / Elachi - 2 tsp
Water - As required to make the batter.
Ghee - Enough to brush the moulds and paniyarams.

Procedure
  • In a big mixing bowl, add the powdered jaggery first with little water. Let it completely get dissolved in the water. Then, add the other ingredients into the bowl and mix them into a thick batter. Consistency of the batter should not be too thick ( like chappathi dough ) and not too thin ( like rava dosa batter ). It should be in a medium thick consistency enough to pour them into the small round moulds. 
  • While preparing the batter, heat the Kuzhi Paniyaram pan on medium heat. Brush the rounds with little ghee.
  • When its heated enough, reduce the flame and pour the batter into the paniyaram moulds carefully. Spilling the batter or improper pouring might result in shapeless paniyarams or might spoil the round shaped treats.
  • After pouring into the moulds, slowly heat the pan on medium heat with the lid closed. Rotate the pan slightly so that the heat is spread uniformly across the entire pan. 
  • After 3 minutes, open the lid and check whether the sweet paniyarams are steamed properly. Flip the paniyarams onto the other side carefully using a thin spoon. Brush the top of the paniyarams with little ghee. 
  • After 3 minutes, check if the paniyarams are fully cooked and turned into golden brown colour. Take out the paniyarams from the moulds and repeat the process with the rest of the batter.


Tips and Suggestions
  • Make sure the flame is not high while making the paniyarams. Otherwise they might turn black very quickly.
  • You can add chopped nuts like almonds, cashewnuts, pistachios into the batter as well and make it more nutritious and tastier.
  • You can add ghee drops on the sides of the moulds if you wish to. I just brushed the moulds with little ghee and brushed the paniyarams with little ghee for flavour.

Thursday, June 12, 2014

Pesarapappu Uppuma / Pesarapappu Upma / Biyam Pesarapappu Upma / Andhra Pesarapappu Upma


Biyyam Pesarapappu Upma is one of Andhra's tradiitional tiffin, which is made with lentils and broken rice steam cooked and tempered with seasonings. Its a healthy heavy tiffin packed with proteins and carbs. With a side of a spicy ginger chutney / allam pachidi and some fresh curd, its heavenly and can be a best option for tiffin night. I tasted this tiffin first at my in-laws home days after marriage. Initially I thought i was going to have pongal upon looking at the ingredients which they took. But what I saw in my plate was some tasty upma in puttu texture and I absolutely loved it. Without having any embarassment or shyness ( especially after marriage ), I finished the whole plate in few minutes and went for the next round. It showed my interests in food indeed.!!! Till today, my mother in law would remember that moment and came to know of my foodie interests through various occasions like this. I learnt the recipe from her and its definitely her recipe. I just followed the way she taught me and we enjoy this upma often in my household. Whenever I visit them during vacation, she never failed to give us a big bag of homemade biyam rava for making this yummy delight. This is once again my mother-in-law's recipe to you all my dear bloggers.

Ingredients
Biyam Rava / Broken rice rava - 1.5 cups
Pesarapappu / Moong Dhal - 3/4 cup
Salt - As Required
Fresh coconut flakes - 1 tbsp
Water - Enough to cook the upma
(Add 2.5 cups of water for 1 cup of rice rava and 1/2 cup of Moong dhal )

Tempering / Tadka 
Oil - 4 tsp
Hing / Asafoetida - 1 Dash
Mustard Seeds - 2 tsp
Jeera / Cumin Seeds - 2 tsp
Shredded Ginger - 1 tbsp
Green Chili - 2 slit into halves
Dry Red chillies - 3 or 4
Curry Leaves - 1 stem

Method
  • In a big thick bottomed vessel, dry roast the moong dal for a minute till a nice aroma emanates. Take it out and store it in a plate.
  • Add oil into the pan and do the tempering process by adding all the ingredients in order.  Once its done, add the Moong Dhal and biyam rice rava and toast the mix with the tempered seasonings for a minute. Add water in the ratio as mentioned above to the vessel. ( I added 41/4 cups of water for 1.5 cups of rice rava and moong dal ).
  • Allow them to cook on medium flame for 10-15 minutes. When its done three fourth, add salt to the upma and mix well. Allow them to cook on low flame for another 10-15 minutes till the rice rava and moong dhal get cooked to the right consistency. Switch off the flame and garnish with coconut flakes just before serving.
  • Enjoy this upma with allam pachidi / ginger chutney and fresh curd.


Tips / Suggestions 
  • Amount of water for cooking depends on the type of rice variety you use. For some rice varieties, it may require more water to cook and so check with the age of the rice you use and add water accordingly.
  • Adding salt at the end of the cooking process is ideal after the mix gets cooked to a fluffy consistency.
  • If this upma's consistency is pasty, its difficult to enjoy. If its in the form of "puttu" consistency ( where cooked rice rava and moon dal is totally separate and dry ), then its enjoyable. So, add right amount of water which is important in this process.
  • If you wish to omit coconut, its totally fine. 
  • Adding coconut flakes is recommended only if you are going to consume then. Becaz storing the coconut sprinkled upma in the refrigerator might not be good option for later use. 

Tuesday, April 29, 2014

Dal Paratha / Dal Chappathi / Dal Roti / Protein Rich Paratha - Using Leftover Dal


Just had some leftover Sorakai Dal / Lauki Dal in my fridge and needed to make a yummy after school tiffin with less time...I decided to transform this Dal into a Dal Paratha by adding few cups of whole wheat flour. No need to add any water while kneading this paratha dough. May be few drops of oil might help you to knead the dough.Trust me, the texture of the dough was extremely soft and easy to spread though. Its definitely not a cumbersome process and makes our life easier with less efforts. And the process yields a healthy protein rich parathas. With some good accompaniments,these parathas will vanish from the plates quickly and makes you satisfied. 
After I decided to blog this recipe, I tried the same with leftover dals like methi dal, spinach dal and plain Dal and it all came out more than I expected. 

Ingredients
Leftover Dals - 3 cups
Whole Wheat Flour - 3 to 4 cups
Oil - 2 tsp to knead the dough. 

NO NEED TO ADD WATER.

Method
  • In a mixing bowl, add the leftover Dal and whole wheat flour and knead perfectly. Add oil little in the middle to ease the process. 
  • Take a small ball out of the kneaded dough, spread them into a thin round using a Chappathi / Roti roller.
  • Fry the Dal paratha on both sides with or without oil on a frying pan. Complete the process with the rest of the Dal paratha dough and make yummy golden parathas.
  • Enjoy these protein rich ones with a side of a pickle, fresh curd and few cucumber slices.

Thursday, November 7, 2013

Japanese Sushi / Sushi / Homemade Sushi


Initially I got introduced to this Japanese Sushi by my husband, he was emphasizing more about this Sushi. I did not give that much importance as I already knew his special liking towards all Asian food. In fact, I used to tease him that he would have definitely got married to a nice Chinese or Japanese girl if we were not married. !!! I did not like this Sushi a bit at first sight in Las Vegas, thought something was made out of left over rice. After tasting a Sushi roll, no change in my feelings at all. It was too cold and could not feel that taste of the inside veggies too. It was too cold and sour. Knowing that its a healthy option for me, ( as it requires zero oil ) my mind was constantly thinking how should I like this Sushi. How could I make it better to satisfy my tongue. Here comes the Magic Man, my husband. He understood what i exactly felt about the Sushi.

He made the Veggie Sushi at home with no deviations in the preparation process. His Vegetable Sushi came out extremely well and we all loved it. Seriously, I loved those Sushi Rolls. It was not too cold for me, all Sushi Rolls were made at room temperature and I could enjoy the taste of the veggies individually. With a slice of pickled ginger and a tiny bit of Wasabi on its top took us to heights. As we were exhausting the Sushi plate faster, he had to keep up his making speed. Finally, he was fortunate to enjoy 2 Sushi rolls only.!!! This recipe is totally my husband's and the process is also defined by him. Credit or criticism directly goes to him. Feel free to prepare and pass on your valuable comments to him. 

Mmmm...I could hear your questions. Why can't we make an Indian Sushi ? Yes, I am planning to slowly murder the Sushi with my hands in the next coming weeks and will blog my results. Friends who enjoy the authentic Japanese Sushi, kindly forgive me for this trial process. I cannot control my imagination wings.

Ingredients 

As Shown in the Picture.


Sushi Rice - 1.5 Cups
Rice Vinegar - 2 tbsp
Roasted Sesame Seeds - 3 tsp
Lite Soya Sauce - As Required
Wasabi Sauce - As Required
Pickled Ginger - As Required
Avocado - 1 ( Sliced as shown in the picture )
Carrot - 1 Medium ( Sliced as shown in the picture )
Cucumber - 1/2 Medium ( Sliced as shown in the picture )
Dried and Roasted Seaweed Sheets ( Nori ) - As Required.
Salt - 3/4 tsp
Sugar - 1.5 tsp
Rice Vinegar - 3 tbsp

Preparation 


Cook the Sushi Rice first. Add 2 cups of water for 1.5 cups of Rice. In a small cup, add 3 tbsp of Rice Vinegar, 1.5 tsp of Sugar and 3/4 tsp of salt. Stir the mixture till the sugar and salt dissolve in rice vinegar. Gently pour the rice vinegar mix into the cooked rice and mix thoroughly. Rice texture and taste mainly determines the taste of the Sushi. 


Wash and the veggies and cut them as shown in the picture. Roast the Sesame seeds to golden brown. 


As we don't have the Sushi Mat right now, on the wooden cutting board, place the thick big Ziplog Bag. First place the Roasted Seaweed Sheet.

Spread the Sushi Rice now on top of the Seaweed Sheet uniformly. A thin layer of rice would be more than enough to make a Sushi. 


Place the cut veggies on one corner of the rice spread as shown in the picture. We placed 2 carrot sticks, 2 cucumber sticks, 3 slices of avocado. Don't stuff more than this as it would be difficult to roll the Sushi. 


Start rolling the Sushi from the veggie side towards the other side carefully. After you roll one round, gently press the roll and continue rolling. This will enable the Sushi to get into shape correctly and firmly.


After you roll completely, cut the Sushi rounds and arrange them on a serving plate in a way you desire. Sprinkle some roasted sesame seeds on all the Sushi and gently pour few teaspoons of Soya Sauce on top of the sushis and serve them with pickled ginger slices and a bit of wasabi sauce. Enjoy the Sushi platter with joy.

Tuesday, October 22, 2013

Cucumber and Sprouts Sandwich - Cool Sandwich


Though I crave for a hot grilled sandwiches always, somehow this cool sandwich with tons of cucumber freshness and crunchy sprouts stole my heart. Its undoubtedly a healthy lunch or brunch or snack at any time. We enjoyed this healthy treat along with our rainbow salad ( Grape tomatoes salad ) and no after cleaning was required.!!! Easy and quick fix lunch with minimal efforts and maximum richness in nutrients.
Ingredients
Multi grain Bread or Whole Wheat Bread - 2 Big Sandwich Slices.
Few Lettuce Leaves
Fresh Cucumber - 1
Ripe Tomato - 1
Red Onion Rings - Few
Alfalfa Sprouts or Sprouts of your choice - 1 Small Bunch
Laughing Cow Swiss Cheese Spread ( LIGHT ) - 1 Slice
Stone Ground Grainy Mustard ( Preferable Grainy ) - 1 tsp
Salt and Black Pepper Powder - To Taste

Method
  • Keep all the ingredients ready. Slightly toast the bread and spread them on a foil.
  • Spread the cheese on one side of the bread. On top of the cheese, layer them with Lettuce Leaves, tomato rounds, sliced red onion rings, cucumber rounds. Press them gently and put some fresh alfalfa sprouts on its top. Similarly, on the other bread, layer it with stone ground mustard followed by the same pattern.
  • Sprinkle some salt and pepper on the top of the bread slices. Carefully place one side on the other bread and cut them into halves and enjoy.
Suggestions
White bread will not be suited for this kind of sandwich. You will definitely enjoy the freshness with grainy brown breads.

Friday, May 17, 2013

Rava Idli with Peanut Chutnet / Sooji Idly with Peanut Chutney


Since few weeks, I have been waiting to make Rava Idlies for breakfast but never get a chance to implement my thought. This is mainly due to my husband who does not like any kind of Idlies at all. This morning, I decided to make it happen and it was a great success indeed.!! Any tiffin with a side of good chutneys will always get an applause and a side of a spicy peanut chutney came for my rescue today. I used only 1.5 cups of Rava and it almost yielded 15 medium size Idlies. Trust me, its very easy to prepare with very less preparation time and you can enjoy fluffy rava idlies instantly.

Ingredients

Rava / Sooji - 1.5 cups
Oil - 3 tsp ( for frying the mustard seeds, rava )
Turmeric Power - 2 tsp
Salt - As Required
Hing - A Dash
Chopped Coriander Leaves - 1 tbsp
Chopped Curry Leaves - 6 or 7
Grated Ginger - 2 tsp
Chopped Green Chillies - 2 Medium
Grated Carrot - 1/2 cup
Mustard Seeds - 2 tsp
Channa Dal / Kadalai Paruppu - 3 tsp
Thick Curd - 1 Cup
Water - As Required.
Cooking Soda / Eno - 1 pinch ( Optional )

Mini Rava Idlies with a side of red capsicum chutney --- Excellent Lunch Box Option for kids


Method
  • In the frying pan, add oil first. When its heated, add Hing, Mustard Seeds, Channa Dal and roast them. To that pan, add the rava and roast it till you get a nice aroma. Switch off the flame. 
  • In a big mixing bowl, transfer the contents from the pan and add the remaining ingredients as well.
  • Mix them well and make sure that the batter consistency is perfect like the regular Idly batter.
  • Leave the Rava Idly Batter aside for 30 minutes. After that, pour them over the oil sprayed idly moulds and steam cook them for 10-13 minutes.
  • Yellowish fluffy idlies would be ready to enjoy with a side of a spicy chutney and podi.

Tips / Variations 
  • Try to make the batter atleast 40 minutes before you steam cook. This in turn yields fluffy, softer and well cooked rava Idlies.
  • Don't add too much while making the batter. Add little by little during the mixing process till you get the correct idly batter consistency. After adding the thick curd, it wont be necessary to add more water.

Wednesday, March 13, 2013

Andhra Pesarattu / Pesarattu / Green Gram Adai


Andhra Pesarattu, a crispy greenish dosa / adai / crepe is best suited for breakfast as its loaded with food amounts of protein. Its an ideal food to kick start the day. With a side of a spicy ginger chutney and some fresh curd, its complete. As this tiffin is bit on the heavier side and fills your tummy, I prefer to have it only  for breakfast and avoid during the end of the day. You will definitely smell the Pesarattu in our kitchen especially during the exam days.!! 

Ingredients


For Grinding the Batter :
Green Gram Lentil / Green Pasipayaru / Green Pesarupappu - 1 cup
Idly Rice / Raw Rice - 1 Handful
Ginger - 1 square inch
Garlic Pods - 1 Medium
Cumin Seeds / Jeera - 1 tsp
Salt - To Taste
Green Chillies - 1 Medium
Hing / Asafoetida - 1 Dash

For Making the Pesarattu :
Oil - Enough to fry the Pesarattu
Red Onion - 1 cup ( finely shredded )

Method
  • Soak the Green Gram Moong Dal overnight or for 6-7 hours. Grind them nicely with all the ingredients as mentioned in a mixer grinder. Add salt to the batter only at the end. Add water little by little while grinding the batter which in turn makes the Pesarttu batter fluffy.
  • Keep the Pesarattu Batter ready. Meantime, keep the shredded red onion and oil ready. Heat the tawa / pan for frying the Pesarattus. Add little water to the Pesarattu Batter is its too thick. 
  • On medium heat, pour a full ladle of the batter at the center of the pan. Uniformly spread it and make a thin circle as shown in the picture. Sprinkle some red onion pieces on its top and add oil at the edges of the circle. 
  • Fry them on both sides and serve the crispy thin Pesarattus with a side of ginger chutney and some fresh curd to cool down the stomach.

Tips / Variations 

  • If you grind the batter in wet grinder, the quantity almost doubles and its super fluffy compared to the batter grinded in a regular mixer grinder.
  • You can even spread a spoonful of ginger chutney on the pesarattu before adding the red onion. Generally in andhra hotels, they coat a thin layer of allam chutney / ginger chutney on the pesarattu before adding the onion which makes it more spicy and tasty. But its optional.
  • You can even sprinkle some finely cut green chillies along with the red onions on its top. But it purely depends on your taste buds.

LinkWithin

Related Posts Plugin for WordPress, Blogger...