Showing posts with label Kootu / Gravy / Dal Varieties. Show all posts

Monday, April 3, 2017

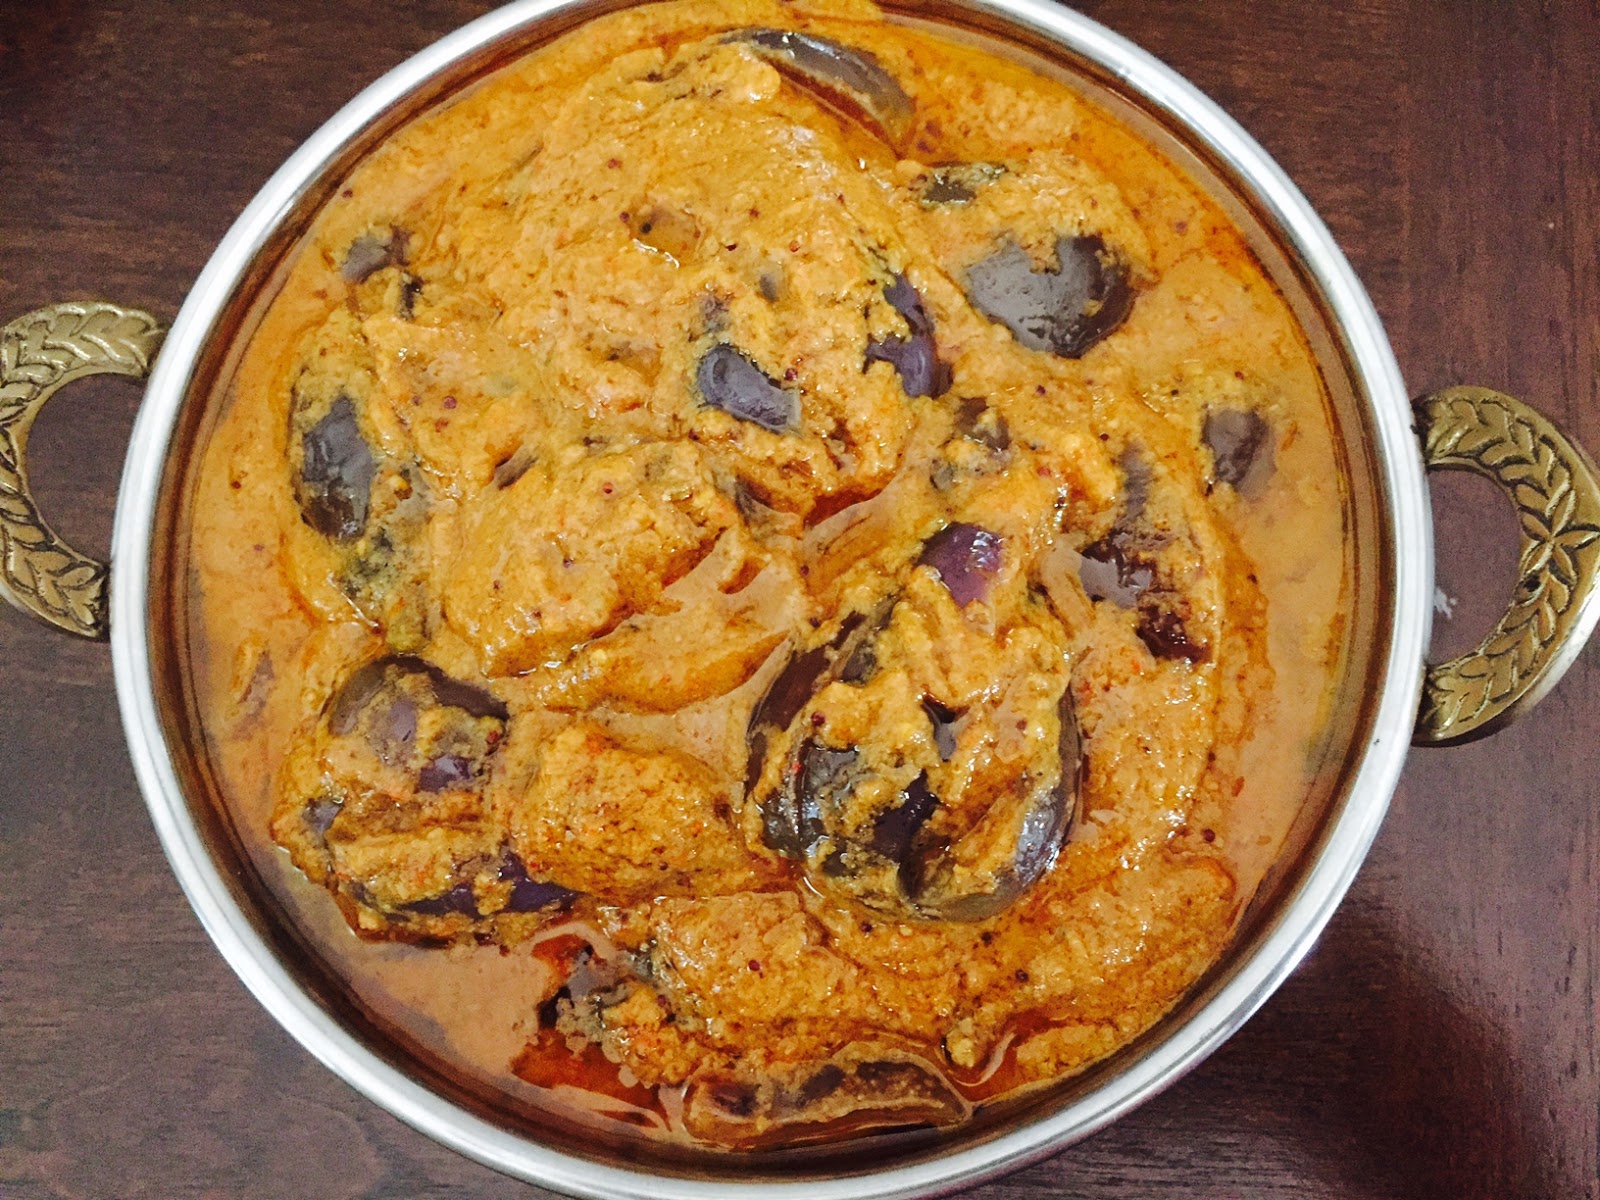
Brinjals in Pudina Gravy / Vankaya in Pudina Gravy / Pudina Vankaya Gravy / Eggplant in Mint gravy


Its always a pleasure to venture out new things with Eggplants / Brinjals. Got some tender fresh purple eggplants from the Vegetable market last week and also got two bunches of fresh mint / pudina. Then I decided to make the Spicy Vankaya Masala with a small twist. Fragrance of pudina nicely blends with the spices and the taste of the gravy is divine. Needless to say the health benefits of Pudina / Mint, it adds more nutritional value to the dish along with the spices. Try this exotic side dish once in your kitchen and enjoy this side dish with a side of hot rice or roti. Well, pudina vankaya masala came out very tasty and acquired a permanent spot in one of the preferred side dishes list at home. !!

Ingredients

Tender Eggplants / Brinjals - 12 to 15
Oil - 2 tbsp
Salt - To Taste
Turmeric Powder - 2 tsp
Curry Leaves - 1 Stem
Cumin Seeds / Jeera - 1 tsp
Mustard Seeds - 1 tsp
Hing - 1 Dash
Sugar - 1 pinch
Red Onion - 2 Medium ( finely shredded )
Ripe Tomatoes - 2 Medium ( finely chopped )
Ginger Garlic Paste - 1 tbsp
Green Chilli - 1 ( finely shredded )

For the Gravy:

Coriander Seeds - 1 tbsp
Channa Dal / Kadalai Paruppu - 3/4 tbsp
Urad Dal / Ulutham Paruppu - 3/4 tbsp
Dry red chillies - 8 to 10
Black Peppercorns - 1 tsp
Sesame Seeds - 1/2 tbsp
Cashew Nuts Whole - 6 or 7
Pudina Leaves washed - 2 cups

Method


  • Wash the eggplants and slit them into four parts but without breaking the eggplant as a whole. Just slit into four portions gently so as to insert the grounded masala inside every eggplant and cook them as whole.Soak them in water and keep it aside.
  • Meantime, in the cooking vessel, toast all the ingredients required to make the gravy except the mint leaves. Once you get a nice aroma, transfer them into a blender and allow them to cool In the same vessel, add a drop of oil and  fry the washed mint leaves as well. Transfer them into the blender and grind them into a thick gravy. 
  • Now take small portions of the gravy and just fillin the slits inside the brinjals. Keep them in a plate carefully. Keep the remaining gravy aside.
  • Now the actual preparation starts. In the cooking vessel, add 1 tbsp of oil. When its heated up, add the hing, mustard seeds, jeera, curry leaves followed by ginger garlic paste, shredded onion and shredded green chili. Fry them till the raw smell completely vanishes.
  • Add the chopped tomatoes, curry leaves, turmeric powder into the cooking vessel now. When the tomatoes get mashed thoroughly, add the masala filled eggplants / brinjals into the cooking kadai / vessel.
  • Add required amount of salt to the vessel just enough for the brinjals. Cover the vessel and allow them to cook well.
  • Once the brinjal gets cooked three fourth, add the remaining gravy paste into the vessel. Add half glass of water or more ( as per your consistency ) into the vessel. Add required amount of salt for the gravy at this point.
  • Cover them again and cook for nearly 6 to 7 minutes. Once you see oil floating on top of the gravy, switch off the flame. While cooking the dish, gently stir the gravy and care not to break the brinjals while mixing.

Tips / Suggestions


  • Always use fresh tender Eggplants to get a delicious curry.
  • It goes well very well with plain basmati rice and a drop of ghee. Perfect combo on a cold winter day.
  • Fresh pudina always enhances the taste of the gravy so don't compromise on its freshness by adding dried mint leaves.
  • Don't forget to add few cashews in your gravy as it adds richness to the gravy.
  • I would love to add a tsp of sesame oil on top of the gravy after its done. If you wish, you can even do the whole dish using sesame oil completely.

Sunday, November 13, 2016

Vankaya Masala / Brinjal Masala - Restaurant Style


Brinjal Masala / Eggplant Masala also called as "Vankaya Masala" is one of the delicacies of Andhra cuisine. I love this gravy especially the one served at weddings and restaurants. It tastes so unique and little rich and creamy in consistency than the regular one that is made at home kitchen. I often make this vankaya masala at home along with the side of hot white rice. No accompaniments are required and it goes well with rotis, chappathis too. In weddings, they serve this gravy along with Brinji Rice which is an excellent combination. Fresh tender small brinjals / Eggplants are best suited for making this gravy.

Ingredients


Fresh Tender Brinjals - Around 20
Ripe Tomato - 1 Big or 2 Medium 
Red Onion - 1 Big
Fresh Ginger Garlic paste - 1 tbsp
Turmeric Powder - 1 tsp
Oil - 1 tbsp
Ghee - 2 tsp
Mustard Seeds - 1 tsp
Cumin Seeds - 1 tsp
Curry Leaves - 1 Stem
Green Chili chopped finely - 1 tsp
Coriander Leaves - To Garnish
Water - As Required for making the gravy
Salt - As Required
Jaggery - 1 tiny cube
Thick Tamarind Extract - 1 tbsp

Grounded Paste


Urad Dal - 2 tsp
Channa Dal - 2 tsp
Black Pepper Seeds - 1/2 tsp
Coriander Seeds - 1 tbsp
Sesame Seeds - 2 tsp
Groundnuts/ Peanuts - 1/2 tbsp
Dry Red Chillies - 8 or 10 
Cashew Nuts - 5 or 6


Method


  • First cut the vegetables that are required and keep them ready. While cutting the brinjals for this gravy, slit them into four halves on the outer side of the tiny brinjal keeping the stem intact. In this way, the whole brinjal will be cooked perfectly and seen in the gravy.
  • Dry Roast all the ingredients that are required to make the grounded paste till you get a nice aroma on a medium flame. It should not turn black. Let it cool down a bit. After its cooled completely, make a thick paste out of it.
  • In the cooking pan, add 1/2 tbsp of  oil and a tsp of ghee first . When its heated, add mustard seeds, cumin seeds in order. 
  • Add the shredded onion,green chili pieces and a pinch of salt into the pan. Fry them for a minute and then add the ginger garlic paste into it. Fry the contents in the pan till the raw smell goes off.
  • Add the tomatoes, turmeric powder, curry leaves into the pan and fry them till the tomatoes get mushy and mashed.
  • Add the tiny brinjals / baby eggplants and little salt now into the pan.Fry them for a minute.
  • Add the thick tamarind extract, required amount of water into the pan. Add jaggery into it now. Cover the lid and allow the contents to cook. When the tiny brinjals get cooked to three fourth, add the grounded paste into the pan. Add required amount of salt for the whole gravy and remaining ghee and oil into it now.
  • Let it cook on medium flame for 6-7 minutes. Once you notice the oil oozing on top layer of the gravy, its done. By then, the gravy would have been perfect with all raw smell completely gone.
  • Switch off the flame and let the gravy cools down little bit. Garnish with coriander leaves and serve with hot rice or rotis.


Tips / Suggestions


  • This gravy tastes extremely good after couple of hours as the gravy settles down with all the grounded spices well.
  • Fresh tiny brinjals are a must for this gravy.
  • For getting the exact creamy consistency, make sure you add all the ingredients in the grounded paste without fail especially the cashews.
  • Do not overcook the brinjals initially. When its cooked to three fourth, add the paste.Otherwise, all the brinjals would get mashed and they wont be seen in the gravy properly.

Tuesday, June 7, 2016

Palak Paneer / Spinach Gravy with Indian Cottage Cheese


While making a north indian dinner or lunch, including Palak always make the menu more colourful and healthy. My family loves Palak Paneer a lot, whether its Palak Paneer, Methi Paneer, Saag Paneer for that matter. Paneer coated with this yummy green gravy steals the show. And that too, if its homemade paneer then the taste will be amazing. Well, this is the most frequently made dish at my home for my rotis and I have been forgetting to blog this recipe for long.  This version is pretty simple, easy and retains the colour, flavour and taste of the Palak / Spinach.

Ingredients
Spinach Leaves - 6 cups
Tomato - 1 
Red Onion - 1 Medium
Green Chillies - 2 Small
Cumin Seeds - 1 tsp
Turmeric Powder - 1/2 tsp
Kashmiri Red Chili Powder - 1 tsp
Coriander Cumin Powder - 2 tsp
Garam Masala Powder - 1 tsp ( I used Kitchen King Garam Masala ).
Salt - To Taste
Sugar - 1/2 tsp
Oil - 1/2 tbsp
Ghee or butter - 1/2 tbsp
Paneer cubes - 15 Squares or less ( As you like )
Ginger Garlic Paste - 3 tsp
Water - As required for getting the gravy consistency. 
Ginger Julians - 6 or 7 julians to garnish.
My Homemade Paneer
Method
  • Wash the Spinach Leaves thoroughly without any sand. Wash the other veggies and keep them ready.
  • Fine cut one green chilli, red onion into tiny pieces and keep them ready.
  • In a kadai / cooking pan, on a medium heat, steam cook the spinach leaves and tomato with the lid open. After its cooled, drain the water and keep it aside. You can add the water into the gravy. 
  • Grind the cooked spinach, tomato along with cumin seeds, green chili into a smooth paste.
  • Cut the paneer into small squares and keep them ready. You can shallow fry them on a flat pan if you wish with little oil. 
  • In the cooking pan / kadai, add half the amount of ghee and oil first. When its heated, add the ginger garlic paste, shredded red onion, green chili and fry them till the raw smell vanishes.
  • To that add the grinded paste along with all other powders and sugar and fry them till the spices blend well with the gravy. Add the cooked water that you kept on the side.
  • Add required amount of salt and cook for another minute. Add the Paneer cubes into the gravy and let the Palak Paneer cook on a medium flame for 2-3 minutes with the lid closed.
  • Add the remaining ghee/butter on its top and some finely shredded ginger julians on its top.
  • Serve the tasty Palak Paneer along with rotis or hot basmati rice.


Tips / Suggestions 

  • Don't over cook the Spinach / Palak as it might lose its colour. 
  • Try to have the right consistency for the gravy, neither thick nor watery.
  • Make this dish with fresh ginger garlic paste and notice the difference in the taste.
  • Homemade Paneer definitely uplifts the taste of Palak Paneer.
  • Generously add some butter on its top just before serving. 
  • Dont forget to serve them in a fancy, restaurant style container finally.!!!!

Monday, May 23, 2016

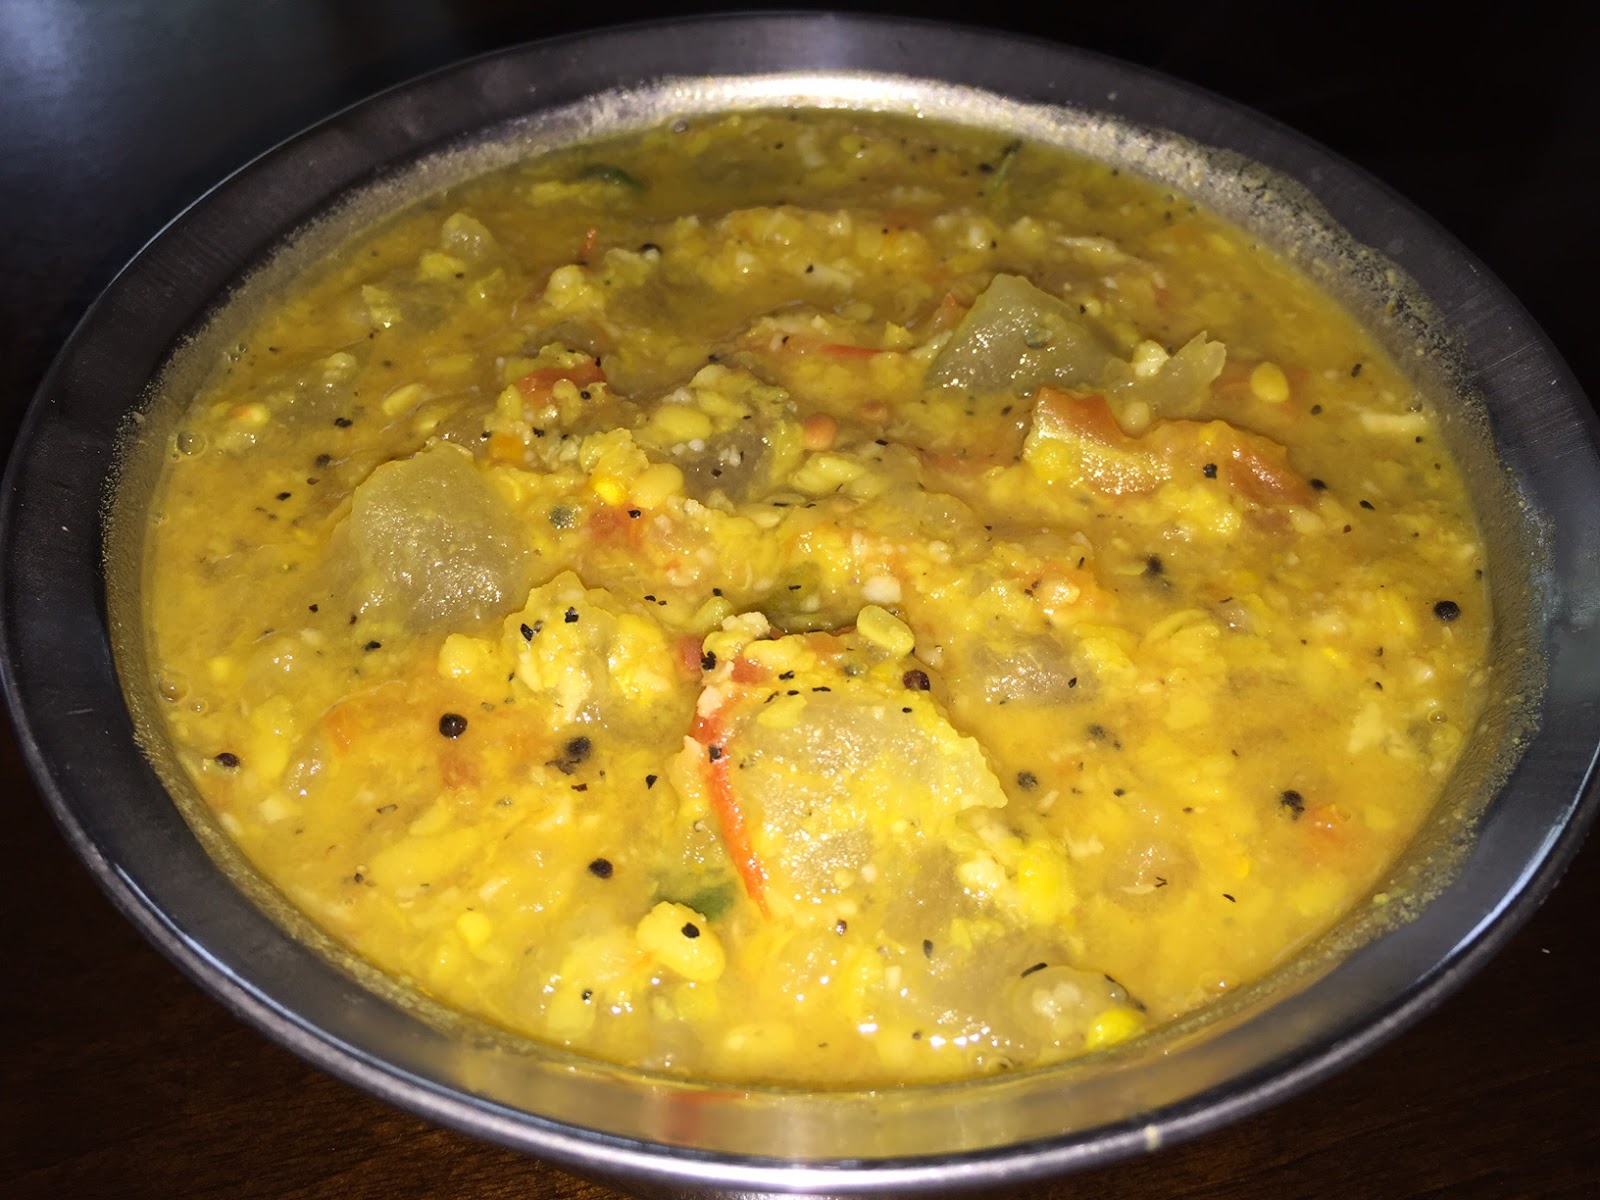
White Pumpkin Kootu / Vellai Poosanikai Kootu - Simple, No Grinding Method


In any Tamilian Meal, kootu will be served along with other vegetable curries. There are many varieties of Kootu served with different vegetables like white pumpkin, Sorakai ( Bottle Gourd ), Avaraikai ( Flat Beans ), Beans,  Red Pumpkin, Chow Chow ( Chayote ), etc., I always love to include a Kootu in my complete meal, especially with water based vegetables as it tastes very well.
This version of White Pumpkin Kootu is my mom's version with no grinding required. As she was a busy mom, she preferred to make healthy items with small short cuts at times. This kootu is just a one pot item which can be cooked in a pressure cooker for 2 whistles and served after tempering right away.  With less time, you can comfortably add a healthy accompaniment to your meal.

Ingredients
Into the Pressure cooker :
White Pumpkin pieces - 3 cups
Moong Dal / Payatham Paruppu - 3/4 cup
Turmeric Powder - 1 tsp
Tomato chopped - 1/2 cup
Green Chillies - 2
Water - Little. ( Enough for the dal to get cooked ).

Tempering / Tadka :
Hing / Asafoetida - 1 Dash
Mustard Seeds - 1 tsp
Cumin Seeds - 1/2 tsp
Urad Dal - 1 tsp
Dry Red Chillies - 1
Curry Leaves - 1/2 stem
Oil / Ghee - 2 tsp

Salt - As Required
Fresh Coconut flakes - 1.5 tbsp.

Method
  • Cut the white pumpkin into bigger chunks and keep ready. Chop the tomato, green chillies and keep ready. Add all the ingredients mentioned under "Into the Cooker" in a pressure cooker and cook for 2 whistles.
  • After the pressure is released completely, open the cooker and add required amount of salt and coconut flakes into the cooked kootu.
  • Let it cook for a minute. Then prepare the tadka in a separate tempering pan. Pour the tempering over the cooked kootu in the pressure cooker.
  • Serve with hot rice and as a nice accompaniment in your meal.

Tips / Suggestions
  • If you have a small pressure cooker, you can add the ingredients directly into the cooker and cook.
  • If you have a medium / big cooker, then you can cook them in a separate vessel inside, even along with rice.
  • If you don't have a pressure cooker, no need to worry. You can cook them over the stove in a thick bottomed pan and follow the same steps.
  • Don't add too much water while cooking. Otherwise you wont get the right kootu consistency.
  • Add only fresh coconut flakes to the kootu. If the coconut is smelly or little bit old, then it spoils the kootu totally after making, wont stay for a longer time.

Sunday, November 16, 2014

Gujarathi Kadhi / Gujju Kadi / Gujarati Kadi

Gujarathi Kadhi with some pakoras in it!!
Kadhi is one the gravy food item made out of sour buttermilk and flavoured with spices. Though the basic preparation of Kadhi remains the same, each and every regions of India have a different version of Kadhi and they are unique in their own way. Punjabi Kadhis are bit thicker with pakodis in it and gujarathi kadhis are bit thinner and little sweet. We love all kinds of Kadhi and enjoy the authentic taste of the kadhisEver since we tasted the gujarathi kadhi in restaurants and at my friend's home, I wanted to try it out at home and save the recipe for future use.  After tasting this Kadi at various places including resturants, friend's home, BAPS temple, I found out that there are many versions of  Gujarathi Kadi.  Now I am blogging the version which I learnt from my gujarathi neighbour as I loved the flavour and punch of the Kadi at their home. But we would never forget the taste and warmth of the Kadhi served at my friend's home earlier and her mother in law ultimately sets a standard making us compare every gujju food with hers. But till today, we could not find any gujju platter better than hers. Her taste is unique and uncomparable though...

Ingredients

Into the Curd / Yogurt :
Sour Thick Buttermilk - 5 Cups
Grated Ginger - 1 tbsp
Grated Garlic - 1 tbsp
Salt - As Required
Sugar - 2 tsp
Turmeric Powder - 1 tsp
Besan / Chick Pea Flour - 3 tbsp ( if sour ) or 2 tbsp ( if not that sour )
Cumin Powder - 3/4 th of a tsp
Yellow Split Mustard Seeds Powder - 3/4th of a tsp

Tadka ( Tempering )

Ghee - 2 tsp
Dry Red Chillies - 3
Cardamom Seeds - 2
Cinnamon Sticks - 2 or 3 small
Lavang or Cloves - 3 or 4
Green Chillies slit into halves - 3
Curry Leaves - 1 Stem
Cumin Seeds / Jeera - 1 tsp
Methi Seeds /Fenugreek seeds - 1/2 tsp
Split Mustard Seeds - 1/2 tsp

To Garnish :
Crushed Coriander Leaves - 1 tbsp

Procedure
  • In a big cooking vessel, add the thick buttermilk first. Add all the other ingredients under the column "Into the Curd / Yogurt". Using a spatula or hand mixer, mix them thoroughly. Add little water to get the right consistency if the curd mixture is too thick. After getting the right consistency for Kadhi, allow the Kadhi to cook on medium flame.
  • Meantime, finish the tempering process in the other gas stove. Add all the ingredients under the column "Tadka/ Tempering" into the ghee and after they are tempered properly, pour them over the cooking Kadhi.
  • Keep stirring the Kadhi continuously on medium flame so that it does not get burned at the bottom. When you notice few bubbles at the top layer, switch off the gas stove.
  • Garnish the Kadhi with crushed coriander leaves and enjoy with jeera rice or plain basmati rice. 

Tips / Suggestions
  • Add some thin dal water into the Kadhi as well instead of adding regular water, it enhances the taste of the Kadhi.  My neighbour just washed the cooker in which we cooked the regular dal with some water and poured that water into the Kadhi vessel. 
  • As you can sip the Gujarathi Kadhi during the meal at any time, I prefer to make it in a consistency where its not too thick nor too watery.
  • You can avoid adding sugar to the Kadhi if your family does not vote for the sweet taste in it. Still it tastes heavenly.
  • Add more grated ginger to the curd mixture if the curd / buttermilk is too thick and sour.

Tuesday, November 11, 2014

Vaazhaithandu Mor Kootu / Banana Stem Mor Kootu


Banana Stem called as "Vaazhaithandu" in Tamil and "Arati Duvva" in Telugu is widely used in South Indian Cuisines. Tender Plantain stem is widely used in making dals, kootu, curry, stir fries or even in salads. Extracting the nutritious stem from the covered layers looks like a tedious process but the effort is really worthy. Inclusion of the banana stem in your daily menu prevents you from stomach related problems, prevents kidney stones and helps in weight reduction etc., Previously it was quite difficult to see Banana Stems in our Indian markets but recently I have been getting this precious stem in many Indian stores and I could not resist my hands grabbing one stem. Today I am blogging another recipe of this stem called as "Vaazhaithandu Mor Kootu".  Process of making this Mor Kootu is easier and it has a refreshing taste and it blends well with any Kara Kuzhambu or Vathal Kuzhambu in a meal.

Ingredients

1 Medium Size Banana Stem
Channa Dal - 1 tbsp
Salt - To Taste

For Ground Paste
Thick Curd - 1 tbsp
Fresh Coconut Flakes - 1 tbsp
Cumin Seeds - 1 tsp
Green Chillies - 2 Medium
Rice Flour - 1/2 tsp

For Tempering
Mustard Seeds - 1 tsp
Curry Leaves - 5 or 6
Dry Red Chillies - 2
Urad Dal - 1/2 tsp
Hing - 1 Dash

Method

  • Remove the outer covers from the banana stem and extract the inner edible stick carefully.  
  • To see how to clean and get the banana stem stick, please see the previous post of mine in the link :    Banana Stem Poriyal
  • Soak the channa dal into warm water for 15 minutes.  Grind the paste with the ingredients as mentioned above into a thick paste and keep it ready.
  • In a cooking vessel, half cook the channa dal along with some water. Add chopped banana stem pieces into the half cooked channa dal. Let them cook on medium flame till the banana stem gets completely cooked. Add little water into the vessel if required while cooking. Do not add more water for cooking as the water content in the banana stem itself would be sufficient to get them cooked.
  • After the channa dal and banana stem get cooked, add the grounded paste into the vessel along with some salt. Mix them well and allow them to cook again for 2-3 minutes on medium flame.
  • Finally do the tempering and pour them over the cooked content in the vessel. Mix them well and enjoy with good accompaniments in your meal.

Saturday, June 7, 2014

Dal Tadka - Restaurant Style Dal Tadka


"Dal" is the staple Indian food which is widely eaten across all regions of India. Dal varieties differ from state to state and as a result there are so many varieties of Dals across India. Out of that, Dal Fry and Dal Tadka are the popular food items that are seen in almost every food menu of the Indian  Restaurants. Initially I was quite confused with the two items and I was pretty sure that they were made out of the same main ingredient Dal. Later I understood why they were called differently and its only the preparation process that actually differentiates them. 
In this post, I am blogging the recipe of Dal Tadka. Dal Tadka is a very popular dhaba food item tempered with aromatic spices and it tastes very good with hot hot rotis. Tadka means tempering in hindi which the tempering acts like a garnish to the protein rich lentil stew. Sometimes even the simplest menu choices make the meal more delicious and gives us warmth. And the combo of a simple Dal Tadka with roti is the one which reminds us of our mother all the time.
Ingredients
Masoor Dal - 1 cup
Moong Dal - 3/4 cup
Tomato diced into small cubes - 1/2 cup
Red Onion shredded - 1/2 cup
Garlic Pods - 3 or 4
Turmeric Powder - 1 tsp
Salt - As Required
Water - As Required for the Dal consistency
Grated Ginger - 1 tsp
Coriander Leaves - To Garnish

Tempering / Tadka :
Oil - 2 tsp ( To be tempered with ghee instead of oil for rich taste, add 2 to 3 tsps of ghee and do the tempering)
Hing / Asafoetida - 1 Dash
Mustard Seeds - 1.5 tsp
Jeera / Cumin Seeds - 2 tsp
Curry Leaves - 5 or 6
Dry Red Chillies - 2 Medium

Method
  • Pressure cook the dal mixture of Masoor dal and Moong dal, tomato, onion, garlic  for 4-5 whistles till they cook perfectly and get pasty. Add a tsp of turmeric powder to the contents in the pressure cooker before actually started cooking them.
  • After the pressure settles down completely, open the cooker and mash the cooked dal mixture. Add some water if its too thick and bring them to the right consistency.
  • On low flame, allow the dal to get cooked with lid open. Then, add required amount of salt, grated ginger to the dal. Simultaneously, do the tempering on the other stove.
  • In a small tempering pan, add all the ingredients for tempering to the oil and pour the tempering over the dal mixture.
  • Garnish the dal that's tempered with these aromatic spices and serve with hot rotis.
Tips / Suggestions 
Addition of a tsp of ghee to the dal tadka gives more flavour and enhances the taste of the dal. But its totally optional.
I would suggest you to dry roast the dal mixture for a minute before actually cooking them. 

Thursday, April 24, 2014

Sambar using Black Chole Broth / Healthy Sambar using Black Chickpeas Broth / Sambar with Karuppu Kondakalai Water


"Idly Sambar and Chutney Combo" is an all time special combo for anyone. But this time I made a small twist while making the regular Sambar. Instead of adding the tamarind juice, I used a healthy broth of Black Chick Peas ( Karuppu Kondaikadalai ). To replace the sourness of tamarind juice, I added a ripe large tomato. This is a good accompaniment to dosas and Pongal too. Enriched with proteins, a cup of this healthy sambar with idlies will definitely kick start the day with full of energy..Have a terrific day ahead by making healthy choices in your food !!!! and with lots of smile.

Black ChickPeas Broth :  Save the drained water of the cooked Black Chickpeas which is nothing but the Broth. 


Ingredients

Black Chickpeas Broth ( Karuppu Kondaikadalai / Black Chole) - 4 to 5 cups.
Tomato - 1 Ripe Large
Onion  - 1/2 cup shredded
Green Chilli - 2 or 3 slit into halves ( I used 3 chillies )
Fresh Coriander Leaves shredded - 1 tbsp ( To Garnish )
Curry Leaves - 5 to 6
Cooked Toor Dal - 1 Cup
Turmeric Powder - 1 tsp
Sambar Powder - 1/2 tbsp
Coriander Powder - 2 tsp
Salt - To Taste
Hing / Asafoetida - 1 Dash
Mustard Seeds - 1 tsp
Jeera / Cumin Seeds - 1 tsp
Vendhayam / Fenugreek Seeds - 1/2 tsp
Oil - 1/2 tbsp ( For tadka / tempering )
Ghee - 2 tsp ( Optional ) ( Just before serving, add 2 tsp on its top to add more flavour and yummy.!!!)


Method

  • Keep the Black Chickpeas Broth, cooked toor dal and the other ingredients ready.  If all the ingredients are ready, this sambar can be prepared before the idli gets steamed as the preparation time is very less.
  • In the cooking pan, add oil first and finish the tempering process by adding Hing, Mustard Seeds, Cumin Seeds and fenugreek seeds. When they sputter, add onions, green chilli, curry leaves next. When the onions get fried, then add tomato and all powders.
  • No need to add salt at this stage. Cover the lid and allow them to cook for 2 minutes.
  • Add the cooked dal and the broth now. Mix them well and add more water according to the consistency you desire.
  • Let the sambar boil for another 3-4 minutes. Finally add required amount of salt and cook for another minute.
  • Switch off and garnish with coriander leaves.
  • Drop 2 tsp of melted ghee on its top before serving.
Tips / Suggestions

  • Never drain the broth of White Chick peas, Black Chick Peas or any Beans. You can very well add the broth while making Kurmas, gravies in place of water which in turn enriches the dish.

Friday, March 1, 2013

Beerakayan Palu Posina Kura / Beerakaya Kura / Peerkangai Curry / Ridge Gourd Curry - Andhra Style


Heard about this curry from my husband a lot..and whenever I buy the Beerakaya from the market, he never failed to mention about this curry and its one of his favourites since his childhood. So I decided to explore this curry based on the input given by him. The dish came out well and fulfilled his expectations.!!! This curry can be eaten either with hot rice or Rotis. It is definitely one of  the recipes I like to repeat in my Kitchen.
Ingredients
Beerakaya / Peerkangai - 2 Big Ones
Onion - 1/2 cup shredded
Ginger Garlic Paste - 1/2 tbsp
Green Chillies - 1 Medium slit into halves
Oil - 1 tbsp
Mustard Seeds - 2 tsp
Cumin Seeds - 2 tsp
Urad Dal - 2 tsp
Salt - To Taste
Turmeric Powder - 1 tsp
Coriander Powder - 2 tsp
Red Chili Powder - 2 tsp
Milk - 1 cup
Coriander Leaves - To Garnish
Curry Leaves - 5 or 6

Adjust the level of red chilli powder as per your spice level. As we are adding milk in this case, 2 tsp of red chili powder and 1 green chilli is ideal for medium spice level. If you want to have more punch, add another green chili.

Method
  • Peel the Beerakaya skin and keep them separately if you are planning to make a Pachadi out of the skin.
  • Cut the Beerakaya into small squares. Likewise keep the other ingredients that are required for the preparation ready.
  • In the cooking pan, add oil first. When its heated, add mustard seeds, cumin seeds, urad dal  followed by ginger garlic paste and onion.
  • Saute them till they get translucent. Then add the Beerakaya pieces,curry leaves and saute them till they get cooked three fourth. You could close the lid in order to fasten this process.
  • Add all the spices, salt into the pan now and saute them for 2-3 minutes till the spices get blended with the cooked beerakaya pieces thoroughly.
  • Add a cup of milk into the pan and allow the contents to cook on a low flame for nearly 8-10 minutes.
  • Once it thickens, switch off the flame. Garnish with coriander leaves and serve.

Wednesday, February 27, 2013

Palak Tofu / Palak Tofu Masala / Fried Tofu in Green Spinach Gravy -- Healthy and Lowfat


Tofu, also called as Bean curd is one the best non-animal protein best suited for vegetarians. Tofu has larger amount of Protein, less fat and low calorie count. I use both Paneer and Tofu in my kitchen equally and try to include Tofu as much as possible. Palak Tofu is one the healthiest side dish i made for my Parathas like Palak Paneer. It has the goodness of both Spinach and Tofu in it. The main reason for making this as a separate post was due to the different preparation I adopted for making the gravy. 
Ingredients
Spinach / Palak - 1 Big Bunch
Extra Firm Tofu - 1 Medium Size Box ( 12 Oz )
Onion - 1/2 Cup ( finely shredded )
Green Chillies - 1 Medium
Ginger Garlic Paste - 1 tbsp
Cumin Seeds - 2 tsp
Tomato cubes- 1/2 cup
Turmeric Powder - 1 tsp
Coriander Cumin Powder - 1/2 tsp
Red chili powder - 2 tsp
Garam Masala Powder - 2 tsp
Sugar - 1 Pinch
Salt - To Taste
Oil - 1.5 tbsp

I did not add any cream, milk or butter in this version and its purely a low calorie side dish. If you are specifically making it for kids or for special occasions, generously add 1 tbsp of Butter, little cream on the top of the side dish just before serving. Or if you wish to have a creamy gravy, you can even add 1/2 cup of  full fat milk while making the gravy.

Method

  • Wash the spinach leaves and chop them nicely. Keep the other ingredients that are required ready.
  • Open the Tofu box and drain the liquid completely. Cut the Tofu into small cubes as shown in the picture and  fry them on a frying pan. Spray the oil on both sides and fry till golden brown on medium heat. Keep it ready.


  • In the cooking pan, add oil first. When heated, add cumin seeds, onion, ginger garlic paste next and saute them till the raw smell completely goes off. 
  • Next add the tomato and spinach leaves and saute them. You would notice the spinach leaves getting reduced in quantity after they are cooked.
  • Add all the powders and mix them well. Saute them again for 2-3 minutes on medium flame. Then add 2 cups of water into the cooking vessel. Add required amount of salt at this stage.
  • Using a hand masher or hand blender, directly blend the green gravy in the cooking vessel. While doing this, you could switch off the flame temporarily. Once the blending process is done, you would notice the thick green gravy nicely setting up. 
  • Add the fried tofu pieces into the gravy and allow them to cook with the lid on for 2-3 minutes.
  • Switch off the flame. Enjoy this healthy side dish with your hot rotis, Parathas. 

Tips / Variations 
  • As mentioned above, you can add richness to the gravy by injecting butter,cream or milk. 
  • If you don't have the hand blender, use the transfer the contents from the cooking vessel into the regular blender and make the gravy too. 
  • In this version, I make the gravy after adding all the spices, spinach, tomato and onion. Also i adopted the direct blending method using the Hand blender which in turn fastens the preparation.

Thursday, February 7, 2013

Methi Matar Paneer Masala / Methi Mutter Paneer Gravy


Fresh Methi Bunch has got a permanent place in my refrigerator and I love to explore many dishes using these methi / fenugreek leaves. For dinner, I decided to use the fresh bunch of methi along with Paneer to make a very tasty side dish for the Pulkas/ Plain rotis.  Of course, with a side of spicy Jalapeno Peppers, bit of sliced cucumbers and carrots and a small cup of fresh Dahi ( Curd ), the meal is complete.  Who would resist such a tempting plate full of goodies? These days, as I have been observing a strict low fat diet, my mind is so cautious while deciding on the menu, preparing the food. For making this "Methi Matar Paneer Masala / Gravy", I have not used any Malai or fresh cream. But still it tastes much better and goes very well with the plain phulkas.  Freshness of the fenugreek leaves / methi leaves definitely upgrades the taste.  Try this out in your kitchen and enjoy your meal with lots of smiles.

Ingredients
Fresh Fenugreek Leaves / Methi Leaves - 1 Bunch
Roma Tomato - 1
Red Onion - 1/2 cup shredded
Green Chili - 1 Medium finely shredded
Ginger Garlic Paste - 1/2 tbsp
Cumin Seeds - 1 tsp
Kasoori Methi - 1 Pinch
Peas - 1 Cup
Small Paneer Cubes - Between 15 to 20.
Oil - 1 tbsp
Turmeric Powder - 1 tsp
Red Chili Powder - 1 tsp
Coriander Powder - 1 tsp
Garam Masala Powder - 2 tsp
Salt - To Taste
2% Milk - 1 Glass

Method
  • Take out the fenugreek leaves carefully from its stem and clean them thoroughly. Keep the vegetables ready before starting the process. Shallow fry the Paneer cubes and keep them ready.
  • In the cooking pan, add oil first. When its heated, add the cumin seeds followed by Ginger Garlic Paste. Fry them for 2 minutes till the rawness goes off. Add the shredded onion and green chili and fry them with a pinch of salt.
  • Then, add tomato pieces, peas and the fresh fenugreek leaves into the pan. Saute them for 2-3 minutes and allow them to cook inside with the lid on. The contents would cook for couple of minutes with the steam inside.
  • When you notice the soggy fenugreek leaves, add all the powders into the pan and stir them well.
  • After frying them for 2-3 minutes, pour a glass of milk into the cooking pan. Mix them well and allow them to cook again with all the spices for another 3-4 minutes.
  • Add the required amount of salt and fry the contents for another 1-2 minute. Finally add the Paneer cubes into the pan and close the lid.
  • Allow the dish to remain on a medium flame with the lid on for another 3 to 4 minutes.
  • Once you are satisfied with the consistency, switch off the flame. Serve this healthy side dish with your hot Phulkas/rotis.

Tips / Variations

You can add water or milk little more if you don't want your gravy too thick.
Shallow frying the Paneer cubes is purely optional. You can add fresh Paneer cubes directly instead.

Thursday, September 13, 2012

Baingan Bharta / Baingan Barta / Low fat , Healthy Style Baingan Bharta


I have tasted different versions of Baingan Bharta so far but this one is unique and special. My Mother-in-law has been making this type of Baingan Bharta since ages and she learnt this version during her calcutta days. My husband is a core fan of this version and he loves to eat this dish with hot rotis. Recently, I made this Baingan dish using our home grown Eggplant and it turned out very well. To my surprise, my daughter loved this spicy baingan dish and requested me to make this often. Though I am not a big fan of this version, due to its simplicity and less oil  I love to enjoy this dish occasionally.
Ingredients
Eggplant - 1 Big or 2 Medium
Red Onion - 1 Medium ( I strongly prefer red onion )
Lime - 1/2
Green Chillies - 2 Big or 3
Salt - To Taste
Coriander Leaves - To Garnish
For the Tadka / Tempering :
Oil - 1/2 tbsp
Hing  Asafoetida - 1 Dash
Mustard Seeds - 1 tsp
Cumin Seeds / Jeera - 1 tsp
Urad Dal / Ulutham Paruppu - 1 tsp
Channa Dal / Kadalai Paruppu - 1 tsp
Dry Red Chillies - 2 Medium
Curry Leaves - 2 or 3
Method
  1. Shred the onion and green chillies into small pieces and keep them ready. Squeeze the lime juice and keep it ready. Wash and crush the coriander leaves into pieces and keep them ready.
  2. Wash the eggplant ( Brinjal ) and wipe it off with the tissue. Poke 2 or 3 holes into the eggplant and roast the eggplant directly onto the flame using a suitable spatula. Rotate the eggplant in all directions till it turns black. The eggplant should shrink in all directions, get cooked inside completely and the skin of the eggplant should turn dark and lightly dry. This denotes the completion point and we could peel off the skin.
  3. If its roasted fully, then it would be very easier to peel off the skin. After peeling the skin, mash the cooked Eggplant thoroughly either using hands or masher in a big mixing bowl.
  4. Add the shredded onion, green chillies, lime juice, coriander leaves, required amount of salt into the mashed eggplant.
  5. In a frying pan, add oil. When its heated, add all the ingredients for the tempering process one by one and pour them over the mixing bowl.
  6. Mix everything well and finally garnish with coriander leaves. Enjoy this oil free side dish with your hot rotis.
Tips / Variations
  • Instead of directly roasting the eggplant, you can microwave the eggplant or broil the eggplant in the oven too. But I adopt this method as the directly roasting process enhances the taste of the Baingan Bharta.
  • If the size of the Bharta is medium, its easier to roast than the big ones.

Tuesday, August 28, 2012

Black Eye Beans Masala / Black Eye Beans in Tomato Gravy


To go with the colourful green spinach parathas, I made this spicy, tangy Black Eye Beans Masala in tomato gravy. Its a very good combo with green and dark orange food items. I should have made this combo on our Independence day with a side of white raita too. Try this out in your kitchen and enjoy...
 
Ingredients
Black Eye Beans - 2 Cups
White Potato - 1 ( Optional )
Ripe Tomato - 4 or 5 Medium
Red Onion - 1 Medium
Green Chili - 1 Medium
Ginger Garlic Paste - 1 tbsp
Cumin Seeds / Jeera - 1 tsp
Kasoor Methi - 1 tsp
Turmeric Powder - 1 tsp
Red Chili Powder - 2 tsp
Garam Masala Powder - 1 tsp
Dhana Jeera Powder - 1 tsp ( Coriander Cumin Powder )
Sugar - 1 pinch
Salt - To Taste
Water - As required for the gravy
Oil - 1 tbsp
Butter or melted ghee - 1 tsp ( OPTIONAL )
Coriander Leaves - To Garnish
Method
  • Soak the Black Eye Beans in water for an hour and pressure cook them for 4-5 whistles. Peel the potato skin and cut them into medium size squares. Cook them in a microwave and keep the potato cubes ready too. Make the tomato puree by grinding five tomatoes and the green chili using a mixer grinder. Cut the onion into small pieces and keep them ready.
  • In the frying pan / kadai, add oil first. When its heated, add the cumin seeds, ginger garlic paste, onion into the pan. Fry them on a medium flame till the raw smell goes off.
  • Add all the powders into the pan and fry them for a minute. Pour the tomato puree into the pan and mix everything well and allow them to cook for 2-3 minutes with the lid closed.
  • Add some water if you notice thickness in the tomato gravy. Adjust the gravy consistency as you wish.
  • Then, add the Black Eye Beans, cooked potato squares and the Kasoor methi into the pan along with salt and a pinch of sugar. Mix the contents thoroughly in the pan and allow them to set properly in the gravy by cooking them on a medium flame for another 3-4 minutes.
  • Garnish with coriander leaves and serve with your nutritious green parathas. Add a tsp of melted butter or ghee on its top just before serving.
Tips / Variations
Don't overcook the Black Eye Beans in the pressure cooker. It should be well cooked and visible separately.

Thursday, August 23, 2012

Vendaikkai Thayir Pachidi / Bendakaya Perugu Pachidi / Okra in Yogurt Gravy / Bindi in curd gravy


Okra / Bindi / Ladies Finger is always liked by all ages. Instead of making the regular Okra fry, I wanted to make this vendakkai Thayir Pachidi as its mostly preferable during summer. It goes well with any spicy, tangy Kuzhambu like Kara Kuzhambu, Vethakuzhambu, spicy tomato rice, or any mixed rice variety..
Decided to make use of my home grown Bindi / Okra, I had been collecting them since a week. Once it came upto a decent count, I finally made my favourite Vendakaya Thayir Pachidi.
Ingredients
Okra Plant in our Home Garden
For Making Okra Fry
Fresh Tender Okra - 25 to 30
Hing / Asafoetida - 1 Dash
Sambar Powder - 3 tsp
Coriander Powder - 1 tsp
Salt - To Taste
Oil - 4 tsp
Mustard Seeds - 2 tsp
Urad Dal / Ulutham Paruppu - 2 tsp
Curry Leaves - 1 Stem
Dry Red Chillies - 2 Medium

For the Curd Gravy
Fresh Curd / Plain Yogurt - 2 Cups
Turmeric Powder - 1 tsp
Salt - To Taste
Hing / Asafoetida - Little
Grounded Paste - Fully ( Make a paste of 1 medium size green chilli, 1 inch of Ginger, 1 tsp of cumin seeds / jeera in a mixer grinder and add it to the fresh curd ).

Method
  • Wash the Okra / Ladies finger thoroughly and cut them into small size. In a kadai / frying pan, add the oil first and finish the tempering first by adding mustard seeds, urad dal, dry red chillies, curry leaves. When its done, add the cut Okra into the pan along with all powders and required amount of salt. Mix them well and cover the lid for the Okra to get cooked with the steam inside. No need to add water while making Okra fry.
  • During this time, make the curd gravy ready. Add all the required things to the fresh curd and whisk them properly and keep the curd gravy ready. Curd Gravy itself would taste good with a flavour of fresh ginger and jeera.
  • When its cooked, open the lid and allow them to get fried on a medium flame slowly. Stir the Okra fry in the middle and let them get fried nicely. I prefer to use Non-Stick pan to fry the Okra with less oil. Its somehow easier for me, as it does not stick to the bottom and also it gets fried nicely with very less oil.
  • Just before serving, add the Okra fry into the curd gravy. Garnish with coriander leaves on its top.
Tips / Variations
You can add some thick Buttermilk to dilute the curd gravy if the curd is too thick.
You can add a stem of fresh coriander leaves while grinding the paste for the Yogurt / curd gravy.
Instead of adding the powders to the curd gravy, I prefer to add to the Okra while frying as it gives a nice aroma.

Tuesday, August 7, 2012

Aloo Palak / Palak Aloo / Spinach Potato Gravy


Aloo Palak is one of the quickest side dish for rotis and pulao and its easier to make it. I prepare aloo palak in two different ways. In the simpler version, to the cooked spinach and potato cubes the tadka would be added along with some spice powders. In this version, the preparation is little elaborate and tried in restaurant style. This version is best suited for special occasions whereas the first simpler version is for regular day cooking.
Ingredients
Spinach Leaves - 10 to 12 Cups packed.
Potato - 2 Medium ( cut into medium cubes )
Green Chilli - 1 Medium ( shredded )
Oil - 1 tbsp
Melted Ghee - 2 tsp
Jeera / Cumin Seeds - 1 tsp
Cinnamon Sticks - 1
Ginger Garlic Paste - 1/4 tsp
Red Onion shredded - 1/2 cup
Ripe tomato - 1 big
Turmeric Powder - 1 tsp
Dhana Jeera Powder / Coriander Cumin Powder - 1 tsp
Red Chili Powder - 1 tsp
Garam Masala Powder - 1 tsp
Salt - To Taste
Sugar - 1 pinch
Water - As desired.

Method
  • Wash the spinach and chop them nicely and keep ready. Cut the onion, tomato, potato, green chilli into desired size and keep them ready. Microwave the potato cubes and keep the cooked potato cubes ready.
  • In the cooking pan / kadai, add oil and melted ghee. When its heated, add the cumin seeds, cinnamon sticks followed by ginger garlic paste. Fry them till the raw smell goes off.
  • Then add the onion, shredded green chilli, tomato and fry them till they get cooked and look mashy.
  • Add the finely chopped spinach leaves into the pan and cook them till the quantity gets reduced considerably and cooked to your satisfaction. No need to water to the pan at this stage. Close the lid in the middle and allow the spinach to get cooked with the steam itself.
  • Add all the powders into the pan now and mix them well.  Add the cooked potato cubes into the pan and mix them all.
  • Add required amount of salt and a pinch of sugar into the pan and fry them for 2-3 minutes. If they get very thick, add little water and make the gravy consistency perfect.
  • Switch off the flame and add a tsp of ghee or little butter on its top just before serving. Its totally optional and I generally do this topping if its made for a special occasion.
Variations / Tips
Potato cubes can be substituted with fried Tofu cubes to make it more healthier.

Friday, July 13, 2012

Alu Gobi / Aloo Gobi / Aloo Gobi Masala

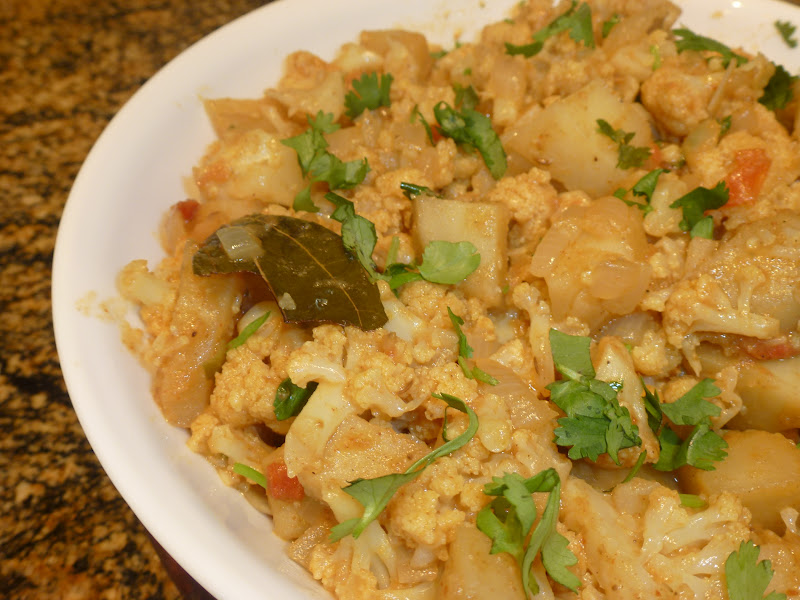
 Aloo Gobi / Potato Cauliflower Curry is one of the quickest and easiest curry for rotis / chapathis and its mostly liked by all ages. I regularly make this curry for my rotis when I have very less preparation time. If its made with fresh Gobi ( cauliflower ), the aroma is very good. Aloo Gobi flavored with all the aromatic spices is definitely a very good accompaniment to rotis or pulav.
Ingredients
Gobi / Cauliflower - 1 Medium
Aloo / Potato - 4 or 5 Medium
Tomato - 1 Medium
Onion shredded - 1/2 cup
Oil - 1 tbsp
Cumin Seeds / Jeera - 1 tsp
Pattai / Cinnamon Stick - 1 Medium
Bay Leaves - 2 Medium
Ginger Garlic Paste - 1/2 tbsp
Green Chili - 1 finely chopped
Coriander Leaves - To Garnish
Turmeric Powder - 1 tsp
Garam Masala Powder - 2 tsp
Coriander Cumin Powder / Dhana Jeera Powder - 1 tsp
Red Chili Powder - 1 tsp
Salt - To Taste
Method
  • Peel the skin off from the potatoes and cut them into cubes of any size as desired. I cut them into medium chunks. Take out the cauliflower florets and wash them with warm water.
  • Cut the onions, tomato, green chili and keep all the other ingredients ready.
  • In a frying pan / kadai, add oil first. When its heated, add cumin seeds, cinnamon stick, bay leaves, ginger garlic paste and fry them well.
  • Then, add the shredded onion, green chili into the kadai and fry them for a minute. When the raw smell goes off, add the tomato pieces and fry for a minute.
  • Add the cauliflower florets and the cooked potato cubes ( in case if you cook the potatoes separately in a microwave ) to the kadai. If you don't intend to cook the potatoes separately, then add the potatoes into the kadai with enough water for them to get cooked.
  • When the potatoes are cooked three fourth, then add all the washed cauliflower florets into the kadai
  • and cook them again on medium flame.
  • When the vegetables are cooked to your satisfaction, add all the powders into the kadai and required amount of salt.
  • Make sure that the aloo and gobi pieces are coated uniformly with all the powders. Fry them on medium flame for 4-5 minutes.
  • Garnish with coriander leaves and serve with your hot rotis or rice pulav.
Variations / Tips
  • You can either cook the potatoes separately and add to the kadai or add the uncooked potatoes directly into the kadai and cook them during the process.
  • Don't cut the cauliflower florets smaller as they might get smashed while cooking.
  • Instead of adding tomato, sometimes i do substitute with Mango powder to inject some sourness into the dish. 

Thursday, June 21, 2012

Methi Kadhi / Methi Kadi / Methi in Buttermilk gravy


Kadhi / Kadi is a lightly sour gravy made using thick curd or thick buttermilk and its an excellent choice for jeera rice, methi parathas or any types of pulav or parathas. In South India, the gravy made using curd or buttermilk is called as "Mor Kuzhambu" whereas in north india, they name the gravy as "Kadhi / Kadi". Preparation of both the versions is totally different and each version have their unique taste. Whenever I have leftover curd in large quantities, I always make this kadhi either plain or with methi leaves or pakodis. This version is made using our fresh home grown methi leaves. My Husband loves to have a side of Kadhi every night with his rotis and parathas. As its summer, I often include this item in our meal along with our regular subzis.
Ingredients
Thick Sour / Lightly Sour Curd - 2 Cups
Turmeric Powder - 1 tsp
Mustard Seeds - 1 tsp
Cumin Seeds / Jeera - 1 tsp
Curry Leaves - 3 or 4
Dry Red Chillies - 2
Fresh Methi leaves - 1 cup washed and chopped.
Salt - To Taste
Sugar - 1 tsp
Green Chillies - 1 medium finely chopped.
Besan Flour - 1 tbsp
Oil - 4 tsp
Water - As Required.
Procedure
  • Wash and chop the fenugreek / methi leaves and keep it ready. In a bowl, add the besan flour and thick sour curd and beat them well.
  • In a vessel, add oil first. When its heated, add mustard seeds, jeera, dry red chillies, curry leaves in succession. When the tempering is done, add the chopped green chillies and methi leaves, turmeric powder, Hing and fry the leaves on a low flame for 2 minutes.
  • Add little water to the vessel and cover the lid so that the methi leaves get cooked inside with the steam thoroughly.
  • When its done, add the beaten curd into the vessel along with salt and sugar. Add water if the desired consistency is not achieved. I generally make this kadhi not too thick or watery. I prefer the middle consistency, so add water according to the consistency you prefer.
  • Allow the Kadhi to boil for 4-5 minutes and switch off the flame.
  • Healthy methi kadhi is now ready to be enjoyed in your meal. Serve this in small bowls as a side during the meal time.

Wednesday, May 30, 2012

Amaranth Kootu / Keerai Kootu

Amaranth leaves, which are called as "Mulai Keerai" in Tamil seem to be rarely available here. I really miss all the green leafy vegetables like Siru Keerai, Manathakkali Keerai, Ponnanganni Keerai, etc., So, whenever I see these nutritious greens in the Indian stores, I grab atleast two bunches. Eating greens at least twice a week keeps us healthy and young and they fight against various diseases. In my childhood, my mom used to make two vegetables in a meal in the middle of her hectic schedule too. Out of that, Mulai Keerai Masiyal or Murungai Keerai curry or any other green varieties would definitely be there. I was fortunate to taste all these healthy greens frequently when  I was young whereas I could not get those right now except few varieties..
Amaranth / Mulai Keerai gives a wonderful flavour while cooking and its highly nutritious. We can do Masiyal, simple dal, curry or any other variety out of these tasty, healthy leaves. This time, I tried Keerai Kootu for a change and i added few cooked dal in my process. You can avoid the cooked dal while making this kootu and its optional. Generally while making this kootu, they don't add cooked dal but i added some to make it more healthy for my kids. Without dal too, it tastes excellent with the grounded paste.
Ingredients
Amaranth Leaves / Mulai Keerai / Thandu Keerai - 1 Big Bunch
Cooked Toor Dal Paste - 2 tbsp
Hing - 1 Dash
Salt - As Required
Turmeric Powder - 1 tsp
Sugar - 1 pinch
For the Grounded Paste :
Fresh Coconut Flakes - 1/2 cup
Cumin Seeds / Jeera - 1 tsp
Green chillies - 2 Medium or 1 Big
Ginger - 1 tiny square
For Tempering / Tadka :
Oil - 2 tsp
Mustard Seeds - 1 tsp
Jeera / Cumin Seeds - 1 tsp
Urad Dal / Ulutham Paruppu - 1 tsp
Kadalai Paruppu / Channa Dal - 1 tsp
Dry Red Chillies - 1 big
Procedure :
  • Wash the Amaranth Leaves / Mulai Keerai and chop them. Meantime, grind the ingredients for the grounded paste and keep it ready.
  • In a vessel, add all the chopped green leaves, turmeric powder, hing, pinch of sugar and some water and allow them to cook thoroughly on medium heat.
  • Cook the toor dal / kandhi pappu / Thuvaram paruppu in a separate cooker and keep it ready too...
  • When the amaranth leaves / toor dal is completely cooked, add the toor dal into the Keerai. Add some salt and the grounded paste into the vessel and allow them to cook for another 4-5 minutes/
  • Finally add tadka into the keerai kootu and serve this healthy side dish in your thali or meals.

Monday, March 26, 2012

Dondakaya Masala / Kovakkai Masala / Tindora Masala


Kovakai / Dondakaya / Tindora / Ivy Gourd vegetable is widely used in Indian Cuisine. We prefer to make a simple fry using this vegetable as its a good accompaniment in any meal. But I tried to give a twist with an idea given by my friend and made a gravy " Kovakai Masala". It goes well with both chappathis/ rotis and rice. My dear blogger friends, try this masala once during parties or during the get-together in our regular party menu and I am sure you will elated with the appreciations.!!!
Ingredients
Kovakkai / Dondakaya - 15 to 20 fresh.
Salt - To Taste
Sugar - 1 Pinch
Turmeric Powder - 2 tsp
Oil - 1 tbsp
For Tempering
Hing / Asafoetida - 1 Dash
Mustard Seeds - 2 tsp
Urad Dal / Ulutham Paruppu - 2 tsp
Curry Leaves - 1 stick
For the Gravy Paste
Cashew Nuts - 6 or 7 full
Khus Khus - 2 tsp
Dry Red Chillies - 5 or 6
Coconut flakes - 2 tsp
Ellu / Sesame Seeds - 2 tsp
Groundnuts / Peanuts - Around 10 full
Method
  1. Wash the Ivy Gourd thoroughly and slit them lengthwise and keep them ready.
  2. In a frying pan / kadai, dry roast all the ingredients for making the gravy paste. Transfer them into a mixer grinder and grind them into a thick gravy paste.
  3. In the same pan, add oil first. When its heated, finish the tempering process by adding all the ingredients.
  4. Then, add the cut Tindora into the kadai and fry them for 2 minutes.
  5. Add the turmeric powder and a pinch of sugar and sprinkle some water for the vegetable to get cooked. Cover the pan with a lid and allow the vegetable to get cooked three fourth and not fully.
  6. When its done to that level, add required amount of salt and the grounded paste. Pour some water to the pan if its too thick and not in gravy consistency.
  7. Mix the contents completely and allow them to cook for 5-6 minutes. Stir the masala in the middle to make sure that its not turning black at the bottom.
  8. Cook for few more minutes and switch off the flame after you get the desired gravy consistency. Raw smell of the paste should be off completely and you would notice the oil getting visible on top of the gravy which indicates the completion point.
  9. Switch off the flame and transfer the Ivy Gourd Masala into a serving bowl.
  10. Enjoy this yummy Masala with your favourite rotis/ chappathis or white rice.
Tips / Variations
  1. You can add some red chili powder if the gravy spiciness is not enough.
  2. Don't overcook the vegetable in the beginning stage itself. 

Wednesday, February 8, 2012

Sorakkai Tomato Kootu


 Kootu is an authentic tamilian item almost served as a side dish in any Tamilian Thali, Weddings or during special occasions. We can make kootu with different kinds of vegetables but watery vegetables like Chayote ( Chow Chow ), Sorakai, White Pumpkin, Snake Gourd are best suited. The gravy base for the Kootu is mostly coconut based and an addition of cooked moong dal / Payatham Paruppu makes it more richer. I am a big Kootu fan and always have a tendency to include this in my regular menu itself. Also we could eat this Kootu ( if there's any leftover..) with hot chappathis too...
Ingredients
Sorakaya / Bottle Gourd - 1 Medium
Tomato - 1 Big
Moong Dal / Payatham Paruppu / Pesara Pappu - 1 Handful
Turmeric Powder - 1 tsp
Hing/Asafoetida - 1 Dash
Cumin Seeds - 2 tsp
Salt - To Taste
Sugar - A small pinch

For the Gravy
Fresh Coconut Flakes - 2 tbsp
Green Chillies - 2 Medium

For the Tadka / Tempering
Oil - 3 tsp
Hing/Asafoetida - 1 pinch
Mustard Seeds - 2 tsp
Urad Dal / Ulutham Paruppu / Minna Pappu - 1 tsp
Channa Dal / Kadalai Paruppu / Senaga Pappu - 1 tsp
Curry Leaves - 7 or 8

Method
  • Peel the skin off and cut the Bottle Gourd into small cubes. Pressure cook the Sorakaya Pieces along with tomato pieces, Moong Dal, turmeric powder and little Hing for 2 whistles.
  • Meantime, make the gravy by grinding the above mentioned ingredients and keep it ready.
  • After the cooker cools down, add the gravy paste into the cooked kootu.
  • Add required amount of salt and a pinch of sugar to the Kootu and allow to boil for few minutes.
  • In a separate tadka pan, add oil and all the ingredients for the tempering and pour them on top of the Kootu.
  • Serve this with hot rice or hot chappathis.

LinkWithin

Related Posts Plugin for WordPress, Blogger...