Thursday, November 7, 2013

Japanese Sushi / Sushi / Homemade Sushi


Initially I got introduced to this Japanese Sushi by my husband, he was emphasizing more about this Sushi. I did not give that much importance as I already knew his special liking towards all Asian food. In fact, I used to tease him that he would have definitely got married to a nice Chinese or Japanese girl if we were not married. !!! I did not like this Sushi a bit at first sight in Las Vegas, thought something was made out of left over rice. After tasting a Sushi roll, no change in my feelings at all. It was too cold and could not feel that taste of the inside veggies too. It was too cold and sour. Knowing that its a healthy option for me, ( as it requires zero oil ) my mind was constantly thinking how should I like this Sushi. How could I make it better to satisfy my tongue. Here comes the Magic Man, my husband. He understood what i exactly felt about the Sushi.

He made the Veggie Sushi at home with no deviations in the preparation process. His Vegetable Sushi came out extremely well and we all loved it. Seriously, I loved those Sushi Rolls. It was not too cold for me, all Sushi Rolls were made at room temperature and I could enjoy the taste of the veggies individually. With a slice of pickled ginger and a tiny bit of Wasabi on its top took us to heights. As we were exhausting the Sushi plate faster, he had to keep up his making speed. Finally, he was fortunate to enjoy 2 Sushi rolls only.!!! This recipe is totally my husband's and the process is also defined by him. Credit or criticism directly goes to him. Feel free to prepare and pass on your valuable comments to him. 

Mmmm...I could hear your questions. Why can't we make an Indian Sushi ? Yes, I am planning to slowly murder the Sushi with my hands in the next coming weeks and will blog my results. Friends who enjoy the authentic Japanese Sushi, kindly forgive me for this trial process. I cannot control my imagination wings.

Ingredients 

As Shown in the Picture.


Sushi Rice - 1.5 Cups
Rice Vinegar - 2 tbsp
Roasted Sesame Seeds - 3 tsp
Lite Soya Sauce - As Required
Wasabi Sauce - As Required
Pickled Ginger - As Required
Avocado - 1 ( Sliced as shown in the picture )
Carrot - 1 Medium ( Sliced as shown in the picture )
Cucumber - 1/2 Medium ( Sliced as shown in the picture )
Dried and Roasted Seaweed Sheets ( Nori ) - As Required.
Salt - 3/4 tsp
Sugar - 1.5 tsp
Rice Vinegar - 3 tbsp

Preparation 


Cook the Sushi Rice first. Add 2 cups of water for 1.5 cups of Rice. In a small cup, add 3 tbsp of Rice Vinegar, 1.5 tsp of Sugar and 3/4 tsp of salt. Stir the mixture till the sugar and salt dissolve in rice vinegar. Gently pour the rice vinegar mix into the cooked rice and mix thoroughly. Rice texture and taste mainly determines the taste of the Sushi. 


Wash and the veggies and cut them as shown in the picture. Roast the Sesame seeds to golden brown. 


As we don't have the Sushi Mat right now, on the wooden cutting board, place the thick big Ziplog Bag. First place the Roasted Seaweed Sheet.

Spread the Sushi Rice now on top of the Seaweed Sheet uniformly. A thin layer of rice would be more than enough to make a Sushi. 


Place the cut veggies on one corner of the rice spread as shown in the picture. We placed 2 carrot sticks, 2 cucumber sticks, 3 slices of avocado. Don't stuff more than this as it would be difficult to roll the Sushi. 


Start rolling the Sushi from the veggie side towards the other side carefully. After you roll one round, gently press the roll and continue rolling. This will enable the Sushi to get into shape correctly and firmly.


After you roll completely, cut the Sushi rounds and arrange them on a serving plate in a way you desire. Sprinkle some roasted sesame seeds on all the Sushi and gently pour few teaspoons of Soya Sauce on top of the sushis and serve them with pickled ginger slices and a bit of wasabi sauce. Enjoy the Sushi platter with joy.

Tuesday, November 5, 2013

Apple Jam / Sweet Apple Jam


Since few weeks, bowls and bowls of fresh juicy red delicious apples showered by our neighbour were decorating our counter top beautifully. We have been eating those apples almost daily. But I really wish to make something out of those sweet apples like spicy thokku or Sweet Jam. I tried both and presenting you friends both the recipes.

Natural sweetness of the red delicious apples was quite enough for this jam. I added 2 cups of Sugar for almost 7 cups of crushed apple. Though the process got over after an hour, its much much simpler and does not need any high end efforts except grinding. Friends, i just grounded the apple pieces in my blender without any water than grating them. But its choice to make the jam with grated apples. Also, i did not peel the apple skin at all as it contains many nutrients.

Sweet Apple Jam 

Ingredients

Red Apples -- Around 10 Medium which could yield 7 cups of grated apples or crushed apples.
Sugar - 2 Cups
Lemon Juice - 1/4 cup
Nutmeg Powder - 1 tsp
Cinnamon Powder - 1/2 tsp ( Optional , I did not add )

Method 

  • Wash all the apples thoroughly and cut them into medium squares. Carefully take out the middle part which contains the apple seeds.
  • In the grinder, grind them coarsely or to a fine paste ( as you wish ) and keep it ready.
  • In a thick bottomed vessel / pan, add all the ingredients and mix them well. Cook the jam on medium heat for about an hour.
  • Stir the cooking jam inside the vessel at intervals. When it comes to a thick jam consistency, switch off the flame.
  • Allow the jam to cool completely. Once its cooled, store the jam in an air tight container.
  • Enjoy the apple jam with fresh baked sandwich breads.

7 Cup Cake / Seven Cup Cake / 7 Cup Burfi


Seven Cup Cake flashed in my mind when I was trying to make a very quick sweet for Diwali. It came out very well and got over first also as my kids loved this cake. At the end, almost i cut the cake into halves and distributed them in order to avoid fights between them. Though the whole world knows about this 7 cup cake, I am just blogging the recipe for future reference. 
Ingredients

Besan Flour / Channa Dal Flour / Kadalai Maavu / Senaga Pindi - 1 Cup
Powdered Sugar - 3 Cups
Melted Butter or Ghee - 1 Cup
Fresh Shredded Coconut - 1 Cup
Whole Milk - 1 Cup

Method
  • In a thick bottomed pan, fry the besan flour on a medium flame until you get a nice aroma. 
  • To that, add all other ingredients and stir them continuously so that no lumps are formed.
  • When it comes to a thick consistency and leaves its sides,switch off the flame. 
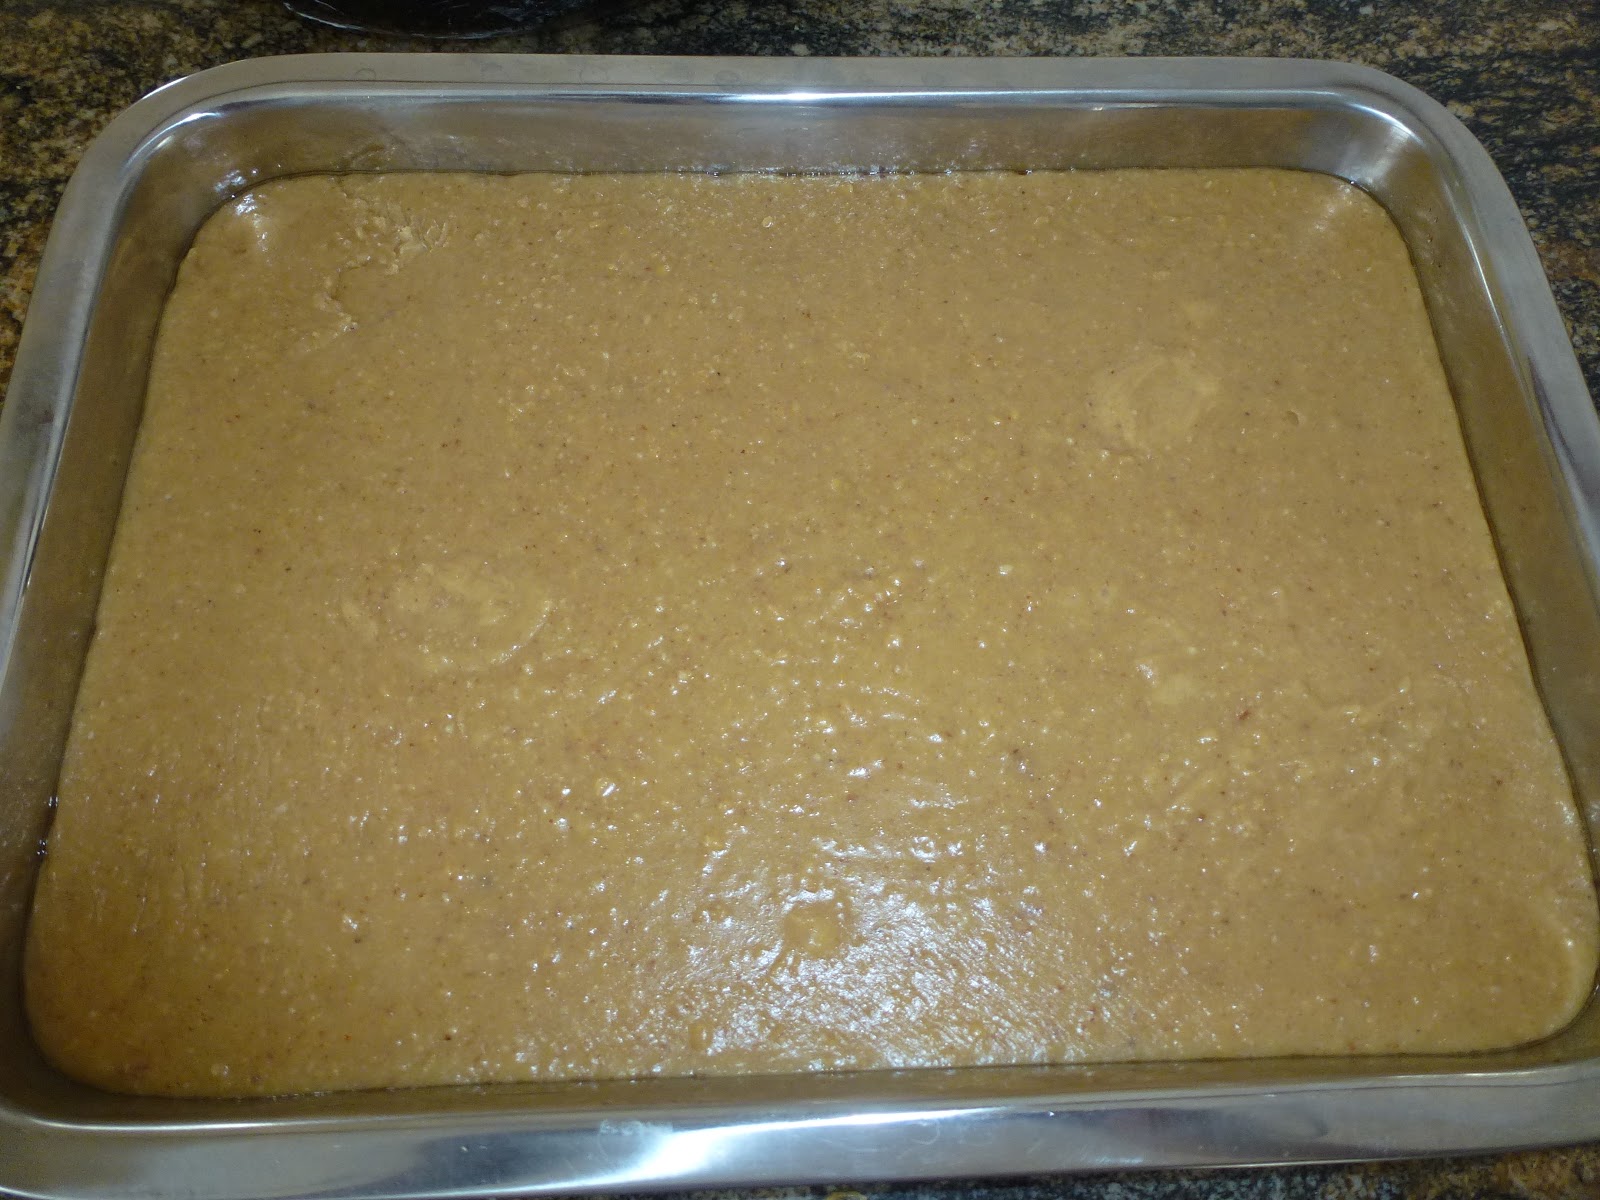
  • Pour them over a plate greased with ghee and spread uniformly. Once it cools down little bit and before it becomes hard, cut them into desired shapes.
  • Once the plate completely cools down, take out the cake pieces carefully and store them in an airtight container.
Tips
  • I prefer to make this sweet in a Non Stick Vessel as it comes out very easily and does not stick to the bottom. 
  • Flame should be constantly maintained at a medium level and not too high.
  • Take out the cake mix at the right point to get softy,spongy and tasty cake.

Thursday, October 31, 2013

Badam Besan Milk Burfi / Badam Besan Milk Cake

Ever since I made the regular MysorePak, I wanted to try out the classic combination of milk, badam ( almonds ) and Besan. I really enjoyed making this rich and creamy cake / burfi and it yielded a decent amount of burfis for the amount of ingredients I used. Mostly its a tension free sweet which could be made during Diwali. You can either prepare this sweet on the stove or using the Microwave method. This time, I adopted the Stove Method and made around 30-40 burfis. I doubled the quantity as mentioned under the ingredients in order to get more burfis. So don't get confused with the number of burfis and the ingredients measure.!!! Definitely not a cumbersome process and its a easy, quick sweet to be made with no mistakes.
 
Ingredients
 
Milk Powder / Mawa  -  1 Cup
Besan / Kadalai Maavu - 1 Cup
Almond Powder - 1.5 Cup
Sugar - 3 Cups
Ghee / Clarified Butter -  1.5 cups
Elachi Powder ( Cardamom Powder ) - 2 tsp
Broken Almonds - For Garnishing ( Optional )
( I did not sprinkle broken almonds on top of the burfi as I wanted to present them like MysorePak ).
 
Method 
  • In a thick bottomed cooking pan, dry roast besan flour till you get a nice aroma. Slightly roast the Badam Powder too and keep all the other ingredients ready.
  • In a separate vessel, make a sugar syrup using little water and sugar. When it melts and thickens a bit, switch off the flame. No need to wait for any string consistency. Purpose is to melt down the sugar completely and make a sugar syrup.
  • In the heated kadai, add the roasted Besan Flour, Badam Powder, Milk Powder and half a cup of ghee and the sugar syrup. Stir them well so that no lumps are formed.
  • Continue stirring till you get a nice appetizing aroma and the Badam Besan Milk Burfi froths up. Add the remaining ghee little by little while stirring.
  • Pour it on a plate greased with ghee and spread the mixture evenly by gently shaking the plate. Allow the burfi to cool down .
  • When it cools down to three fourth, cut them into equal squares with a greased knife.
  • Once it completely cools down, remove the burfis carefully and store them in an airtight container.
Tips
  • Use pure ghee in order to obtain the perfect taste and texture.
  • If you don't have almond powder, use the rich and creamy Badam Paste instead. Soak the almonds in water and peel off its skin and then grind them into a smooth paste.
  • If you don't have milk powder, replace them with a rich and full fat milk instead. But it might slows down the preparation process as you need to continuously stir them till it thickens. 
  • To get a flavourful colourful burfi, soak few strands of Kesar ( Saffron ) into the warm milk and pour them over the mixture while stirring. It injects good Kesar flavour and taste into the cake and make it more colourful and yummy. If you have Saffron available, don't omit this choice.

Thursday, October 24, 2013

Moong Dal Sundal / Payatham Paruppu Sundal / Navarathri Sundal


Payatham Paruppu sundal is one of my favourites which i mom make generally on the first day of Navarathri.
Easy to make and little care should be taken in order to get the right consistency. If you add more water while cooking this dal, it becomes soggy and you will end up eating a moong dal pasty sundal. Right amount of water and cook time determines the taste and consistency. No need to soak this Moong dal overnight and all. 

Ingredients
Moong Dhal / Payatham Paruppu / Pesara Pappu - 1 Cup
Hing / Asafoetida - 1 Dash
Oil - 3 tsp
Mustard Seeds - 1 tsp
Curry Leaves - 1 stick
Green Chillies - 1 Big
Dry Red Chili - 1
Grated Ginger - 1/2 tsp
Salt - To Taste
Crushed Coriander Leaves - To Garnish ( Optional )
Fresh Coconut Flakes - 1 tbsp

Method
  • Pressure cook the Moong Dhal up to 1 whistle. Just add water just for the dal to get immersed. Don't add more water during this process. After the cooker gets cooled down, drain the excess water from the dal and keep the cooked and drained dal ready. 
  • In a cooking pan, add oil first. When its heated up, add hing, mustard seeds, dry red chili, green chili, curry leaves, grated ginger in order. Finally add the cooked dal and required amount of salt into the pan. Gently turn few times so that the salt gets mixed up well.
  • Cover the lid and allow them to cook for just 2 minutes on a medium flame. Switch off the flame.
  • Sprinkle fresh coconut flake, coriander leaves ( if you like ) on top of the sundal. 
  • Navarathri neivedhyam is ready.


Suggestions 
  • Cook the dal to the right consistency. 
  • If you wish to increase the sundal quantity suddenly, add some grated carrots into the sundal and serve. 
  • If you have some leftover sundal, you can make any kootu out of it during the next meal.

Tuesday, October 22, 2013

Cucumber and Sprouts Sandwich - Cool Sandwich


Though I crave for a hot grilled sandwiches always, somehow this cool sandwich with tons of cucumber freshness and crunchy sprouts stole my heart. Its undoubtedly a healthy lunch or brunch or snack at any time. We enjoyed this healthy treat along with our rainbow salad ( Grape tomatoes salad ) and no after cleaning was required.!!! Easy and quick fix lunch with minimal efforts and maximum richness in nutrients.
Ingredients
Multi grain Bread or Whole Wheat Bread - 2 Big Sandwich Slices.
Few Lettuce Leaves
Fresh Cucumber - 1
Ripe Tomato - 1
Red Onion Rings - Few
Alfalfa Sprouts or Sprouts of your choice - 1 Small Bunch
Laughing Cow Swiss Cheese Spread ( LIGHT ) - 1 Slice
Stone Ground Grainy Mustard ( Preferable Grainy ) - 1 tsp
Salt and Black Pepper Powder - To Taste

Method
  • Keep all the ingredients ready. Slightly toast the bread and spread them on a foil.
  • Spread the cheese on one side of the bread. On top of the cheese, layer them with Lettuce Leaves, tomato rounds, sliced red onion rings, cucumber rounds. Press them gently and put some fresh alfalfa sprouts on its top. Similarly, on the other bread, layer it with stone ground mustard followed by the same pattern.
  • Sprinkle some salt and pepper on the top of the bread slices. Carefully place one side on the other bread and cut them into halves and enjoy.
Suggestions
White bread will not be suited for this kind of sandwich. You will definitely enjoy the freshness with grainy brown breads.

Monday, October 21, 2013

Grape Tomatoes Salad with Black Olives, Cucumber and Mozzarella Cheese


Couple of weeks back, we harvested few buckets of red grape tomatoes and yellow pear tomatoes from our home garden. Also, our kind neighbour showered us with more of the same varieties. Really wanted to consume those tiny tomatoes before they start to spoil. I decided to make a wonderful and a very colourful salad with homegrown tomatoes, fresh green cucumbers, Olives, red onion and fresh Mozzarella cheese. Because of the richness in its colour, it got attracted by the kids and its a very good accompaniment to any pasta or sandwich. I made a combo of this rainbow salad and a healthy sandwich ( Cucumber and Sprouts Sandwich) for lunch. Needless to say, my family welcomed the combo and enjoyed the lunch. Try this combo at your home and make some twists to your sandwich / pasta according to your family tastes and enjoy.

Ingredients 
Red Grape Tomatoes -  Around 30 tomatoes.
Yellow Pear Tomatoes - Around 30 tomatoes.
Black Olives -  1 cup ( Cut into thin rounds )
Cucumbers - 1 Medium Size
Shredded Red Onion - 1/4 cup
Grated Fresh Mozzarella Cheese - Between 2-3 cups ( Adjust according to your taste ).
Salt - As Desired
Black Pepper Powder - As Desired
Extra Virgin Olive Oil - 1 tbsp
Dried Basil  - 1 tsp ( For Flavour )
Dried Oregano  - 1 tsp ( For Flavour ).

Method 
In a big mixing bowl, add all the ingredients in order. Gently mix them so that the tomatoes get coated with the cheese and spices perfectly. Leave it for 5-10 minutes and enjoy this salad along with a warm pasta or sandwich.  Customize the salad with your own imagination.

LinkWithin

Related Posts Plugin for WordPress, Blogger...