Friday, December 16, 2011

Carrot Curry / Carrot Poriyal

Carrots are a good source of Beta Carotene , Vitamin A, antioxidants, dietary fibre and minerals. As we all know, Vitamin A deficiency cause poor vision and night vision loss. By including carrots in the daily diet, this deficiency can be rectified to some level. During my childhood, I used to see carrots in sambar, upma, any subzi, plain subzi, etc.,in my home. Carrots and greens were mostly included in the daily food menu. Well, some people might not consider this Carrot Curry at all and cannot imagine making a separate curry/subzi with carrots alone. !!!!( Even my husband thinks so!!!). Its better for them to have raw carrots in salads, doubly happy to eat carrot halwa as much as they can. But inclusion of carrot curry in the daily menu cannot be avoided by me as I am a veggie lover. So I try to twist the carrot curry in different ways and make it special. This is one of the varieties of carrot curry I make. Try this out with fresh carrots and you will surely enjoy this curry.
Ingredients
Fresh Carrots -  1 Bunch ( Around 6-7 Medium )
White Onion - 1/2
Oil - 3 tsp
Hing / Asafoetida - 1/2 tsp
Mustard Seeds - 2 tsp
Jeera / Cumin Seeds - 1 tsp
Urad Dal / Ulutham Paruppu / Minna Pappu - 2 tsp
Curry Leaves - 5 or 6
Dry Red Chillies - 2 Medium
Salt - To Taste
Turmeric Powder - 1 tsp
For the Powder
Groundnuts / Kadalai / Peanuts - 2 tbsp
Black Peppercorns - 2
Cumin Seeds / Jeera - 1/2 tsp
Dry Red Chillies - 1 Medium
Procedure
  • Roast the ingredients mentioned under the "Powder" slightly and grind them into a fine powder and keep it ready.
  • Wash and peel the carrots and cut them into small squares. Cut the onion into small pieces and keep it ready.
  • In the cooking pan, add the oil first for tempering. Add the ingredients for tempering in order and when its done, add the onion pieces and fry them for a minute.
  • Add the cut carrots with little turmeric powder and some water.
  • Cover the cooking pan with a lid and allow the carrots to get cooked thoroughly.
  • After 6-7 minutes, open the lid and add the grounded powder into the pan. Add required amount of salt too into the pan. Mix everything thoroughly for 3-4 minutes.
  • Switch off the flame. Serve this with white rice or any other rice combo.

Thursday, December 15, 2011

Methi Chole


Chole, a famous Punjabi food is one of our family favorites too.. As I have abundant home grown methi leaves ( fenugreek leaves ), I opted to make "Methi Chole" side dish for my chappathis. This time, I was keen in making the dish in a traditional punjabi way. On a snowy winter day, a plate of hot chappathis/rotis with a side of hot spicy chole definitely adds joy to the day. This time, I referred to my small recipe slip which i have been preserving since years given by my Delhi neighbour. In those days, my punjabi friend used to feed us with so many specialities. Chole was one of them in her list. Thanks to her tips and recipe, I am blogging this Protein Packed Methi Chole with you all...
Ingredients
Chickpeas / White Channa / Garbanzo Beans / Vellai Kondakadai - 2 Cups
Onion - 1
Tomato - 1 Big
Salt - To Taste
Sugar - 1 Pinch
Oil - 1 tbsp
Jeera/Cumin Seeds - 1 tsp
Fresh Fenugreek Leaves / Methi Leaves - 2 Cups
Cinnamon Sticks - 2
Lavang/Cloves - 4 or 5
Bay Leaves - 2 or 3
Turmeric Powder - 2 tsp
Red Chilli Powder - 2 tsp
Coriander Powder - 1 tsp
Anardana Powder - 1 tbsp
Punjabi Chole Powder - 1 tbsp
Cardamom Powder - 1/2 tsp
Green Chillies - 2
Ginger Grated - 2 tsp
Butter or ghee - 1 tsp ( For Flavour, its optional)


Method
  • Wash and soak the Chickpeas / white channa in water for overnight or for 6-7 hours in warm water.
  • Pressure cook them along with a cinnamon stick for 6-7 whistles till the channa get cooked well. Take 2 tbsp of cooked channa and mash them well and keep the paste aside.
  • Meantime, cut the onions, tomato, green chillies into small pieces and keep them ready. Wash the fenugreek leaves thoroughly without any sand and chop them nicely.
  • Keep all the required powders aside.
  • In any suitable cooking pan of your choice ( mostly i make them in the used pressure cooker itself), add butter/ghee and oil first. When its heated, add cumin seeds, cinnamon stick, cloves, bay leaves, onion pieces first.
  • Fry them till the onion turns golden brown. Add the fenugreek leaves at this stage. On a low flame, fry the methi leaves for few minutes.
  • Add the tomato pieces along with all other powders, little salt, pinch of sugar and a cup of water and cook them well.
  • Add the well cooked channa into the gravy along with the mashed channa paste.
  • Cover the cooking pan with the lid and cook them for few more minutes. Switch off the flame and garnish with fresh coriander leaves. Serve with hot rotis/chapathis.

Vankaya Kothimira Karam \ Brinjals in Spicy Coriander Based Gravy


Vankaya Kothimira karam, is an another variety made using fresh small baby brinjals.  The gravy for this variety is made using coriander leaves, leftover coriander stems and some lentils and spices. The taste is so fresh and delicious and it also goes well with ghee rice, plain basmati rice or hot white rice and its an excellent choice for parties as its a good combination of colour, aroma and taste. Needless to say the benefits of coriander leaves, its always a good choice to consume coriander leaves in daily cooking.
Ingredients
Small Baby Brinjals - 12 - 14.
Red Onion - 1
Oil - 2 tbsp
Salt - To Taste
Turmeric Powder - 1 tsp
Red Chili Powder - 1 tsp
For the Gravy
Coriander Leaves / Stem - 2 or 3 cups
White Sesame Seeds - 1 tbsp
Green Chillies -  3 to 4 medium
Ginger - 1 Small piece
Channa Dal / Senaga Pappu - 1 tbsp
Urad Dal / Minna Pappu - 2 tsp
Jeera / Cumin Seeds - 1 tsp
Black Peppercorns - 3 or 4
Tamarind - 1 small pinch.
Jaggery - a tiny piece.


Method
  • Wash the baby brinjals and make 4 to 5 slits at the wider portion without breaking the Brinjals. Likewise, carefully make the slits into all the brinjals and keep them temporarily ready in a bowl filled with water. Cut the red onion into small pieces and keep them ready.
  • Meantime, in the frying pan, add the ingredients for the gravy as mentioned above and roast them slightly except coriander leaves. Switch off the flame. Add the coriander leaves and stems and fry them in the remaining heat for few seconds. Transfer all the contents from the pan into the mixer grinder and grind them after its cooled down. Keep  the coriander gravy paste ready.
  • In a thick bottomed vessel or non-stick pan, add oil first. When its heated, add the mustard seeds, cumin seeds into the oil. When its sputters, add the finely cut red onions and brinjals into the kadai and fry them well in that oil for a minute or two.
  • Add turmeric powder, little salt and some water for the brinjals to cook three fourth. Cover the vessel with the lid and allow them to cook for 5 - 10 minutes till the brinjals get cooked.
  • Open the lid and add the gravy paste into the kadai. Add a tsp of red chili powder, required amount of salt and coat the cooked brinjals with the greenish thick coriander paste in all directions.
  • Cover the lid and allow them to cook for few minutes.  Switch off the flame after you see some oil oozing out of the gravy.
  •  Serve the greenish gravy dish with a side of hot rice or ghee rice or rotis.
Tips / Variations
You can add more green chillies to the gravy to make it more spicier.
Cook the brinjals well before adding the gravy.
You can add 1 or 2 tsp of cashewnuts to the gravy when you make it on special occasions. This is turn would make the gravy thicker and tastier.
 

Wednesday, December 14, 2011

Thengai Thogayal / Kobbari Pachidi / Spicy Coconut Hummus


Thengai Thogayal / Kobbari Pachidi is one of the most common item in the festival menu. Also, we could see this item along with some spicy vegetable fry during normal days. Fresh coconuts are always tastier and they taste better if its made with a good punch. Even today, I like to scrap the coconut flakes instead of cutting them across and grinding them with spices.
Ingredients
Fresh Coconut shredded - 1 Cup
Oil - 1 tbsp
Hing /Asafoetida - 1 Dash
Urad Dal / Minna Pappu / Ulutham Paruppu - 1 tbsp
Dry Red Chillies - 6 -7
Tamarind - 1 small piece
Curry Leaves - 5 or 6
Mustard Seeds - 1 tsp
Cumin Seeds / Jeera - 1 tsp
Salt - To Taste
Jaggery - 1 tiny piece
Method
  • Using a proper shredder, take out the fresh coconut flakes and keep them ready.
  • In the pan, add oil first. When its heated, add Hing, Urad Dal , dry red chillies and roast them slightly on medium flame.
  • When they turn golden brown, add the tamarind, jaggery and mix them well. Switch off the flame.
  • Add the coconut flakes into the pan and mix them very well and transfer them to the grinder jar.
  • Grind them coarsely and add required amount of salt and keep the thogayal ready.
  • In a separate tempering pan, add oil and when its heated, add Mustard Seeds, Cumin Seeds, little urad dal, curry leaves and fry them for few seconds.
  • Pour the tadka over the Thogayal/Pachidi and serve with hot rice.
Tips
Dont reduce the spice level. If the coconut is sweeter, it might reduce the spicyness of the Thogayal.

Apple Halwa


Though we like to eat fresh apples all the time, its always interesting to try out new things with our favourite fruits or vegetables at home. One of my friends had given us lots of their home grown fresh apples. I made apple halwa out of those sweet apples. The process was quicker and we require only very less ingredients for making this delicious halwa. Try this out at home and I am sure you will enjoy the unique taste of apple halwa. Later you can twist, customize your version with different kinds of apples..and let me know your discoveries too...This sweet will be an ideal healthy sweet especially during parties as its different.
Ingredients
Apple Puree - 5-6 cups ( My friend gave me a bag full of apples..I made a puree out of it using the   
                                        blender without peeling the skin. So, you can approximately take 4 or 5 Red
                                        Delicious Apples.)                                
Sugar - 3-4 tbsp
Cardamom Powder - 1 tsp
Food Colour ( Red ) - a small pinch.
Ghee - 3 tsp
Cashew nuts - 2 tsp
Pista - 2 or 3
Almonds / Badam - 3 or 4
Method
  • Make apple puree using a mixer grinder or blender without peeling the skin. Take out the seeds of the apples and then grind them.
  • In a big non-stick pan or any thick bottomed vessel, add the puree and allow them to cook with the lid for 10-15 minutes till the apple puree become thicker.
  • When its slightly thicker, add sugar and food colour powder to the pan and cook them for another 3-4 minutes.
  • Add the cardamom powder, ghee to the halwa and stir them nicely.
  • When the apple halwa becomes thicker and comes out of the sides of the pan easily, its an indication that the process is complete.
  • Switch off the flame and transfer the halwa to the serving bowl.
  • Decorate the apple halwa with lightly roasted cashewnuts, pistas, almonds and serve..
Tips /Variations
Adjust the sugar level according to your taste buds and also according to the sweetness of the apples you have.
To thicken the apple puree quickly, you can also use microwave while making this halwa.

Tuesday, December 13, 2011

Vegetable Biryani - Hotel Style / Vegetable Biriyani - Hotel Style / Veg Biryani - Hotel Style


Vegetable biryani served in hotels have a very different taste all the time for me. I tried several times to get to the right version of the Hotel Biryani but somehow it was failing all the times. Finally I got the secret recipe from my friend aunt in Bangalore couple of years ago and she explained to me in detail how they would do that biryani in large and small quantities in restaurants. From that time, I could feel confident that my biryani almost tasted like the Hotel ones. I tried the recipe several times at home and it did not disappoint me at all. This is the first version of the vegetable biryani which I learnt in my life and all other rice varieties were later tried by me, learnt from others..in the recent years.
I use our regular rice for making this biryani but not the Basmati Rice mainly to resemble the "Kadai Biryani".
Ingredients
For grinding:
Tomato - 2 Medium or 1 Big ripe
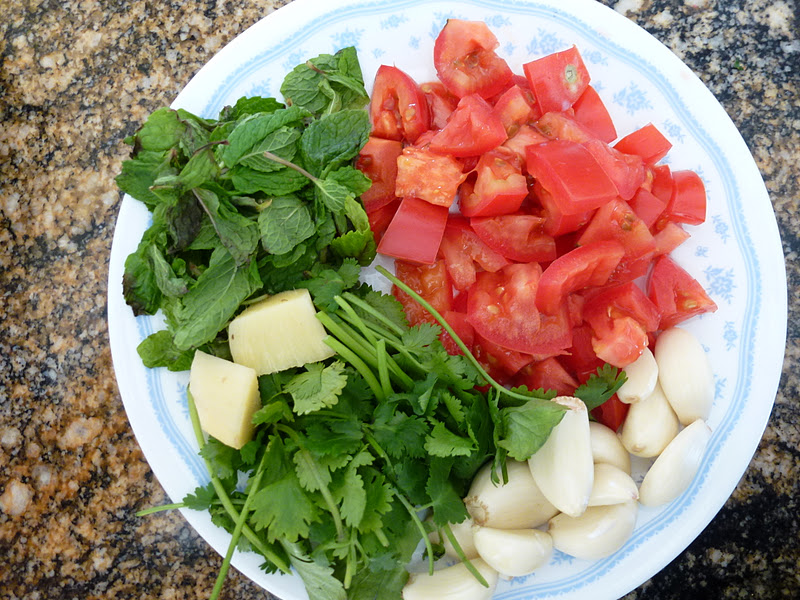
Pudina Leaves/Mint Leaves - 5-6 stems
Ginger - 2 small pieces
Coriander Leaves - 1 Cup
Garlic Pods - 9-10.
Red Onion cut - 1/2 cup
Green Chillies - 8 or 9
Sombu / Fennel Seeds - 1 tsp
Cinnamon Sticks / Pattai - 1 Stick Medium
Krambhu / Lavang / Cloves - 4 or 5
Cashew Nuts - 1 tbsp
Marathi Moggu - 1 tiny piece
Biryani Flower - 1 tsp
In a big non stick pan, add 1 tsp of ghee and 1 tbsp of oil and fry the above mentioned ingredients for few minutes and make a thick paste of it using a mixer grinder and keep it ready.
For the Biryani Main Process :
Red Onion - 1 Medium
Capsicum - 1/2 finely shredded or cut
Carrots - 1 medium
Beans - 15 to 20 cut into finger size
Potato - 1 Big
Peas - 1 Cup
Mint Leaves / Pudina Leaves - 2 tsp
Cinnamon Stick - 1
Marathi Moggu - 1
Sombhu / Fennel Seeds - 2 tsp
Kala Jeera - 1 tsp
Biryani Leaves - 3 or 4
Thick Coconut Milk - 1 Big Tumbler / Glass
Sona Masoori Rice - 2 Cups
Salt - To Taste
Red Chilli Powder - 1 tsp
Coriander Powder - 1 tsp
Turmeric Powder - 2 tsp
Ghee or Butter - 2 tsp
Oil - 2 tbsp 
Actual Preparation Process :

Make the Gravy as mentioned above.
Extract the Coconut Milk and keep it ready.
Soak the Rice in water till you switch on the flame.
Cut the vegetables and keep the other ingredients as mentioned above and keep them handy.

  1. In a non-stick vessel or in a big pressure cooker, add the ghee / butter and oil first.
  2. When they get heated, add the masala spices first followed by Onion and capsicum. Add  a pinch of salt and fry them till golden brown.
  3. Add the grounded paste ( gravy ) into the cooker and fry patiently on low flame till the raw smell is completely gone.
  4. Add the cut vegetables into the cooker now and fry them for a minute.
  5. Add all the powders into the cooker at this stage and fry everything well for another 2 minutes.
  6. Drain all the water from the rice and add them to the cooker and fry it along with all other ingredients till the rice get dried and slightly fried.
  7. For 2 cups of Sona Masoori Rice, add a cup of thick coconut milk and a cup of little watery coconut milk and 2.5 cups of water.
  8. Mix them well and add required amount of salt into the cooker and allow them to cook for just 2 whistles on a medium flame.
  9. If you cook the biryani in a Non-stick vessel, then close the lid and allow them to cook on a low flame till the biryani is completely cooked.
  10. Switch off the flame after the biryani is done in both the cases and allow the cooker to get cool down completely.
  11. After 10-15 minutes, slowly open the cooker and check the Biryani consistency. Keep the lid open for few minutes.
  12. Add some fried bread / bun pieces ( if you like ) into the biryani and serve it with cool onion raita.
  13. You will definitely enjoy this version of the biryani though it might take little more time.
  14. Its a complete meal and an excellent choice for weekend lunch.
Tips / Variations
Don't add more water as it makes the Biryani Pasty.
Don't reduce the spice level in this version, especially don't reduce the green chillies at all. Otherwise, the biryani would be sweeter due to the addition of coconut milk. ( My experience!!!) 

Thursday, December 8, 2011

Adai - Protein Rich Lentils Dosa


Adai is one of the traditional South Indian tiffin which is mostly served with Aviyal in restaurants. This is made with a mixture of different Lentils and there are many varieties of Adai like Carrot Adai, Cabbage Adai, Coconut Adai, Drumstick Leaves Adai, Onion Adai, etc., based on the vegetable we add to the Lentils Mix. Now, I am blogging about the regular Adai with some onions in it. I try to make this often for breakfast as its a rich high protein breakfast for kids. With a side of fresh curd, Adai is definitely an ideal wholesome breakfast.
I used the Lentils like Moong Dal ( Green Gram ), Thuvar Dal ( Split Red Gram ) and Channa ( Chickpea / Bengal Gram ) in my Adai along with some Idly Rice.
Upon looking at the nutritional benefits of Lentils, they are having highest level of protein, contain dietary fiber, folate and other vitamins. Sprouted Lentils also contain sufficient levels of all amino acids and they are a good source of Iron.
Ingredients
Channa Dal / BengalGram - 1 Cup
Moong Dal / Green Gram - 1/4 Cup
Thuvar Dal / Split Red Gram - 1/2 Cup
Idly Rice - 1/2 Cup
Hing / Asafoetida - 1 Dash
Dry Red Chillies - 3
Red Onion shredded - 1/2 cup
Curry Leaves - 7 to 8.
Salt - To Taste
Oil - To fry the Adais.

Method :

Making the Adai Batter :
Soak all the Lentils and Idly rice in a same container with water for 2-3 hours. Drain the water and grind it using a mixer grinder with Hing and Dry red chillies. Add some water into the coarse paste and make it little thicker but not like thin dosa batter. Add required amount of salt and crushed curry leaves to the Batter and keep it ready. After 2 or 3 hours, start making the Adais as they taste better after you leave the batter for sometime. But it should not be kept for fermentation.
Making the Adai on the Stove :
Heat the frying pan on the stove on medium heat. Using a red onion, spread little bit of oil onto the frying pan/tawa and make the surface uniform and smooth before pouring the batter. When its sizzling hot, reduce the flame and pour one round of batter into the center and slowly extend it and make a big round like below.  Apply oil along the sides of the Adai and in the middle. Fry the Adai on medium heat on both sides.
Continue the same process for the rest of the Adais and serve the crispy thin adais with a side of thick fresh curd and ginger pickle.


Tips / Variations:
While frying the Adais, turn it to the other side of frying only after the first is fried to slight golden brown and crispy.
Add drops of oil in the middle of the Adais instead of pouring more oil on its sides.
Try to serve with a side of good Aviyal if you are making this on special occasions.

LinkWithin

Related Posts Plugin for WordPress, Blogger...