Monday, March 1, 2021

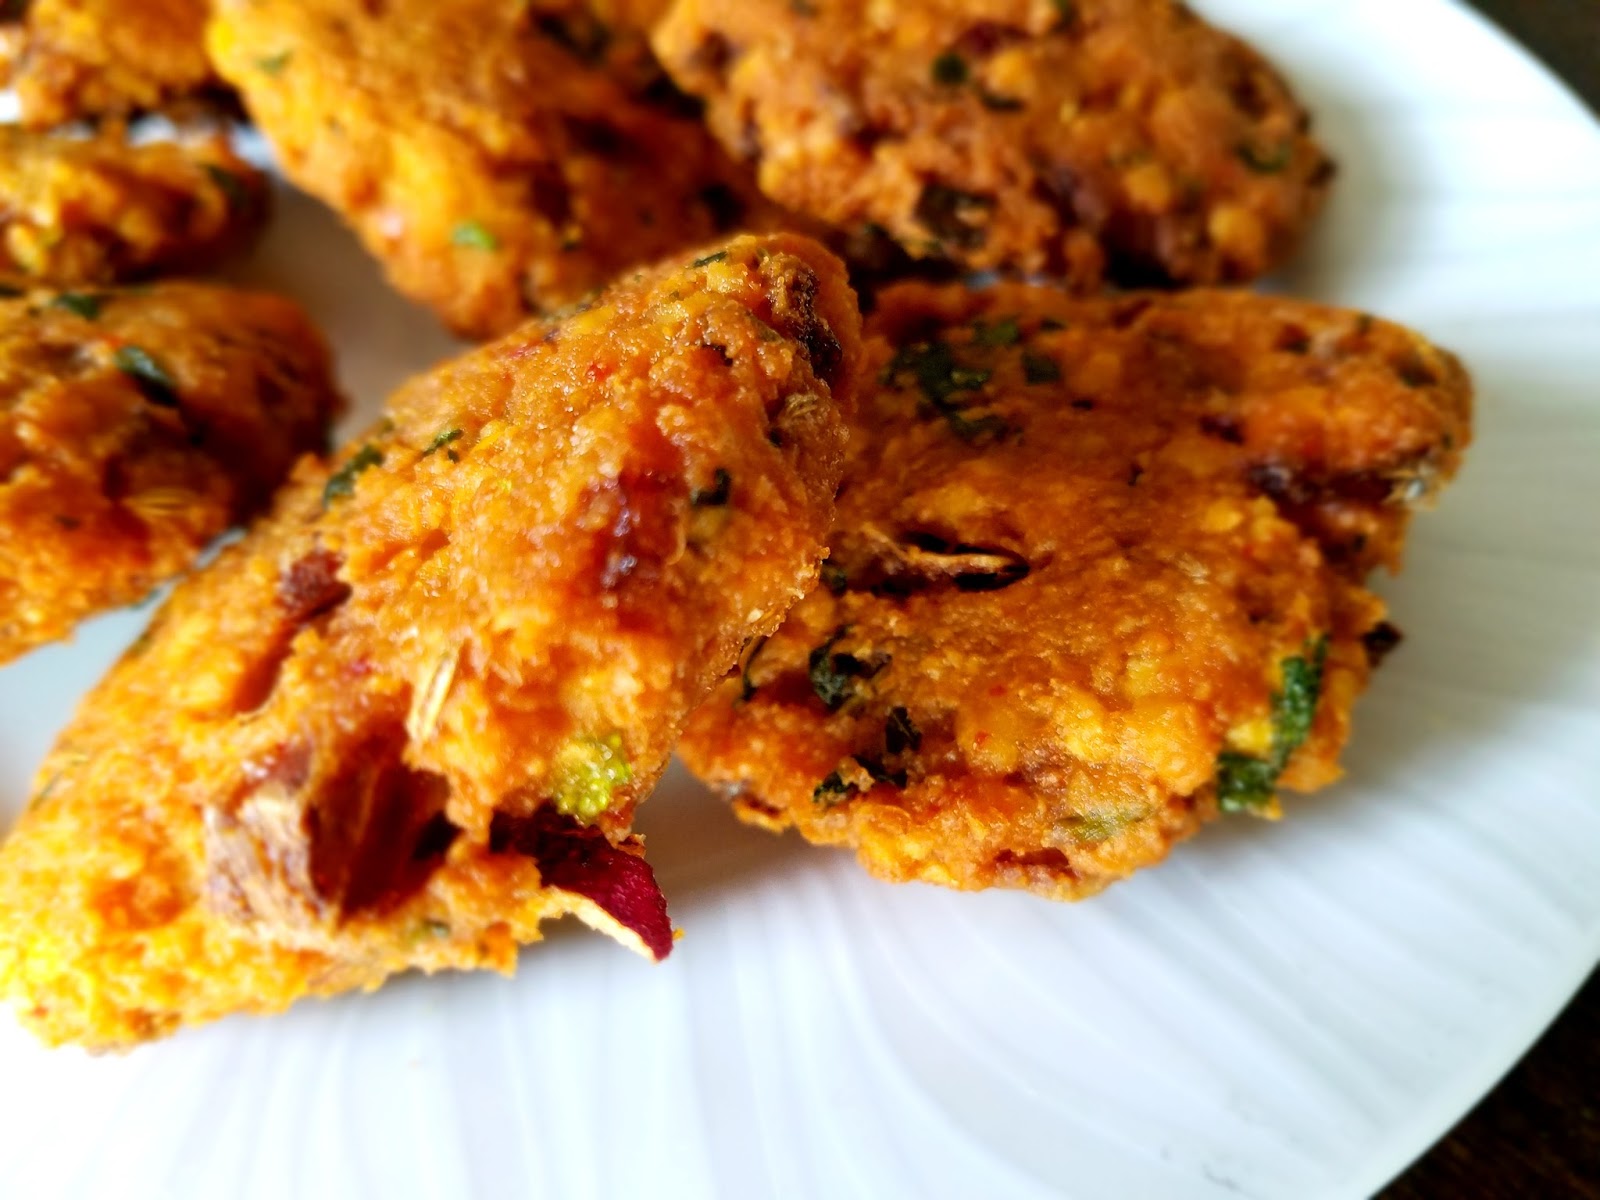
Banana Flower Vadai / Vaazhaipoo Vadai / Arati puvvu Vada


Banana Flower / Vaazhaipoo in Tamil / Arati Pavvu in Telugu is one of the Superfoods which is easily available in markets. This banana flower blossom has many medicinal properties and is highly nutritious. In TamilNadu, they widely use this flower to make many dishes in the kitchen. Though cleaning the banana flower florets is little tedious, my mom never failed to make this curry or Usili using this flower. During childhood, we often saw either banana flower curry or banana stem kootu in our meal.  Vaazhaipoo vadai / banana flower vada is one of the delicacies of Tamil Nadu. You can either fry this lentil based vadai in oil or cook them in air fryer too. 

Ingredients 

Channa Dal / Bengal Gram Lentil - 2 Cups
Fennel Seeds / Sombu - 1 tsp
Rice Flour - 1/4 tbsp
Garlic - 2 Pods
Ginger - 1 small cube
Green chillies - 4 Medium
Dry Red Chilli - 1 
Chopped coriander leaves - 1 handful
Crushed curry leaves - 1 stick
Hing / Asafoetida - 1 Dash
Salt - To Taste
Oil - Enough to fry the vadas
Water - Enough to grind the batter coarsely. 
Banana Flower florets of 1 flower thoroughly cleaned and chopped.

Preparation

Cleaning Banana flower 

Cleaning the Banana flower seems to be a little time consuming job initially. Once you know the technique of it, its a matter of few minutes and you will nail it easily everytime you buy.
  • Rub your hands with little oil while doing this job as your hands might turn sticky and black during this process.
  • Open the purple petals one by one and take out the yellow colour florets carefully.
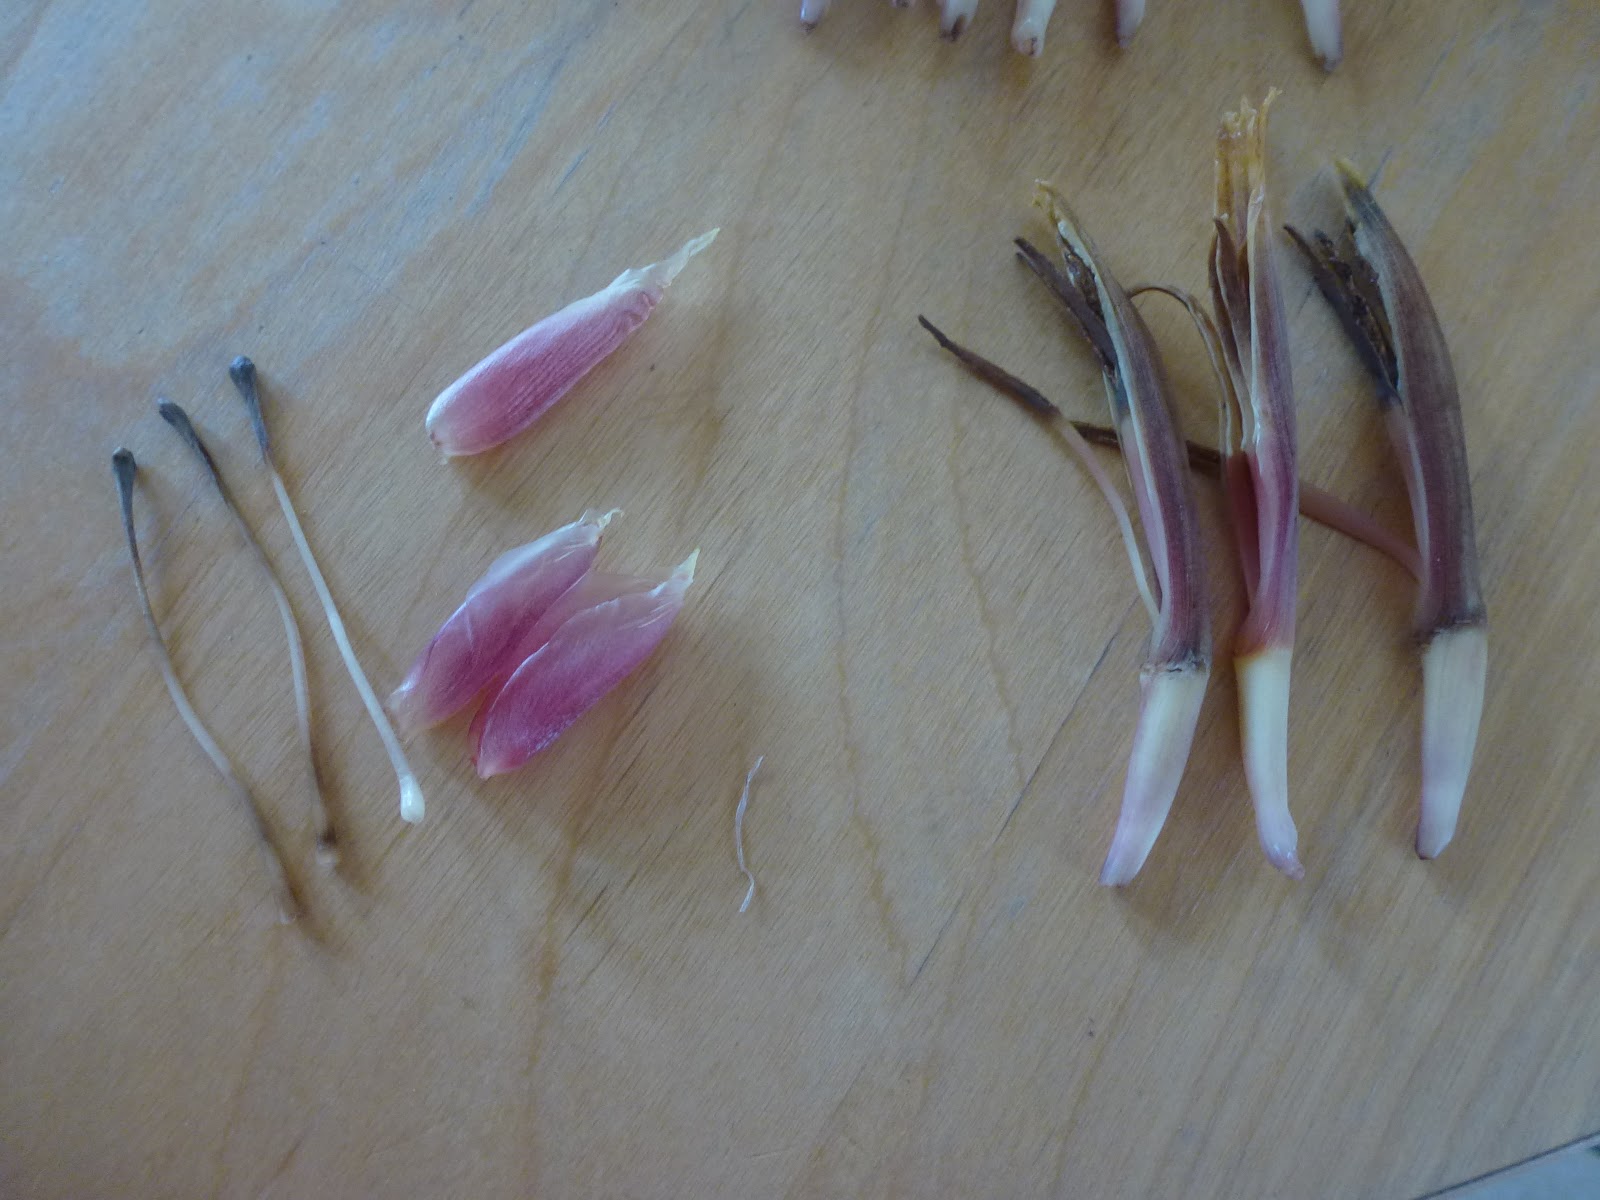
  • Remove the two parts from every floret carefully.
  • In the picture I added, I showed the two parts that are to be taken out from each floret. One part looks like a plastic ear phone and the other part is a thick long stem with a thick dot on its top.
  • Chop the cleaned florets under each petal and immediately put them in a diluted buttermilk in a vessel. This is mainly to prevent colour changing.
  • Follow the same process for all the petals till you notice a small cone shaped yellow tender bud. As this tender yellow cone is also highly nutritious, chop them too finely and add it to the vessel. Keep the chopped florets ready.

Vada Batter Preparation

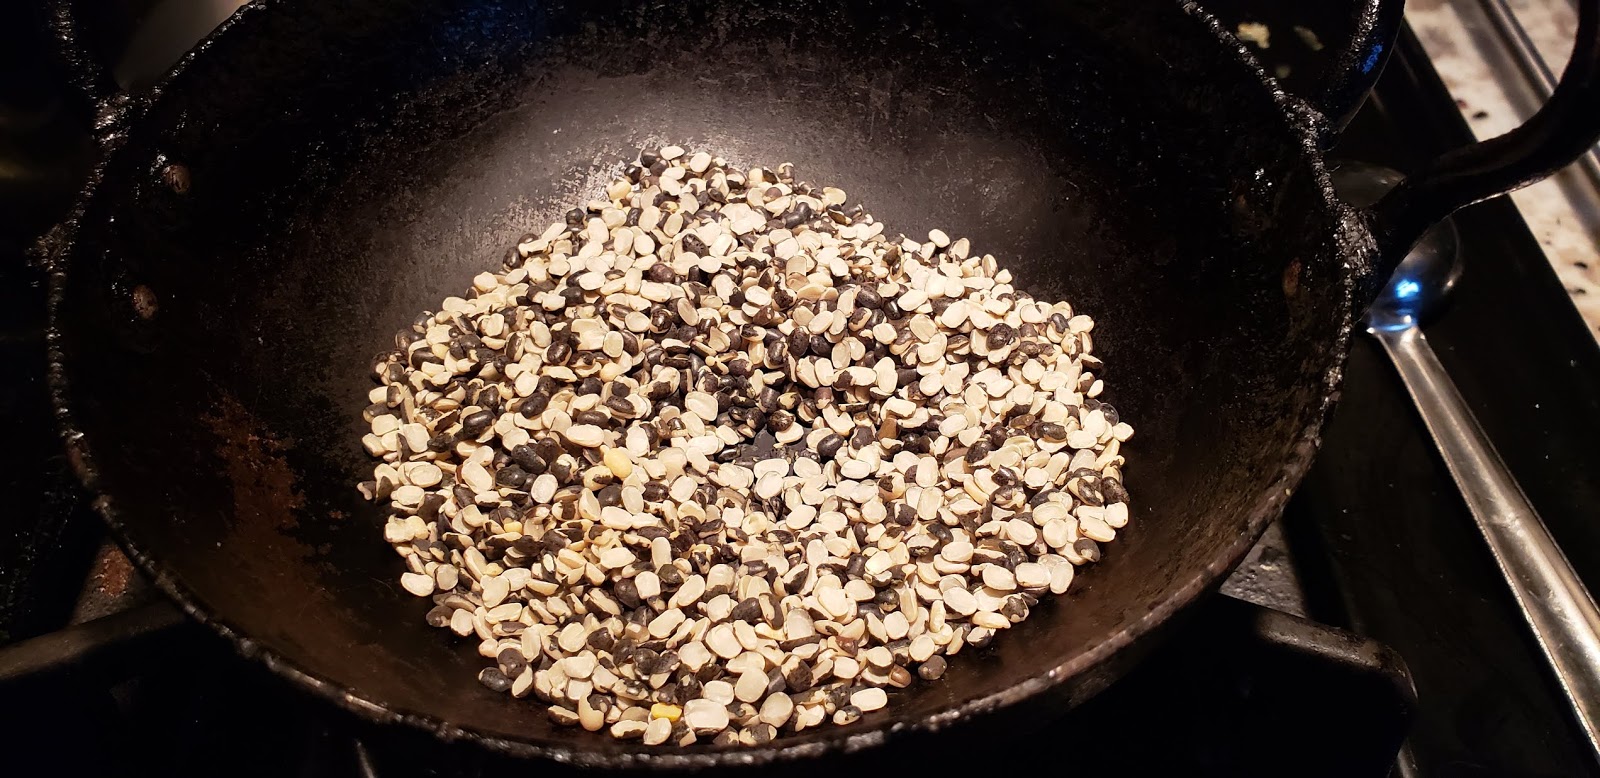
  • Wash the dal thoroughly and soak them in warm water for an hour.
  • Meantime, clean the banana flower florets and keep the chopped florets ready. 
  • Grind the dal along with garlic, ginger, dry red chilli, fennel seeds to a coarse paste. Transfer the dal batter into the mixing bowl.
  • Add required amount of salt, hing, little rice flour, chopped coriander leaves and curry leaves, finely chopped green chillies, banana flower florets into the vada batter. Drain the chopped banana flower florets from the buttermilk mix and use the diluted water later. 
  • Simultaneously keep the kadai with oil on medium flame. When you notice slight smoke on top, then the oil is ready for frying.
  • Grease the palms with little oil and take a small portion of the batter and make a round pattie shaped  vada.
  • Gently drop them one by one into the heated oil. Fry them on both sides till they turn golden brown on medium heat. 
  • Serve the crispy banana flower vada / Vaazhaipoo vadai with a cup of coffee or tea.!!

Tips / Suggestions

  • Don't add too much water while grinding. Sprinkle little water which is just enough for grinding.
  • Don't fry the vadas on high flame as it will not help in getting golden vadas. It might turn them darker and also the inner part of the vadas might not get cooked perfectly.
  • Adjust the number of chillies as per your spice level.

Friday, February 19, 2021

Orange Neem flower Rasam / Orange Vephampoo Rasam


I have not planned to make this rasam. Mandarin oranges which I bought from the grocery store were too sour and we were able to enjoy those little ones. Initially I thought of making orange marmalade but I dropped that idea as I did not want to use any sugar. Finally I decided to make a spicy healthy rasam using these oranges.  The sourness of these oranges perfectly substituted in this rasam and I didnt need to use any tamarind at all.  Addition of neem flowers to this rasam makes it even more balanced in taste. Nowadays, I like to add neem flowers in all my rasams as they are very good for treating stomach related problems, for treating intestinal worms, etc.,  Totally, this rasam contains the mixed taste of all the healthy ingredients and its an excellent Vitamin C booster.

Our family enjoys a cup of rasam daily as an appetizer, including my kids which in turn triggers me to try out different varieties of rasam. After I tasted, I see a slight resemblance between this rasam and pineapple rasam. With a side of  potato fry or hot rice, it tasted heavenly. Try this rasam in your kitchen and let me know your feedback. 

Ingredients

Orange Juice of  15 little Mandarins
Tomato - 2 medium
Turmeric powder - 1/2 tsp
Rasam powder - 2 tsp
Salt - As required
Water - As required
Toor dal water - 1/2 cup ( Optional )
Coriander leaves - To Garnish

For Seasoning 

Ghee - 1/2 tbsp
Hing - 1 Dash
Mustard Seeds - 1 tsp
Cumin seeds / jeera - 1 tsp
Dry red chili - 1
Black pepper powder - 1 tsp
Cumin powder - 1 tsp
Curry leaves - 3 or 4
Dried neem flower - 1 tbsp

Preparation Process

  • Peel the Mandarin oranges and extract the juice using a blender. Filter the pulp and keep the orange juice ready. Crush the tomatoes in the blender and keep the tomato pulp ready.
  • In the cooking vessel, add half a cup of water,tomato pulp, turmeric powder,rasam powder,salt and little hing. Close the lid and allow them to cook for few minutes till the raw smell goes off.
  • Add the orange juice into the vessel and allow them to cook for a minute on low flame. Add required amount of water as per your consistency. Do not boil the rasam after you add the orange juice.
  • Start the seasoning on a separate tadka pan on its side. Add all the ingredients for seasoning in the tadka pan. When its done, pour the tadka over the rasam.
  • Garnish it with coriander leaves.
  • Switch off the flame.
  • Enjoy with hot rice and a nice veggie fry of your choice. 

Tips

  • Do not boil the rasam after you add the orange juice. Switch off the flame after a minute and let the orange juice gets cooked with the existing heat.
  • I prefer to add little black pepper powder, cumin powder in the tadka. This definitely adds more flavour and punch to the rasam. This is my mom's method of seasoning especially for rasams.

Tuesday, February 16, 2021

Simple Vaazhaikai Curry / Raw Banana Curry / Plantain Curry / Aratikaya Kura


Raw Banana / Vaazhaikai / Aratikaya is a powerhouse of vitamins and minerals. Though we can make many recipes using this vegetable, this version is my most favourite one which my mom used to make during amavasai day ( No Moon Day ).  This curry is very easy to make as it requires very less ingredients.

Ingredients

Raw banana - 3 medium
Turmeric Powder - 1 tsp
Red chili powder - 1/2 tsp ( optional )
Salt - As required

For Seasoning / tadka 

Coconut Oil - 2 tsp
Mustard Seeds - 1 tsp
Jeera / Cumin Seeds - 1/2 tsp
Hing / Asafoetida - 1 dash
Urad dal - 1 tsp
Channa Dal - 1 tsp
Curry leaves - 1 stem
Green chilli - 2 ( Chop them or slit them as you like )
Dry Red chilli - 1 

For Garnishing

Coconut flakes - 1 tbsp
Coriander leaves - 1/2 tbsp

Method

  • Heat oil in the cooking vessel. When heated first add mustard seeds and once it splutters, then add the other ingredients for seasoning and saute for a minute until the dals turn golden brown. 
  • Add the chopped raw banana pieces along with turmeric powder. Add 1/4 cup of water into the vessel.
  • On Medium-low flame, allow the vazhaaikai / raw banana to cook for 4-5 minutes. Once its cooked three fourth, add required amount of salt and close the lid.
  • Once the vazhaikai pieces become tender, add the red chili powder if you like. Saute it for 2 minutes.
  • Switch off the flame and garnish the curry with coconut flakes and coriander leaves.
  • Enjoy this delicious curry with hot rice and rasam. 

Tips

  • I definitely use coconut oil especially for making this curry as it gives a nice aroma to the cooked Vazhaikai / raw banana.
  • As this is not a fry, cook the vazhaikai / raw banana till the pieces become tender and soft.  The cooked pieces should be separate and not mushy.

Tuesday, February 9, 2021

Patnam Pakoda / Pattanam Pakoda / Medhu Pakoda


Patnam Pakoda also called as Medhu Pakoda is a famous street food in Tamil Nadu and is mostly available in many tea shops. These pakodas should be enjoyed with a cup of hot coffee or tea. Once you start enjoying these crunchy pakodas, you cannot hold your hands taking more and more. Generally pakodas are made with Besan Flour or Kadalaimaavu. But this pattnam pakoda is made with Pottukadalai Maavu ( Roasted Gram Dal / Chutney Dal ).  I made these pakodas during lockdown thinking that these would last for a week so that we could enjoy during our tea time with a nice snack for a week. On the Contrary, the bowl got emptied on the same day of preparation. These pakodas are deep fried in oil to get the delicious crunchy bite. If you have an Air fryer, you can try with few pakodas and compare both the versions. I have not ventured it out yet.

Ingredients

Chutney Dal / Roasted Gram Dal / Pottukadalai Flour  - 2 Cups
Rice Flour - 1 Cup
Green Chilli - 4 
Ginger - 1 small cube
Garlic - 2 pods
Fennel Seeds - 1 tsp
Salt - As Required
Red Onion - 1 Big or 2 Medium
Curry Leaves crushed - 1 stem
Coriander Leaves - 1 tbsp
Red chilli powder - 1/2 tsp
Hing / Asafoetida - 1 Dash
Oil - Enough for frying
Ghee - 1 tbsp
Baking Soda - 1 pinch

Preparation

  • First prepare the Pottukadalai Maavu / Roasted Gram dal flour by grinding them in a mixie smoothly and keep it aside.
  • Crush the green chilli, fennel seeds, curry leaves, garlic, ginger in a mortar or in a mixie gently. Keep it ready. Chop the onions and keep it aside.
  • In a mixing bowl, add the ghee and a pinch of baking soda. Gently mix them using the tip of the fingers in order to mix the soda with the ghee completely. This process keeps the inner part of the pakoda softer and enhances the taste as well.
  • To the bowl, add the Roasted gram flour / Pottukadalai Maavu,rice flour,chopped onions,crushed green chili mix, red chilli powder, hing and mix them thoroughly. Add water little by little to the bowl and make a dough like a roti dough. 
  • Once the dough is ready, make lemon sized balls of the dough and keep them ready for frying.
  • While preparing the pakoda dough, you can start heating the oil for frying process.
  • On low-medium heat, fry all the pakoda balls in the oil and drain them out once they turn golden brown and crispy.
  • Enjoy the delicious Pakoda with hot tea / coffee.

Tips / Suggestions

It tastes best when its slowly fried on low-medium flame. Cooking on high flame might yield half cooked inner part and dark coloured pakodas.

Friday, February 5, 2021

Thai Velli Maa Vilakku - Healthy Maa Vilakku


"Maa Vilakku"  in Tamil means Edible light with a small dent in the middle to hold the ghee. Its generally lighted during the month of "Thai" and "Aadi" in our place as a prasadam / offering to Goddess. This edible lamp is made out of processed rice flour and powdered Jaggery.  Still I remember how my mom used to light these traditional edible lights in our native place Thanjavur in front of the Goddess Bangaru Kamakshi Amman. She used to follow all the traditions in her own unique way in spite of having a hectic work schedule.  Following her traditions with heartful of thanks and respect, I made the Maa Vilakku today in our home but with a small twist. I have substituted rice flour with my processed millet flour, little almond flour, sesame seeds powder and Jaggery.  The consistency of the prasadam was good enough to make a nice ball and it tasted very good.  

Next time try this Maa Vilakku at your home especially when you want to have a healthy millet option.

Ingredients


Processed Millet Flour - 1.5 Cups 
Almond Flour - 1 Cup
Brown sesame seeds powder - 1/2 cup
Ghee - 2 tsp
Powdered Jaggery - Between 1/2 cup to 3/4th.
Elachi powder / cardamom powder - 1 tsp

Method 

1.  Soak the Kodo Millet / Varagu in water for 1 hour. Drain them completely and dry them on a dry paper towel or on a thin muslin cloth for 20 minutes. Powder them in a blender.
2. Add a cup of almond flour, sesame seeds, crushed jaggery into the blender and grind them nicely.
3. Pour the grinded mix into a bowl. Add elachi powder and ghee into the mixture.
4. Divide them into two portions and make a round lamp with a small dent in the middle.
5. Pour ghee into the dents and keep them on a silver plate. Decorate the plate with kumkum, flowers and light this divine Maa Vilakku in your pooja.

Suggestions

I used Kodri Millet / Kodo Millet for making this prasadam. You can use any millets of your choice.

Monday, February 1, 2021

Vankaya Biryani / Brinjal Biryani


During lockdown,  I made Vankaya Biryani ( Brinjal Biryani ) just for using my tender purple brinjals in a different form for lunch. Whenever I get baby brinjals from the store, either I make brinjal gravy or curry. Big brinjals would be mostly consumed for making Baigan bhartha, Brinjal Thogayal, baba ghanoush, kathirikai Gothsu. Our foodie family totally love this biryani. Flavor of this biryani is so unique due to the addition of baby brinjals. Try this only with fresh baby brinjals as the taste is totally determined by the freshness of the brinjals. We can enjoy this hot biryani with a side of mixed veg raita. This brinjal biryani is an excellent alternative to our regular vegetable biryani. Next time, if you have abundant baby brinjals, Vankaya biryani should hit in your mind.!!!

Ingredients

Baby Brinjals ( Purple ) --  12 to 15
Red Onion - 2 Medium or 1 big one
Green Chili - 5
Tomato - 1 Medium
Basmati Rice - 2 Cups
Salt - As Desired
Ghee - 1 tbsp.
Cooking Oil - 1 tbsp.
Ginger garlic Paste - 1/2 tbsp.
Turmeric Powder - 1 tsp
Chili Powder - 1 tsp
Coriander Powder - 1/2 tbsp.
Biryani Masala Powder - 1 tbsp.
Water - 3.75 cups of water.
Lemon Juice - 1 tsp
Roasted Cashew nuts - To Garnish
Coriander Leaves - To Garnish

Masala Ingredients - For First Tadka 

Cinnamon Stick - 2 or 3
Marathi Moggu - 1
Lavang - 3 or 4
Sombhu / Fennel Seeds - 1 tsp
Jeera / Cumin Seeds - 1 tsp
Kali jeera - 1 tsp
Cardamom - 2
Bay Leaves - 2 or 3

Procedure 


Wash the brinjals and slit them into four keeping the stem intact and keep it ready.  Cut tomato, onions, green chilies and keep it aside.

Cook the Basmati Rice Separately
Soak the basmati rice and keep it ready. Cook the basmati rice separately in a vessel or pressure cooker along with a cinnamon stick, 2 lavang, 1 bay leaf, 1 tsp of ghee. Add 3.5 cups of water for 2 cups of basmati rice. Basmati rice should be cooked three fourth and not mushy.  

While the rice is getting cooked, finish the remaining process as below.

Brinjal Cooking Process
  • Take a wide deep vessel to prepare the biryani. Add 1 tbsp. of ghee and 1/2 tbsp. of oil first. 
  • Add all the masala ingredients and fry them little on medium heat. Then add the red onion slices into the vessel. Fry them till it turns light golden brown and not burnt. Add the ginger garlic taste then and fry them till the raw smell goes away.
  • Add the tomato, green chili into the vessel now and let it cook till they get mushy.
  • Add the slit brinjals into the vessel now along with the remaining oil.  Fry the brinjals on medium heat for 2 to 3 minutes.
  • Add all the powders required for making the biryani. Add salt just enough for the brinjals sitting in the vessel. Don't add all the salt.
  • Mix them thoroughly with the brinjals. Cover the lid and allow them to get cooked on medium heat till the brinjals get cooked completely.
  • When its done, layer the vessel with the cooked basmati rice and the cooked brinjal masala. 
  • Press them and cover the lid. On a low flame, let the biryani cook for 5 to 6 minutes.
  • After its done, switch off the flame. Add a tsp of lemon juice and mix it. 
  • Garnish the biryani with coriander leaves and roasted cashew nuts.
  • Enjoy with a side of mixed veg raita. 

Tips
  • Good quality basmati rice to get a rich flavor.
  • Small baby brinjals should be fresh.
  • Brinjals should be well coated with all the masala powders and get cooked.
  • Keeping the layered biryani on low flame will give a well cooked biryani with tiny light crispy brinjals.
  • You can add some fried onions on its top just before serving.

Monday, February 24, 2020

Kandathippili Rasam / Long Pepper Rasam


Kandathippili Rasam / Long Pepper Rasam is one of the traditional rasam recipes of Tamil Nadu. This rasam has numerous health benefits. It helps to cure severe cold, soothes cough and it is used to cure stomach related problems and good for digestion. It increases the appetite, removes toxins from your body and boosts immunity.

My mom used to make this rasam whenever we complained of any body aches, especially after coming back home from a long trip. 

In our household, rasam is enjoyed by everyone and they all love to drink the rasam as an Appetizer.

Ingredients

For Rasam Base :

Thick Tamarind Water - 1 cup 
Hing / Asafoetida - 1 Dash
Turmeric Powder - 1 tsp
Sambar Powder - 2 tsp
Salt - As Required
Jaggery - 1 pinch
Crushed Tomatoes - 1.5 Cup
Water - As Required
Corainder Leaves - To Garnish 
Cooked Toor Dal Water - 1 cup

For Seasoning:

Ghee - 2 tsp
Hing - 1 pinch
Mustard Seeds - 1 tsp
Cumin Seeds - 1 tsp
Curry Leaves - Few


For Grinding :

Coriander Seeds - 3 tsp
Black Peppercorn - 2 tsp
Cumin Seeds - 4 tsp
Dry Red Chilli - 1
Kandathippili ( Long Pepper ) - 6 sticks


Preparation :

  • Soak tamarind in hot water for 10 minutes and extract the tamarind juice and keep it ready.
  • Roast the ingredients for making the Kandathippili powder and grind them in the mixer.
  • Add all the ingredients for making the rasam in the cooking vessel. 
  • Adjust the consistency by adding required amount of water.
  • Close the vessel and allow the rasam to boil for 4 or 5 minutes.
  • When the raw smell of the tamarind completely goes away, add the kandathippili powder, toor dal water and mix them well.
  • Allow the rasam to cook for few more minutes on medium flame till you see a frothy layer on top of the rasam.
  • Switch off the flame and do the seasoning separately.
  • Pour the tadka over the rasam vessel.
  • Garnish with crushed coriander leaves and enjoy this healthy homemade rasam with hot rice and ghee.

Tips

Try to make rasam always in "Eeya Sombu" , a pure tin vessel and enjoy. 

Sunday, February 23, 2020

Healthy Salad for Weightloss


Earlier, I was not a big fan of raw salads. I found it really difficult to pick them and chew little by little, I totally did not enjoy it. Slowly, few salads that I had at outside restaurants triggered my tongue and I discovered the way of enjoying the salad in my own terms. Its always good to eat raw vegetables and fruits daily. If you like to reduce your weight or fat from your body, consumption of raw vegetables helps you to achieve the results quickly. This is one of the salads I make often. I don't follow any rule or formula specifically while making a salad for myself. I fix my salad with any leftover veggies and if I like the combo, I will record it and follow the same pattern sometimes.  This salad was also recorded in the same way. 

Ingredients

For the Salad :

Romaine Lettuce - 1 cup roughly chopped
Cucumber - 1/2 cup chopped 
Grated Carrot - 1/2 cup
Steamed Corn - 1/2 cup
Cherry tomatoes - 1/2 cup ( Cut the cherry tomato in half )
Mixed Bell Pepper chopped - 1/2 cup ( I used red bell pepper, orange bell pepper and green bell pepper ).
Salt - As required
Coriander Leaves - 1 tbsp ( Shredded Leaves )

For the Dressing:

Lemon Juice - 1 tbsp
Salt - As required
Black Pepper powder - 1 tsp
Mexican Seasoning Powder - 2 tsp
( If you don't have this, you can add 2 tsp of crushed red chili flakes and cumin powder )


Preparation

Wash all the vegetables and cut into desired shapes.
Assemble them in your salad mixing bowl.
Meantime, make the dressing and keep it ready.
Add required amount of salt and pour the dressing into the bowl.
Mix it thoroughly and enjoy.

Tips 

You can add any chopped nuts of your choice into this salad and enjoy. Nuts like Walnuts, pumpkin seeds, sunflower seeds and almonds are best suited.

Friday, February 21, 2020

Dangar Pachidi / Dangar Pachadi / Urad Dal Raita


Dangar Pachidi / Urad Dal Raita /Dangar Thayir Pachidi is a very traditional recipe,which is not talked by people nowadays. In fact, I wonder how many people of our generation know about this easy thayir pachidi.  This is one of the no cook raita / thayir pachidi which can be easily prepared at home. This fiber rich pachidi is a good source of Iron, folic acid and is best suited for women. It reduces cholesterol and has numerous health benefits too. It serves as a good accompaniment to Vatha Kuzhambu, Milagu Kuzhambu or any spicy Kara Kuzhambu.
We can add vegetables if we like, I added few fried  ladiesfinger / okra into this pachidi. My grandma used to add fried vathals along with tadka into this pachidi. Dont forget to make this yummy pachidi with a vegetable of your choice and enjoy with some spicy kuzhambu. This Pachidi helps you greatly especially when you are making a very big feast with 15 items for some guests. 

Ingredients

Thick Curd - 1.5 Cup
Water - As required
Black Urad Dal - 1 tbsp
Salt - As Required
Oil - 2 tsp
Hing / Asafoetida - 1 Dash
Mustard Seeds - 1 tsp
Jeera / Cumin Seeds - 1 tsp
Curry Leaves - Few
Dry Red chili - 1
Turmeric Powder - 1/2 tsp
Red Chilli powder - 1/2 tsp
Cut Okra / Ladiesfinger / Vendaikai - 2 Cup ( As you Like )

Preparation

  • Dry Roast the Black Urad dal till you notice a nice aroma.

  • Powder it in a mixer and add it to the curd mixture. Add water to adjust the consistency of the pachidi.
  • Add required amount of salt to this and keep it aside.

  • Meantime, add oil in a frying pan. When its heated, add mustard seeds, jeera, hing, curry leaves, dry red chili, turmeric powder. 
  • After that, add the cut okra,salt,red chili powder and fry them till the okra is nicely cooked and fried.

  • Transfer the hot fried okra/ ladies finger curry into the Dangar Pachidi mixture.
  • Enjoy with Vatha kuzhambu and Appalam. 

Tips 

1. You can add grated carrot or grated cucumber / zucchini into the pachidi directly. If you prefer to add freshly grated veggies, make tadka separately and pour it over the pachidi.
2. I like to make this Pachidi with black urad dal. You can make this with white urad dal too. 
3. This pachidi tastes very good with fried veggies or vathals.
4. I like to make this with fresh curd or light sour curd as its a no cook Pachidi.

Tuesday, February 4, 2020

Gooseberry Cucumber Curd Pachidi / Nellikai Vellarikai Thayir Pachidi


In every meal of the day, I love to include one curd pachidi with either cucumber, carrot or any other suitable vegetable. Though we don't get fresh Gooseberries year round here, I bought a pack of frozen gooseberries from the Indian store.  Using those gooseberries, I made this fresh curd pachidi for our Saturday lunch thali. I make this pachidi whenever I buy frozen gooseberries. Gooseberry also called as "Nellikai" in Tamil is a good source of Vitamin C, boosts immunity in our system, good for diabetes and has numerous health benefits. I also added a small cucumber along with gooseberries while making this pachidi but its totally optional. Personally I like the blended mixture of cucumber with gooseberries and coconut.

Try to make this curd pachidi often in your kitchen and enjoy. Try to add tadka to your curd pachidi always, it definitely adds more flavor and enhances the taste of the curd pachidi. 

Ingredients

Gooseberries - 5 or 6 medium size
Cucumber - 1 Small
Green chillies - 3 
Fresh Coconut flakes - 1/2 cup
Cumin seeds / Jeera - 2 tsp
Ginger - 1 small piece
Salt - As required
Fresh Thick curd - 1 cup
Coriander leaves - To Garnish

For Tadka

Oil - 1 tsp
Hing - A Dash
Mustard Seeds - 1 tsp
Urad Dal - 1 tsp
Curry Leaves - 2 or 3
Dry red chili - 1

Preparation

Grind gooseberries, shredded cucumber, coconut flakes, green chillies, jeera, ginger along with little curd in a blender. Add required amount of salt and grind again for few seconds. Transfer the mixture into a serving bowl. Add the remaining curd to the pachidi and mix it well. If its too thick, add little water to the pachidi and adjust the consistency. Prepare the tadka in a pan with little oil and pour the tadka over the curd pachidi. Garnish with few crushes coriander leaves and include this delicious curd pachidi in your thali / meal.

Tuesday, January 21, 2020

Avocado Chappathi / Avocado Roti / Avocado Paratha


Avocado is one of the veggies which always occupy a permanent space in our refrigerator. Avocado is incredibly nutritious, high in Potassium, loaded with fiber, good for heart, etc., Today I made Avocado Chappathis using a perfectly ripen Avocado, instead of making my regular guacamole. The rotis are extremely softer and it melts in your mouth. No need to add water while kneading the roti dough, the fatty texture from the avocado itself is enough to knead the roti dough. With a side of cucumber salad and spinach chole, the dinner was perfect with hot Avocado rotis.

Avocado roti dough should be made a little thicker as it would be easier to make the rounds. 

Ingredients 

Ripen Avocado - 1
Salt - As required
Ajwain Seeds - 1/2 tsp
Crushed green chili - 1 medium
Olive Oil - 1 tsp
Whole Wheat Flour - 1 Cup
Bajri Flour - 1/4 cup
NO WATER REQUIRED


Preparation

First, peel the Avocado and add it in the mixing bowl. Smash the Avocado completely and make a smooth paste. Add all the other ingredients into the mixing bowl and knead the dough without adding any water. Keep it aside. After 20 minutes, make a small round and fry the roti on the heated tawa
both sides. Apply little ghee on top of the avocado roti before serving. Enjoy the rotis with good accompaniments. 


Sunday, January 12, 2020

Majjiga Pulusu / Mor Kuzhambu without Coconut


Any gravy or side dish made with curd or buttermilk always tempts me. Though I love to make Mor Kuzhambu in my regular meal, sometimes if you run out of fresh coconut or not in a mood to grind the paste for mor kuzhambu, Majjiga Pulusu is the better option. Neither we need fresh coconut nor we need to grind the paste for making this yummy Pulusu. My husband taught me how to make this simple, easiest Majjiga Pulusu using the leftover sour yogurt. You can either make this Pulusu with just onions or with tomatoes, grated cucumber or any veggies of your choice.  Pour this over a plate of hot rice and enjoy this with a side of some spicy potato fry.

When you are making a big meal and if you like to include a gravy item with yogurt, Majjiga Pulusu is a wonderful choice. 


Ingredients 

Thick Sour Yogurt/curd -  2 Cups
Water - As required
Red Onion - 1/2 cup sliced
Salt -  To Taste
Coriander Leaves - To Garnish

Tadka 

Turmeric Powder - 1/4 teaspoon ( Optional )
Hing / Asafoetida - 1 Dash
Mustard Seeds - 1 tsp
Cumin Seeds / Jeera - 1 tsp
Dry Red chilies - 2 
Grated Ginger - 1/2 teaspoon
Green Chili - 1 
Curry Leaves - 1 Small Stem
Urad Dal - 1 tsp
Channa Dal - 1 tsp

Preparation

Take 2 cups of thick yogurt/curd in a vessel.  Add some water into it and adjust the consistency as you like but try not to make it thin. Add required of salt into it.  On its side, heat 2 tsp of oil in a tadka pan. Add the ingredients as mentioned under Tadka. Pour the tadka over the vessel and let it remain on the stove for 3 to 4 minutes on medium flame. Switch if off and garnish with coriander leaves. Enjoy this pulusu with hot rice. 

Monday, December 11, 2017

Masala Vadai / Crunchy Masala Vadai / Masala Vada


During rain, our mind instantly thinks about enjoying a cup of chai / tea with few hot masala vadais on its side. Somehow I cannot forget the taste of the newspaper wrapped masala vadais that I and my sisters enjoyed during childhood.  Especially after school, we used to buy few crunchy masala vadais from a nearby stall where they made fresh vadas daily. Just to reminisce, still I wrap atleast 2 or 3 vadas in newspaper and have it with my tea. Though I rarely make fried vadas at home nowadays, we thoroughly enjoy each and every vadas we make. Absolutely no vadas will be left untouched.!!!

While making masala vadas , I am sticking on to this version firmly. Its mainly due to the crisp and crunch vadas it yields. Somehow in my home, they don't enjoy soggy vadas, especially soggy masala vadas.

Ingredients

Split Pea Lentil -  1 Cup
Channa Dal / Bengal Gram Lentil - 1 Cup
Fennel Seeds / Sombu crushed - 2 tsp
Hing / Asafoetida - 1 Dash
Salt - To Taste
Rice Flour - 1/2 tbsp
Crushed Garlic - 2 Pods
Crushed Ginger - 1/2 tbsp
Green chillies - 4 Medium
Dry Red Chilli - 1 
Chopped coriander leaves - 1 handful
Crushed curry leaves - 1 stick
Finely chopped red onion - 3 medium
Oil - Enough to fry the vadas
Water - Enough to grind the batter coarsely. 

Method 
  • Wash the dals thoroughly and soak them in warm water for an hour.
  • Grind them along with crushed garlic, green chillies, dry red chilli to a coarse paste.
  • Add the rest of the ingredients into the mixing bowl. Add required amount of salt and a dash of Hing into the vada batter. 
  • Simultaneously keep the kadai with oil on medium flame. When you notice flames on top, then the oil is ready for frying.
  • Grease the palms with little oil and take a small portion of the batter and make a round Pattie shaped  vada.
  • Gently drop them one by one into the heated oil. Fry them on both sides till they turn golden brown and look crunchy.
  • Serve them with a side of spicy kara chutney. Enjoy with a cup of coffee or tea.!!

Tips
  • Don't add too much water while grinding. Sprinkle little water which is just enough for grinding.
  • Don't fry the vadas on high flame as it will not help in getting golden vadas. It might turn them darker and also the inner part of the vadas might not get cooked perfectly.
  • If possible, try to keep the vada batter in the refrigerator for 15 minutes before frying. It helps in getting golden crispy vadas with inside part perfectly cooked.
  • Adjust the number of chillies as per your spice level.

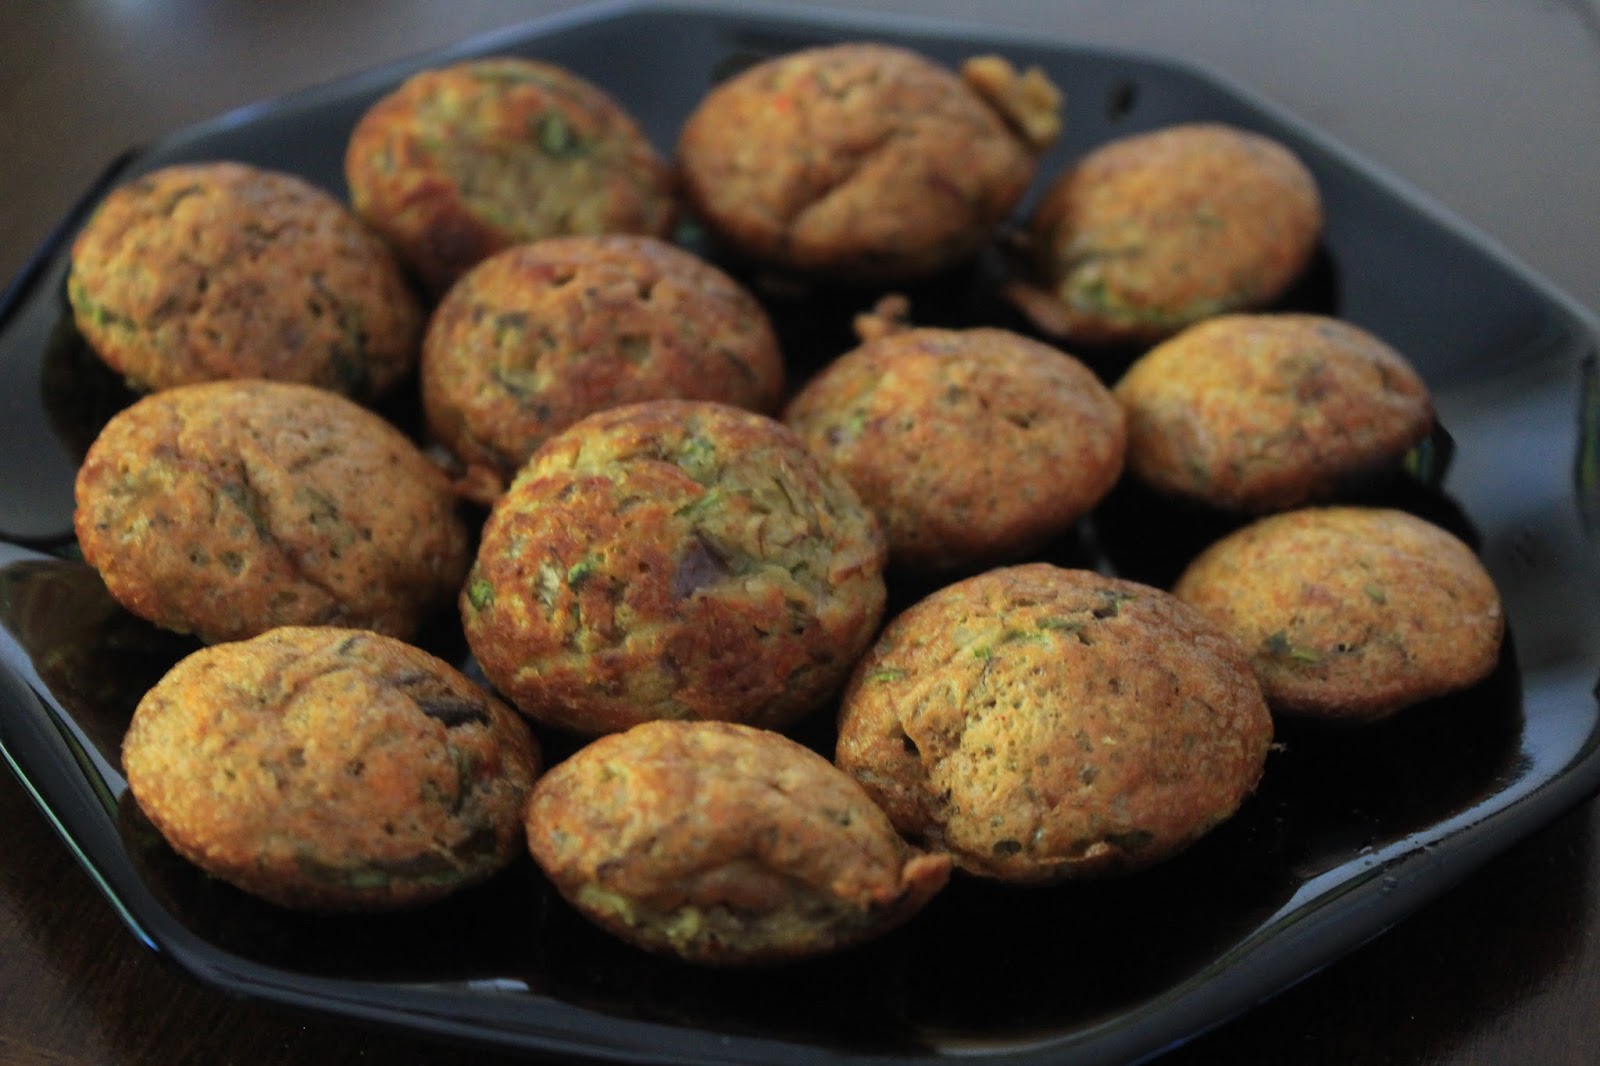
Banana Flower Paniyarams / Vaazhaipoo Paniyarams - Using Leftover Adai Batter


Banana flower / Vazhaipoo also called as Banana Blossom is an incredible, edible flower which is highly nutritious. It is considered as a Super food for women especially during the menstruating period. I wanted to make some delicious breakfast with coconut chutney but not idly or dosa. I had only some leftover Adai batter. Also, I had a full bowl of pre cleaned / pre cut cut banana flower florets soaked in diluted buttermilk sitting on my counter top. So I decided to make Paniyarams with banana flower and adai batter. As the Adai batter is salted and spicy, just add the chopped banana flower, few coriander leaves and mix them well. 

 Ingredients

Leftover Adai Batter - 5 Cups
Chopped Banana flower florets - 2 Cups
You can adjust as per the availability and your taste.

Method

  • For making the paniyarams, keep the paniyaram plate on the stove.
  • On medium flame, add drops of oil into the paniyaram moulds first. Then fill the moulds with the batter not upto the rim of the mould. Just pour only 3/4th of the mould. Fill all the moulds with the rest of the batter. 
  • Add drops of oil towards the sides of the Paniyarams.
  • Steam cook them with the lid closed on medium flame for 3 to 4 minutes.
  • Open the lid and flip the paniyarams carefully to the other side. Close the lid again.
  • Steam cook again for another 3 minutes. Turn both sides and check if they turn golden brown.
  • As the banana flower is added to the batter, its better to cook them for more minutes if not golden brown. 
  • Enjoy the Paniyarams with a side of coconut chutney or any spicy chutney.

Tips

  • Don't overcook the Paniyarams as they might turn black. 
  • Don't steam cook the Paniyarams on high flame.

Saturday, December 9, 2017

Ragi Idly / Finger Millet Idly - With No Rice


Idly is an all time comfort food and especially when it comes to breakfast, I always prefer to make varieties of Idly / Dosa along with good chutneys or nice gravies like sambar, kurma, kadappa as accompaniment. Having heard about the health benefits of millets, I also want to include those nutritious millet in our day to day meal as much as I can. Though you all would have seen this ragi idly or even have tried it in your own way either with finger millets or using ragi flour, I wish to share the way I made in my kitchen with you.  I have been making these fluffy, delicious brown idlies for breakfast. Ragi idlies taste very good if they are made with the real ragi millet grains than ragi flour. 

Ingredients

Ragi Millet / Finger Millet - 2 cups
Urad Dal - 1 Cup
Poha / Aval - 1/2 cup
Fenugreek Seeds / Methi seeds - 2 tsp
Salt - To taste
Water - Enough to grind the batter


Preparation Process

  • Wash and soak all the ingredients in a big vessel except fenugreek seeds. Soak the fenugreek seeds / methi seeds in a small cup with little water. Let it remain for 4 to 5 hours.
  • After that, wash them well thoroughly and grind them together in a mixer grinder by adding little amount of water while grinding occasionally.
  • Grind the batter to a smooth consistency. Store the batter in a large container so that there is enough space for the batter to ferment. Add required amount of salt to the ragi batter and mix it well.
  • Store it in a warm place or nearer to a heat vent which speeds up the fermentation process.
  • After good fermentation, mix the batter once or twice nicely. Now the batter is ready to make idlies.
  • Coat the idly moulds with little sesame oil, pour the ragi idly batter over the moulds uniformly.
  • Steam cook the Idly plates for 10 to 12 minutes. After few minutes, carefully open and scoop the ragi idlies out of the idly moulds. Serve the ragi idlies with either coconut chutney or tomato chutney and also with a cup of delicious sambar and enjoy!

Tips 

  • Add enough water while grinding the batter and make sure that the batter is fermented well.
  • If the batter is not fermented that good, add 1/4 tsp of baking soda and mix it well. Then you make the ragi idlies.
  • If the batter is fermented well, then the batter will increase in volume and double up the size. In that scenario, the idlies would be softer and porous.

Monday, April 3, 2017

Brinjals in Pudina Gravy / Vankaya in Pudina Gravy / Pudina Vankaya Gravy / Eggplant in Mint gravy


Its always a pleasure to venture out new things with Eggplants / Brinjals. Got some tender fresh purple eggplants from the Vegetable market last week and also got two bunches of fresh mint / pudina. Then I decided to make the Spicy Vankaya Masala with a small twist. Fragrance of pudina nicely blends with the spices and the taste of the gravy is divine. Needless to say the health benefits of Pudina / Mint, it adds more nutritional value to the dish along with the spices. Try this exotic side dish once in your kitchen and enjoy this side dish with a side of hot rice or roti. Well, pudina vankaya masala came out very tasty and acquired a permanent spot in one of the preferred side dishes list at home. !!

Ingredients

Tender Eggplants / Brinjals - 12 to 15
Oil - 2 tbsp
Salt - To Taste
Turmeric Powder - 2 tsp
Curry Leaves - 1 Stem
Cumin Seeds / Jeera - 1 tsp
Mustard Seeds - 1 tsp
Hing - 1 Dash
Sugar - 1 pinch
Red Onion - 2 Medium ( finely shredded )
Ripe Tomatoes - 2 Medium ( finely chopped )
Ginger Garlic Paste - 1 tbsp
Green Chilli - 1 ( finely shredded )

For the Gravy:

Coriander Seeds - 1 tbsp
Channa Dal / Kadalai Paruppu - 3/4 tbsp
Urad Dal / Ulutham Paruppu - 3/4 tbsp
Dry red chillies - 8 to 10
Black Peppercorns - 1 tsp
Sesame Seeds - 1/2 tbsp
Cashew Nuts Whole - 6 or 7
Pudina Leaves washed - 2 cups

Method


  • Wash the eggplants and slit them into four parts but without breaking the eggplant as a whole. Just slit into four portions gently so as to insert the grounded masala inside every eggplant and cook them as whole.Soak them in water and keep it aside.
  • Meantime, in the cooking vessel, toast all the ingredients required to make the gravy except the mint leaves. Once you get a nice aroma, transfer them into a blender and allow them to cool In the same vessel, add a drop of oil and  fry the washed mint leaves as well. Transfer them into the blender and grind them into a thick gravy. 
  • Now take small portions of the gravy and just fillin the slits inside the brinjals. Keep them in a plate carefully. Keep the remaining gravy aside.
  • Now the actual preparation starts. In the cooking vessel, add 1 tbsp of oil. When its heated up, add the hing, mustard seeds, jeera, curry leaves followed by ginger garlic paste, shredded onion and shredded green chili. Fry them till the raw smell completely vanishes.
  • Add the chopped tomatoes, curry leaves, turmeric powder into the cooking vessel now. When the tomatoes get mashed thoroughly, add the masala filled eggplants / brinjals into the cooking kadai / vessel.
  • Add required amount of salt to the vessel just enough for the brinjals. Cover the vessel and allow them to cook well.
  • Once the brinjal gets cooked three fourth, add the remaining gravy paste into the vessel. Add half glass of water or more ( as per your consistency ) into the vessel. Add required amount of salt for the gravy at this point.
  • Cover them again and cook for nearly 6 to 7 minutes. Once you see oil floating on top of the gravy, switch off the flame. While cooking the dish, gently stir the gravy and care not to break the brinjals while mixing.

Tips / Suggestions


  • Always use fresh tender Eggplants to get a delicious curry.
  • It goes well very well with plain basmati rice and a drop of ghee. Perfect combo on a cold winter day.
  • Fresh pudina always enhances the taste of the gravy so don't compromise on its freshness by adding dried mint leaves.
  • Don't forget to add few cashews in your gravy as it adds richness to the gravy.
  • I would love to add a tsp of sesame oil on top of the gravy after its done. If you wish, you can even do the whole dish using sesame oil completely.

Tuesday, March 14, 2017

Karadaiyan Nombu 2017

Karadaiyan Nombu 2017
Karadaiyan Nombu is the traditional festival which we do every year. We do this festival mainly for the welfare of the husband. We pray to Goddess Kamakshi Devi on this pooja day, offer the Sweet and Savory Adais along with little butter as prasadham and tie a yellow thread on the neck by chanting this Sloka :

"Urugaadha Vennaiyum Oradaiyum Naan Tharuven
 Orukaalum Yen Kanavar Ennai Piriyadirukanum"

During my childhood, my mom would always tie her nine yard saree while performing this pooja. Though she is not with me now, her memories are everywhere. Especially during poojas, I try to remember every small thing she did during the festivals. I always smile while adding Jaggery to any sweet as she liked to add more sweetness. Her Sweet prasadams would always be too sweet as she loved sweets. After doing this pooja, I looked at her photo and she smiles as usual. Its so painful to be without mom. I love to share so many things after every festival with my mom. She used to listen patiently, gave advice, criticized few in her own funny way. I am missing all those things now.

Remembering my loving mom again on her favourite festival. Love you Amma so much.


Annavaram Sathyanarayana Swamy Prasadam


Sathyanarayana Swamy Vratham is one of the main poojas which we try to do at home at least once a year. Though this vratham can be performed at any day of the month with at most dedication, ekadasi and pournami days are considered to be the most auspicious days for performing this vratham. When I think of this vratham, I cannot stop thinking about the yummy prasadham we make at home for this vratham. In Annavaram where the Sathyanarayana Swamy temple is located, they make this everyday as Neivedhyam and distribute it to the devotees. Its made of broken wheat , jaggery and plenty of ghee. Oh, the aroma of this prasadam will take you to heaven and it just melts in your mouth.I made with 3 cups of broken wheat as we all have sweet tooth. You can make it with 1 cup of broken wheat rava too. Reduce the other quantities while making and enjoy. 

Ingredients

Broken Wheat Rava - 3 Cups
Jaggery powdered - 2 cups
Sugar - 2 cups
Cardamom Powder - 3 tsp
Pachai Karpooram / Cooking camphor - 1 small pinch
Saffron - Few Strands
Whole Milk - 2 Cups
Water - 6 Cups
Ghee - 1 Cup
Cashew Nuts - 2 tbsp
Dry Grapes / Raisins - 2 tbsp


Method

  • In a thick bottomed cooking vessel, add a tbsp of ghee and fry the Cashew nuts and raisins till they get golden brown. Store them in a container separately as they need to be added at the end.
  • In the remaining ghee, add the broken wheat rava and fry them for few seconds. Add the milk, saffron strands and water and cook them well.
  • Once they are cooked perfectly, add jaggery and sugar into the vessel. It would start melting and the mixture would turn slightly watery. 
  • Add 1/4 cup of ghee and stir the mixture on medium heat. Slow cook the mixture till the consistency gets little thicker. 
  • Add the crushed cardamom powder, cooking camphor into the mixture and add the remaining amount of ghee into the vessel at intervals.
  • Cook the prasadam on medium heat till the consistency gets perfect and comes to a thick semi solid halwa.
  • Garnish with the roasted cashews and raisins and offer the prasadham to Sathyanarayana Swamy.


Notes / Tips 
  • Slow cooking greatly helps in getting the right consistency.  
  • The ghee you added will ooze out on its sides completely after its cooked perfectly.
  • Addition of cooking camphor, saffron strands, cardamom greatly enhances the aroma and taste of this prasadam.
  • Some people make this prasadam using only Sugar too but I added Jaggery and Sugar equally just to get the exact taste of the Annavaram prasadam.

Sunday, November 13, 2016

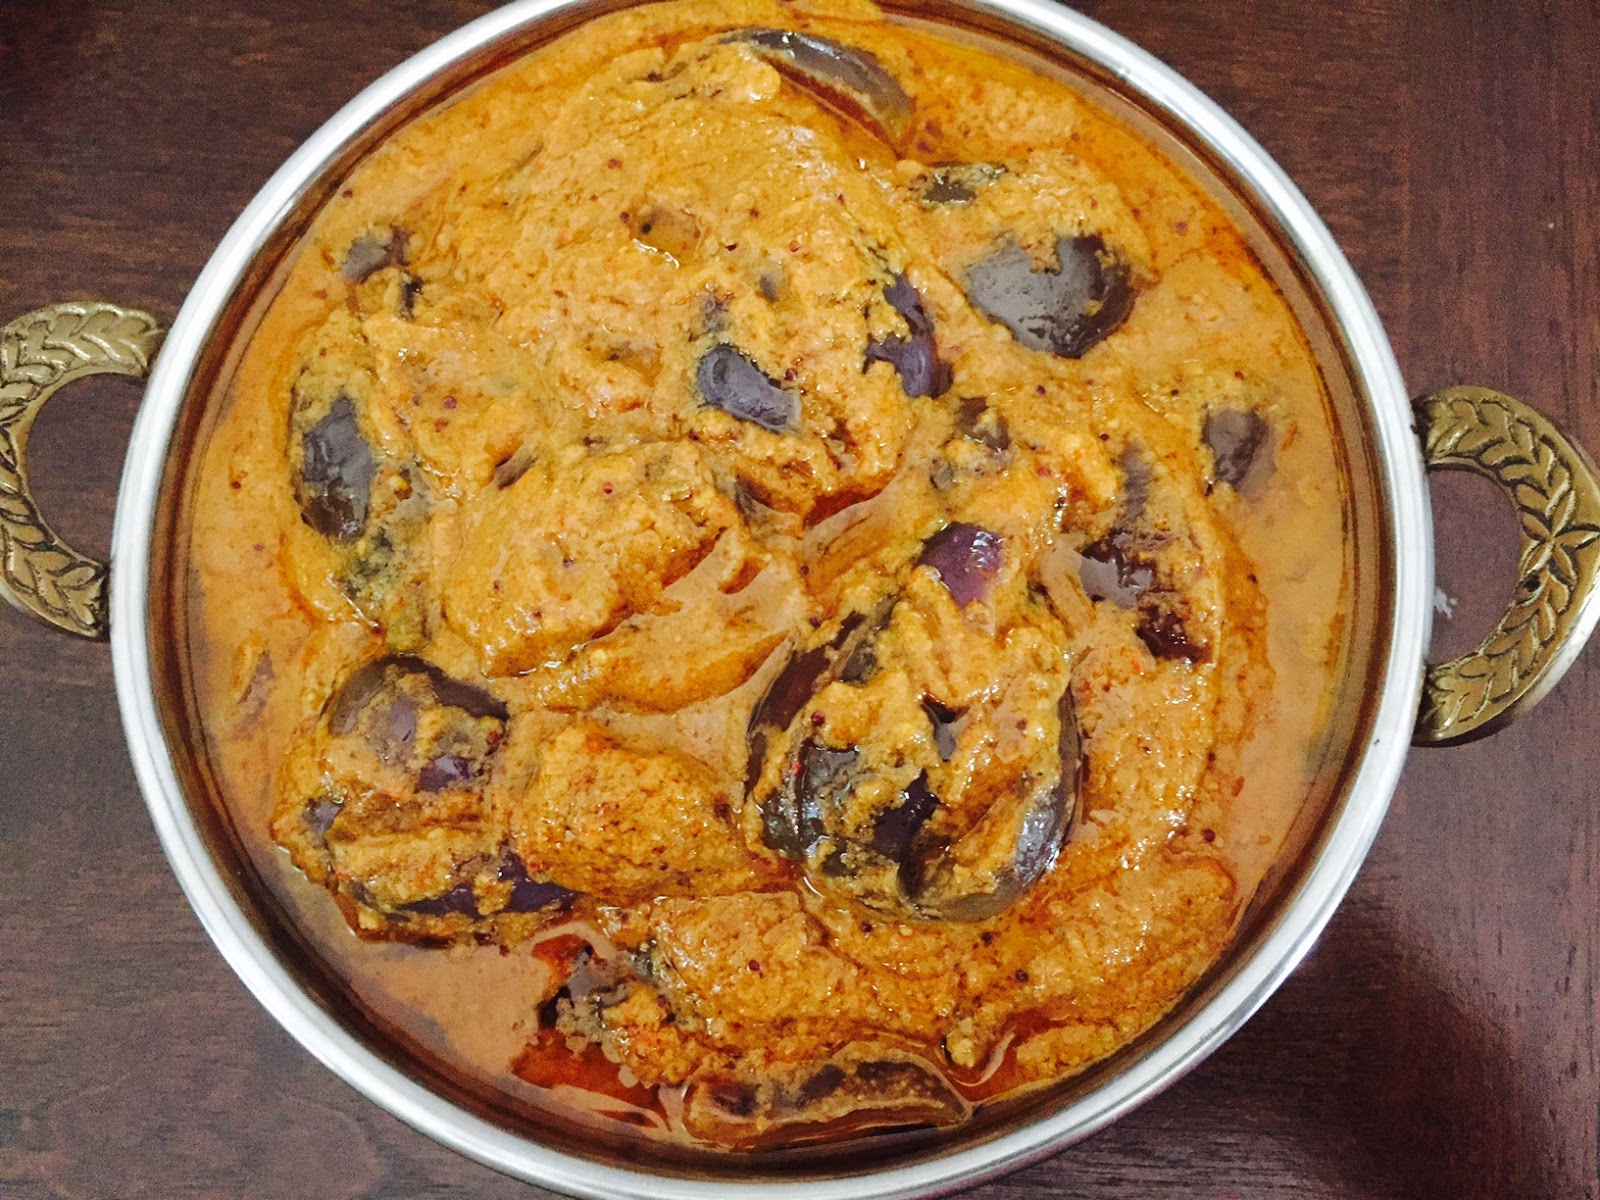
Vankaya Masala / Brinjal Masala - Restaurant Style


Brinjal Masala / Eggplant Masala also called as "Vankaya Masala" is one of the delicacies of Andhra cuisine. I love this gravy especially the one served at weddings and restaurants. It tastes so unique and little rich and creamy in consistency than the regular one that is made at home kitchen. I often make this vankaya masala at home along with the side of hot white rice. No accompaniments are required and it goes well with rotis, chappathis too. In weddings, they serve this gravy along with Brinji Rice which is an excellent combination. Fresh tender small brinjals / Eggplants are best suited for making this gravy.

Ingredients


Fresh Tender Brinjals - Around 20
Ripe Tomato - 1 Big or 2 Medium 
Red Onion - 1 Big
Fresh Ginger Garlic paste - 1 tbsp
Turmeric Powder - 1 tsp
Oil - 1 tbsp
Ghee - 2 tsp
Mustard Seeds - 1 tsp
Cumin Seeds - 1 tsp
Curry Leaves - 1 Stem
Green Chili chopped finely - 1 tsp
Coriander Leaves - To Garnish
Water - As Required for making the gravy
Salt - As Required
Jaggery - 1 tiny cube
Thick Tamarind Extract - 1 tbsp

Grounded Paste


Urad Dal - 2 tsp
Channa Dal - 2 tsp
Black Pepper Seeds - 1/2 tsp
Coriander Seeds - 1 tbsp
Sesame Seeds - 2 tsp
Groundnuts/ Peanuts - 1/2 tbsp
Dry Red Chillies - 8 or 10 
Cashew Nuts - 5 or 6


Method


  • First cut the vegetables that are required and keep them ready. While cutting the brinjals for this gravy, slit them into four halves on the outer side of the tiny brinjal keeping the stem intact. In this way, the whole brinjal will be cooked perfectly and seen in the gravy.
  • Dry Roast all the ingredients that are required to make the grounded paste till you get a nice aroma on a medium flame. It should not turn black. Let it cool down a bit. After its cooled completely, make a thick paste out of it.
  • In the cooking pan, add 1/2 tbsp of  oil and a tsp of ghee first . When its heated, add mustard seeds, cumin seeds in order. 
  • Add the shredded onion,green chili pieces and a pinch of salt into the pan. Fry them for a minute and then add the ginger garlic paste into it. Fry the contents in the pan till the raw smell goes off.
  • Add the tomatoes, turmeric powder, curry leaves into the pan and fry them till the tomatoes get mushy and mashed.
  • Add the tiny brinjals / baby eggplants and little salt now into the pan.Fry them for a minute.
  • Add the thick tamarind extract, required amount of water into the pan. Add jaggery into it now. Cover the lid and allow the contents to cook. When the tiny brinjals get cooked to three fourth, add the grounded paste into the pan. Add required amount of salt for the whole gravy and remaining ghee and oil into it now.
  • Let it cook on medium flame for 6-7 minutes. Once you notice the oil oozing on top layer of the gravy, its done. By then, the gravy would have been perfect with all raw smell completely gone.
  • Switch off the flame and let the gravy cools down little bit. Garnish with coriander leaves and serve with hot rice or rotis.


Tips / Suggestions


  • This gravy tastes extremely good after couple of hours as the gravy settles down with all the grounded spices well.
  • Fresh tiny brinjals are a must for this gravy.
  • For getting the exact creamy consistency, make sure you add all the ingredients in the grounded paste without fail especially the cashews.
  • Do not overcook the brinjals initially. When its cooked to three fourth, add the paste.Otherwise, all the brinjals would get mashed and they wont be seen in the gravy properly.

LinkWithin

Related Posts Plugin for WordPress, Blogger...