Saturday, December 7, 2013

Karuvepilai Kuzhambu / Curry Leaves Pepper Gravy / Karuveppillai Kuzhambu / Karuvepilai Milagu Kuzhambu


Curry Leaf is one of the important ingredients in South Indian Cuisine and its called as "Karuvepilai" in tamil and "Karivepaaku"  in Telugu. Its almost added as a seasoning agent in most of the South Indian delicacies and these leaves emanate an excellent aroma during tempering. Upon looking at its outstanding medicinal benefits, they are rich in Calcium, Phosphorus, Iron and good amount of vitamins. The alkaloids present in curry leaves are believed to have tons of antioxidant properties. Its used as a home remedy for indigestion, nausea and heartburn. They are good for maintaining a good eyesight as they prevent the growth of cataracts. Regular intake of its juice help people with kidney disease and helps people in preventing hereditary diabetes. One of its popular use is for hair growth and colour. Regular intake of curry leaves in any form helps in preventing premature greying of hair. So its an ideal thing to include curry leaves a regular part of your diet. 
Its difficult to get good amount of fresh curry leaves in the place i live. Fortunately, I was able to get these precious leaves in abundance last week. So I decided to make the Curry Leaves kuzhambu with those fresh ones. I made it in a thicker form in order to enjoy this Karuvepilai kuzhambu at least for a week. Today its snowing heavily and I decided to make our lunch time healthier and tastier with our home favourites. Our lunch includes this spicy and tangy Karuvepilai Kuzhambu with Aviyal, Spinach Pappu and Potato curry. Preparation is simpler and does not require more efforts.

Ingredients
Fresh Curry Leaves - 2 Big Bunches ( yields about 5 cups of curry leaves )
Thick Tamarind Juice - 1 cup
Thuvar Dal / Tuvaram Paruppu / Toor Dal - 3 tbsp.
Black Peppercorns /Milagu - 4 tsp
Jeera / Cumin Seeds - 1 tsp
Vendhayam / Fenugreek Seeds - 1/4 tsp
Coriander Seeds - 1 tbsp
Dry Red Chillies - 2 Medium
Hing / Asafoetida - 1 Dash
Salt - As Required
Gingelly Oil / Sesame Oil - 3 tbsp
Mustard Seeds - 3 tsp

Method
  • Soak the tamarind in water and extract its juice and keep ready. Take out the leaves from the stem and wash the curry leaves thoroughly and dry them.
  • In the cooking vessel / kadai, add 1/2 tbsp of gingelly oil. Roast the thuvar dal, black peppercorns, jeera, vendhayam, coriander seeds, dry red chillies to golden brown and transfer them to the mixer grinder.
  • In the same vessel, fry the cleaned curry leaves with the remaining oil till the raw smell goes off.
  • Grind them along with other ingredients in the blender and keep the paste ready.
  • Add another tbsp of gingelly oil to the cooking vessel. When its heated, add hing/ asafoetida and mustard seeds for tempering. When its sputters, add the tamarind juice into the vessel.
  • Cook them for 3-4 minutes till the raw smell goes off. Then, add the grounded curry leaves paste from the blender to the vessel carefully. Add some water to the blender and pour all the paste into the cooking vessel.
  • Add required amount of salt into the cooking vessel and cook the contents for 10-15 minutes.
  • Once you get a semi solid consistency add the remaining amount of gingelly oil into the vessel.
  • Let the kuzhambu cook for another 2-3 minutes and then switch off the stove.Generally this kuzhambu tastes good on the second day. Enjoy this healthy south indian delicacy with a good accompaniment.

Saturday, November 16, 2013

Kandi Pachidi / Andhra style Kandi Pachidi / Toor Dal Chutney


In Tamilnadu, they make Paruppu Thogayal out of toor dal ( Thuvaram Paruppu ) and the regular combo my mom made generally at home was Paruppu Thogayal with Jeera Rasam and a curry. Especially when we take head bath with Sesame Oil, we were given this combo with a side small potato golden curry. Only to enjoy this combo, many days I agreed to take oil bath.!!! 

In Andhra, they call this thogayal as "Kandhi Pachidi" with a small twist in its flavours. My husband used to talk more about this Kandhi Pachidi and its his alltime favourite pachidi. Well, its a typical andhra delight loaded with tons of Protein. I made this Kandhi Pachidi by following his Mom's recipe. With a dash of melted ghee in hot rice and few urad dal appalams/papads, its a divine combination to taste on a cold rainy day!!! Only the texture determines the exact taste of this Pachidi, which should be coarsely grounded but not a fine smooth paste.

Ingredients

Toor Dal ( Kandhi Pappu / Thuvaram Paruppu ) - 1 Cup
Cumin Seeds - 1 tsp
Urad Dal - 1 tsp
Dry Red Chilies - 4 to 5
Garlic Pods - 4
Tamarind - Tiny Pinch ( Blueberry Size )
Oil - 3 tsp
Salt - To Taste
Jaggery - A tiny piece.
Hing / Asafoetida - 1 Dash
For Tadka / Seasoning
Mustard Seeds - 1 tsp
Curry Leaves - 1 stem
Oil - 1 tsp

Method 
  • Roast the toor dal in a frying pan with no oil until you notice an excellent aroma. Toor dal would turn into a light golden colour after roasting.
  • Wash the toor dal in running water and immediately drain them and keep aside.
  • In the pan, add oil first. When its heated, add the crushed garlic pods, cumin seeds, urad dal, dry red chillies and fry them for 2 minutes.
  • Grind them together along with the drained toor dal along with required amount of salt, Hing, Jaggery and tamarind and make a coarse paste. 
  • In the tempering / tadka pan, add mustard seeds and curry leaves into the heated oil. When they start sputtering, pour the tempered mix over the coarsely grounded Kandi Pachidi. 
  • Enjoy this delightful pachidi with hot rice and papads.

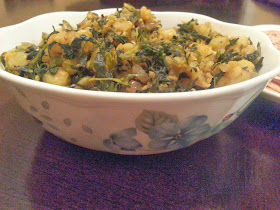
Methi Aloo Subzi / Methi Aloo Curry / Fenugreek Leaves Potato Curry


Methi aloo is an amazing accompaniment to rotis and you can never see any leftovers for sure. If you are a methi ( fenugreek ) lover, you would definitely enjoy the taste of this subzi. Slight bitterness of methi blends with the aromatic spices gives a fabulous taste with potatoes. Taking out the fenugreek leaves from the stem looks like a cumbersome process but you can make it fun while doing that  job along with kids or watching your favourite show in the television. Other than this, it takes just couple of minutes to prepare this yummy side dish.

Ingredients

Fresh Fenugreek leaves - 4 cups
Potato - 4 Medium
Red Onion  - 1/2
Green Chillies - 3 Medium
Turmeric Powder - 1 tsp
Cumin Coriander Powder - 3 tsp
Red Chili Powder - 1 tsp
Salt - As required
Sugar - One pinch
Oil - 1/2 tbsp
Ajwain Seeds ( Omam ) - 2 tsp
Garlic Pods - 3

Method
  • While taking out the fenugreek leaves from its stem, cook the potatoes simultaneously and keep them ready after peeling off its skin. Wash  and clean the fenugreek leaves to get rid off any sand or dust in them.
  • Cut the onion, green chillies and garlic pods finely and keep them ready.
  • In the cooking pan, add oil first. When its heated, add ajwain ( omam ) into the oil. Add the shredded garlic first into the pan. Fry them for a minute and add red onion pieces and shredded green chili into it.
  • Fry them till the onion gets translucent. Add the cleaned fenugreek leaves into the pan now. 
  • Mix them well and add little bit of water for the methi leaves to cook nicely. Close the lid and allow the methi leaves to cook for 2-3 minutes.
  • When they are cooked, fry them for a minute on high flame to get rid off excess water content if any. 
  • Finally add the cooked and peeled potatoes along with salt and a pinch of sugar into the pan. 
  • Fry the methi aloo till they blend together well and get fried enough.
  • Enjoy with hot rotis with a side of curd raita and a spicy pickle.


Tips / Suggestions 
Cook the subzi on a medium flame only.
Care should be taken while adding water to cook methi leaves. In fact, I sprinkled enough water on its top
and cooked carefully as the methi gets mushy while getting cooked.

Thursday, November 14, 2013

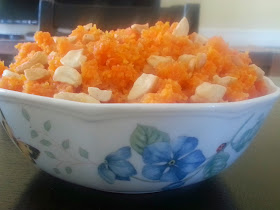
Carrot Halwa / Gajar Ka Halwa


I have been trying to blog the recipe of Carrot Halwa and Carrot Badam Kheer since a year. Somehow it was not getting included due to two main reasons. First the sweet might get over before I take a picture or the picture taken might be extremely bad to upload. But this time, I managed to get a decent picture of Carrot Halwa. Every time I make the sweets, I try to tell myself not to eat more than few bites. Oh, its really difficult to resist the temptation though.!!!

Ingredients
Grated Carrot - 7 Cups
Ricotta Cheese / Kova / Mawa - 1 Cup
Sugar - 3 Cups
Melted Butter / Ghee - 1/2 cup ( As Required )
Roasted Cashewnuts - To Garnish
Dry Grapes - To Garnish
Cardamom Powder - 2 tsp
Thick Milk - 2 Cups
 
Method
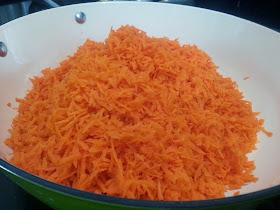
Peel the carrot skin and grate them nicely and make 7 cups of grated carrot ready.
 
In a round thick bottomed vessel, cook them in milk on medium heat till they get cooked fully. You would notice the change in its texture and colour once its cooked thoroughly.
 
Add powdered sugar into the pan and mix them well. Add the cardamom powder and 1 tbsp. of ghee into the pan. Cook them on medium heat and stir constantly.
 
When the sugar syrup completely blends with the cooked carrot, add the mawa / kova or ricotta cheese into the cooking vessel now. Mix them well and slowly add the remaining ghee at regular intervals. When the carrot halwa solidifies little bit, garnish with ghee roasted cashew nuts and dry grapes and enjoy.
 

Thursday, November 7, 2013

Japanese Sushi / Sushi / Homemade Sushi


Initially I got introduced to this Japanese Sushi by my husband, he was emphasizing more about this Sushi. I did not give that much importance as I already knew his special liking towards all Asian food. In fact, I used to tease him that he would have definitely got married to a nice Chinese or Japanese girl if we were not married. !!! I did not like this Sushi a bit at first sight in Las Vegas, thought something was made out of left over rice. After tasting a Sushi roll, no change in my feelings at all. It was too cold and could not feel that taste of the inside veggies too. It was too cold and sour. Knowing that its a healthy option for me, ( as it requires zero oil ) my mind was constantly thinking how should I like this Sushi. How could I make it better to satisfy my tongue. Here comes the Magic Man, my husband. He understood what i exactly felt about the Sushi.

He made the Veggie Sushi at home with no deviations in the preparation process. His Vegetable Sushi came out extremely well and we all loved it. Seriously, I loved those Sushi Rolls. It was not too cold for me, all Sushi Rolls were made at room temperature and I could enjoy the taste of the veggies individually. With a slice of pickled ginger and a tiny bit of Wasabi on its top took us to heights. As we were exhausting the Sushi plate faster, he had to keep up his making speed. Finally, he was fortunate to enjoy 2 Sushi rolls only.!!! This recipe is totally my husband's and the process is also defined by him. Credit or criticism directly goes to him. Feel free to prepare and pass on your valuable comments to him. 

Mmmm...I could hear your questions. Why can't we make an Indian Sushi ? Yes, I am planning to slowly murder the Sushi with my hands in the next coming weeks and will blog my results. Friends who enjoy the authentic Japanese Sushi, kindly forgive me for this trial process. I cannot control my imagination wings.

Ingredients 

As Shown in the Picture.


Sushi Rice - 1.5 Cups
Rice Vinegar - 2 tbsp
Roasted Sesame Seeds - 3 tsp
Lite Soya Sauce - As Required
Wasabi Sauce - As Required
Pickled Ginger - As Required
Avocado - 1 ( Sliced as shown in the picture )
Carrot - 1 Medium ( Sliced as shown in the picture )
Cucumber - 1/2 Medium ( Sliced as shown in the picture )
Dried and Roasted Seaweed Sheets ( Nori ) - As Required.
Salt - 3/4 tsp
Sugar - 1.5 tsp
Rice Vinegar - 3 tbsp

Preparation 


Cook the Sushi Rice first. Add 2 cups of water for 1.5 cups of Rice. In a small cup, add 3 tbsp of Rice Vinegar, 1.5 tsp of Sugar and 3/4 tsp of salt. Stir the mixture till the sugar and salt dissolve in rice vinegar. Gently pour the rice vinegar mix into the cooked rice and mix thoroughly. Rice texture and taste mainly determines the taste of the Sushi. 


Wash and the veggies and cut them as shown in the picture. Roast the Sesame seeds to golden brown. 


As we don't have the Sushi Mat right now, on the wooden cutting board, place the thick big Ziplog Bag. First place the Roasted Seaweed Sheet.

Spread the Sushi Rice now on top of the Seaweed Sheet uniformly. A thin layer of rice would be more than enough to make a Sushi. 


Place the cut veggies on one corner of the rice spread as shown in the picture. We placed 2 carrot sticks, 2 cucumber sticks, 3 slices of avocado. Don't stuff more than this as it would be difficult to roll the Sushi. 


Start rolling the Sushi from the veggie side towards the other side carefully. After you roll one round, gently press the roll and continue rolling. This will enable the Sushi to get into shape correctly and firmly.


After you roll completely, cut the Sushi rounds and arrange them on a serving plate in a way you desire. Sprinkle some roasted sesame seeds on all the Sushi and gently pour few teaspoons of Soya Sauce on top of the sushis and serve them with pickled ginger slices and a bit of wasabi sauce. Enjoy the Sushi platter with joy.

Tuesday, November 5, 2013

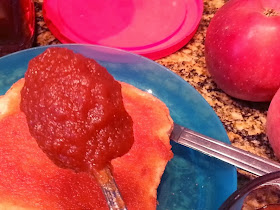
Apple Jam / Sweet Apple Jam


Since few weeks, bowls and bowls of fresh juicy red delicious apples showered by our neighbour were decorating our counter top beautifully. We have been eating those apples almost daily. But I really wish to make something out of those sweet apples like spicy thokku or Sweet Jam. I tried both and presenting you friends both the recipes.

Natural sweetness of the red delicious apples was quite enough for this jam. I added 2 cups of Sugar for almost 7 cups of crushed apple. Though the process got over after an hour, its much much simpler and does not need any high end efforts except grinding. Friends, i just grounded the apple pieces in my blender without any water than grating them. But its choice to make the jam with grated apples. Also, i did not peel the apple skin at all as it contains many nutrients.

Sweet Apple Jam 

Ingredients

Red Apples -- Around 10 Medium which could yield 7 cups of grated apples or crushed apples.
Sugar - 2 Cups
Lemon Juice - 1/4 cup
Nutmeg Powder - 1 tsp
Cinnamon Powder - 1/2 tsp ( Optional , I did not add )

Method 

  • Wash all the apples thoroughly and cut them into medium squares. Carefully take out the middle part which contains the apple seeds.
  • In the grinder, grind them coarsely or to a fine paste ( as you wish ) and keep it ready.
  • In a thick bottomed vessel / pan, add all the ingredients and mix them well. Cook the jam on medium heat for about an hour.
  • Stir the cooking jam inside the vessel at intervals. When it comes to a thick jam consistency, switch off the flame.
  • Allow the jam to cool completely. Once its cooled, store the jam in an air tight container.
  • Enjoy the apple jam with fresh baked sandwich breads.

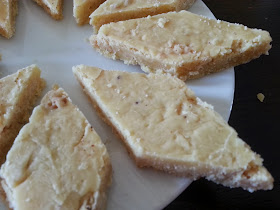
7 Cup Cake / Seven Cup Cake / 7 Cup Burfi


Seven Cup Cake flashed in my mind when I was trying to make a very quick sweet for Diwali. It came out very well and got over first also as my kids loved this cake. At the end, almost i cut the cake into halves and distributed them in order to avoid fights between them. Though the whole world knows about this 7 cup cake, I am just blogging the recipe for future reference. 
Ingredients

Besan Flour / Channa Dal Flour / Kadalai Maavu / Senaga Pindi - 1 Cup
Powdered Sugar - 3 Cups
Melted Butter or Ghee - 1 Cup
Fresh Shredded Coconut - 1 Cup
Whole Milk - 1 Cup

Method
  • In a thick bottomed pan, fry the besan flour on a medium flame until you get a nice aroma. 
  • To that, add all other ingredients and stir them continuously so that no lumps are formed.
  • When it comes to a thick consistency and leaves its sides,switch off the flame. 
  • Pour them over a plate greased with ghee and spread uniformly. Once it cools down little bit and before it becomes hard, cut them into desired shapes.
  • Once the plate completely cools down, take out the cake pieces carefully and store them in an airtight container.
Tips
  • I prefer to make this sweet in a Non Stick Vessel as it comes out very easily and does not stick to the bottom. 
  • Flame should be constantly maintained at a medium level and not too high.
  • Take out the cake mix at the right point to get softy,spongy and tasty cake.

Thursday, October 31, 2013

Badam Besan Milk Burfi / Badam Besan Milk Cake

Ever since I made the regular MysorePak, I wanted to try out the classic combination of milk, badam ( almonds ) and Besan. I really enjoyed making this rich and creamy cake / burfi and it yielded a decent amount of burfis for the amount of ingredients I used. Mostly its a tension free sweet which could be made during Diwali. You can either prepare this sweet on the stove or using the Microwave method. This time, I adopted the Stove Method and made around 30-40 burfis. I doubled the quantity as mentioned under the ingredients in order to get more burfis. So don't get confused with the number of burfis and the ingredients measure.!!! Definitely not a cumbersome process and its a easy, quick sweet to be made with no mistakes.
 
Ingredients
 
Milk Powder / Mawa  -  1 Cup
Besan / Kadalai Maavu - 1 Cup
Almond Powder - 1.5 Cup
Sugar - 3 Cups
Ghee / Clarified Butter -  1.5 cups
Elachi Powder ( Cardamom Powder ) - 2 tsp
Broken Almonds - For Garnishing ( Optional )
( I did not sprinkle broken almonds on top of the burfi as I wanted to present them like MysorePak ).
 
Method 
  • In a thick bottomed cooking pan, dry roast besan flour till you get a nice aroma. Slightly roast the Badam Powder too and keep all the other ingredients ready.
  • In a separate vessel, make a sugar syrup using little water and sugar. When it melts and thickens a bit, switch off the flame. No need to wait for any string consistency. Purpose is to melt down the sugar completely and make a sugar syrup.
  • In the heated kadai, add the roasted Besan Flour, Badam Powder, Milk Powder and half a cup of ghee and the sugar syrup. Stir them well so that no lumps are formed.
  • Continue stirring till you get a nice appetizing aroma and the Badam Besan Milk Burfi froths up. Add the remaining ghee little by little while stirring.
  • Pour it on a plate greased with ghee and spread the mixture evenly by gently shaking the plate. Allow the burfi to cool down .
  • When it cools down to three fourth, cut them into equal squares with a greased knife.
  • Once it completely cools down, remove the burfis carefully and store them in an airtight container.
Tips
  • Use pure ghee in order to obtain the perfect taste and texture.
  • If you don't have almond powder, use the rich and creamy Badam Paste instead. Soak the almonds in water and peel off its skin and then grind them into a smooth paste.
  • If you don't have milk powder, replace them with a rich and full fat milk instead. But it might slows down the preparation process as you need to continuously stir them till it thickens. 
  • To get a flavourful colourful burfi, soak few strands of Kesar ( Saffron ) into the warm milk and pour them over the mixture while stirring. It injects good Kesar flavour and taste into the cake and make it more colourful and yummy. If you have Saffron available, don't omit this choice.

Thursday, October 24, 2013

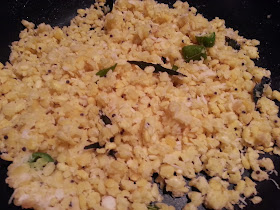
Moong Dal Sundal / Payatham Paruppu Sundal / Navarathri Sundal


Payatham Paruppu sundal is one of my favourites which i mom make generally on the first day of Navarathri.
Easy to make and little care should be taken in order to get the right consistency. If you add more water while cooking this dal, it becomes soggy and you will end up eating a moong dal pasty sundal. Right amount of water and cook time determines the taste and consistency. No need to soak this Moong dal overnight and all. 

Ingredients
Moong Dhal / Payatham Paruppu / Pesara Pappu - 1 Cup
Hing / Asafoetida - 1 Dash
Oil - 3 tsp
Mustard Seeds - 1 tsp
Curry Leaves - 1 stick
Green Chillies - 1 Big
Dry Red Chili - 1
Grated Ginger - 1/2 tsp
Salt - To Taste
Crushed Coriander Leaves - To Garnish ( Optional )
Fresh Coconut Flakes - 1 tbsp

Method
  • Pressure cook the Moong Dhal up to 1 whistle. Just add water just for the dal to get immersed. Don't add more water during this process. After the cooker gets cooled down, drain the excess water from the dal and keep the cooked and drained dal ready. 
  • In a cooking pan, add oil first. When its heated up, add hing, mustard seeds, dry red chili, green chili, curry leaves, grated ginger in order. Finally add the cooked dal and required amount of salt into the pan. Gently turn few times so that the salt gets mixed up well.
  • Cover the lid and allow them to cook for just 2 minutes on a medium flame. Switch off the flame.
  • Sprinkle fresh coconut flake, coriander leaves ( if you like ) on top of the sundal. 
  • Navarathri neivedhyam is ready.


Suggestions 
  • Cook the dal to the right consistency. 
  • If you wish to increase the sundal quantity suddenly, add some grated carrots into the sundal and serve. 
  • If you have some leftover sundal, you can make any kootu out of it during the next meal.

Tuesday, October 22, 2013

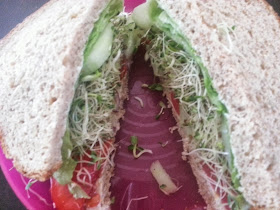
Cucumber and Sprouts Sandwich - Cool Sandwich


Though I crave for a hot grilled sandwiches always, somehow this cool sandwich with tons of cucumber freshness and crunchy sprouts stole my heart. Its undoubtedly a healthy lunch or brunch or snack at any time. We enjoyed this healthy treat along with our rainbow salad ( Grape tomatoes salad ) and no after cleaning was required.!!! Easy and quick fix lunch with minimal efforts and maximum richness in nutrients.
Ingredients
Multi grain Bread or Whole Wheat Bread - 2 Big Sandwich Slices.
Few Lettuce Leaves
Fresh Cucumber - 1
Ripe Tomato - 1
Red Onion Rings - Few
Alfalfa Sprouts or Sprouts of your choice - 1 Small Bunch
Laughing Cow Swiss Cheese Spread ( LIGHT ) - 1 Slice
Stone Ground Grainy Mustard ( Preferable Grainy ) - 1 tsp
Salt and Black Pepper Powder - To Taste

Method
  • Keep all the ingredients ready. Slightly toast the bread and spread them on a foil.
  • Spread the cheese on one side of the bread. On top of the cheese, layer them with Lettuce Leaves, tomato rounds, sliced red onion rings, cucumber rounds. Press them gently and put some fresh alfalfa sprouts on its top. Similarly, on the other bread, layer it with stone ground mustard followed by the same pattern.
  • Sprinkle some salt and pepper on the top of the bread slices. Carefully place one side on the other bread and cut them into halves and enjoy.
Suggestions
White bread will not be suited for this kind of sandwich. You will definitely enjoy the freshness with grainy brown breads.

Monday, October 21, 2013

Grape Tomatoes Salad with Black Olives, Cucumber and Mozzarella Cheese


Couple of weeks back, we harvested few buckets of red grape tomatoes and yellow pear tomatoes from our home garden. Also, our kind neighbour showered us with more of the same varieties. Really wanted to consume those tiny tomatoes before they start to spoil. I decided to make a wonderful and a very colourful salad with homegrown tomatoes, fresh green cucumbers, Olives, red onion and fresh Mozzarella cheese. Because of the richness in its colour, it got attracted by the kids and its a very good accompaniment to any pasta or sandwich. I made a combo of this rainbow salad and a healthy sandwich ( Cucumber and Sprouts Sandwich) for lunch. Needless to say, my family welcomed the combo and enjoyed the lunch. Try this combo at your home and make some twists to your sandwich / pasta according to your family tastes and enjoy.

Ingredients 
Red Grape Tomatoes -  Around 30 tomatoes.
Yellow Pear Tomatoes - Around 30 tomatoes.
Black Olives -  1 cup ( Cut into thin rounds )
Cucumbers - 1 Medium Size
Shredded Red Onion - 1/4 cup
Grated Fresh Mozzarella Cheese - Between 2-3 cups ( Adjust according to your taste ).
Salt - As Desired
Black Pepper Powder - As Desired
Extra Virgin Olive Oil - 1 tbsp
Dried Basil  - 1 tsp ( For Flavour )
Dried Oregano  - 1 tsp ( For Flavour ).

Method 
In a big mixing bowl, add all the ingredients in order. Gently mix them so that the tomatoes get coated with the cheese and spices perfectly. Leave it for 5-10 minutes and enjoy this salad along with a warm pasta or sandwich.  Customize the salad with your own imagination.

Tuesday, September 10, 2013

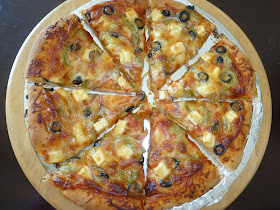
Italian Pesto Pizza / Pizza with Pesto Sauce / Pesto Pizza

Festivals are over and we heartfully enjoyed the special offerings we made to God. A small change in the tracks, today I decided to gear towards something easier and  exotic. Suddenly, this Pesto Pizza flashed in my mind as I had all the ingredients luckily available. Trust me, it was not at all a cumbersome process. Pretty easier as the sauce was ready.

Ingredients

Pizza Base :
All Purpose Flour - 1.25 Cups
Baking Soda - 1/4 tsp
Salt - 1 tsp
Sugar - 1/2 tsp
Black Pepper Powder - 1 tsp
Italian Seasoning Powder - 1.5 tsp
Olive Oil - 1 tbsp ( To knead the Dough )
Water - As required to Knead the Dough.
Yeast - 2 tsp ( Soaked in 1/4 cup of warm milk )

Pizza Sauce 
Pesto Sauce - As required. ( Either Homemade or Store bought , I used Costco Brand Pesto Sauce).

Toppings
Red Onion Rings - 6
Black Olives - 5 or 6 cut into thin rounds
Mushrooms - 4 or 5 cut into thin slices.
Mozzarella Cheese - Between 2 to 3 Cups. ( As desired ).

Method

Knead the Pizza Dough by adding all the ingredients mentioned under the "Pizza Base". Cover the dough with a wet cloth and leave aside for 2-3 hours till the dough rises up.

Using a roller, roll the dough and make a thin crust pizza base. It can be well achieved by using hands too..
Spray some oil onto the base of the pizza baking tray. Carefully transfer the handmade thin crust into the pizza tray. Spread the Pesto Sauce on top of the Pizza base equally in all directions as shown in the picture below.


After that, apply the shredded mozzarella cheese on top of the Pesto Sauce uniformly in all directions. Its better to make the edges of the Pizza crust little thicker as it might prevent the cheese spills during the baking process.

On top of the Mozzarella cheese spread, throw the toppings in any fashion you like. Press them gently.Now the Pizza is ready to be baked. You can either bake it in the conventional oven by following the regular process or choose other handy methods. This time I baked this Pesto Pizza in my Bella Pizza Maker. Its an awesome Kitchen Appliance which makes my life pretty easier. Especially for baking just a single pizza or for any sudden pizza craving, this Bella Pizza Maker comes as a rescue.!!! It took nearly 8-9 minutes in the Pizza Maker and the Pizza is ready to be served. 

Make slices using the Pizza cutter and serve the slices with Parmesan cheese and  red chilli flakes on top.
Enjoy with a side of some chilled Apple cider. You will remember me then....Enjoy this recipe my dear friends and let me know your experience.

Saturday, September 7, 2013

Pineapple Gojju / Karnartaka Style Pineapple Gojju


A big tasty pineapple sitting inside the refrigerator triggered my mind to make a Karnataka style dinner couple of days back. I have been thinking of doing this yummy Pineapple Gojju which I relished when I were in Bangalore at restaurants and work place. I always enjoyed the spicy, sweety and tangy taste of this gojju and it goes well with hot rice and a good accompaniment for rotis / chappathis too.  With the limited ingredients I had then, I made a small course Karnataka meal this time comprising of Pineapple Gojju, Cucumber Koshimbir, Sorekai Chutney and Sorekai Pappu. A different meal at the end of the day was quite interesting and we enjoyed the Karnataka cuisine very much. I will come back with more traditional Karanataka dishes soon... At my home, we always love to explore different cuisines of India, love to introduce these special cuisines to the kids (including the biggest one - my husband). I want them to have the opportunity to experience the wide range of tastes and the depth of variety of the cuisines from each region of  Mother India.

Ingredients

Pineapple Cubes - 1.5 cups
Tamarind Juice - 1 cup
Oil - 3 tsp
Hing - 1 Dash
Mustard Seeds - 2 tsp
Jeera / Cumin Seeds - 1 tsp
Curry leaves - 5 or 6
Dry Red chillies - 2 Medium
Urad Dal - 1 tsp
Channa Dal - 1 tsp
Turmeric Powder - 1/2 tsp
Bisibelebath Powder / MTR Sambar Powder - 1 tbsp
Salt - To Taste
Jaggery - 1 small pinch

Simple Karanataka Meal - Sorekai Pappu, Cucumber Koshimbir, Sorekai Chutney, Pineapple Gojju

Method
  • In the cooking vessel, add the oil first. When its heated, add Hing, Mustard seeds, Jeera, urad dal, channa dal, curry leaves and dry red chillies in order. When its roasted enough, add the pineapple cubes into the vessel and cook them on medium heat for 3-4 minutes.
  • Add the powders, tamarind juice, pinch of jaggery and required amount of salt and allow the Gojju to boil till it thickens little bit. Switch off the flame and serve with hot rice or hot rotis/chappathis. 
Tips
Try to make this Gojju with a tangy and sweety pineapple than using a very sweet pineapple. If the tangyness of the pineapple is good enough, we could reduce the amount of tamarind juice.

Cucumber Kosambari / Cucumber Kosambir / Vellarikai Kosambari


Kosambari also called as "Koshimbir" or "Kosambir" in other parts of India is made generally using soaked Moong dal, fresh coconut flakes and any preferred vegetables like cucumber, carrot, etc., Mostly its served as one of the side dishes in an elaborate festive meal and its also offered as prasadam to God during festivals.
Above all, I like this cucumber kosambari mainly due to its low calorie value. And its an excellent choice for weight reduction.

Ingredients
Fresh Cucumber - 1
Fresh coconut flakes - 1 tbsp
Soaked Moong Dal - 1/4 cup
Salt - As required
Fresh coriander Leaves - To Garnish
Oil - 1 tsp
Hing - 1 dash
Mustard Seeds - 1 tsp

Procedure
Cut the cucumber into small pieces. You can either peel off the skin if its too thick or cut the cucumber with the skin if its tender. Add all the ingredients into a mixing bowl. In the frying  pan, add the oil. When its heated, add the hing and mustard seeds. When it starts sputtering, pour it over the bowl. Mix everything thoroughly and garnish with the crushed coriander leaves at the end. 

Tips / Variations
Try to add salt just before serving the Kosambari as it might get watery. 
Care should be taken while adding salt as even an extra pinch would ruin the entire Kosambari.
Tempering process is totally optional.


Wednesday, September 4, 2013

Gundu Urulaikizhangu Fry / Small Baby Potato Fry / Chinna Urulaikizhangu Curry


"Gundu Urulaikizhangu curry" makes every kid happy and in fact, my blog will not be complete without my favourite childhood recipe. Whenever my eyes get a glimpse of these yummy golden baby potatoes during my vegetable shopping, I grab a small bunch of these tiny potatoes and make this curry. Sometimes, I would fix any main dish just to go with this small potato curry in my kitchen. Of course, I made my kids too love this curry!!! 

Ingredients
Small Golden Potatoes - 15 or 18.
Oil - 2 tbsp 
Mustard Seeds - 2 tsp
Urad Dal / Ulutham Paruppu - 3 tsp 
Hing / Asafoetida - 1 Dash
Turmeric Powder - 1 tsp
Sambar Powder - 2 tsp
Red Chili Powder - 2 tsp
Dhaniya Powder / Coriander Powder - 1 tsp ( Optional ) ( If you want to taste this curry only with the chili taste, you can plug this off )
Salt - To Taste
Curry Leaves - 5 or 6 

Method
  • Cook the golden potatoes with the skin. After its cooked, peel off the skin and cut them into halves if the size is considerably bigger. If its tiny, fry the potato as it is.
  • First add the oil in the frying pan. When its heated, add the Hing, mustard seeds, urad dal, curry leaves in succession.
  • Add all the peeled potatoes into the pan now. Add all the powders and requires amount of salt into the pan.
  • Gently coat all the potatoes with the powders and fry them uniformly. For 2 minutes, just close the lid and allow them to get cooked.
  • Then fry them without lid on medium flame till you get crispy, golden potatoes. Add little more oil if required while frying them. If you use a non-stick pan, the amount of oil for frying would be less. 


Friday, May 24, 2013

Mamidikaya Pulihora / Mango Rice / Mangai Puliodarai


Made this Mango / Mamidikaya Pulihora on Ugadi day 2013 along with other delicacies. Tangy taste of the raw mango along with the spices made this Pulihora a divine treat. This is very much suited for people who cannot have tamarind for some reasons. Simpler process and less preparation time makes it more easier especially during festive time as you will be focusing on many festive treats at the same time. Mango rice along with just appalams / papads  is a good lunch combo on normal days.
Ingredients
Raw Mango - 1
Sona Masoori Rice - 1.5 cup uncooked.
Green Chillies - 2 Big
Dry Red chillies - 2 Big
Mustard Seeds - 2 tsp
Urad Dal / Ulutham Paruppu - 2 tsp
Cumin Seeds / Jeera - 1 tsp
Channa Dal / Kadalai Paruppu - 2 tsp
Ground nuts / Peanuts - 1 Full Handful
Curry Leaves - 1 stem.
Hing / Asafoetida - 1 Dash
Turmeric Powder - 2 tsp
Spice Powder - 1 tbsp ( Dry Roast 1 tsp of coriander seeds, 1/2 tbsp of white sesame seeds, 1 dry red chili and grind them to a fine powder )
Salt - As required
Sesame Oil - 1 tbsp 
Method
  • Cook the Sona Masoori and keep ready. Peel the skin off and grate the raw mango and keep ready.
  • Make the spice powder as described above and keep ready.
  • In a big cooking pan, add oil first and finish the tempering process by adding the above mentioned ingredients. 
  • Add the turmeric powder, grated raw mango into the pan and fry for a minute.
  • Add the cooked rice, spice powders, salt into the pan and mix them thoroughly. Let the Mamidikaya Pulihora remains for atleast an hour before you actually serve. In this way, the tangyness of the raw mango and spiciness from the powders will get into the cooked rice which in turn makes the Pulihora even more tastier.
  • Enjoy with a side of Appalams/ Papads, Vadams or crispy vada or Potato fry.

Tips / Variations 
  • Reduce the amount of the spice powder if the raw mango is not too tangy. Also, the amount of spice powder  can be decided according to your taste buds.
  • Cook the rice to the desired level which is the key point while making any mixed rice.

Monday, May 20, 2013

Crunchy Mint Vadai / Pudina Vadai


Made these crunchy and flavourful mint vadas on the day of Tamil New Year 2013. Have been trying to post the recipe of this vadai since then but it got materialised only today. What is different from the regular paruppu vadai? A question may arise in your mind. I made this mint vadai only with Split Pea Lentil and little bit of Moong Dal and with a cup of fresh mint / pudina leaves.  Thanks to my efforts on grinding, the vadas came out pretty much dry and crispy. Needless to say that there were none left in the serving plate for me to munch while cleaning the leftovers.!!!
 
Ingredients
Split Pea Lentil - 1.5 cups
Moong Dal / Payatham Paruppu - 1 Handful
Green Chili - 1 Big
Dry Red Chillies - 2 Medium
Fresh Pudina Leaves chopped - 3/4 th of a cup.
Cumin Seeds - 1 tsp
Salt - To Taste
Hing / Asafoetida - 1 Dash
Grated Ginger - 2 tsp
Sombu / Fennel Seeds - 1 tsp
Oil - Enough for frying the vadas.
 
Method
  • Soak the Split Pea Lentil and Moong Dal together for 2 hours. Add a handful of Split Pea lentil just before grinding into the soaked lentils.
  • Grind them coarsely along with all the other ingredients except pudina / mint leaves. Add salt only during the last grinding cycle.
  • Add little water while grinding enough to grind the mixture coarsely. Add the fresh pudina leaves to the grounded dal mixture.
  • Heat the oil under medium flame. When its heated, fry the vadas till they become golden brown on medium flame.
  • Complete the process for the remaining vada batter and enjoy the crispy, mint flavoured vadas.
Tips / Variations
  • Don't grind the vada batter to a fine paste.
  • Do not add coriander leaves or curry leaves while making these vadas. Somehow I prefer to enjoy only the unique mint flavour in this vadai.
  • Handful of split pea lentils that are added just before grinding makes it even more tastier.

Friday, May 17, 2013

Rava Idli with Peanut Chutnet / Sooji Idly with Peanut Chutney


Since few weeks, I have been waiting to make Rava Idlies for breakfast but never get a chance to implement my thought. This is mainly due to my husband who does not like any kind of Idlies at all. This morning, I decided to make it happen and it was a great success indeed.!! Any tiffin with a side of good chutneys will always get an applause and a side of a spicy peanut chutney came for my rescue today. I used only 1.5 cups of Rava and it almost yielded 15 medium size Idlies. Trust me, its very easy to prepare with very less preparation time and you can enjoy fluffy rava idlies instantly.

Ingredients

Rava / Sooji - 1.5 cups
Oil - 3 tsp ( for frying the mustard seeds, rava )
Turmeric Power - 2 tsp
Salt - As Required
Hing - A Dash
Chopped Coriander Leaves - 1 tbsp
Chopped Curry Leaves - 6 or 7
Grated Ginger - 2 tsp
Chopped Green Chillies - 2 Medium
Grated Carrot - 1/2 cup
Mustard Seeds - 2 tsp
Channa Dal / Kadalai Paruppu - 3 tsp
Thick Curd - 1 Cup
Water - As Required.
Cooking Soda / Eno - 1 pinch ( Optional )

Mini Rava Idlies with a side of red capsicum chutney --- Excellent Lunch Box Option for kids


Method
  • In the frying pan, add oil first. When its heated, add Hing, Mustard Seeds, Channa Dal and roast them. To that pan, add the rava and roast it till you get a nice aroma. Switch off the flame. 
  • In a big mixing bowl, transfer the contents from the pan and add the remaining ingredients as well.
  • Mix them well and make sure that the batter consistency is perfect like the regular Idly batter.
  • Leave the Rava Idly Batter aside for 30 minutes. After that, pour them over the oil sprayed idly moulds and steam cook them for 10-13 minutes.
  • Yellowish fluffy idlies would be ready to enjoy with a side of a spicy chutney and podi.

Tips / Variations 
  • Try to make the batter atleast 40 minutes before you steam cook. This in turn yields fluffy, softer and well cooked rava Idlies.
  • Don't add too much while making the batter. Add little by little during the mixing process till you get the correct idly batter consistency. After adding the thick curd, it wont be necessary to add more water.

Sunday, April 14, 2013

Iniya Tamizh Puthandu Nal Vazhthukkal / Happy Tamil New Year - 2013 / Tamil Varusha Pirappu

 Tamil Varusha Pirappu Feast - White Rice, Araichuvitta Sambar, Vendaikkai Mor Kuzhambu, Cabbage Pattani Curry, Aviyal, Potato Pattani Kara Curry, Vendaikai Podipotta Curry, Mango Neemflower Sweet Pachidi, Semiya Payasam, Poorna Boli, Pudina Paruppu Crispy Vadai, Tempered Curd Rice.

Wishing my dear bloggers, friends and family, a very Happy Prosperous Tamil New Year.

Tamil New Year 2013 is a special New Year for all of us,as it falls on a weekend. This in turn gives us enough time to do prayers, cooking and enjoy the lunch leisurely. I tried to make Poli, Pachidi which are generally prepared during the New Year festivals this time too. Mango Pachidi is the main pulse of the New year Festival which is made out of raw mango, neem flower, jaggery which combines the taste of Sweet, Sour, Bitter and Salt.  This pachidi depicts the entire colours of life. New Year Feast is always elaborate with more traditional recipes followed by generations to generations in every household. 

I am sure you all would have celebrated the Tamil New Year at your home with lots of fun.  

Spread the word of "Love and Peace" and enjoy the whole year with lots of success, good health and wealth.

Thursday, April 11, 2013

Ugadi Subhakanshalu - 2013

Ugadi Bhojanam - 2013   Paramannam, Black Channa Dal Sundali, Ugadi Pachadi, Mammidikaya Puliohara, Minnapa Garelu, Odiyalu, Pappu Chaaru, Annam.

Sri Vijaya Nama Samvatsara Ugadi Shubhakanshalu.


Wishing you all a very Happy Ugadi. This year brings you all more happiness, prosperity, good health and peace. 

We celebrated Ugadi with lots of prayers and prasadams. !! This Day became more special and fulfilling after attending the Evening Ugadi Special Pooja at our temple. Well, day after tomorrow, we are again gearing up for another festival,Tamil New Year( Chithirai Vizha 2013 ).Feeling happier that it falls on a weekend day as the whole family could sit and enjoy the festival together. Of course, with our special guests for the day. ( Athithi Devo Bhava!!)

By end of the day, I feel satisfied that I also tried to make some good memories to my kids. Still, the childhood memories I had during the festivals were priceless and I cherish those moments many times by talking about the varieties of food my mom made, the special prayers and pooja my Dad performed, etc., Hoping to make such good memories for my daughter and son too...atleast to some extent.

Wishing you all once again a very Happy Ugadi. 

Wednesday, April 10, 2013

Indian Style Vegetable Tofu Pizza / Veggie Tofu Pizza / Vegetable Pizza / Veggie Pizza


Pizza remains a magic word all the time to make the kids smile. Though we don't regularly dine at Pizza restaurants, I like the idea of making pizza start from scratch at home, even the Pizza Base. My love towards Italian Cuisine is very special and I have been trying out different pestos and experimenting various kinds of Pasta, Soups in my kitchen with my testers ( my family of course!!!) at home. Somehow, I decided to inject the Indian flavor and taste into this vegetable pizza this time. So I made the Pizza Sauce on Indian Style and built the Pizza according to our home taste.  It came out very well and I assure you, my dear friends, its not a time consuming recipe at all if you have all the ingredients ready at one shot. Just  prepare the Pizza Dough before 5-6 hours with the yeast and keep it ready. By the time the dough sets up, keep all the other ingredients required for making the Pizza like the Sauce, vegetables, black pepper powder, Mozzarella cheese,etc., ready. Its a wise decision to prepare the Pizza Sauce in advance and store it in an airtight container and in refrigerator for later use. We can surprise the kids by giving them a quick Mini Cheese Pizza or any favourite pizza of their choice as an after school snack if the Pizza Sauce is readily available.

I used the All-Purpose Flour and the wheat flour in the ratio of 4:1 this time. This ratio is purely based on your taste and choice. You can either make a whole wheat pizza or can use both the wheat flour and all purpose flour equally. Generally, 2 cups of flour yield a large pizza. So decide your flour portion accordingly.

I replaced Paneer cubes with fresh Extra Firm Tofu Cubes. Try this out in your kitchen and let me know your feedback and suggestions. 

Ingredients

For the Pizza Dough

( This is to make 2 large pizza and a Medium sized cheese pizza. Adjust your portion for making a single large pizza )

All Purpose Flour - 4 Cups
Whole Wheat Flour - 1 Cup 
Salt - To Taste
Rapid Rising Yeast - 1 small packet. ( 1.5 tbsp )
Sugar - 1 tsp
Black Pepper Powder - 2 tsp 
Italian Seasoning Powder - 1 tsp
Garlic Powder - 1.5 tsp
Light Olive Oil - Between 1/2 cup and 3/4 cup ( Reduce it to 1/4 cup while making a single large pizza )
Warm Milk - 3/4 cup ( Should not be too hot or too cold )
Water - Little for making the perfect dough.

For the Pizza Sauce

Olive Oil - 2 tsp
Minced Garlic - 2 tsp
Shredded Onion - 1/4 cup
Shredded Green Bell Pepper / Capsicum - 1/4 cup
Tomato Puree - 2 cups
Salt - To Taste
Kasoor Methi Leaves - 1 tsp
Red Chilli Powder - 1/2 tsp ( Could use red chili flakes instead )
Tandoor Masala Powder - 1.5 tsp ( I used Store made Tandoor Masala Powder )
Italian Seasoning Powder - 1 tsp
Coriander Cumin / Dhana Jeera Powder - 1/2 tsp
Sugar - 1 Pinch

For the Pizza Toppings

Mozzarella Cheese Shredded - 3/4 cup ( For 1 Large Pizza )
Green Bell Peppers , Sliced Black Olives, Sliced fresh Jalapeno Peppers, Fresh Spinach Leaves, Sliced Red Onions, Pineapple Squares, Sliced Mushrooms, Fresh Coriander Leaves ( To Garnish and Flavor ).
Olive Oil - 2 tsp ( To Brush the Sides )

Method 

Pizza Sauce

In the frying pan, add oil first. When its heated, add the minced garlic, onion, green bell peppers and saute them well. Once the raw smell takes off, add all the powders,salt and sugar and  tomato puree and cook them well for 3-4 minutes on a medium heat. After it gets cooled, store them in an airtight container. For future use, its good to store the leftover sauce in the refrigerator.

Pizza Dough

First warm the milk in the microwave. Then add the yeast and sugar into the warm milk. Yeast gets activated nicely in warm milk and allow them to froth for 4-5 minutes. In a big mixing bowl, add the other ingredients for making the Pizza Dough and knead them thoroughly. While kneading, add the frosted yeast milk into the dough mixture too. Kneading at this stage really helps us to get a nice, fluffy pizza dough. Cover the pizza dough with a wet cloth and keep it in a warm place till it doubles in quantity. This process might get over between 1.5 to 2 hours which totally depends on how you knead the dough, proportions of the dough and the place where you kept.

Pizza Toppings

Keep all the vegetables that are required ready. Keep the shredded Mozzarella cheese ready too. Knead the dough once again so that the air bubbles get released equally in all directions. 
Preheat the Over to 400 Degrees first. 
Divide the dough equally for the number of pizzas you are going to make. Take the portion of the dough and spread it on the floured surface. You can either use the roller to spread the pizza dough or use your strong hands to make the pizza. I used the roller initially to spread it into round shape and later i used my hands to spread it out uniformly in all directions. 
If you wish a thin crust, spread the dough large enough and make it thin using your hands. 
Brush the top layer of the pizza with little oil. Apply the Pizza Sauce and spread them across uniformly. Leave quarter inch around the edges of the Pizza which could be brushed with little oil later before baking starts.
On top of the Pizza Sauce, spread the shredded Mozzarella Cheese evenly and generously. Don't finish the entire Mozzarella Cheese at this stage. Keep some for the final layer too.
On top of the Mozzarella Cheese, arrange the sliced / cut veggies, paneer cubes or Tofu cubes as you like. Sprinkle some more Mozzarella Cheese over the toppings and cover them. 


Similarly, make the rectangular thin  crust pizza with different toppings. I made a thin crust rectangular pizza with Pineapple, Black Olives, Jalapeno Peppers, Red Onions. Also, I made a medium size thick crust Cheese Pizza with a single topping of Black Olives. For the thick crust cheese pizza, I generously added more Cheese to balance the thickness. Keep the arranged pizzas for baking into the oven now. 

After 25 minutes, I noticed a slight brownish colour around the edges of the pizza. This indication clearly tells the completion process. Check all the pizzas in the oven for the completion individually. Slowly remove the pizzas from the oven and you would notice the nicely baked pizzas with melted cheese at their center. When its hot, slice the pizzas into desired shapes and distribute it to the kids happily. Sprinkle some hot red chilli flakes and Parmesan cheese on top of the Pizza slices and enjoy the Pizza Party with a side of strawberry lemonade.
Tips and Variations
  • You can add any toppings to your pizza and you can totally drive your imaginations high while making this yummy treat to your kids.
  • Use a good quality Mozzarella cheese to get a hot restaurant style pizza.
  • Don't compromise on the pizza sauce at all. The quality of the pizza sauce upgrades the Pizza taste considerably well. 
  • If you want to make it more healthy, make the Pizza Dough with whole wheat flour and enjoy.